はじめに
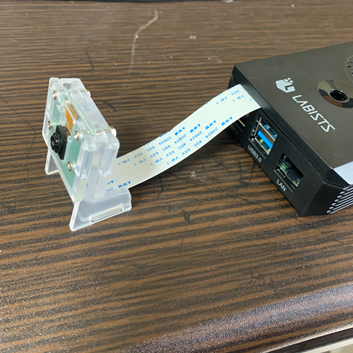
ラズパイ+設置したカメラを使って、リアルタイムに画像処理できるようPythonで実装してみた記事です。
要点はこちらです。
- ラズパイにOpenCVを導入する
- とりあえずリアルタイム映像を映してみる
- テキストを入れる
- 白黒画像(2値化処理)で表示させる
- 二値化処理+領域枠取り+領域間に線を引く+その距離を表示する
Raspberry Piへカメラを取り付けて、Motionソフトにより自宅監視サイト(但し自宅Wifi圏内でのみ閲覧可能)を構築した
https://qiita.com/drafts/dcc0dc728f36214769d6/edit
- 画像処理をするプログラムを作成(画像ver.)
- :画像処理をするプログラムを作成(動画ver.)
- (今回)Raspberry Piに環境構築+プログラムを格納
- (今回)撮影した画像でリアルタイムで処理できるか確認
- 工場の改善に繋がる良い処理方法の探索
- KPI値を改善して、成果
ラズパイにOpenCVを導入する
前提としてRaspeberry Pi4 のRAM4GBを使用しています。
まずは、ラズパイにOpenCVのライブラリを導入します。ターミナルを起動し、以下コマンドでダウンロード可能です。
sudo apt-get install python-opencv
ラズパイにPicamera(ラズパイカメラのライブラリ)を導入する
次に、ラズパイに接続しているカメラを動作させるためのライブラリを導入します。先ほどと同様にターミナルから以下コマンドで導入することが可能です。
sudo apt-get install python-picamera
とりあえずリアルタイム映像を映してみる
さて、とりあえずカメラによってリアルタイム画像を出力させてみましょう。
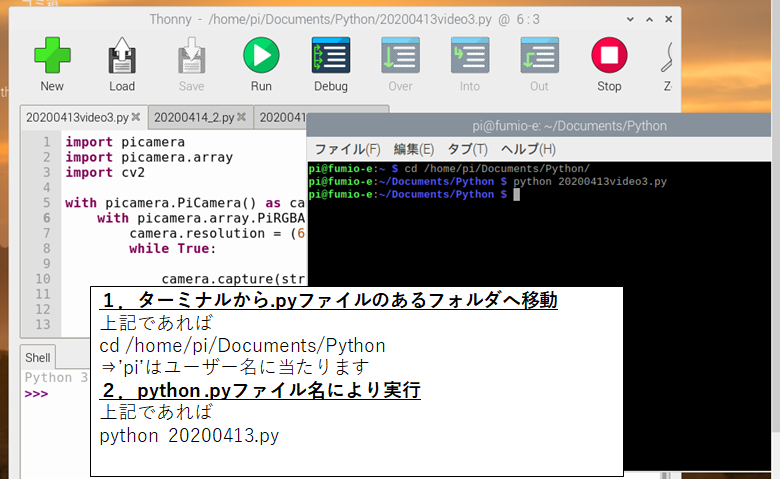
プログラムを実行するには、ターミナルから実行する必要があります。起動させた直後はプログラムファイル(.pyファイル)が格納されているフォルダで無い場合があるため、cdコマンドで移動しておきましょう。
本プログラムを実行するとウィンドウが別で開きカメラのリアルタイム映像が出力されます。終わる場合は'q'キーを押すと止まるように設定しています。
とりあえず移すだけ、のプログラムは下記になります。
import picamera
import picamera.array
import cv2

with picamera.PiCamera() as camera:
    with picamera.array.PiRGBArray(camera) as stream:
        camera.resolution = (640, 480)
        while True:

            camera.capture(stream, 'bgr', use_video_port=True)

            cv2.imshow('frame', stream.array)

            if cv2.waitKey(1) & 0xFF == ord("q"):
                break

            stream.seek(0)
            stream.truncate()
        cv2.destroyAllWindows()
通常のOpenCVのみで撮影する場合、動画のキャプチャー画像を
ret, frame = cap.read()
で戻り値としてframeに入れることが多いのですが、picameraの場合
picamera.array.PiRGBArray(camera) as stream:
として、picamera.arrayに格納されます。基本的にframeを引数として取っていたところをpicamera.arrayに変更すれば問題ないようです。
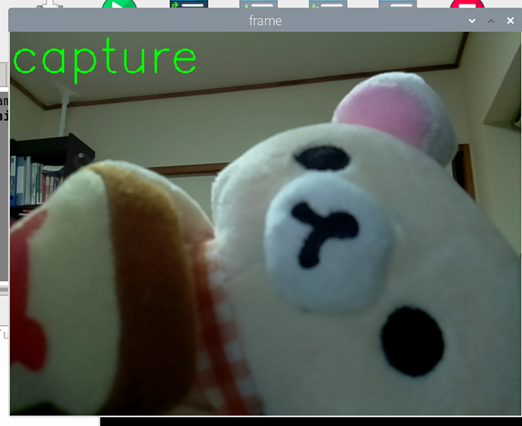
実際の撮影した映像がこちらです。
テキストを入れる
さて、画像上にテキストボックスをいれます。opencvでの指定と全く同じで、引数をpicamera.arrayに取るだけでOKです。
import picamera
import picamera.array
import cv2

text = 'capture'

with picamera.PiCamera() as camera:
    with picamera.array.PiRGBArray(camera) as stream:
        camera.resolution = (640, 480)
        while True:

            camera.capture(stream, 'bgr', use_video_port=True)

            cv2.putText(stream.array, text,(0, 50), cv2.FONT_HERSHEY_SIMPLEX, 2, (0, 255, 0), thickness=2)
            cv2.imshow('frame', stream.array)

            if cv2.waitKey(1) & 0xFF == ord("q"):
                break

            stream.seek(0)
            stream.truncate()
        cv2.destroyAllWindows()
良いですね。
白黒画像(2値化処理)で表示させる
ほとんど冗長かもしれませんが、単純に白黒画像として表示する場合がこちらです。cv2.inRange()メソッドにて指定したBGR値範囲を255(白側)、それ以外を0(黒)とします。
以下プログラムではlower,upperで指定しています($lower≤(blue,green,red)≤upper$)。
import picamera
import picamera.array
import cv2
import numpy as np

bgrLower = np.array([0, 100, 100])
bgrUpper = np.array([250,250, 250])

text = 'capture'

with picamera.PiCamera() as camera:
    with picamera.array.PiRGBArray(camera) as stream:
        camera.resolution = (640, 480)
        while True:

            camera.capture(stream, 'bgr', use_video_port=True)
            stream.array = cv2.inRange(stream.array, bgrLower, bgrUpper)
            cv2.putText(stream.array, text,(0, 50), cv2.FONT_HERSHEY_SIMPLEX, 2, (0, 255, 0), thickness=2)
            cv2.imshow('frame', stream.array)

            if cv2.waitKey(1) & 0xFF == ord("q"):
                break

            stream.seek(0)
            stream.truncate()
        cv2.destroyAllWindows()
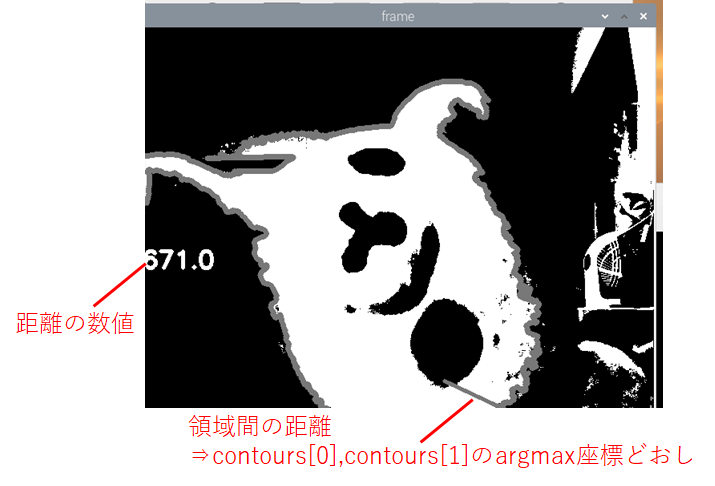
二値化処理+領域枠取り+領域間どおしに線を引く+その距離を表示する
さて、先ほどから何段階か飛んでいますが動画バージョンで行っていることと同じ処理をしています。
(Python:OpenCV)動画をリアルタイムで二値化処理させつつ、領域間の距離を示す値を出力させてみた
https://qiita.com/drafts/531783e5edd6f0165185/edit
import picamera
import picamera.array
import cv2
import numpy as np
import math

bgrLower = np.array([0, 100, 100])
bgrUpper = np.array([250,250, 250])

text = 'capture'
idx = 0


with picamera.PiCamera() as camera:
    with picamera.array.PiRGBArray(camera) as stream:
        camera.resolution = (640, 480)


        while True:

            idx += 1

            camera.capture(stream, 'bgr', use_video_port=True)

            stream.array = cv2.inRange(stream.array, bgrLower, bgrUpper)#Binalization

            ret, contours, hierarchy = cv2.findContours(stream.array, cv2.RETR_TREE, cv2.CHAIN_APPROX_NONE )
            contours.sort(key=lambda x: cv2.contourArea(x), reverse=True)
            stream.array=cv2.drawContours(stream.array,contours[0:1],-1,(120,120,120),5)

            #Put lines in movies.
            x1=np.unravel_index(np.argmax(contours[0],axis=0), contours[0].shape)
            x2=np.unravel_index(np.argmax(contours[1],axis=0), contours[0].shape)
            stream.array = cv2.line(stream.array, tuple(x1[0][0]), tuple(x2[0][0]), (120,120,120), 3)

            #Subtitles
            if idx % 30 == 0:
                text =str(math.floor(np.linalg.norm(x1[0][0]-x2[0][0])))
            cv2.putText(stream.array, text,(0, 300), cv2.FONT_HERSHEY_SIMPLEX, 1.0, (255, 255, 255), thickness=3)


            cv2.imshow('frame', stream.array)


            if cv2.waitKey(1) & 0xFF == ord("q"):
                break

            stream.seek(0)
            stream.truncate()
        cv2.destroyAllWindows()
さて、無事にリアルタイム映像を画像処理しながら出力させることができました。
終わりに
凡そ形になりました。picameraライブラリを使えばかなり容易に画像処理であったり、再生を行えることが分かりました。
しかしまだ残課題が下記であるため、もう少し使いやすいよう改善していく予定です。
- 二値化したい領域できれいに分ける⇒cv2.inRange()の改善
- 距離を測りたい場所を指定する⇒座標取得の方法を改善
プログラム全文はこちらです。
https://github.com/Fumio-eisan/video_20200415


