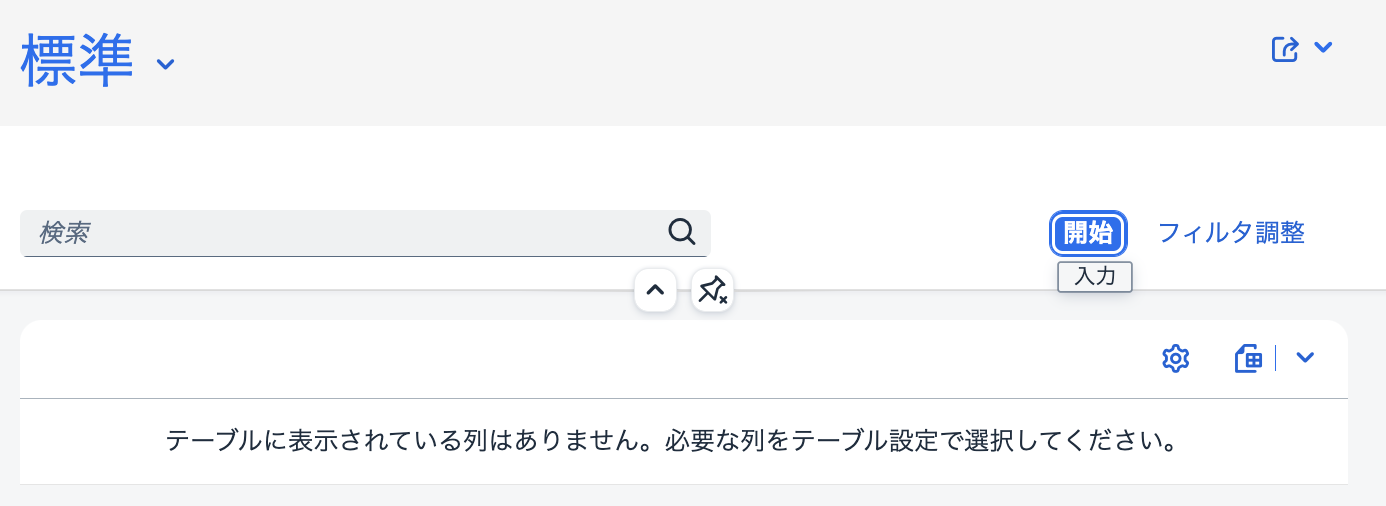
仕事でモックアップ画面を作るので、CAPとFiori elementsを使って作ってみました。BTPにデプロイまではせず、ローカルPCで動くまでが記事の範囲です。
CAPやFioriの単語解説はせずに、作成手順を記載しています。
この記事は SAP Advent Calendar 2022 の12月23日分として執筆しています。
ここを参考に開発
環境
以下の環境で実施。インストールされていることが前提です。macOSで実施していますが、Windowsでも大きな差はないはずです。nvmはWindows向けがあるか調べていませんが、Node.jsのバージョン管理は必須ではないです。
| 種類 | 種類(小分類) | バージョン | 備考 |
|---|---|---|---|
| デバイス | MacbookPro | 14(M1 Chip) | |
| OS | macOS | 13.1(Ventura) | |
| Node.jsバージョン管理 | nvm | 0.39.2 | |
| その他 | Node.js | v18.12.1 | |
| その他 | npm | 9.2.0 | |
| Node.jsパッケージ | SAPUI5 CLI | 2.14.17 | npmでインストール |
| Node.jsパッケージ | CDS dev kit | 6.4.0 | |
| その他 | CF CLI | 8.4 | |
| IDE | VS Code | 1.74.1 | |
| VS Code Extension | SAP CDS Language Support | 6.4.0 | |
| VS Code Extension | SAP Fiori tools - Extension Pack | 1.8.3 |
手順
CAP
1. Project Folder 作成
適当にフォルダを作成。今回はtest-uiにします。
mkdir test-ui
cd test-ui
2. プロジェクト初期化
CAP CLIからcds initコマンドでプロジェクト初期化します。Project Setup and Layoutsに少し詳しく書かれています。
% cds init
Creating new cap project in current folder

Adding feature 'nodejs'...
Done adding features

Find samples on https://github.com/SAP-samples/cloud-cap-samples
Learn about next steps at https://cap.cloud.sap
treeで作られたフォルダ・ファイルを確認。Default Project Layoutsにデフォルトのレイアウト記載あり。
% tree -al
.
├── .DS_Store
├── .cdsrc.json
├── .eslintrc
├── .gitignore
├── .vscode
│   ├── extensions.json
│   ├── launch.json
│   └── tasks.json
├── README.md
├── app
├── db
├── package.json
└── srv
3. Node.jsパッケージインストール
前ステップでpackage.json は以下のように作られています。
{
  "name": "test-ui",
  "version": "1.0.0",
  "description": "A simple CAP project.",
  "repository": "<Add your repository here>",
  "license": "UNLICENSED",
  "private": true,
  "dependencies": {
    "@sap/cds": "^6",
    "express": "^4"
  },
  "devDependencies": {
    "sqlite3": "^5.0.4"
  },
  "scripts": {
    "start": "cds run"
  }
}
npm installでNode.jsパッケージをインストール。
% npm install
npm WARN deprecated @npmcli/move-file@1.1.2: This functionality has been moved to @npmcli/fs

added 175 packages, and audited 176 packages in 10s

12 packages are looking for funding
  run `npm fund` for details

found 0 vulnerabilities
npm lsでpackage.jsonの中身がインストールできているかを確認。
% npm ls
test-ui@1.0.0 /Users/i348221/Documents/repositories/test-ui
├── @sap/cds@6.4.0
├── express@4.18.2
└── sqlite3@5.1.4
4. CAPサーバー起動
cds watchコマンドでCAPサーバーを起動。現時点では「何もないよ」と言われていますね。ターミナルはこの状態のままにしておきます。
% cds watch


cds serve all --with-mocks --in-memory?
watching: cds,csn,csv,ts,mjs,cjs,js,json,properties,edmx,xml,env,css,gif,html,jpg,png,svg...
live reload enabled for browsers

        ___________________________


    No models found in db/,srv/,app/,schema,services.
    Waiting for some to arrive...
5. サンプルファイル作成
cds add samplesコマンドでサンプルのドメインモデルとデータとサービスを作ります。
% cds add samples
Adding feature(s) to project in current folder

Adding feature 'samples'...
Done adding features
作成されたものを確認(node_modulesフォルダは邪魔なので除外)。以下の3つが作成されています。
- db/data/my.bookshop-Books.csv
- db/data-model.cds
- srv/cat-service.cds
% tree -I node_modules
.
├── README.md
├── app
├── db
│   ├── data
│   │   └── my.bookshop-Books.csv
│   └── data-model.cds
├── package-lock.json
├── package.json
└── srv
    └── cat-service.cds
ドメインモデル(db/data-model.cds)
namespace my.bookshop;

entity Books {
  key ID : Integer;
  title  : String;
  stock  : Integer;
}
データ(db/data/my.bookshop-Books.csv)
ID;title;stock
1;Wuthering Heights;100
2;Jane Eyre;500
サービス(srv/cat-service.cds)
using my.bookshop as my from '../db/data-model';

service CatalogService {
    @readonly entity Books as projection on my.Books;
}
6. ODataサービス確認
先程放置したcds watchコマンドのターミナルを見ます。2つのファイルがロードされていることがわかります。
[cds] - loaded model from 2 file(s):

  db/data-model.cds
  srv/cat-service.cds

[cds] - connect using bindings from: { registry: '~/.cds-services.json' }
[cds] - connect to db > sqlite { database: ':memory:' }
 > init from db/data/my.bookshop-Books.csv
/> successfully deployed to sqlite in-memory db

[cds] - serving CatalogService { path: '/catalog' }

[cds] - server listening on { url: 'http://localhost:4004' }
[cds] - launched at 2022/12/20 15:47:25, version: 6.4.0, in: 4.154s
[cds] - [ terminate with ^C ]

[cds] - GET /catalog/$metadata
[cds] - GET /catalog/Books
ブラウザでhttp://localhost:4004で開いてみます。

ここからのリンクでメタデータやODataのEndpoint結果を参照できます。
$metadata
http://localhost:4004/catalog/$metadataでメタデータ参照。
<?xml version="1.0" encoding="utf-8"?>
<edmx:Edmx Version="4.0" xmlns:edmx="http://docs.oasis-open.org/odata/ns/edmx">
  <edmx:Reference Uri="https://oasis-tcs.github.io/odata-vocabularies/vocabularies/Org.OData.Capabilities.V1.xml">
    <edmx:Include Alias="Capabilities" Namespace="Org.OData.Capabilities.V1"/>
  </edmx:Reference>
  <edmx:Reference Uri="https://sap.github.io/odata-vocabularies/vocabularies/Common.xml">
    <edmx:Include Alias="Common" Namespace="com.sap.vocabularies.Common.v1"/>
  </edmx:Reference>
  <edmx:Reference Uri="https://oasis-tcs.github.io/odata-vocabularies/vocabularies/Org.OData.Core.V1.xml">
    <edmx:Include Alias="Core" Namespace="Org.OData.Core.V1"/>
  </edmx:Reference>
  <edmx:DataServices>
    <Schema Namespace="CatalogService" xmlns="http://docs.oasis-open.org/odata/ns/edm">
      <EntityContainer Name="EntityContainer">
        <EntitySet Name="Books" EntityType="CatalogService.Books"/>
      </EntityContainer>
      <EntityType Name="Books">
        <Key>
          <PropertyRef Name="ID"/>
        </Key>
        <Property Name="ID" Type="Edm.Int32" Nullable="false"/>
        <Property Name="title" Type="Edm.String"/>
        <Property Name="stock" Type="Edm.Int32"/>
      </EntityType>
      <Annotations Target="CatalogService.EntityContainer/Books">
        <Annotation Term="Capabilities.DeleteRestrictions">
          <Record Type="Capabilities.DeleteRestrictionsType">
            <PropertyValue Property="Deletable" Bool="false"/>
          </Record>
        </Annotation>
        <Annotation Term="Capabilities.InsertRestrictions">
          <Record Type="Capabilities.InsertRestrictionsType">
            <PropertyValue Property="Insertable" Bool="false"/>
          </Record>
        </Annotation>
        <Annotation Term="Capabilities.UpdateRestrictions">
          <Record Type="Capabilities.UpdateRestrictionsType">
            <PropertyValue Property="Updatable" Bool="false"/>
          </Record>
        </Annotation>
      </Annotations>
    </Schema>
  </edmx:DataServices>
</edmx:Edmx>
データ
CSVファイルdb/data/my.bookshop-Books.csvの内容がODataサービスとしてhttp://localhost:4004/catalog/Booksから取得できています。
{
    "@odata.context": "$metadata#Books",
    "value": [
        {
            "ID": 1,
            "title": "Wuthering Heights",
            "stock": 100
        },
        {
            "ID": 2,
            "title": "Jane Eyre",
            "stock": 500
        }
    ]
}
Fiori preview
「Fiori preview」のリンクからhttp://localhost:4004/$fiori-preview/CatalogService/Books#preview-appを開けます。
さすがにデータは見えないようです。

Fiori elements
7. Fiori elements template を使ったUI生成
VS Codeのコマンドパレット(View → Command Palette or Shift + Command + P for macOS / Ctrl + Shift + P for Windows)から「Fiori: Open Application Generator.」を開きます。
7.1. Template Selection
以下の項目を入力して「NEXT」ボタンを押下。
- Application Type: SAP Fiori elements
- Which template do you want to use?: List Report Page
7.2. Data Source and Service Selection
データソースをLocal CAPにして、先程作成したOData Serviceを選択。

7.3. Entity Selection
Main EntityにBooksを選び、設問「Automatically add table columns to the list page and a section to the object page if none already exists?」にはNoにしておきます。

7.4. Project Attributes
スクリーンショットの内容を入力して「FINISH」ボタン押下。

7.5. 生成オブジェクト確認
UI系オブジェクトはappフォルダに生成されるので、カレントディレクトリをappに移動後、中身を確認します。
app % tree
.
├── services.cds
└── test-ui
    ├── README.md
    ├── annotations.cds
    ├── package.json
    ├── ui5.yaml
    └── webapp
        ├── Component.js
        ├── annotations
        │   └── annotation.xml
        ├── i18n
        │   └── i18n.properties
        ├── index.html
        ├── localService
        │   └── metadata.xml
        ├── manifest.json
        └── test
            ├── flpSandbox.html
            ├── integration
            │   ├── FirstJourney.js
            │   ├── opaTests.qunit.html
            │   ├── opaTests.qunit.js
            │   └── pages
            │       ├── BooksList.js
            │       └── BooksObjectPage.js
            ├── testsuite.qunit.html
            └── testsuite.qunit.js
cds watchコマンドのターミナルにappフォルダ以下の2つのファイルが認識されています。
[cds] - loaded model from 4 file(s):

  db/data-model.cds
  srv/cat-service.cds
  app/services.cds
  app/test-ui/annotations.cds

[cds] - connect using bindings from: { registry: '~/.cds-services.json' }
[cds] - connect to db > sqlite { database: ':memory:' }
 > init from db/data/my.bookshop-Books.csv
/> successfully deployed to sqlite in-memory db

[cds] - serving CatalogService { path: '/catalog' }

[cds] - server listening on { url: 'http://localhost:4004' }
[cds] - launched at 2022/12/20 18:08:36, version: 6.4.0, in: 503.481ms
[cds] - [ terminate with ^C ]
2つのファイルの中身を見てみます。
using from './test-ui/annotations';
using CatalogService as service from '../../srv/cat-service';
8. Fiori画面確認
http://localhost:4004/の画面をリフレッシュすると「Web Applications」に作成したFioriへのリンクが追加されています。
リンク/test-ui/webapp/index.htmlからhttp://localhost:4004/test-ui/webapp/index.htmlを開きます。
この時点では、検索条件もなく検索をしても検索結果は出てきません。

9. UI Annotation追加
UI Annotationとして srvフォルダにcat-service-ui.cdsを以下のデータで新規作成。
annotate CatalogService.Books with {
    ID    @title: 'ID';
    title @title: 'Title';
    stock @title: 'Stock';
}

annotate CatalogService.Books with @(UI: {
    SelectionFields: [
        ID,
        title,
        stock
    ],
    LineItem       : [
        {Value: ID},
        {Value: title},
        {Value: stock},
    ]
});
http://localhost:4004/test-ui/webapp/index.htmlをリフレッシュすると検索条件が追加され、検索も可能な状態になりました。

後続
後続作業として、検索ヘルプ追加も調べました。


