サマリー
Spring Native 0.11(GraalVM)を使ってSpring BootのアプリをNaitive Image化しました。
※手順の中で開発環境を作るので、自分の好きなアプリへの修正が可能です
Q:Naitive Image化とは?
A:今回の検証だと、javaアプリをexe形式にすること
Q:Naitive Image化の何がいいの?
A:アプリ起動が速くなる
Q:アプリ起動が速くなると何がいいの?
A:サーバーレスアーキテクチャーのようにコンテナが頻繁に起動・削除を繰り返す環境で有用
今回のアプリの測定結果は以下の通り
| 形式 | 起動時間 |
|---|---|
| Naitive Image (exe) | 約0.1秒 |
| jar | 約2秒 |
環境 : Windows10、4コア8スレッド、メモリ16G
Naitive Imageの起動時間はjarに比べて20倍程度早い!
検証方法
以下を参考に実施。ただ、色々省かれているので、その部分を補った形で、qiitaの記事を記載
New AOT Engine Brings Spring Native to the Next Level
https://spring.io/blog/2021/12/09/new-aot-engine-brings-spring-native-to-the-next-level
GraalVM(コミュニティエディション)の設定
・GraalVM(コミュニティエディション)のダウンロード
https://www.graalvm.org/downloads/
※Java 17 basedのWindows版を選択
・graalvm-ce-java17-windows-amd64-21.3.0.zipを解凍して、以下に配置

・環境変数のPathに以下を追加
C:\tools\graalvm-ce-java17-21.3.0\bin
※この記事では、ユーザー環境変数を利用
※graalvmを一番上に設定しておくと、仮に他のjavaをpathで指定していても、graalvmが優先されるはず。
・コマンドプロンプトでjavaのバージョン確認
GraalVMになっていればOK
java -version
openjdk version "17.0.1" 2021-10-19
OpenJDK Runtime Environment GraalVM CE 21.3.0 (build 17.0.1+12-jvmci-21.3-b05)
OpenJDK 64-Bit Server VM GraalVM CE 21.3.0 (build 17.0.1+12-jvmci-21.3-b05, mixed mode, sharing)
・Guコマンドが使えるようになるので、native imageコンパイラを取得する
gu install native-image
Downloading: Release index file from oca.opensource.oracle.com
Downloading: Component catalog from www.graalvm.org
Processing Component: Native Image
Downloading: Component native-image: Native Image  from github.com
Installing new component: Native Image (org.graalvm.native-image, version 21.3.0)
ポスグレの設定
・ポスグレダウンロード
※実際はEDBのサイトからインストーラーをダウンロード
※postgresql-14.1-1-windows-x64.exe
・デフォルト設定でインストール
※ポスグレインストール後に立ち上がるスタックビルダーでの付随ソフトウェアのインストールはしなかった
※スーパーユーザー(postgres)のPASSはpostgresを設定
・環境変数のpathに以下を追加
C:\Program Files\PostgreSQL\14\bin
・すでにポスグレが起動していることを確認

・接続して、テーブル作成してデータ挿入
※デフォルトがauto commitなので、commitはいらない
psql -d postgres -U postgres
create table customer (id integer, name varchar(30));
insert into customer (id,name) values (1,'田中');
insert into customer (id,name) values (2,'佐藤');
insert into customer (id,name) values (3,'高橋');
select * from customer;
eclipse(統合開発環境)の設定
・eclipseダウンロード
https://mergedoc.osdn.jp/
※2021版のjavaのフルエディションを選択
・以下に配置

Maven(ビルドツール)の設定
・Mavenのダウンロード
https://maven.apache.org/download.cgi
※Binary zip archiveのapache-maven-3.8.4-bin.zipをダウンロード
・解凍して以下に配置
C:\tools\apache-maven-3.8.4
・環境変数のpathに以下を追加
C:\tools\apache-maven-3.8.4\bin
・環境変数にJAVA_HOMEを作成し以下を設定
C:\tools\graalvm-ce-java17-21.3.0
・バージョン確認
※mavenのバージョンが3.8.4であること及びJavaのvendorがgraalvmであることを確認する
mvn -v
Apache Maven 3.8.4 (9b656c72d54e5bacbed989b64718c159fe39b537)
Maven home: C:\tools\apache-maven-3.8.4
Java version: 17.0.1, vendor: GraalVM Community, runtime: C:\tools\graalvm-ce-java17-21.3.0
Default locale: ja_JP, platform encoding: MS932
OS name: "windows 10", version: "10.0", arch: "amd64", family: "windows"
・後々、mvnコマンド実行時に、「コマンドが長すぎる」というエラーが出るので、
レポジトリ(mvnコマンドの実行で取得されるライブラリの配置先)の位置を変更しておく。
【修正ファイル】C:\tools\apache-maven-3.8.4\conf\settings.xml
【追記内容】<localRepository>C:\mvn-repo</localRepository>
※デフォルトで記載があるが、コメントアウトしてあるので、それを外して任意のパスに変更する。できるだけ短くした方が良さそう。
※事前にC:\mvn-repoのフォルダは作っておいてね
visualstudioの設定
Naitive Image化の際に使用するC++コンパイラ取得の為の作業
・Visual Studio 2022をダウンロード
https://visualstudio.microsoft.com/ja/downloads/
・イントーラー起動時に、「c++によるデスクトップ開発」にチェックを入れる

・以下を環境変数のPATHに追加
C:\Program Files\Microsoft Visual Studio\2022\Community\VC\Tools\MSVC\14.30.30705\bin\Hostx64\x64
・環境変数にINCLUDEを作成し以下を設定
C:\Program Files (x86)\Windows Kits\10\Include\10.0.19041.0\ucrt;C:\Program Files\Microsoft Visual Studio\2022\Community\VC\Tools\MSVC\14.30.30705\include;C:\Program Files (x86)\Windows Kits\10\Include\10.0.19041.0\um;C:\Program Files (x86)\Windows Kits\10\Include\10.0.19041.0\shared;
・環境変数にLIBを作成し以下を設定
C:\Program Files\Microsoft Visual Studio\2022\Community\VC\Tools\MSVC\14.30.30705\lib\x64;C:\Program Files (x86)\Windows Kits\10\Lib\10.0.19041.0\um\x64;C:\Program Files (x86)\Windows Kits\10\Lib\10.0.19041.0\ucrt\x64;
アプリケーション作成
・javaプロジェクトの雛形作ってくれるサイトにアクセス
https://start.spring.io/
・以下のように設定して、GENERATEボタン押下
※dependencies忘れないように
※今回の検証では、2.6.3(SNAPSHOT)を使っていますが、Spring Native0.11.1はSpringBoot2.6.2のみをサポートしているので、2.6.2を使用する方がベストでした。
※https://docs.spring.io/spring-native/docs/current/reference/htmlsingle/

・以下に配置

・コマンドプロンプトで C:\dev\reactive に移動して以下のコマンドを実行
※javaプロジェクトをeclipseで読み込めるように設定
mvn eclipse:eclipse
・eclipse起動
C:\tools\pleiades-2021-12-java-win-64bit-jre_20220106\pleiades\eclipse\eclipse.exe
・以下の画像に従って、プロジェクトをインポート


・ReactiveApplicationを以下のように修正
package com.example.reactive;

import org.springframework.boot.SpringApplication;
import org.springframework.boot.autoconfigure.SpringBootApplication;
import org.springframework.context.annotation.Bean;
import org.springframework.data.annotation.Id;
import org.springframework.data.repository.reactive.ReactiveCrudRepository;
import org.springframework.web.reactive.function.server.RouterFunction;
import org.springframework.web.reactive.function.server.RouterFunctions;
import org.springframework.web.reactive.function.server.ServerResponse;

@SpringBootApplication
public class ReactiveApplication {

	public static void main(String[] args) {
		SpringApplication.run(ReactiveApplication.class, args);
	}

	@Bean
	RouterFunction<ServerResponse> routes(CustomerRepository repository){
		return RouterFunctions.route()
				.GET("/customers", request -> ServerResponse.ok().body(repository.findAll(),Customer.class))
				.build();
	}

}

interface CustomerRepository extends ReactiveCrudRepository<Customer, Integer>{}

record Customer(@Id Integer id, String name) {}
・application.propertiesを以下のように修正
spring.r2dbc.url=r2dbc:postgres://localhost/postgres
spring.r2dbc.username=postgres
spring.r2dbc.password=postgres
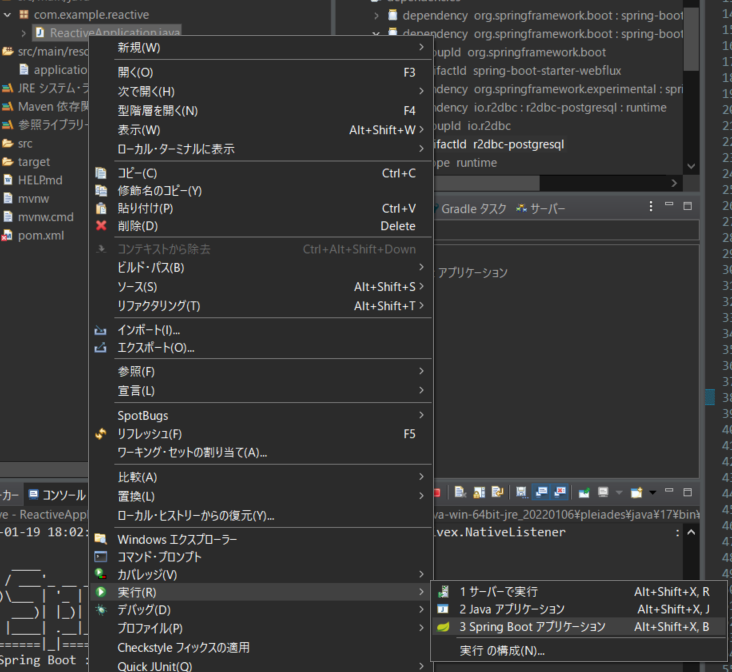
・アプリケーションを起動
・アプリにアクセスしてみる
・以下のように表示されれば成功

Naitive Image化
・コマンドプロンプトで C:\dev\reactive に移動して以下のコマンドを実行
mvn -DskipTests=true -Pnative clean package
・以下のようにBUILD SUCCESSがでれば成功
※途中でjavaのexception発生。この検証では無視。
作ったNative Imageのアプリはちゃんと動きはした。
[reactive:16252]     (clinit):     999.87 ms,  5.34 GB
[reactive:16252]   (typeflow):  22,893.27 ms,  5.34 GB
[reactive:16252]    (objects):  46,570.47 ms,  5.34 GB
[reactive:16252]   (features):  12,921.12 ms,  5.34 GB
[reactive:16252]     analysis:  86,511.86 ms,  5.34 GB
[reactive:16252]     universe:   4,698.57 ms,  5.27 GB
[reactive:16252]      (parse):   2,524.57 ms,  5.27 GB
[reactive:16252]     (inline):   8,585.65 ms,  5.37 GB
[reactive:16252]    (compile):  38,561.64 ms,  5.53 GB
[reactive:16252]      compile:  53,156.32 ms,  5.53 GB
[reactive:16252]        image:   5,028.09 ms,  5.71 GB
[reactive:16252]        write:     534.19 ms,  5.71 GB
[reactive:16252]      [total]: 158,567.99 ms,  5.71 GB
# Printing build artifacts to: C:\dev\reactive\target\reactive.build_artifacts.txt
[INFO] ------------------------------------------------------------------------
[INFO] BUILD SUCCESS
[INFO] ------------------------------------------------------------------------
[INFO] Total time:  03:14 min
[INFO] Finished at: 2022-01-19T19:50:19+09:00
[INFO] ------------------------------------------------------------------------
・reactive.exeができているので、実行
※exeをダブルクリックしてもいいし、画像の通りコマンドプロンプトから実行してもOK
C:\dev\reactive\target\reactive.exe

・0.114秒で起動!!!
・ファイルサイズは以下の通り

通常のパッケージ作成(jar作成)
・コマンドプロンプトで C:\dev\reactive に移動して以下のコマンドを実行
mvn package spring-boot:repackage
・以下のようにBUILD SUCCESSがでれば成功
[INFO] Replacing main artifact with repackaged archive
[INFO]
[INFO] --- spring-boot-maven-plugin:2.6.3-SNAPSHOT:repackage (default-cli) @ reactive ---
[INFO] Replacing main artifact with repackaged archive
[INFO] ------------------------------------------------------------------------
[INFO] BUILD SUCCESS
[INFO] ------------------------------------------------------------------------
[INFO] Total time:  01:08 min
[INFO] Finished at: 2022-01-20T11:01:56+09:00
[INFO] ------------------------------------------------------------------------
・reactive-0.0.1-SNAPSHOT.jarができているので、実行

・1.986秒で起動(Native Imageは0.114秒)
・ファイルサイズは以下の通り
