はじめに
アパレル会社勤務のOLがAIに興味を持ち、エンジニアを目指すべくプログラミングの勉強を始めました。
この記事はプログラミングスクールAidemyさんの最終課題である、画像識別アプリを作成する過程を記録したものです。
「いつかスイーツ大国フランスで本場の味を!」
という憧れからフランス菓子をアプリのテーマに決めました。
かの有名なラデュレのマカロン大好きです。
目次
- 実行環境
- 画像収集
- 画像の読み込み,データ分割
- CNNモデルの作成,学習
- HTML,CSSのコーディング
- FLASKのコード作成
- アプリのデプロイ,動作確認,リンク先
- 考察,感想
- 参考文献
1. 実行環境
・Python 3.7.12
・Windows 10
・Google Colaboratory
・Visual Studio Code
2. 画像収集
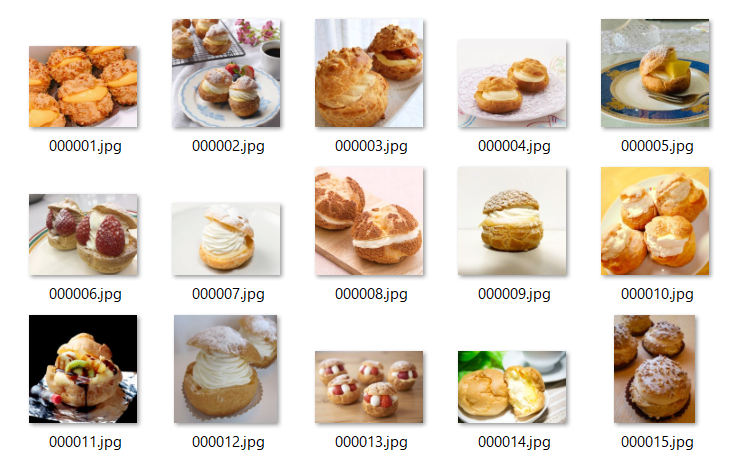
テーマの選定ができたので学習に必要な画像を収集していきます。
集める画像はマカロン、カヌレ、オランジェット、ダックワーズ、シュークリーム、エクレア、フロランタン、シャルロットの8種類です。
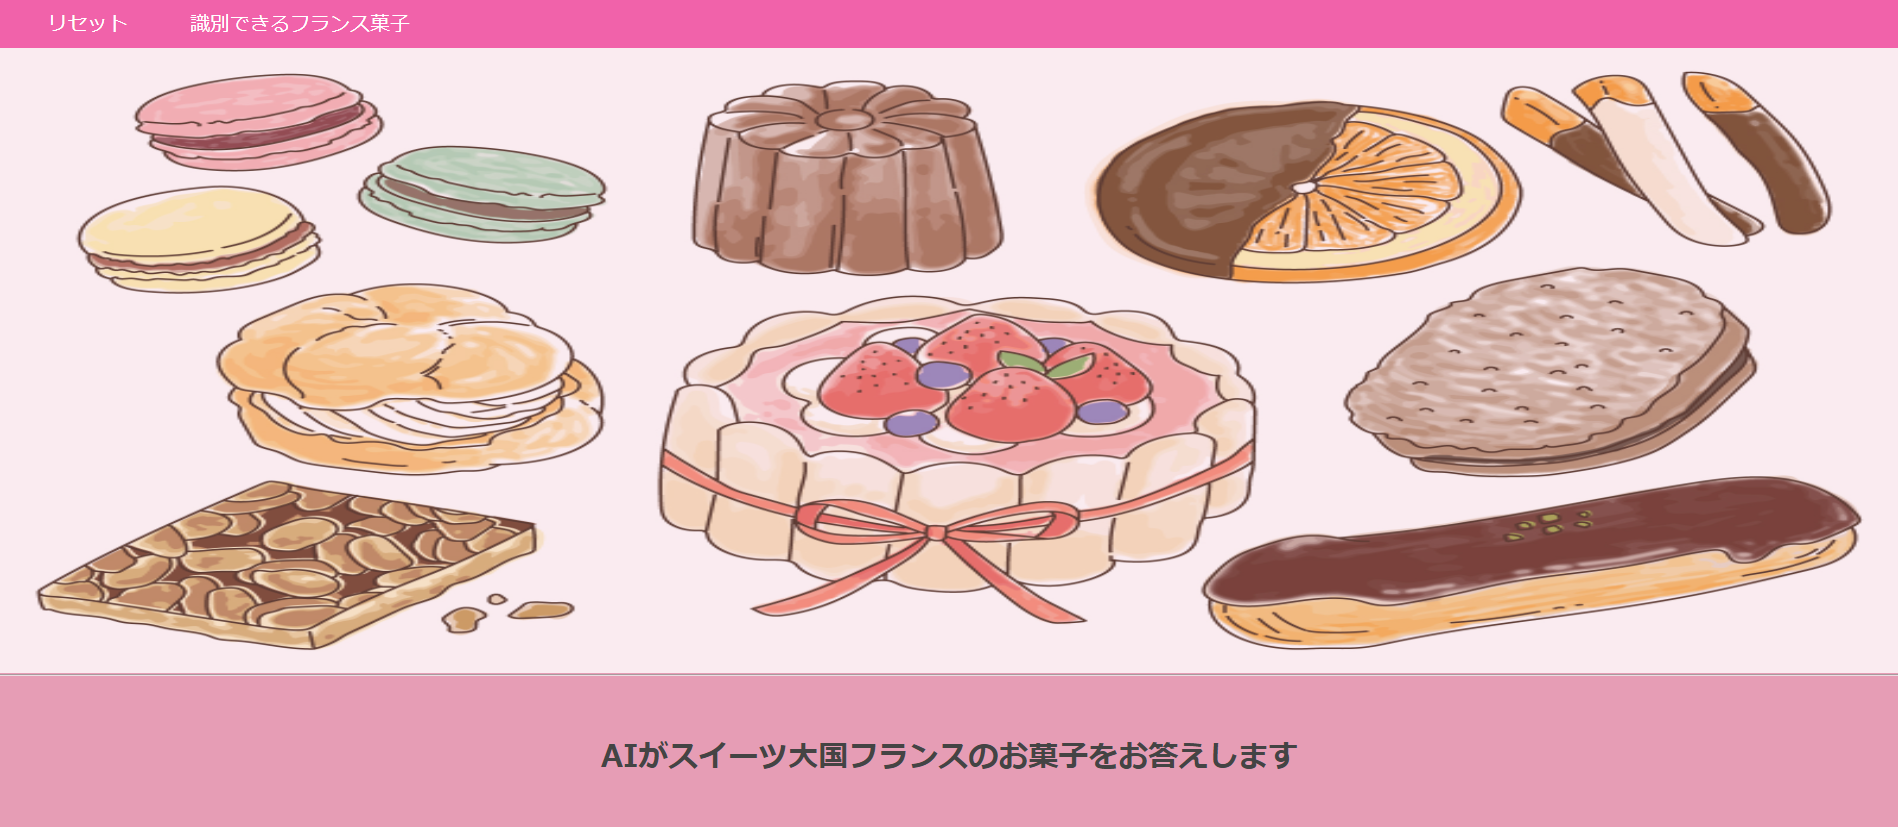
この8種類はフロント画面に使用するイラストに関連しています。
今回icrawlerを用いて画像を一括ダウンロードしました。
icrawlerはpythonでwebクローリングを行い画像を集めるためのフレームワークです。
短いコードを記述するだけで画像を集めることができました。
# モジュールをインポート
from icrawler.builtin import BingImageCrawler
import glob

# 検索リストの生成(日本語もOK)
search_words = ["マカロン","カヌレ","オランジェット","ダックワーズ","シュークリーム","エクレア","フロランタン","シャルロット お菓子"]
dir_names = ["マカロン","カヌレ","オランジェット","ダックワーズ","シュークリーム","エクレア","フロランタン","シャルロット"]

for search_word,dir_name in zip(search_words,dir_names):
  # Bing用クローラーの生成
  bing_crawler = BingImageCrawler(
      downloader_threads=4,           # ダウンローダーのスレッド数
      storage={'root_dir': "/content/drive/MyDrive/成果物2/"+dir_name}) # ダウンロード先のディレクトリ名

  # クロール(キーワード検索による画像収集)の実行
  bing_crawler.crawl(
      keyword=search_word,
      max_num=300)           # ダウンロードする画像の最大枚数
コード内で画像の最大枚数を300枚に指定しましたが、ダウンロードされたのは各200枚ずつくらいでした。
そこから各スイーツの特徴がしっかり写っている画像を厳選し100~130枚ほど収集しました。
画像を間引く作業は人力です。
3. 画像の読み込み,データ分割
学習の準備をしていきます。
Googleドライブ内にダウンロードされた画像をGoogle Colaboratoryで読み込みます。
正解ラベルを付けた後に、データを訓練データ8割と検証データ2割に分割します。
import os
import cv2
import numpy as np
import matplotlib.pyplot as plt
from keras.utils.np_utils import to_categorical
from keras.layers import Dense, Dropout, Flatten, Input
from keras.applications.vgg16 import VGG16
from keras.models import Model, Sequential
from tensorflow.keras import optimizers

# パスに使用するスイーツの名前リスト
sweets_lists = ["マカロン","カヌレ","オランジェット","ダックワーズ","シュークリーム","エクレア","フロランタン","シャルロット"]
sweets_paths = []

# 画像ファイルのパスを取得
for i in range(len(sweets_lists)):
  sweets_path = os.listdir('/content/drive/MyDrive/成果物2/'+sweets_lists[i])
  sweets_paths.append(sweets_path)

# 画像ファイルの読み込み
img_sweets = []
for i in range(len(sweets_lists)):

  for j in range(len(sweets_paths[i])):
    img = cv2.imread('/content/drive/MyDrive/成果物2/' + sweets_lists[i] + '/' + sweets_paths[i][j])
    img = cv2.resize(img, (200,200))
    img_sweets.append(img)

# 画像データをnumpy配列に変換して正解ラベルを付ける
X = np.array(img_sweets)
y =  np.array([0]*len(sweets_paths[0]) + [1]*len(sweets_paths[1]) + [2]*len(sweets_paths[2]) + [3]*len(sweets_paths[3]) + [4]*len(sweets_paths[4]) + [5]*len(sweets_paths[5]) + [6]*len(sweets_paths[6]) + [7]*len(sweets_paths[7]))

# 画像データをシャッフル
rand_index = np.random.permutation(np.arange(len(X)))
X = X[rand_index]
y = y[rand_index]

# 訓練データと検証データに分割
X_train = X[:int(len(X)*0.8)]
y_train = y[:int(len(y)*0.8)]
X_test = X[int(len(X)*0.8):]
y_test = y[int(len(y)*0.8):]

# 正解ラベルをone-hotベクトルに変換
y_train = to_categorical(y_train)
y_test = to_categorical(y_test)
4. CNNモデルの作成,学習
CNNモデルの作成と学習を実施していきます。
VGG16で学習を進めていたところ正解率が80%手前までしか上がらなかったため、Inception-v3にモデルを変更しました。
Inception-v3はImageNetと呼ばれる大規模な画像データセットに対して画像の分類精度を競うコンペティションILSVRCで2014年に優勝したモデルです。
VGG16同様1,000クラスの画像分類を行うよう学習されています。
次にハイパーパラメータの変更と検証です。
- Global Average Pooling 層を利用することで全結合層によるパラメータ数の増加を防ぎ、Dropoutを使わずに過学習を抑制している。
- 入力サイズを(200, 200)として画質を上げると精度が高くなった。
- epochsを10ずつ重ねて様子を見る。vall_lossは下がり、val_accuracyは上がり順調に推移していった。
最終的な全体のコードは以下のようになりました。
from keras.applications.inception_v3 import InceptionV3
from keras.layers.pooling import GlobalAveragePooling2D

# モデルにInception-v3を使用する
input_tensor = Input(shape=(200, 200, 3))
inception_v3 = InceptionV3(include_top=False, weights="imagenet", input_tensor=input_tensor)

top_model = Sequential()
top_model.add(GlobalAveragePooling2D())
top_model.add(Dense(1024, activation='relu'))
top_model.add(Dense(8, activation='softmax'))

# モデルの連結
model = Model(inputs=inception_v3.input, outputs=top_model(inception_v3.output))

# コンパイル
model.compile(loss='categorical_crossentropy',
              optimizer=optimizers.SGD(lr=1e-4, momentum=0.9),
              metrics=['accuracy'])

# 学習の実行
model.fit(X_train, y_train, batch_size=8, epochs=10, validation_data=(X_test, y_test))

# 学習モデルを保存してダウンロード
from google.colab import files

result_dir = 'results'
if not os.path.exists(result_dir):
    os.mkdir(result_dir)
# 重みを保存
model.save(os.path.join(result_dir, 'model.h5'))

files.download( '/content/results/model.h5' )
オランジェットには2通りの形があり(丸いものと細長いもの)、見た目の特徴が異なる画像をひとつにまとめているのでF値が低くなるのではと心配していましたがなんとか大丈夫そうです。
それよりもシュークリームが予想外の低さを示してしまい気になりますが、時間も限られているので今回はこのまま続行します。
5. HTML,CSSのコーディング
次にHTML,CSSのコーディングを実施していきます。
全体のデザインとしては教材内で作成したアプリのデザインをベースに作成していきます。
フリー画像素材をダウンロードできるイラストACでかわいいイラストを見つけたのでbackground-imageとして使用することにします。
このイラスト内にあるスイーツを識別できるようにしました。
ヘッダーメニューにHOMEに戻ることができるリセットボタンと、識別できるフランス菓子の種類を別ウインドウで開けるように設定しました。
HTMLとCSSのコードです。
<!DOCTYPE html>
<html lang='ja'>
<head>
<meta charset='UTF-8'>
<meta name='viewport' content="device-width, initial-scale=1.0">
<meta http-equiv='X-UA-Compatible' content="ie=edge">
<title>フランス菓子識別アプリ(8種類対応)</title>
<link rel='stylesheet' href="./static/stylesheet.css">
</head>
</body>
<header>
<div>
<a class='home' href="{{url_for('upload_file')}}">
リセット
</a>
<a class='variety' href="{{url_for('c_type')}}" onClick="window.open('./templates/c_type.html','windowname','scrollbars=yes,width=550,height=450'); return false;">
識別できるフランス菓子
</a>
</div>
</header>
<div class='main'>
<img class="title" src="./static/pic/top_img.jpg">
<h2> AIがスイーツ大国フランスのお菓子をお答えします</h2>
<p class='img_send'>画像を送信してください</p>
<form method='POST' enctype="multipart/form-data">
<input class='file_choose' type="file" name="file">
<input class='btn' value="送信" type="submit">
</form>
<h3 class='answer'>{{answer}}</h3>
</div>
<footer>
<small>© 2022 E.Arakawa</small>
</footer>
</body>
</html>
body{
    max-width: 1920px;
    width: 100%;
    padding: 0px 0px;
    margin: 0 auto;
    background-color: #e69db5;
    display: flex;
    flex-direction: column;
    min-height:100vh;
}

header{
    height: 40px;
    width: 100%;
    background-color: #f162aa;
}

.home{
    width: 140px;
    color: #fff;
    line-height: 44px;
    text-align: center;
    display: block;
    transition: all 0.5s;
    text-decoration: none;
    float: left;
}

.variety{
    width: 200px;
    color: #fff;
    line-height: 44px;
    text-align: center;
    display: block;
    transition: all 0.5s;
    text-decoration: none;
    float: left;
}

.home:hover {
    background-color: rgba(255, 255, 255, 0.3);
    width: 180px;
}

.variety:hover {
    background-color: rgba(255, 255, 255, 0.3);
    width: 250px;
}

.title{
    background-size: cover;
    opacity: 0.8;
    border-bottom: 2px groove;
}

img{
    width: 100%;
    height: 500px;
}

h2{
    color: #444444;
    margin: 40px 0px;
    text-align: center;
}

.img_send{
    color: #444444;
    margin: 50px 0px 30px 0px;
    text-align: center;
    font-size: 20px;
}

.answer{
    color: #734e30;
    margin: 70px 0px 30px 0px;
    text-align: center;
    font-size: 25px;
}

form{
    text-align: center;
}

.flower_info{
    text-align: center;
    font-size: 20px;
}

.error_message{
    color :orangered;
    text-align: center;
    font-size: 25px;
}

footer{
    background-color: #f162aa;
    border-top: 3px ridge;
    text-align: center;
    height: 10px;
    width: 100%;
    padding: 0px 3px 10px 3px;
    margin-top: auto;
}

small{
    color: #fff;
}
こちらが識別可能なフランス菓子の種類を記載した別ウインドウのコードです。
<!DOCTYPE html>
<html lang="ja">
<head>
    <meta charset="UTF-8">
    <meta http-equiv="X-UA-Compatible" content="IE=edge">
    <meta name="viewport" content="width=device-width, initial-scale=1.0">
    <title>識別できるフランス菓子の種類</title>
    <link rel="stylesheet" href="../static/c_type.css">
</head>

<body>
    <h2>
        識別できるフランス菓子は以下の8種です。
    </h2>
    <div>
        <ul>
            <li>マカロン</li>
            <li>カヌレ</li>
            <li>オランジェット</li>
            <li>ダックワーズ</li>
            <li>シュークリーム</li>
            <li>エクレア</li>
            <li>フロランタン</li>
            <li>シャルロット</li>
        </ul>
    </div>

    <a href="#" onclick="window.close()">[閉じる]</a>
body{
    background-color: #e69db5;
    text-align: center;
}

h2{
    text-align: center;
}

div{
    text-align: center;
    margin-left: -40px;
    margin-right: auto;
}

li{
    list-style: none;
}
6. FLASKのコード作成
HTML,CSSのコード同様、Aidemyさんの手書き文字識別アプリのコードをベースに作成していきます。
import os
from flask import Flask, request, redirect, render_template, flash
from werkzeug.utils import secure_filename
from tensorflow.keras.models import Sequential, load_model
from tensorflow.keras.preprocessing import image

import numpy as np


classes = ["マカロン","カヌレ","オランジェット","ダックワーズ","シュークリーム","エクレア","フロランタン","シャルロット"]
image_size = 200

UPLOAD_FOLDER = "uploads"
ALLOWED_EXTENSIONS = set(['png', 'jpg', 'jpeg', 'gif'])

app = Flask(__name__)

def allowed_file(filename):
    return '.' in filename and filename.rsplit('.', 1)[1].lower() in ALLOWED_EXTENSIONS

model = load_model('./model.h5')#学習済みモデルをロード


@app.route('/', methods=['GET', 'POST'])
def upload_file():
    if request.method == 'POST':
        if 'file' not in request.files:
            flash('ファイルがありません')
            return redirect(request.url)
        file = request.files['file']
        if file.filename == '':
            flash('ファイルがありません')
            return redirect(request.url)
        if file and allowed_file(file.filename):
            filename = secure_filename(file.filename)
            file.save(os.path.join(UPLOAD_FOLDER, filename))
            filepath = os.path.join(UPLOAD_FOLDER, filename)

            #受け取った画像を読み込み、np形式に変換
            img = image.load_img(filepath,target_size=(image_size,image_size))
            img = image.img_to_array(img)
            data = np.array([img])
            #変換したデータをモデルに渡して予測する
            result = model.predict(data)[0]
            predicted = result.argmax()
            pred_answer = "これは " + classes[predicted] + " です"

            return render_template("index.html",answer=pred_answer)

    return render_template("index.html",answer="")

# 識別できるフランス菓子の種類(別ウインドウ)
@app.route('/templates/c_type.html')
def c_type():
    return render_template('c_type.html')

if __name__ == "__main__":
    port = int(os.environ.get('PORT', 8080))
    app.run(host ='0.0.0.0',port = port)
7. アプリのデプロイ,動作確認,リンク先
Herokuにアプリをデプロイしていきます。
無事にデプロイできた後に動作確認です。
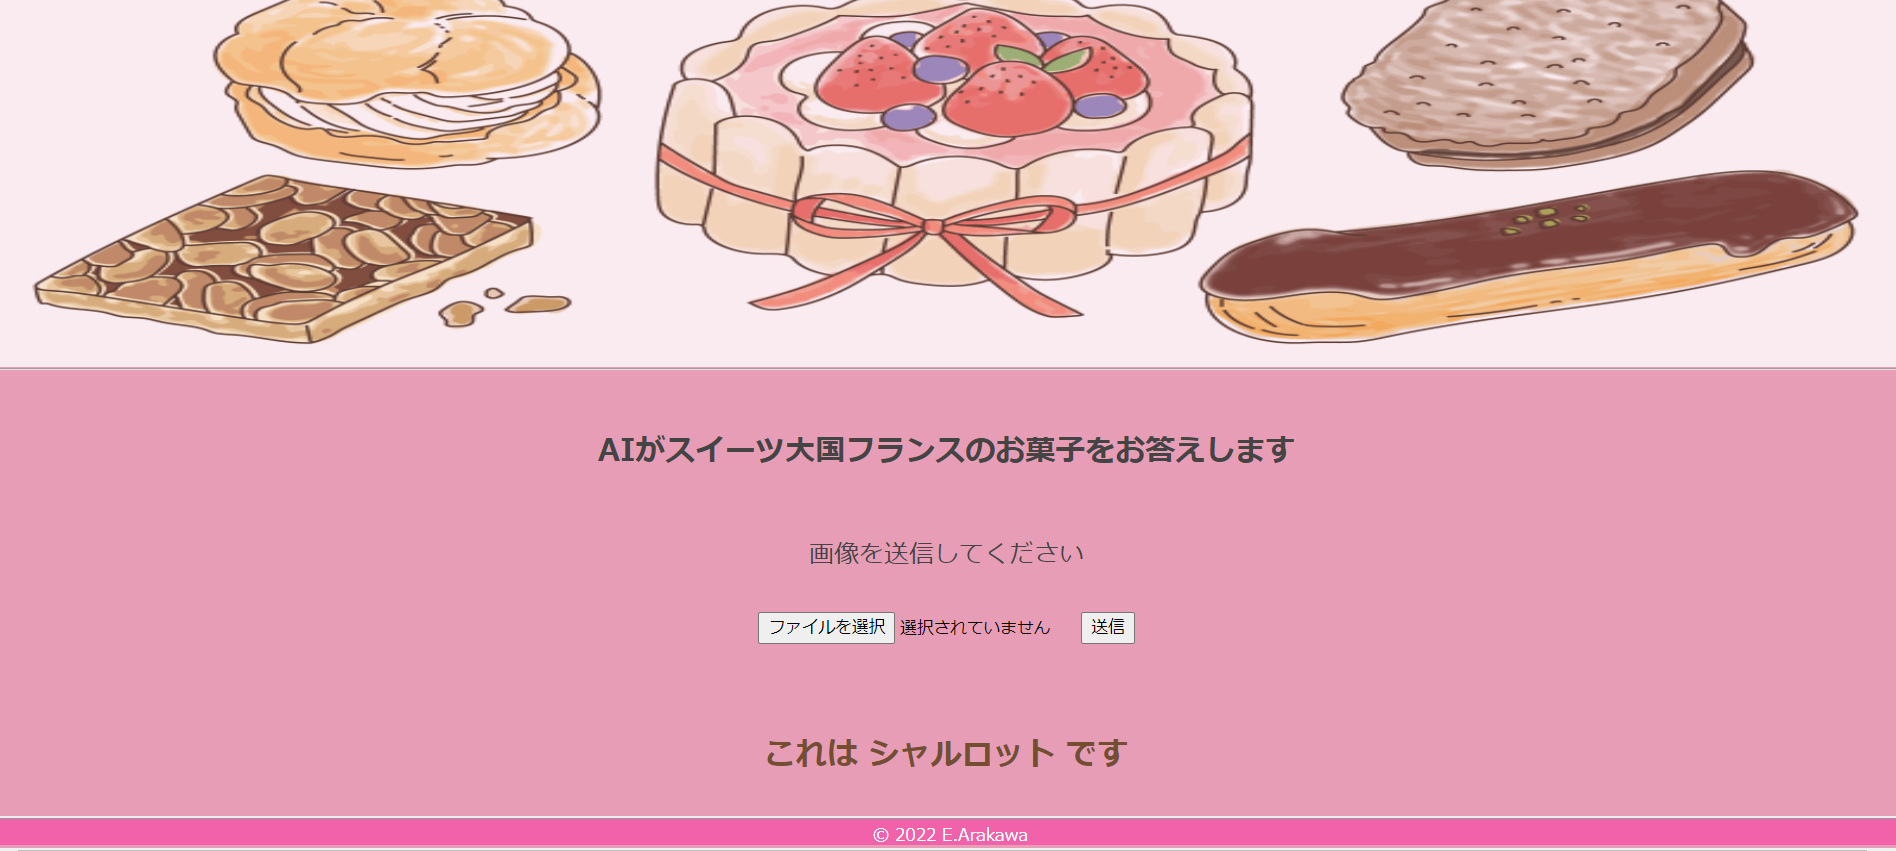
まずはイラスト中央のシャルロットの画像を使用してみます。

結果
もうひとつ、F値の低さが気になったシュークリームを見てみます。

結果

ふたつとも正解です。
さらに2通りの形が存在するオランジェットを正しく識別できるか試してみます。
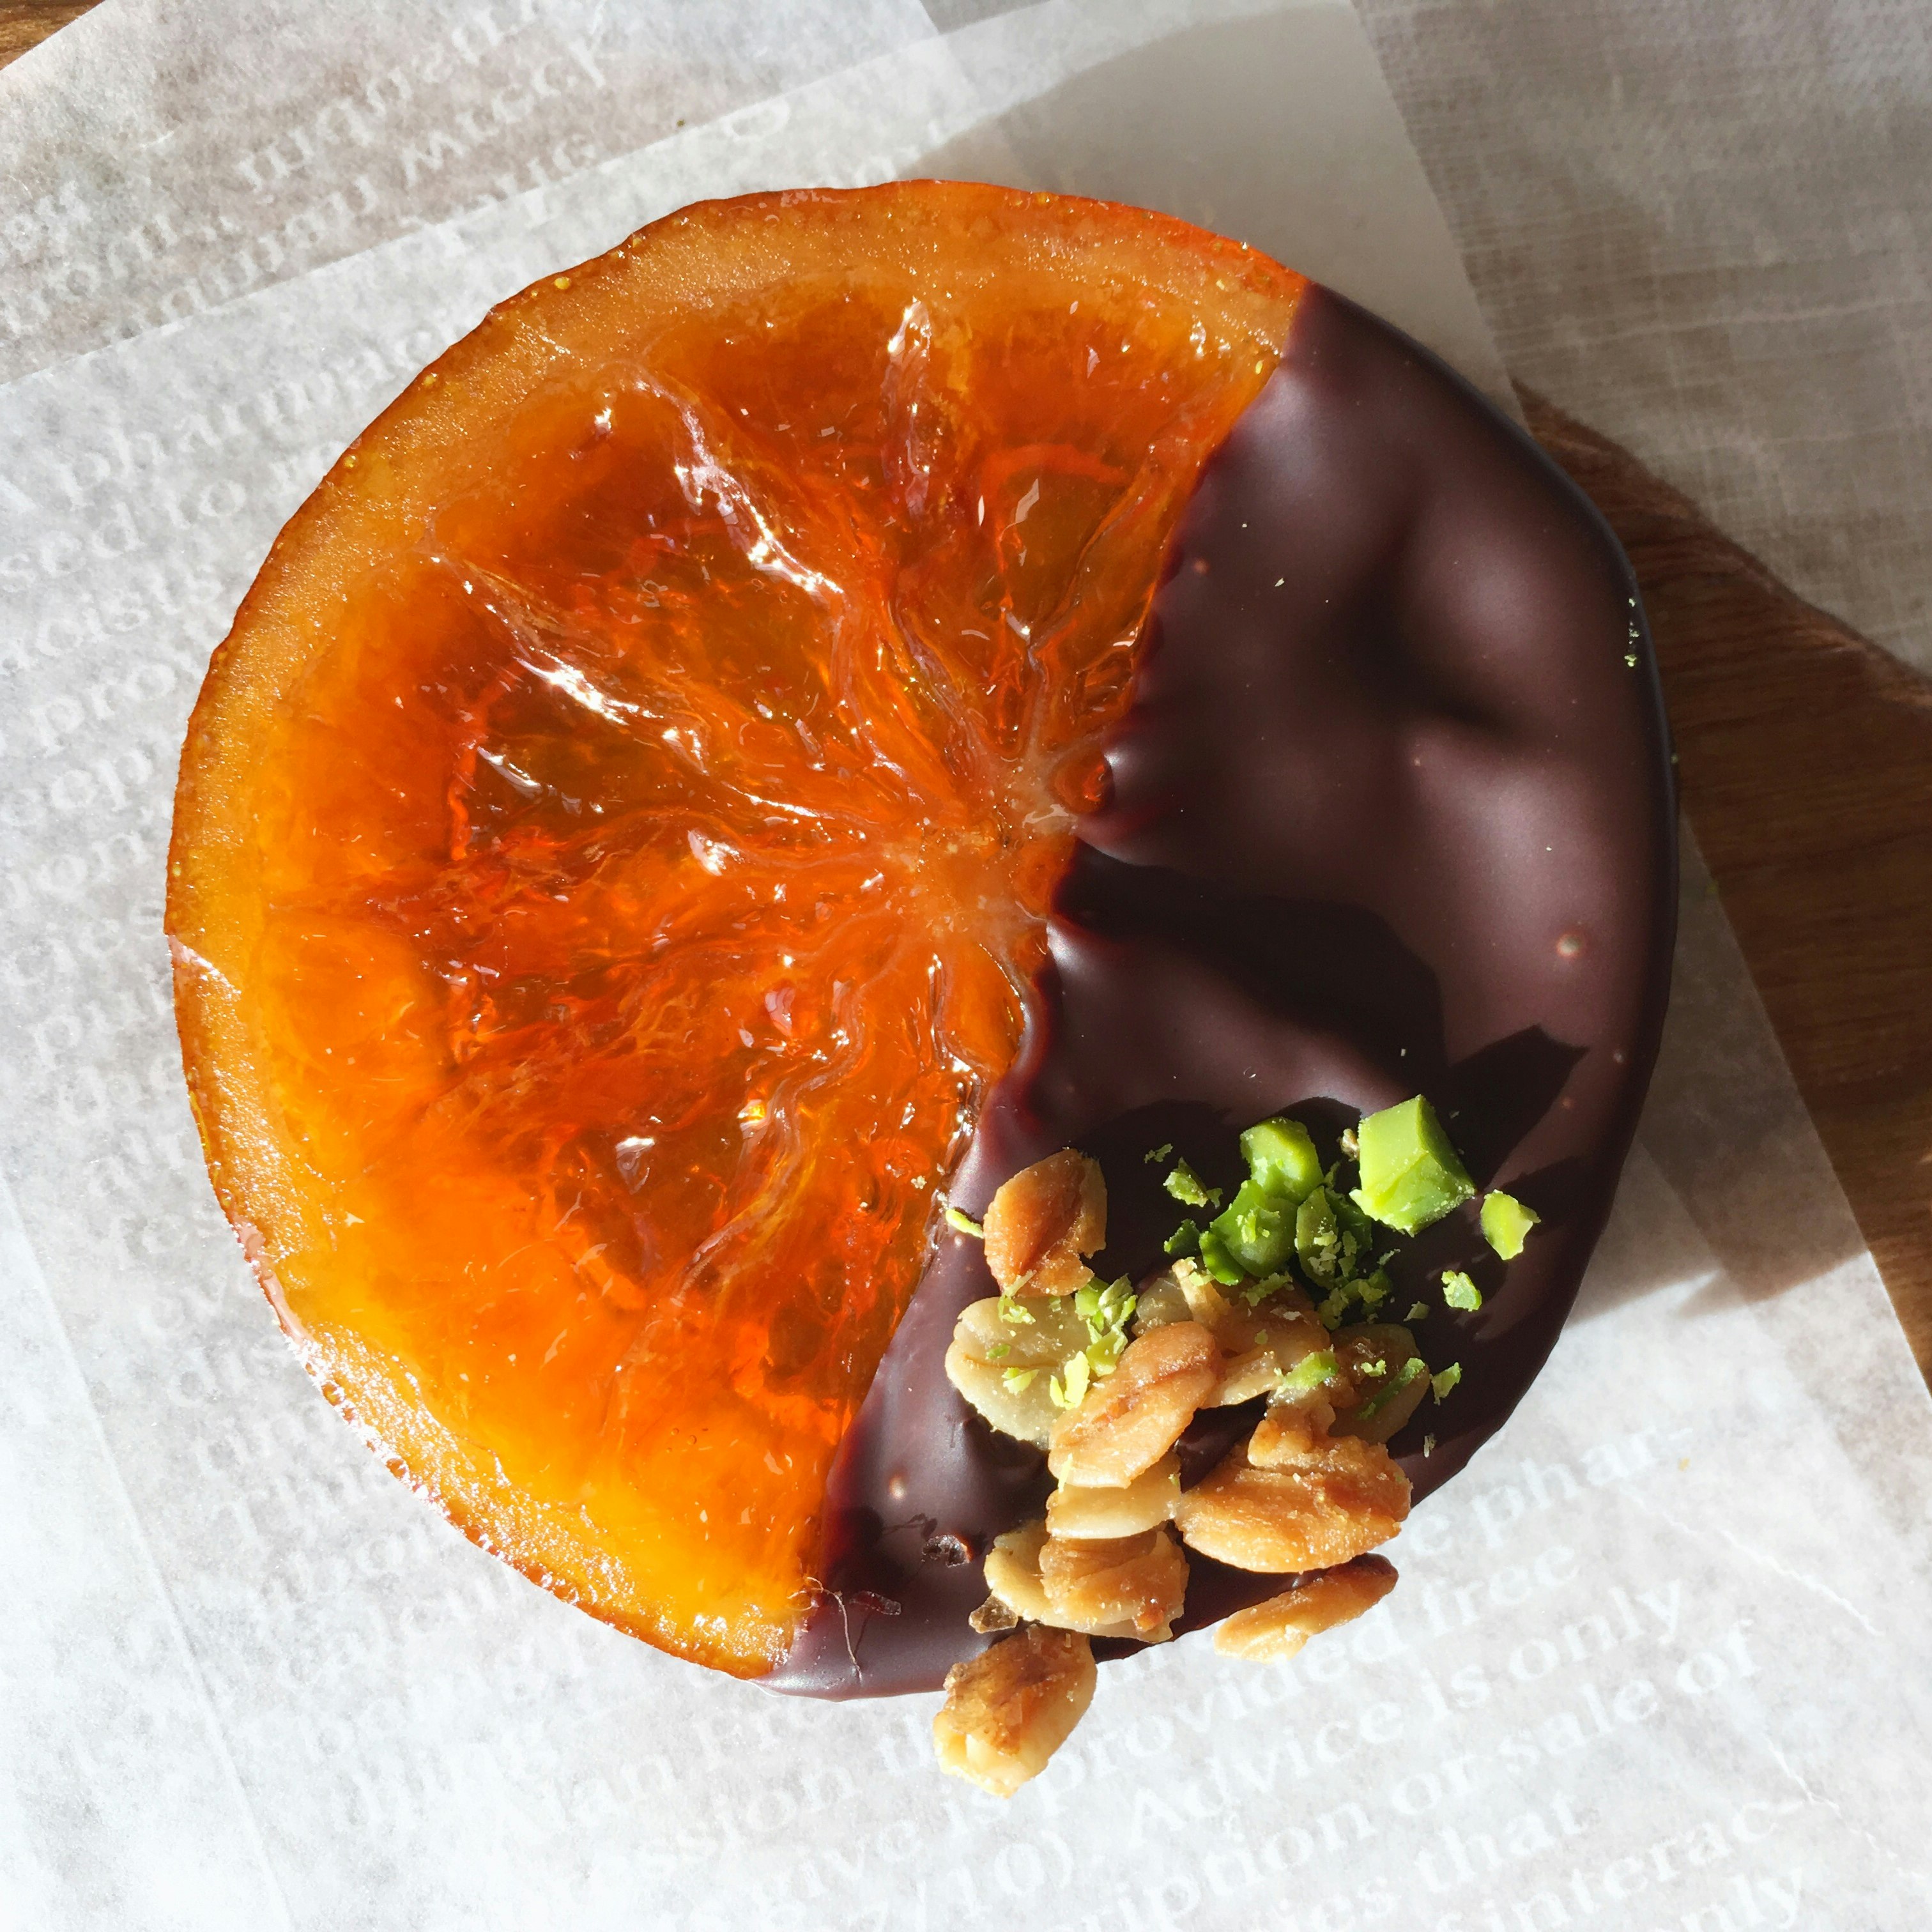

結果
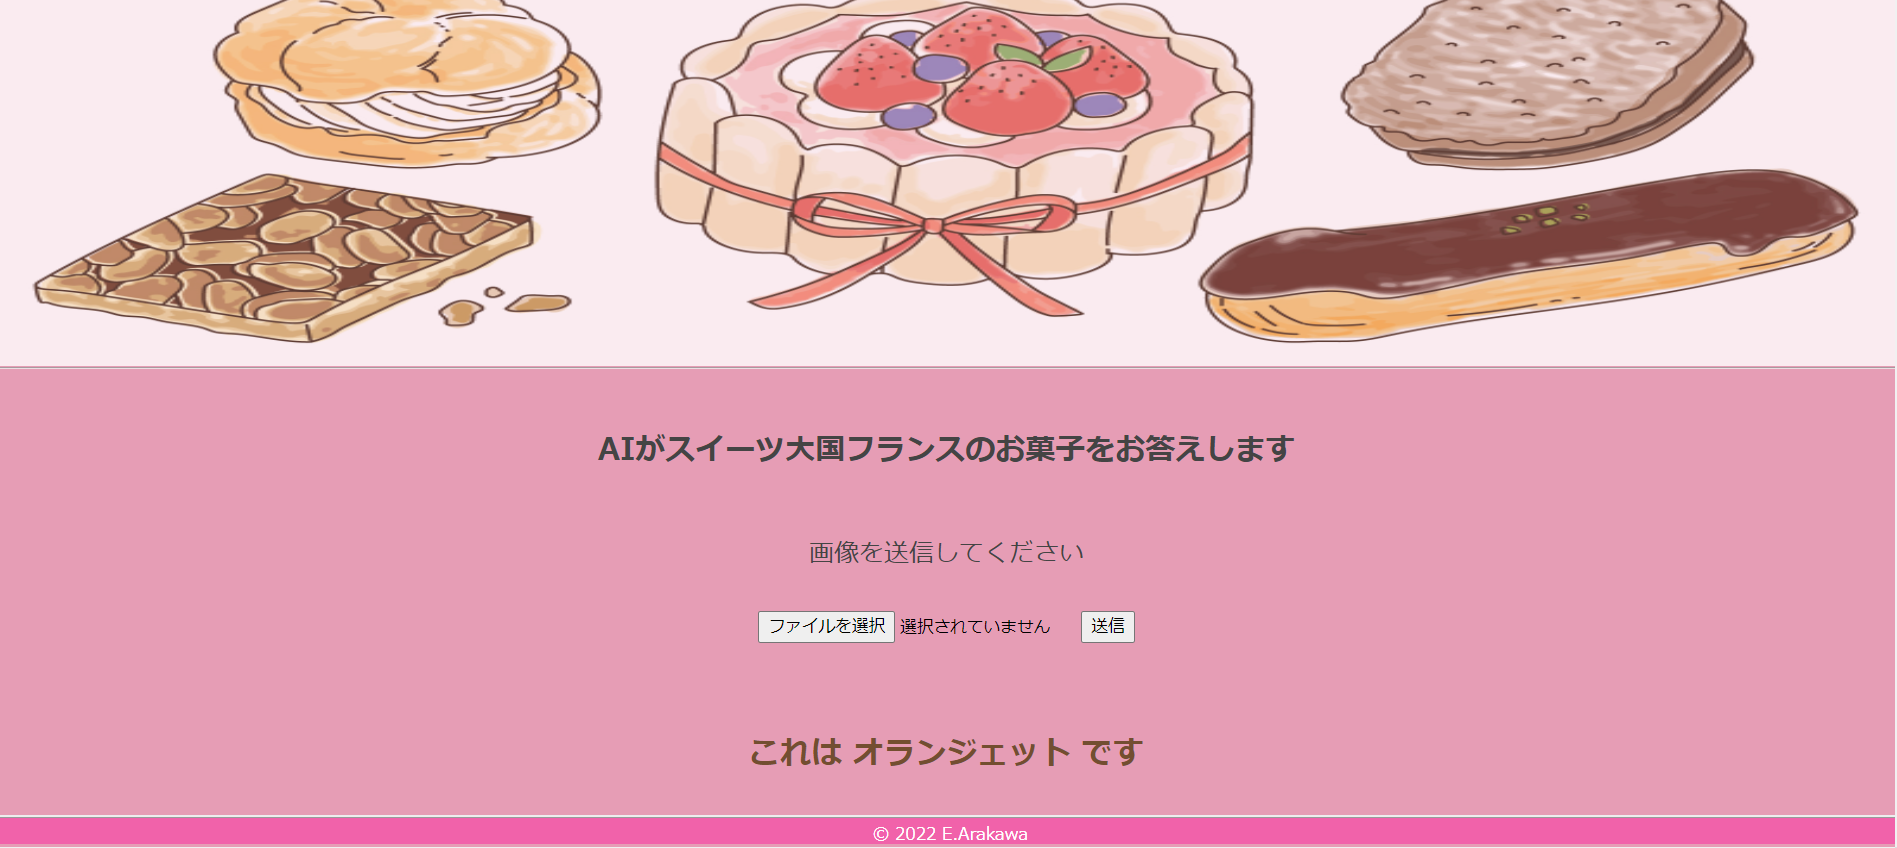
どちらの画像もオランジェットと答えることができました。
AIが導き出した答えの確認ができたので、これでひとまず完成とします。
アプリのリンク先は下記になります。
ページが開くまで30秒ほどお待ちください。
8. 考察,感想
今回オリジナル画像のみでアプリ作成に挑みました。
画像のレベル(余計なものが写っている、中央に位置していない等)や枚数が画像識別の精度に大きく影響するのだと学びました。
自身の目で確認して特徴的な画像を厳選したつもりでしたが、AIにとっては情報が少なかったのだろうと思います。
画像を水増しするコードを加えても良かったかもしれないです。
教材内で使用したVGG16ではなくInception-v3を使用したので、ハイパーパラメータの調整と同様に転移学習に使用するモデルによって精度の改良に繋がることを身をもって知ることができました。
今後HTML、CSS、FLASKについてもしっかり勉強していきたいと思いました。
学んだ機械学習の知識をデータ分析にも生かしていきたいです。
本当に様々なエラーがありましたが、自分で切り抜けられるよう頑張って力を付けていきたいです。
9. 参考文献
アラフォーが"ネコ"のネコ種を判別するAIアプリを作成してみた
[画像データをキーワード検索で効率的に収集する方法(Python「icrawler」のBing検索)]
(https://www.atmarkit.co.jp/ait/articles/2010/28/news018.html)
ILSVRC を振り返り CNN を deep に理解する①
Qiita Markdown 書き方 まとめ
イラストAC

