WPF SheepCalendar 第2日目の記事です。
一般的なデスクトップアプリ開発を通じてDependency Injection(DI:依存性注入)というものを体感すべくCodingを試みました。DIは分離性と結合度を下げ、テスト実装を容易にします。
参考になりそうなとても素晴らしい記事
これを実際のプロジェクトで再現します。
依存性注入とはC#において、Interfaceで実装し、コンストラクタで実装したアルゴリズム(ビジネスロジック)を実装したレイヤー層を注入という認識でまず間違いないです。他の言語でも多分似たようなものでしょう。
Github
私はとても初心者に優しいので、あまりにも万年初心者過ぎてムリだよという方向けにGithubリポジトリを作成しました。
出来ればgit Cloneでやろう(Download zipでもいいけど)。
Gsudoもインストールするとラクです。
git clone https://github.com/Sheephuman/DependensyTest.git
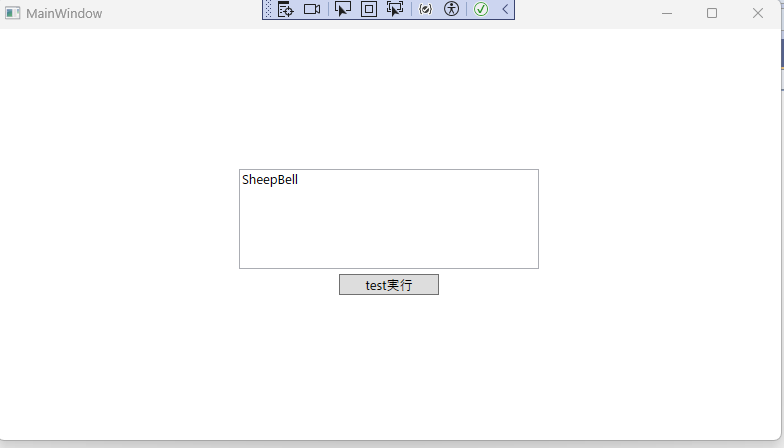
外観
シンプルにします。
<Window x:Class="DependensyTest.MainWindow"
        xmlns="http://schemas.microsoft.com/winfx/2006/xaml/presentation"
        xmlns:x="http://schemas.microsoft.com/winfx/2006/xaml"
        xmlns:d="http://schemas.microsoft.com/expression/blend/2008"
        xmlns:mc="http://schemas.openxmlformats.org/markup-compatibility/2006"
        xmlns:local="clr-namespace:DependensyTest"
        mc:Ignorable="d"
        Title="MainWindow" Height="450" Width="800">
    <Grid>
        <StackPanel Orientation="Vertical" VerticalAlignment="Center">
            <TextBox TextWrapping="Wrap" Text="SheepBell"  x:Name="corralsheepText" Width="300" Height="100" Margin="0,0,0,5"/>
            <Button Content="test実行" Click="testExecute_Click" x:Name="testExecute" Width="100" Margin="0,0,0,5"/>


        </StackPanel>
    </Grid>
</Window>
実装してみる
まずテスト実装を注入するためのレイヤークラスを作成します。
"IDependencyInjectionTests.cs" としました(何でも構いません)
面倒なのでinterfaceもこちらに突っ込みます。
using System.Text.RegularExpressions;

namespace IDependensyTest
{
     public interface IDependencyInjectionTests
 {
     public string 羊を追い込む処理(string sheeps);

     public int 羊を追い込んだ数をカウントする(string sheeps);
 }


        public class TestService : IDependencyInjectionTests
        {


            public int 羊を追い込んだ数をカウントする(string sheeps)
            {
                string matchPattern = "sheep";
                int count = Regex.Matches(sheeps, matchPattern).Count;

                return count;
            }

            public string 羊を追い込む処理(string sheeps)
            {
                return sheeps.Replace("sheep", "| sheep |");
            }

        }
}
Tips
Visual Studioをリファクタリング機能を使えば自動で実装作業出来ます(VSCodeは知らん)
注入する対象のメインクラスを作成する
分かり易さ優先で日本語名のクラスを使用させていただきますが、実際は英語の命名をオススメします。
namespace DependensyTest
{
    public interface IDependencyInjectionTests
    {
        public string 羊を追い込む処理(string sheeps);

        public int 羊を追い込んだ数をカウントする(string sheeps);
    }


    public class 羊を囲い込むクラス
    {
        public 羊を囲い込むクラス(IDependencyInjectionTests _injection)
        {

            testInjection = _injection;
        }


        private IDependencyInjectionTests testInjection;


        public int tester(string sheeps)
        {
            return testInjection.羊を追い込んだ数をカウントする(sheeps);

        }


    }
}
Buttonイベントの実装
XamlでButtonにクリックイベントを登録します。
<Button Content="test実行" Click="testExecute_Click" x:Name="testExecute" Width="100" Margin="0,0,0,5"/>
イベント呼び出し
インターフェースは呼び出しは
インターフェース 変数名 = new クラス名() となります。覚えましょう.
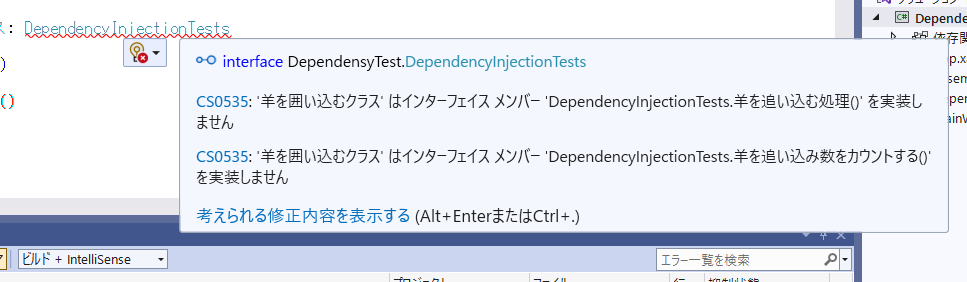
日本語名を使用したせいでコード補完が出ません。クラス名に日本語名を使用するのはやめましょう。
これはコンストラクタインジェクションの一例となります。
  private void testExecute_Click(object sender, RoutedEventArgs e)
  {
      //interfeaceを介してtest実装レイヤー呼び出し(interface Injection)
      IDependencyInjectionTests inject = new TestService();

      //テスト実装レイヤーをメイン実装クラスに注入
      var injectionTests = new 羊を囲い込むクラス(inject);

      int res = injectionTests.tester(corralsheepText.Text);


      MessageBox.Show(res.ToString());


  }
構造としてはこのようなイメージです
緑のレイヤーがテスト用実装を示します。
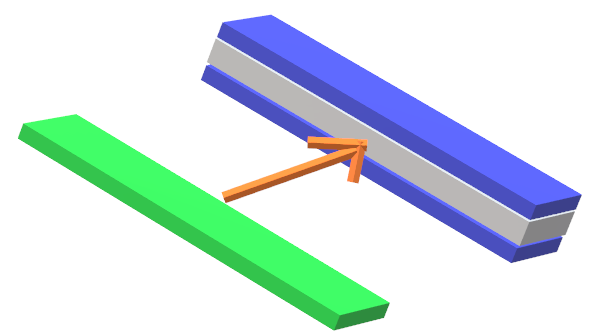
テスト実装をメイン実装に差し込みます。
この実装のメリット
実装としてはあまり直感的ではなく分かりにくいと思われますが、依存性を失くしテストを容易にするとはどういった意味なのかについて解説していきます。
新しい実装を追加してみる
まず、新しいテスト実装用メソッドを書きます

新しいテスト実装を書きます(前の実装はコメントアウトでもした方がいい)。
実装は既存のビジネスロジックを変更しません。そして前の実装との切り替えが自在です。
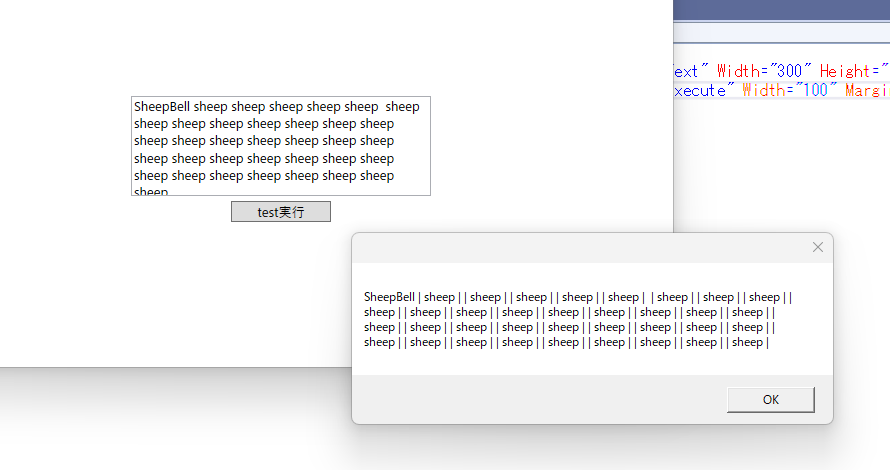
実行結果
こんな感じ。
如何でしたでしょうか?
如何でしたか構文
このように、実装したメソッドがあるテスト用レイヤーを"差し込む"(Injection)事がこの実装方法の肝です。既存の実装に何の手を加える事なく実装出来ます。
ただ単にinterfaceを実装するというだけではなく、「羊にペイントをするクラス」「蹄のお手入れをするクラス」などのテスト用クラスをテスト用レイヤーに追加することで、いちいち単体テストプロジェクトを立ち上げたりすることなく、メインクラスの実装と分離することが出来ます。これは大きなメリットと言えます。
ドキュメント性も上がりますし、以前の実装に戻したくなった場合もこの実装方法であれば容易です。
間にテスト用レイヤーを挟むのがポイント。
別のインジェクションパターンを試す
以下はPHPの記事ですが、CSharpで出来そうだったので試しました。
InterFaceインジェクション(Interface Injection)
Interfaceで注入するやり方。
外観
<Button Content="test2実行" Click="testExecute2_Click" x:Name="testExecute2" Width="100" Margin="0,0,0,5"/>
羊を囲い込むクラス.csに
   public void SetDependency(IDependencyInjectionTests dependency)
   {

       testInjection = dependency;
   }
を追加します。
呼び出し
   private void testExecute2_Click(object sender, RoutedEventArgs e)
   {
    //interfaceを介してクラス読み込み
 IDependencyInjectionTests interLayer = new TestService();

 //通常のインスタンス作成
 羊を囲い込むクラス injector = new 羊を囲い込むクラス();

 //メソッドの引数でInterfaceLayerをインジェクション
 injector.SetDependency(interLayer);

 var res = injector.tester2(corralsheepText.Text);
 MessageBox.Show(res.ToString());
   }
実行結果
Setter Injection
ここまで来たら割と単純です。
プロパティを実装クラスに追加する
     private IDependencyInjectionTests? testInjection;

     public IDependencyInjectionTests IDProperty
     {
         get
         { if (testInjection == null) throw new InvalidOperationException();
             return testInjection;
         }
         set
         {
             testInjection = value;
         }
     }
呼び出し側
  private void testExecute3_Click(object sender, RoutedEventArgs e)
  {
     //interfaceを介してクラス読み込み
 IDependencyInjectionTests interLayer = new TestService();
 //通常のインスタンス作成
 羊を囲い込むクラス injector = new 羊を囲い込むクラス();

 injector.IDProperty = interLayer;

 var res = injector.tester2(corralsheepText.Text);
 MessageBox.Show(res.ToString());
  }
実行結果は割愛。
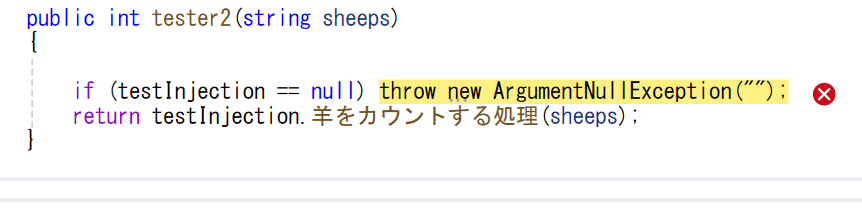
試しにコメントアウトしてみた
  private void testExecute3_Click(object sender, RoutedEventArgs e)
  {
     //interfaceを介してクラス読み込み
 IDependencyInjectionTests interLayer = new TestService();
 //通常のインスタンス作成
 羊を囲い込むクラス injector = new 羊を囲い込むクラス();

 //injector.IDProperty = interLayer;

 var res = injector.tester2(corralsheepText.Text);
 MessageBox.Show(res.ToString());
  }
結果
testInjectionはNullとなり、Codeが正しく動作している事が確認できました。
参考になりましたらいいねをお願いします!
たいへん励みになります(とても丁寧な記事)。
出典:ポプテピピック(お気に触りましたら申し訳ない)