この記事はSwift その2 Advent Calendar 2020の20日目の記事です。
SwiftUIの例を中心にSwiftにおける変数展開1についてみていきます。
SwiftUIの不思議な機能
SwiftUIでは次のようなコードが書けます。
struct MyView: View {
    var body: some View {
        HStack{
            Text("これは\(Image(systemName: "swift"))です")  //OK
            Text("これは\(Text("太い文字").bold())です")      //OK
        }
    }
}

めちゃくちゃ便利です。つい最近まで魔法だと思っていました。
ところで、次のようなコードはエラーが出ます。
    var body: some View {
        HStack{
            Text("これは\(Button("ボタン"){})です") //Instance method 'appendInterpolation' requires that 'Button<Text>' conform to '_FormatSpecifiable'
            Text("これは\(Color.red)です")         //Instance method 'appendInterpolation' requires that 'Color' conform to '_FormatSpecifiable'
        }
    }
テキストの中にButtonが埋め込めないのは理解できます。ところが、次のコードもエラーです
    var body: some View {
        HStack{
            Text("これは\(false)です") //No exact matches in call to instance method 'appendInterpolation'
        }
    }
普通ならばこのTextは「これはfalseです」と表示すべきです。ところがそうはなりません。
また、こうやると画像を表示できなくなります。
struct MyView: View {
let text: String
var body: some View {
HStack{
Text(text)
}
}
}
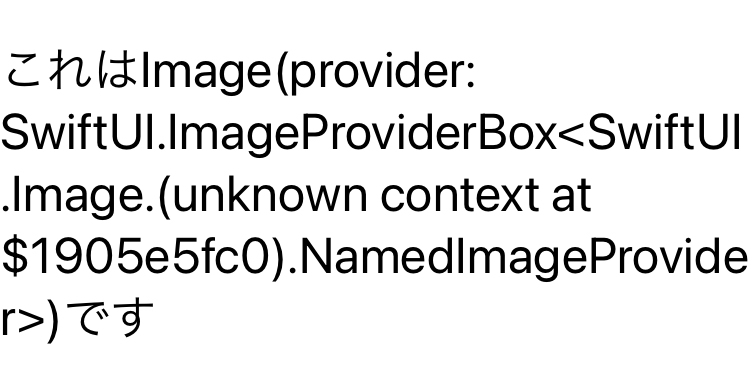
MyView(text: "これは\(Image(systemName: "swift"))です") //これはImage(provider: SwiftUI.ImageProviderBox<SwiftUI.Image.(unknown context at $1905e5fc0).NamedImageProvider>)です
何かがおかしいのです。
エラーを読むと、どうやらappendInterpolationと_FormatSpecifiableが大事なようです。この謎を解くため、まずはappendInterpolationについて調べてみましょう。
ExpressibleByStringInterpolation
Swiftには型を文字列リテラルで初期化できるようにするExpressibleByStringLiteralというprotocolがあります。
例えば次のような構造体を作れば、文字列リテラルで初期化できるようになります。
struct MyString: ExpressibleByStringLiteral, CustomStringConvertible {
    typealias StringLiteralType = String

    let body: String

    init(stringLiteral: Self.StringLiteralType){
        self.body = stringLiteral
    }

    var description: String {
        return body
    }
}

let myString: MyString = "アイウエオ"       //OK
ところが、これだけではこのコードはエラーになります。
let myString: MyString = "\("アイウエオ")" //エラー
これは変数展開はExpressibleByStringLiteralだけでは足りないからです。
そこで登場するのがExpressibleByStringInterpolationです。
extension MyString: ExpressibleByStringInterpolation {}
let myString: MyString = "\("アイウエオ")"  //OK
これで無事変数展開が使えるようになります2。
このExpressibleByStringInterpolationはassociatedtypeとしてStringInterpolationProtocolに準拠するStringInterpolationという型を要求します。デフォルトではこれにDefaultStringInterpolationが指定されています。
associatedtype StringInterpolation : StringInterpolationProtocol = DefaultStringInterpolation where Self.StringLiteralType == Self.StringInterpolation.StringLiteralType
つまりこのprotocolが付与されたことで、MyStringにはStringInterpolationといくつかのメソッドが追加され、それらの働きによって変数展開が可能になったという事です。
StringInterpolationProtocolに準拠する型はappendInterpolationとappendLiteralというメソッドを持っています。そうです、さっき出ていたappendInterpolationというのはどうやら変数展開の際に呼ばれるメソッドのようです。
変数展開を拡張
appendInterpolationを理解するために、自前で新しい変数展開を作ってみましょう。
ドキュメントによるとappendInterpolationを追加で定義することで、変数展開をカスタマイズできます。
appendInterpolationmethods support virtually all features of methods: they can have any number of parameters, can specify labels for any or all of their parameters, can provide default values, can have variadic parameters, and can have parameters with generic types. Most importantly, they can be overloaded, so a type that conforms toStringInterpolationProtocolcan provide several differentappendInterpolationmethods with different behaviors. AnappendInterpolationmethod can also throw; when a user writes a literal with one of these interpolations, they must mark the string literal with try or one of its variants.
StringのStringInterPolationはデフォルトのDefaultStringInterpolationですから、これを拡張すれば通常のStringの変数展開も拡張できます。やってみましょう。
extension DefaultStringInterpolation {
    mutating func appendInterpolation(reversed value: String) {
        self.appendInterpolation(String(value.reversed()))
    }
}

let string = "アイウエオ"
print("Reversed string: \(reversed: string)")  //オエウイア
なんとこれだけで"\(reversed: string)"という新しい記法が定義されてしまいました3。
SwiftUIの変数展開
さて、ではSwiftUIの動作です。ドキュメントによるとTextは次のように動作します。
SwiftUI doesn’t call the init(_:) method when you initialize a text view with a string literal as the input. Instead, a string literal triggers the init(_:tableName:bundle:comment:) method — which treats the input as a LocalizedStringKey instance — and attempts to perform localization.
特に指定することなくイニシャライザを呼んだ場合、init(_:tableName:bundle:comment:)を呼び出すようですが、このイニシャライザの最初の引数はLocalizedStringKeyという型になっています。
このLocalizedStringKeyはExpressibleByStringInterpolationに準拠する型で、内部にはStringInterpolationというstructがあります。つまりLocalizedStringKeyはDefaultStringInterpolationではなく独自に実装したStringInterpolationを使っていることになります。
この独自のStringInterpolationには次のようなメソッドがあります。
func appendInterpolation<T>(T)
func appendInterpolation(String)
func appendInterpolation(Text)
func appendInterpolation(Image)
func appendInterpolation(ClosedRange<Date>)
func appendInterpolation(DateInterval)
func appendInterpolation<Subject>(Subject, formatter: Formatter?)
func appendInterpolation<Subject>(Subject, formatter: Formatter?)
func appendInterpolation<T>(T, specifier: String)
func appendInterpolation(Date, style: Text.DateStyle)
これで冒頭にあげた不思議な挙動が説明できるようになります。
TextとImageをTextの中で変数展開できるのは、それぞれ以下2つのメソッドが用意されているからです。
func appendInterpolation(Text)
func appendInterpolation(Image)
また、一番上のappendInterpolation<T>(T)は次のように定義されています。
mutating func appendInterpolation<T>(_ value: T) where T : _FormatSpecifiable
つまりButtonやColorをこのメソッドの引数に入れようとして、_FormatSpecifiableに準拠していないよ、と怒られていたわけです。
StringとしてTextの引数を受け取ると画像が表示できなくなるのは、そもそも指定すべきがStringではなくLocalizedStringKeyだからです。したがって次のようにすれば解決です。
struct MyView: View {
    let text: LocalizedStringKey
    var body: some View {
        HStack{
            Text(text)
        }
    }
}

MyView(text: "これは\(Image(systemName: "swift"))です")

カスタムビューの実装でよくTextの引数として使う値をStringとして受け取っているものを見かけますが、LocalizedStringKeyとして受け取った方がいいのかもしれません。
しかし"\(false)"がエラーになるなど、LocalizedStringKeyでは困る場面もあります。このためTextには次のようなイニシャライザが用意されています。これは引数をverbatim(文字通り)に解釈します。
init(verbatim content: String)
これを使えばBoolが入れられない問題は次のように解消できます。
    var body: some View {
        HStack{
            Text(verbatim: "これは\(false)です")
        }
    }
もちろん
    var body: some View {
        HStack{
            Text("これは\(false)です" as String)
        }
    }
でもいいと思います。
Textの変数展開を拡張する
せっかく調べたので、最後に拡張してみましょう。といってもextensionを書くだけなので簡単です。
extension LocalizedStringKey.StringInterpolation{
    mutating func appendInterpolation(bold value: LocalizedStringKey){
        self.appendInterpolation(Text(value).bold())
    }

    mutating func appendInterpolation(underline value: LocalizedStringKey){
        self.appendInterpolation(Text(value).underline())
    }

    mutating func appendInterpolation(italic value: LocalizedStringKey){
        self.appendInterpolation(Text(value).italic())
    }

    mutating func appendInterpolation(systemImage name: String){
        self.appendInterpolation(Image(systemName: name))
    }
}
このように定義すれば
struct MyView: View {
    var body: some View {
        Text("これは\(bold: "太字")で\(underline: "下線")で\(italic: "italic")で\(systemImage: "swift")です!")
    }
}

簡単に文字列を装飾できるようになりました。
結論
- Swiftの文字列リテラル内の変数展開は、代入先の型が
ExpressibleByStringInterpolationに準拠していることが必要 -
ExpressibleByStringInterpolationのassociatedtypeであるStringInterpolationはappendInterpolationというメソッドを持ち、これが変数展開の動作を担う -
StringはDefaultStringInterpolationを使っている -
Text("hoge")と書いた時、"hoge"の型はLocalizedStringKeyになる -
LocalizedStringKeyはStringInterpolationを独自に持っている -
LocalizedStringKey.StringInterpolationはTextやImageを引数に取るappendInterpolationが実装されているので、これらを引数にできる
SwiftUIでなんとなく使ってきた機能の謎が解けてとてもスッキリしました。やはりドキュメントは読むべきですね。
参考資料
- StringInterpolationProtocol | Apple Developer Documentation
- DefaultStringInterpolation | Apple Developer Documentation
- Text | Apple Developer Documentation
- LocalizedStringKey | Apple Developer Documentation
- LocalizedStringKey.StringInterpolation | Apple Developer Documentation
-
String Interpolationは文字列補完や文字列挿入と訳すのが正確なようですが、ここでは便宜的に変数展開と呼ぶことにします。 ↩
-
なお
ExpressibleByStringInterpolationはExpressibleByStringLiteralに準拠するので、最初からこちらを用いても問題ないでしょう。 ↩ -
StringInterPolationProtocolが要求しているのはappendLiteralの実装なのですが、ドキュメントによれば変数展開ではSwiftが呼び出すのはappendInterpolationの方だそうです。この辺りは何か事情があるのかもしれません。 ↩