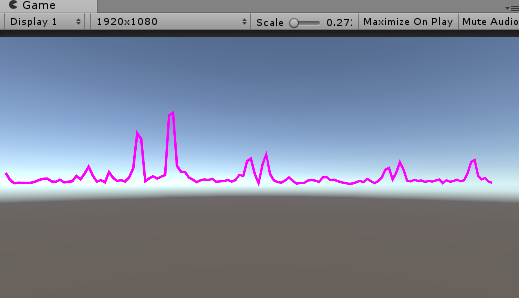
前回は音量だけでしたが、今回は周波数ごとの音量(パワー)を表示してみます。

-
Hierarchyタブで右クリック>空のゲームオブジェクトを作る
-
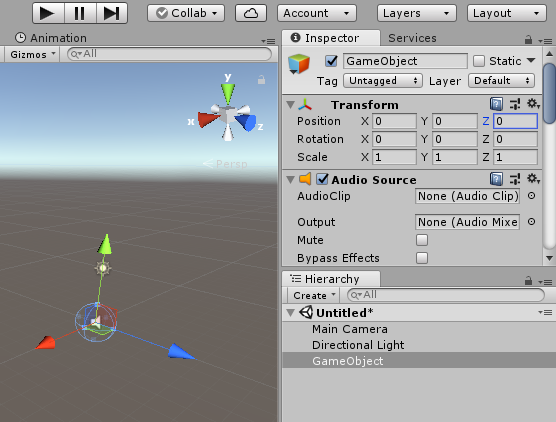
作ったオブジェクトに[AddComponent]>AudioSourceでオーディオソースをつける
-
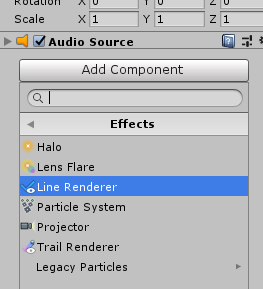
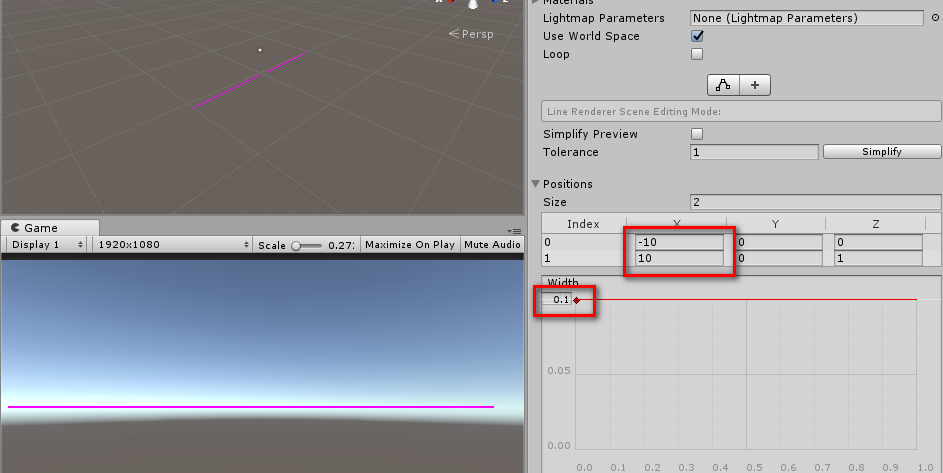
さらに[AddComponent]>Effect>LiniRendererでラインをつける
-ラインの表示幅を-10 ~ 10,線の幅を0.1にする
- Project>Create>C#Scriptでスクリプトを作成し、MicSpectrumSample.csという名前を付けて下記をコピペする
MicSpectrumSample.cs
using System.Collections;
using System.Collections.Generic;
using UnityEngine;

public class MicSpectrumSample : MonoBehaviour {
    private readonly int SampleNum = (2 << 9); // サンプリング数は2のN乗(N=5-12)
    [SerializeField, Range(0f, 1000f)] float m_gain = 200f; // 倍率
    AudioSource m_source;
    LineRenderer m_lineRenderer;
    Vector3 m_sttPos;
    Vector3 m_endPos;
    float[] currentValues;

    // Use this for initialization
    void Start () {
        m_source = GetComponent<AudioSource>();
        m_lineRenderer = GetComponent<LineRenderer>();
        m_sttPos = m_lineRenderer.GetPosition(0);
        m_endPos = m_lineRenderer.GetPosition(m_lineRenderer.positionCount-1);
        currentValues = new float[SampleNum];
        if ((m_source != null) && (Microphone.devices.Length > 0)) // オーディオソースとマイクがある
        {
            if (m_source.clip == null) // クリップがなければマイクにする
            {
                string devName = Microphone.devices[0]; // 複数見つかってもとりあえず0番目のマイクを使用
                int minFreq, maxFreq;
                Microphone.GetDeviceCaps(devName, out minFreq, out maxFreq); // 最大最小サンプリング数を得る
                int ms = minFreq / SampleNum; // サンプリング時間を適切に取る
                m_source.loop = true; // ループにする
                m_source.clip = Microphone.Start(devName, true, ms, minFreq); // clipをマイクに設定
                while (!(Microphone.GetPosition(devName) > 0)) { } // きちんと値をとるために待つ
                Microphone.GetPosition(null);
                m_source.Play();
            }
        }
    }

    // Update is called once per frame
    void Update () {
        m_source.GetSpectrumData(currentValues, 0, FFTWindow.Hamming);
        int levelCount = currentValues.Length/8; // 高周波数帯は取らない
        Vector3[] positions = new Vector3[levelCount];
        for (int i=0;i< levelCount; i++)
        {
            positions[i] = m_sttPos + (m_endPos - m_sttPos) * (float)i / (float)(levelCount - 1);
            positions[i].y += currentValues[i] * m_gain;
        }
        m_lineRenderer.positionCount = levelCount;
        m_lineRenderer.SetPositions(positions);
    }

}
- 音量が表示される
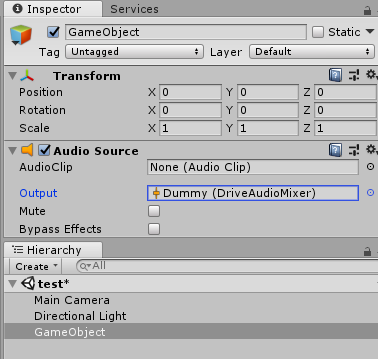
今回はAudioSource > AudioClipに音ソースを指定するとそちらのスペクトラムを表示しますが、指定しない場合はマイクがハウリングを起こすので以下の設定を行います。
- Projectタブで右クリック>Create>AudioMixer でオーディオミキサーを作る
- オーディオミキサー>Groups>+マークをクリックし、Dummyという名前のグループを作る
- できたDummyのボリュームを最小(-80)にする
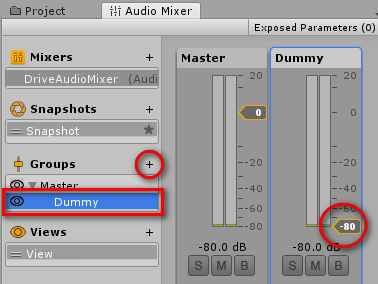
- 最初に作成したGameObject>AudioClip>OutputにDummyを指定する