1. 概要
LODを確認するコンソールコマンドについて紹介します。
デバッグやLODの各パラメータの調整時などに役に立ちます。
2. コマンド
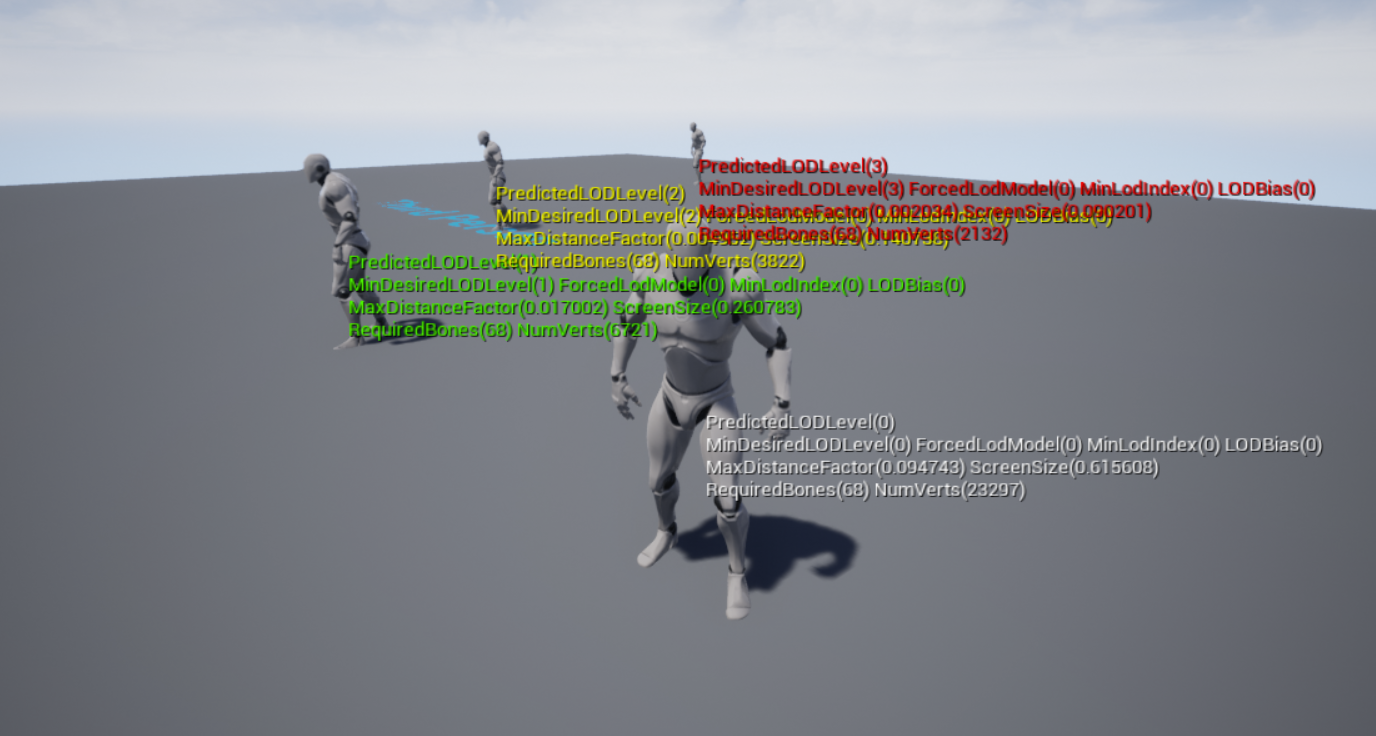
2.1. a.VisualizeLODs 1
LODに現在どのような値が適用されているかを確認できるコンソールコマンドです。
・ボーン数、頂点数も確認することができ、Shipping/Test以外のビルドで有効
・SkinnedMeshComponentを継承したComponentにのみ視覚化が可能
・表示色は以下の通りでソース上にハードコードで定義
| LOD | Color |
|---|---|
| LOD0 | White |
| LOD1 | Green |
| LOD2 | Yellow |
| LOD3 | Red |
| Other | Purple |
以下の箇所で実装されています。
SkinnedMeshComponent.cpp
bool USkinnedMeshComponent::UpdateLODStatus_Internal(int32 InMasterPoseComponentPredictedLODLevel)
{
	//...
	if (CVarAnimVisualizeLODs.GetValueOnAnyThread() != 0)
	{
		// Reduce to visible animated, non SyncAttachParentLOD to reduce clutter.
		if (SkeletalMesh && MeshObject && bRecentlyRendered)
		{
			const bool bHasValidSyncAttachParent = bSyncAttachParentLOD && GetAttachParent() && GetAttachParent()->IsA(USkinnedMeshComponent::StaticClass());
			if (!bHasValidSyncAttachParent)
			{
				const float ScreenSize = FMath::Sqrt(MeshObject->MaxDistanceFactor) * 2.f;
				FString DebugString = FString::Printf(TEXT("PredictedLODLevel(%d)\nMinDesiredLODLevel(%d) ForcedLodModel(%d) MinLodIndex(%d) LODBias(%d)\nMaxDistanceFactor(%f) ScreenSize(%f)"),
					PredictedLODLevel, MeshObject->MinDesiredLODLevel, LocalForcedLodModel, MinLodIndex, LODBias, MeshObject->MaxDistanceFactor, ScreenSize);

				// See if Child classes want to add something.
				UpdateVisualizeLODString(DebugString);

				FColor DrawColor = FColor::White;
				switch (PredictedLODLevel)
				{
				case 0: DrawColor = FColor::White; break;
				case 1: DrawColor = FColor::Green; break;
				case 2: DrawColor = FColor::Yellow; break;
				case 3: DrawColor = FColor::Red; break;
				default:
					DrawColor = FColor::Purple; break;
				}

				DrawDebugString(GetWorld(), Bounds.Origin, DebugString, nullptr, DrawColor, 0.f, true, 1.2f);
			}
		}
	}
	//...
}
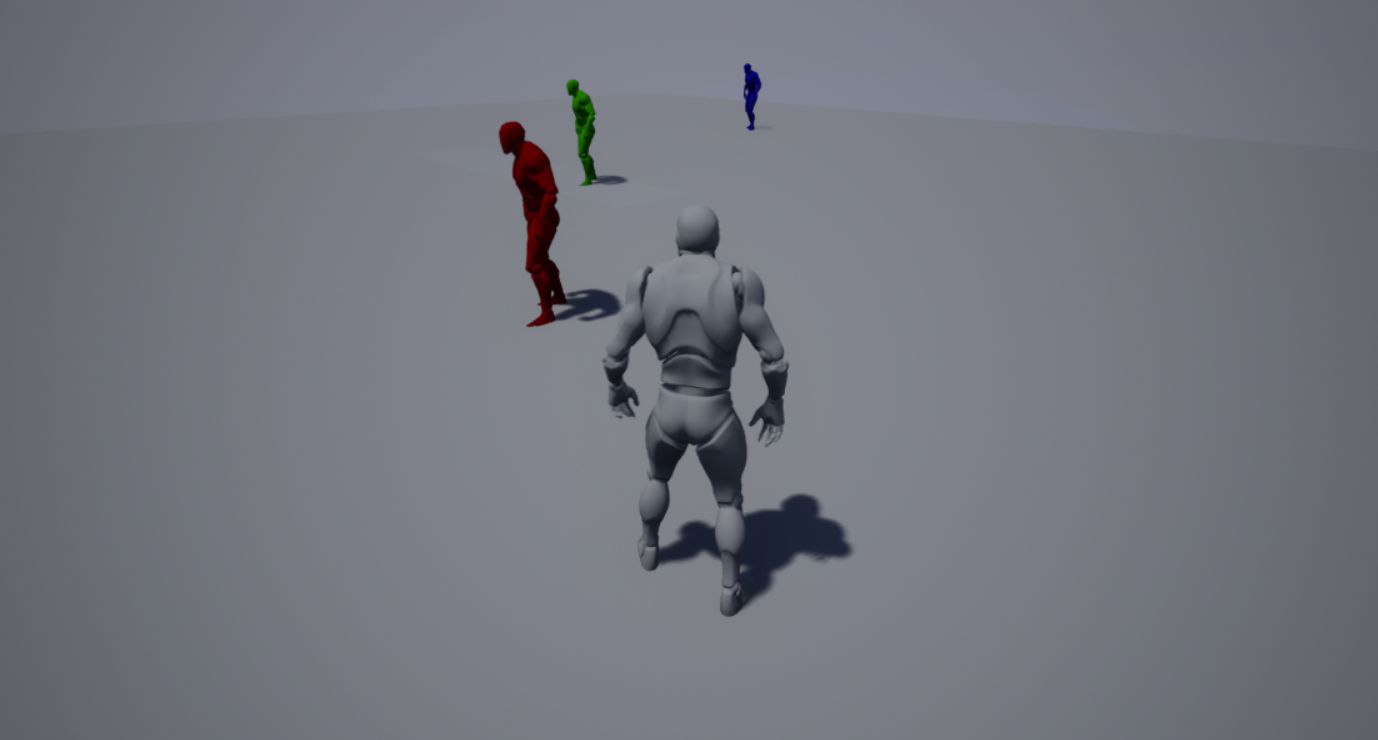
2.2. ShowFlag.LODColoration 1
現在適用されてLODをLODレベル毎の色で確認することができるコンソールコマンドです。
・全てのPrimitiveComponentに対して有効
・表示色は以下の通りで定義 (BaseEngine.iniのLODColorationColors参照)
| LOD | Color |
|---|---|
| LOD0 | White |
| LOD1 | Red |
| LOD2 | Green |
| LOD3 | Blue |
| LOD4 | Yellow |
| LOD5 | Fuchisia |
| LOD6 | Cyan |
| LOD7 | Purple |
以下の箇所で実装されています。
SkinnedMeshComponent.cpp
void ApplyViewModeOverrides(
	int32 ViewIndex,
	const FEngineShowFlags& EngineShowFlags,
	ERHIFeatureLevel::Type FeatureLevel,
	const FPrimitiveSceneProxy* PrimitiveSceneProxy,
	bool bSelected,
	FMeshBatch& Mesh,
	FMeshElementCollector& Collector
	)
{
# if !(UE_BUILD_SHIPPING || UE_BUILD_TEST)
	// ...
	else if (EngineShowFlags.LODColoration)
	{
		if (!Mesh.IsTranslucent(FeatureLevel) && GEngine->LODColorationColors.Num()  > 0)
		{
			int32 lodColorationIndex = FMath::Clamp((int32)Mesh.VisualizeLODIndex, 0, GEngine->LODColorationColors.Num() - 1);

			bool bLit = Mesh.MaterialRenderProxy->GetMaterial(FeatureLevel)->GetShadingModels().IsLit();
			const UMaterial* LODColorationMaterial = (bLit && EngineShowFlags.Lighting) ? GEngine->LevelColorationLitMaterial : GEngine->LevelColorationUnlitMaterial;

			auto LODColorationMaterialInstance = new FColoredMaterialRenderProxy(
				LODColorationMaterial->GetRenderProxy(),
				GetSelectionColor(GEngine->LODColorationColors[lodColorationIndex], bSelected, PrimitiveSceneProxy->IsHovered() )
				);

			Mesh.MaterialRenderProxy = LODColorationMaterialInstance;
			Collector.RegisterOneFrameMaterialProxy(LODColorationMaterialInstance);
		}
	}
	// ...
}
3. まとめ
実機上ですばやくLODが入っているか、どのようなLODが適用されているかを確認する際に役に立ちます。
これらをうまく活用してデバッグを効率的に行いましょう。