お知らせ
2020-12-31
Get Head Loc Rot関数の実装画像を差し替えました。ただしサンプルプロジェクトの方は変更していないため、差し替えた画像を参考に修正してください。
参考資料のリンク先の動画が非公開になったことで閲覧不可になったため削除しました。
はじめに
AI Perceptionについては以下の記事を参照。
【UE4】AI Perception の紹介と使い方
公式の紹介ページ(最近更新されたらしいです)
Artificial Intelligence - AI Perception
AI Perceptionの向きはRoot Componentの回転を使用しているため必ずしも頭の回転と一致するわけではありません。
例えば敵兵士がパトロール中に左右を向くアニメーションを再生しても、Root Componentそのものが回転しているわけではないので、プレイヤーとバッチリ目が合っても「視野内に入った」と知覚してくれません。
下の画像は赤色の枠が敵を表し、オレンジの矢印は向いている方向、緑の矢印はAI Perceptionの方向を示しています。
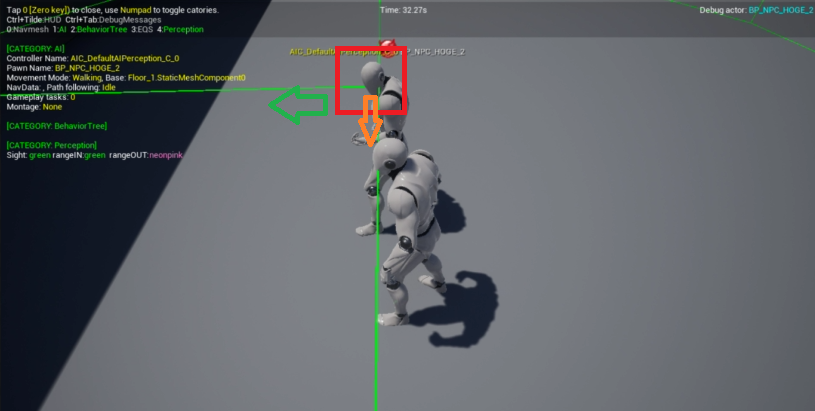
この問題を修正するにはC++で GetActorEyesViewPoint関数 をオーバーライドする必要があります。
プロジェクトはこちら
記事の内容を実装したプロジェクトをアップしています。
Version 4.22.3
https://1drv.ms/u/s!Au-8FqgREBKZiBrXYXOlaXcBj8v9?e=oT5PzR
修正してみよう!
GetActorEyesViewPoint関数をオーバーライドするためにAIControllerクラスを親としたC++クラスを追加します。
無事に生成&コンパイル出来たら、ヘッダ側に以下のように追記します。
public:
	UFUNCTION(BlueprintImplementableEvent, BlueprintCallable, Category = "PerceptionExtended")
		void GetHeadLocRot(FVector& OutLocation, FRotator& OutRotation) const;

	virtual void GetActorEyesViewPoint(FVector& out_Location, FRotator& out_Rotation) const override;
CPP側には以下のように追記します。
void クラス名::GetActorEyesViewPoint(FVector& out_Location, FRotator& out_Rotation) const
{
	GetHeadLocRot(out_Location, out_Rotation);
}
C++側はこれで終了です。
次はBlueprintImplementableEventとして宣言した GetHeadLocRot関数 をブループリント側で実装します。
最初にCharacterクラスを親としたブループリントを作成し、メッシュやアニメーションブループリントを設定します。
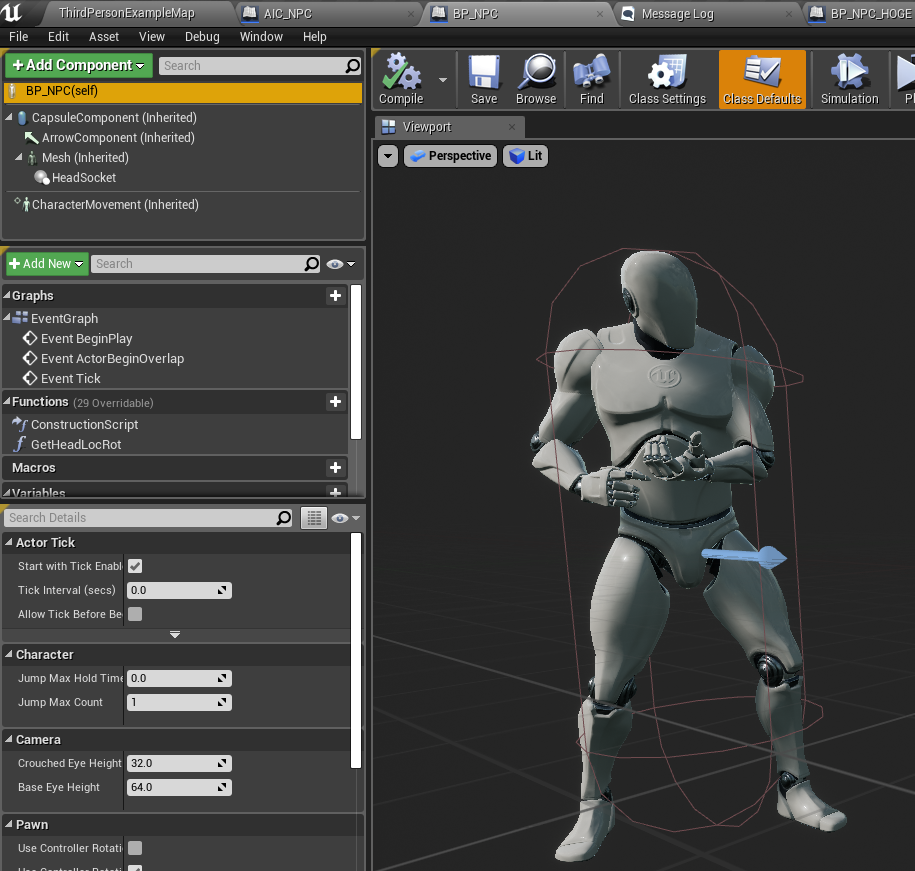
Meshコンポーネントの子として Scene Component を追加します。
追加したScene Componentを選択し、Detailsパネル(詳細パネル)の Sockets - Parent Socket の虫眼鏡マークをクリックし、Headボーンを選択します。
追加したScene Componentがアニメーションと追従することを確認したら、Scene ComponentのRotationを調整します。
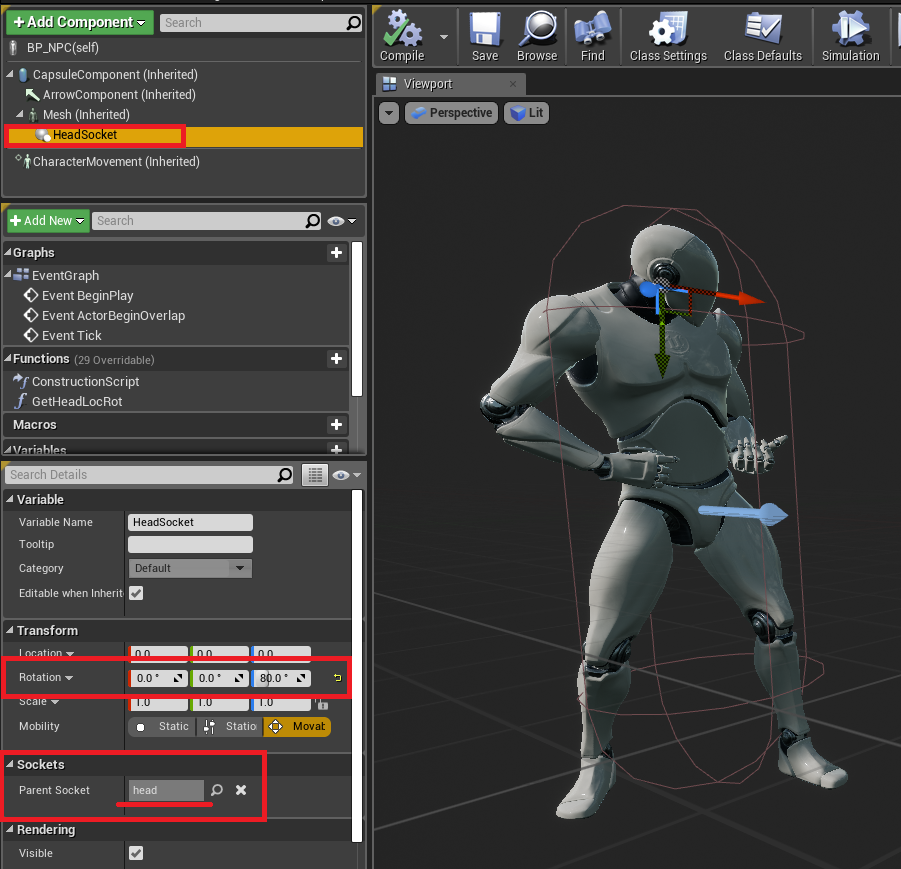
次にC++で作成し、GetActorEyesViewPoint関数をオーバーライドしたAI Controllerクラスを親としたブループリントを作成します。
Event GraphでOn Possessイベントを呼び出し、返り値PossessedPawnから上で作成したAIキャラクターブループリントへキャストし、返り値を変数へ格納します。

My BlueprintパネルのFunctionsから Overrideボタン をクリックし、一覧から GetHeadLocRot を選びます。
選んだら自動でGetHeadLocRotタブが開かれるので次のようにノードを配置します。
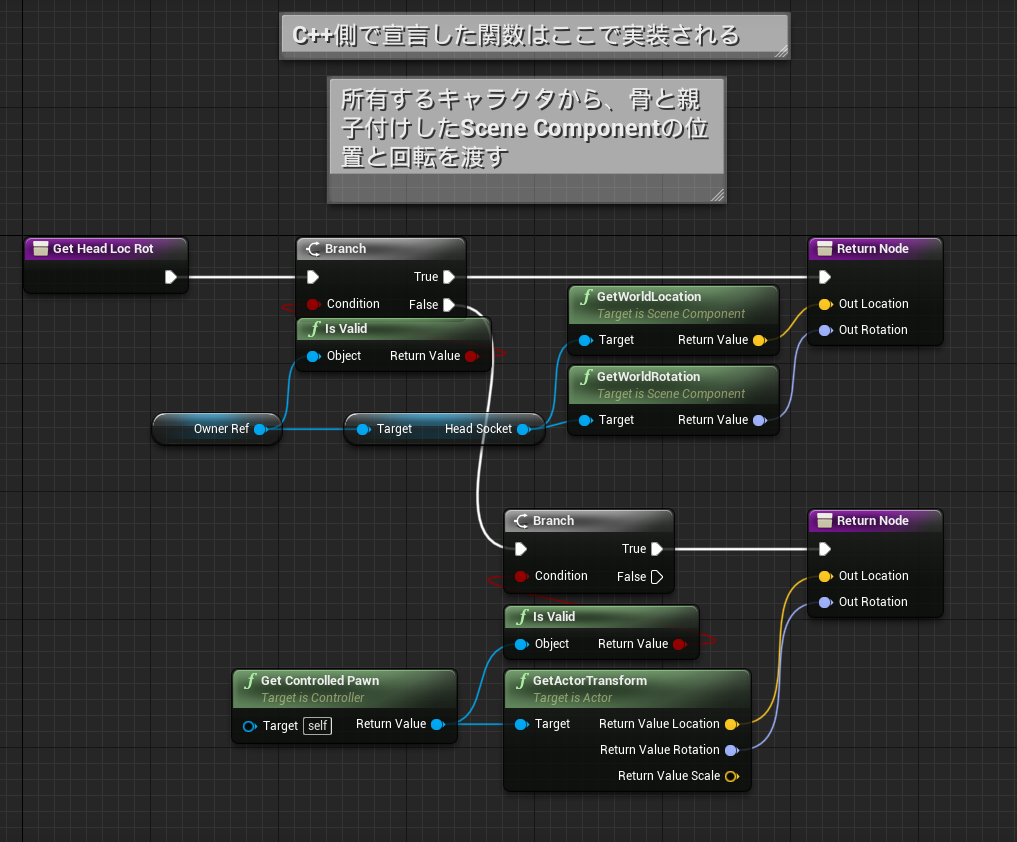
Add Componentで AI Perception Component を追加して、AI Sight Configを設定します。
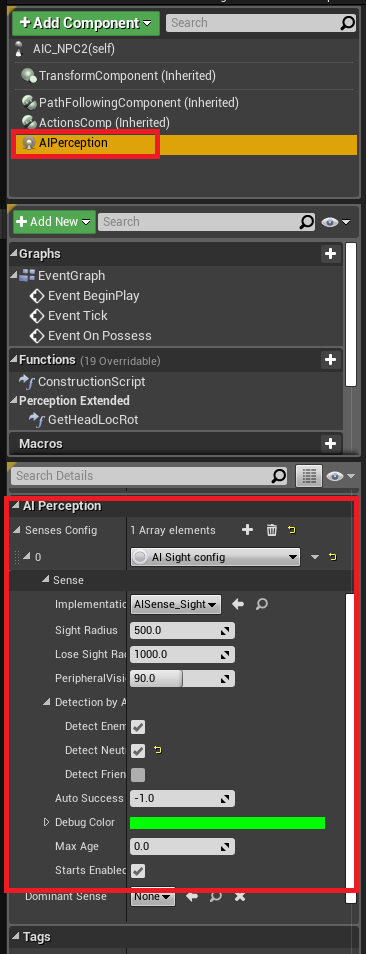
以上でAI Perceptionが頭の回転と一致するようになりました。
参考資料
なし
