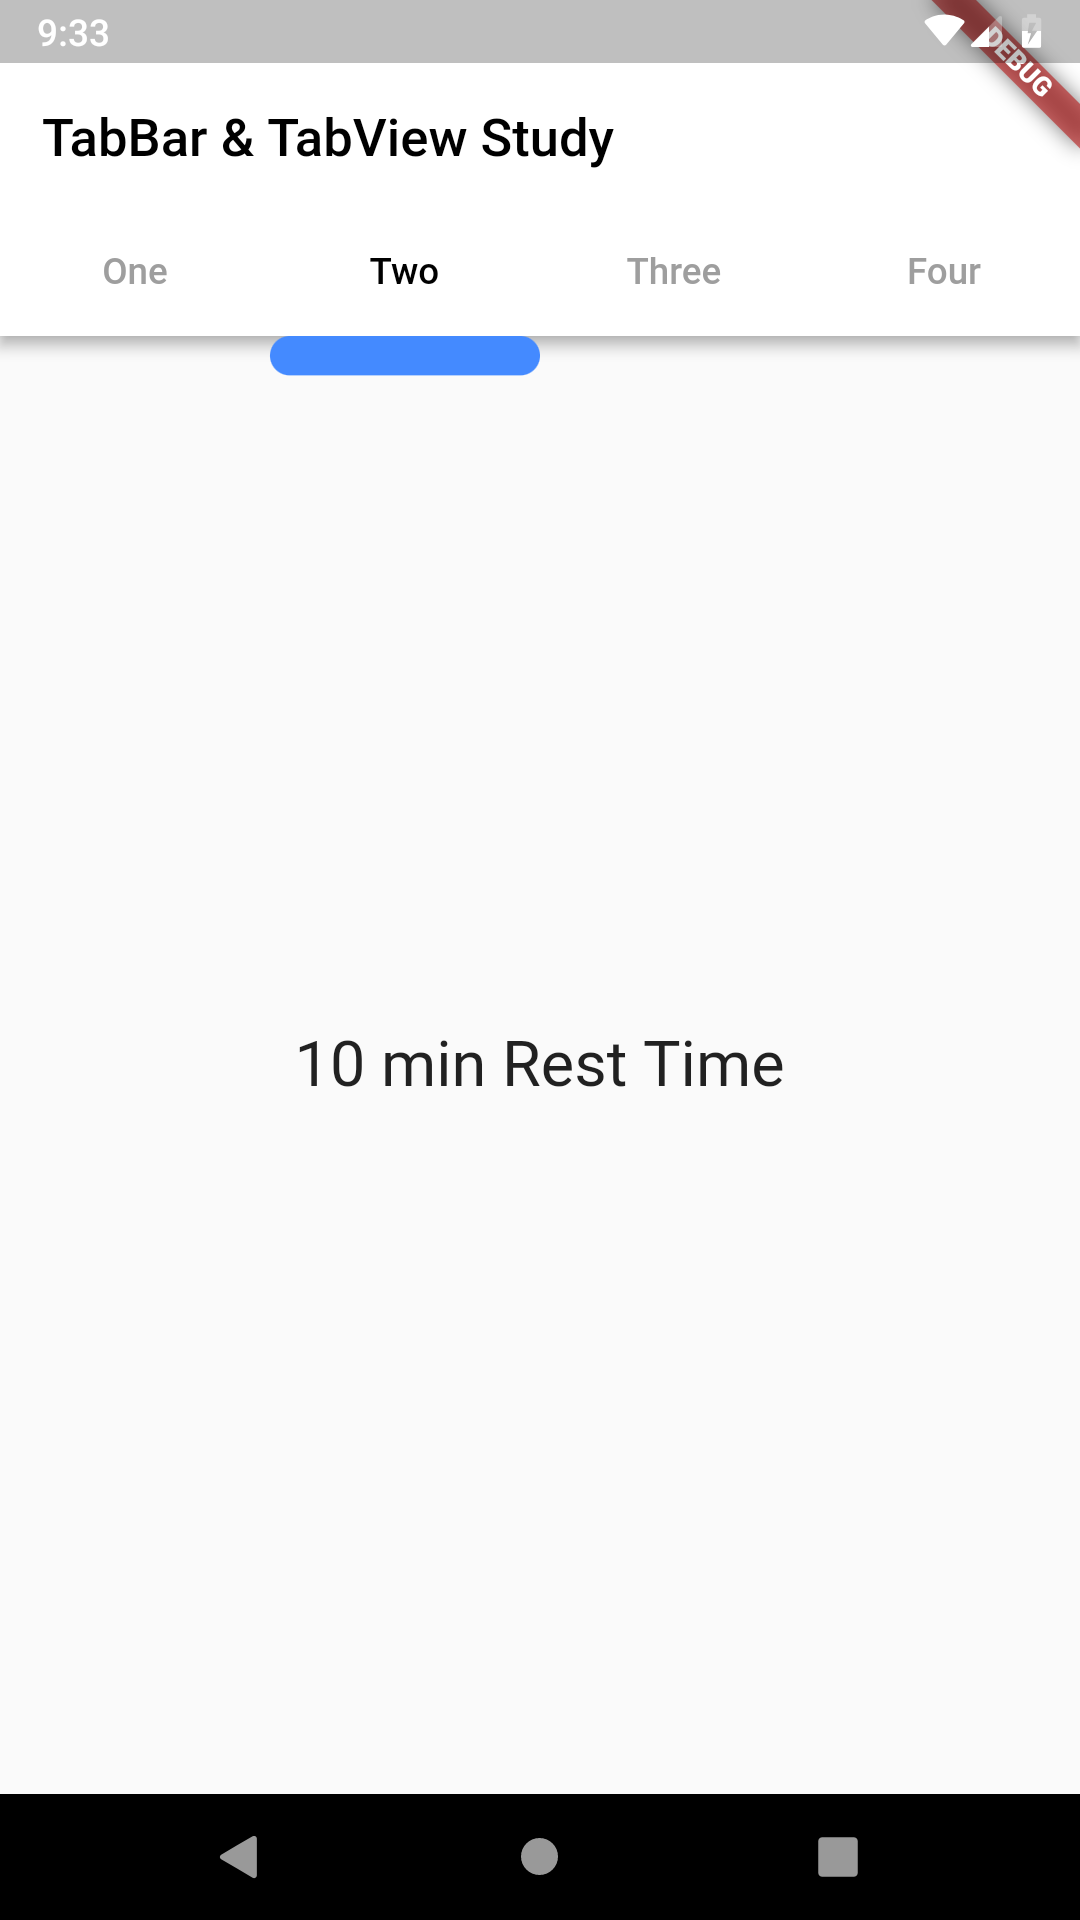
こんにちは。Dreamwalkerです。
今回はTabBarとTabBarと一緒に使うTabBarViewについて、かいてみたいと
おもいます~
まず、TabControllerから
TabBarやTabBarViewにはTabControllerというクラスが必要です。
TabController _tabController;
tabControllerはTabBarのインデックスを管理します。で、TabBarで押したメニューを
TabBarViewでWidgetを変わったりします。
後、TickerProviderが必要です。
class _MainPageState extends State<MainPage>
    with SingleTickerProviderStateMixin {
SingleTickerProviderStateMixin やTickerProviderStateMixin を追加します。
Controller init
StatefulWidgetを使うので、initStateに
_tabController = TabController(length: tabs.length, vsync: this);
 @override
  void initState() {
    // TODO: implement initState
    super.initState();
    _tabController = TabController(length: tabs.length, vsync: this);
  }
Tab Widgetを作ろう
TabBarに使うTab Widgetを追加します。
こんな感じです。
final List<Tab> tabs = <Tab>[
    Tab(
      text: 'One',
    ),
    Tab(
      text: "Two",
    ),
    Tab(
      text: "Three",
    ),
    Tab(
      text: "Four",
    )
  ];
TabBarを画面に。
TabBarはAppBarのBottomでよくつかいます。
他のWidgetに追加して、使っても問題ないし、問題なかったです。
Widget位置は気楽に。
appBar: AppBar(
        backgroundColor: Colors.white,
        title: Text("TabBar & TabView Study", style: TextStyle(
          color: Colors.black,
        ),),
        bottom: TabBar(
//          isScrollable: true,
          tabs: tabs,
          controller: _tabController,
          unselectedLabelColor: Colors.grey,
          indicatorColor: Colors.blue,
          indicatorSize: TabBarIndicatorSize.tab,
          indicatorWeight: 2,
          indicatorPadding: EdgeInsets.symmetric(horizontal: 18.0,
              vertical: 8),
          indicator: CustomTabIndicator(),
          labelColor: Colors.black,
        ),
      ),
Indicatorなど、カスタマイズする。
基本のDefaultで使ってもおしゃれです。でも、プロジェクトによって
デザインは変わるので、カスタマイズ際は indicatorをカスタマイズしましょう。
indicator: CustomTabIndicator(),
TabBarViewを使おう
TabBarViewのWidgetはTabBarのWidget数と同じく
Children Widgetが必要です。これを注意しましょう。
 body: TabBarView(
        controller: _tabController,
        children: tabs.map((tab) {
          return _createTab(tab);
        }).toList(),)
Code
import 'package:flutter/material.dart';

class TabBarTestApp extends StatelessWidget {
  @override
  Widget build(BuildContext context) {
    return MaterialApp(
      home: MainPage(),
    );
  }
}

class MainPage extends StatefulWidget {
  @override
  _MainPageState createState() => _MainPageState();
}

class _MainPageState extends State<MainPage>
    with SingleTickerProviderStateMixin {
  final List<Tab> tabs = <Tab>[
    Tab(
      text: 'One',
    ),
    Tab(
      text: "Two",
    ),
    Tab(
      text: "Three",
    ),
    Tab(
      text: "Four",
    )
  ];
  TabController _tabController;

  @override
  void initState() {
    // TODO: implement initState
    super.initState();
    _tabController = TabController(length: tabs.length, vsync: this);
  }

  @override
  Widget build(BuildContext context) {
    return Scaffold(
      appBar: AppBar(
        backgroundColor: Colors.white,
        title: Text("TabBar & TabView Study", style: TextStyle(
          color: Colors.black,
        ),),
        bottom: TabBar(
//          isScrollable: true,
          tabs: tabs,
          controller: _tabController,
          unselectedLabelColor: Colors.grey,
          indicatorColor: Colors.blue,
          indicatorSize: TabBarIndicatorSize.tab,
          indicatorWeight: 2,
          indicatorPadding: EdgeInsets.symmetric(horizontal: 18.0,
              vertical: 8),
          indicator: CustomTabIndicator(),
          labelColor: Colors.black,
        ),
      ),
      //Todo
      body: TabBarView(
        controller: _tabController,
        children: tabs.map((tab) {
          return _createTab(tab);
        }).toList(),)
    );
  }

  Widget _createTab(Tab tab){
    return Center(
      child: Text("10 min Rest Time" , style: TextStyle(
        fontSize: 24.0
      ),),
    );
  }
}
動画もあります。
最近Flutterライブコーティングし始めました。
今回のTabBarとTabBarViewについでの動画はこちら
