初めに
ハイレゾ音源しかもってないためmp3とか知りません。FLACやWAVEのタグ情報(曲名やアーティスト)を取得したいのです。
mutagenライブラリでは、wav形式の音楽ファイルのタグ情報が取得できなかったため、pytaglibライブラリを使用しました。
PC環境
windows10 pro 64bit
python 3.8.1 64bit
pytaglibをinstallする
pytaglibはTagLibというC++ライブラリをバインドしてpythonから動作するようにしたライブラリ。
Windowsは「pip install pytaglib」ではダメ
以下公式の下のほうにある「Manual Compilation: Windows」を実施した。
pytaglib公式
準備
TagLibをダウンロードして解凍しておく。
(https://taglib.org/#windows)
手順1
1. Install Microsoft Visual Studio 2015 Community Edition. In the installation process, be sure to enable C/C++ support. Alternatively, install Visual Studio 2017, but install the "v140" C++ toolset and use the "Visual Studio 2015" version of the developer command prompt below.
C++のビルドにSDK8.1を使用しているが、Microsoft Visual Studio 2019ではSDK8.1はインストールできないため、古いVisual Studioをインストールする。
手順2-1
Download the current taglib release and extract it somewhere on your computer.
TagLibをダウンロードして解凍しておく。
(https://taglib.org/#windows)
手順2-2
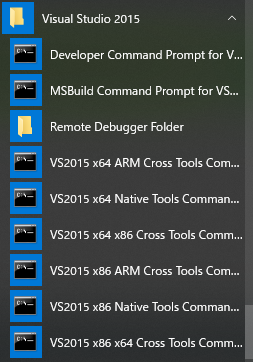
Start the VS2015 x64 Native Tools Command Prompt. On Windows 8/10, it might not appear in your start menu, but you can find it here: C:\ProgramData\Microsoft\Windows\Start Menu\Programs\Visual Studio 2015\Visual Studio Tools\Windows Desktop Command Prompts
スタートメニューから「VS2015 x64 Native Tools Command Prompt」を実行する。
★コマンドプロンプトは複数あるため、間違えないように!
手順2-3
3. Navigate to the extracted taglib folder and type: cmake -G "Visual Studio 14 2015 Win64" -DCMAKE_INSTALL_PREFIX=".\taglib-install" to generate the Visual Studio project files.
taglibの解凍先に移動して、以下コマンドを実行(※)
cmake -G "Visual Studio 14 2015 Win64" -DCMAKE_INSTALL_PREFIX=".\taglib-install"
taglibフォルダ内に「taglib-install」のフォルダができて、ライブラリが作成される。
※ cmakeコマンドが実行できなかったため、CMAKE(cmake-3.16.4-win64-x64.msi)をインストールした。
CMAKE
手順3
3. Still in the VS2015 command prompt, navigate to the pytaglib directory.
手順2のコマンドプロンプト上でpytaglibのディレクトリへ移動する。
手順4
4. Tell pytaglib where to find taglib: set TAGLIB_HOME=C:\Path\To\taglib-install
手順2で作成したC++のTagLibのパスを通しておく。
手順5
5. Build pytaglib: python setup.py build and install: python setup.py install
以下コマンドを実行してpythonで利用可能にする。
python setup.py build
python setup.py install
★ 間違えて別のコマンドプロンプトで実行すると、「fatal error LNK1112」で怒られる。ここで1日はまった・・・
最後に
これでようやくサンプルにあるような感じでタグ情報の取得ができた!
flacもwaveも同じコードで取得できるため、個人的にはmutagenよりもいいかなと感じました。
しかし、TagLibのC++ライブラリのビルドから作業が必要であり、日本語の情報が少なく準備が大変です。
import taglib
song = taglib.File("/path/to/my/file.wave")
print(song.tags)