前提条件
DNSサーバ(BIND9)が導入済み
その他のDNSサーバやRoute 53などは環境に応じて書き換えてください。
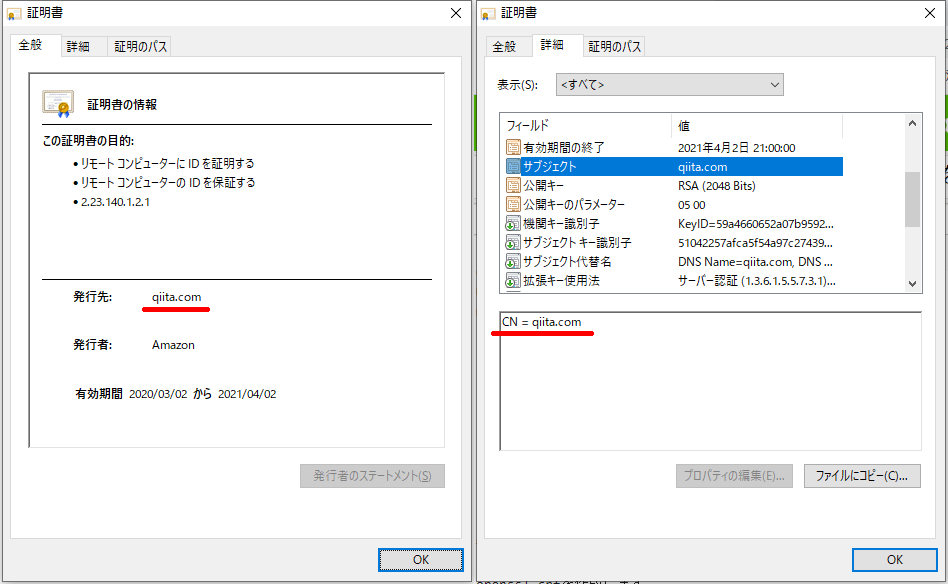
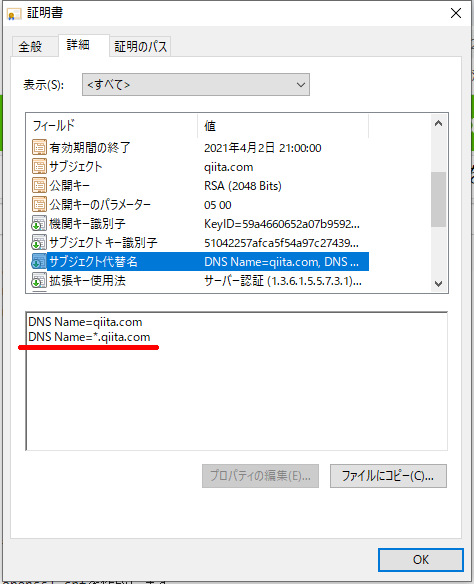
発行先のドメイン名が *.example.jp, example.jp
鍵生成アルゴリズムが ECDSA P_256
生成されるファイルは下記の通り
- privkey.pem (秘密鍵)
- cert.pem (サーバ証明書)
- chain.pem (中間証明書)
- fullchain.pem (サーバ証明書+中間証明書)
- csr.pem (証明書署名要求)[中間ファイル]
検証環境
$ uname -sr
Linux 4.18.0-193.6.3.el8_2.x86_64

$ cat /etc/redhat-release
CentOS Linux release 8.2.2004 (Core)

$ openssl version
OpenSSL 1.1.1c FIPS  28 May 2019

$ certbot --version
certbot 1.9.0

$ named -v
BIND 9.11.13-RedHat-9.11.13-6.el8_2.1
サーバ証明書生成スクリプトの作成
ユーザはroot、カレントディレクトリは/root/certで作業していきます。
1. メインのスクリプト
# !/bin/bash

# ECDSAで秘密鍵を生成する
# -out に出力される秘密鍵のファイル名 今回は「privkey.pem」
openssl ecparam \
    -genkey \
    -name prime256v1 \
    -out privkey.pem

# 証明書署名要求(CSR)を生成する
# -key にひとつ前で指定した秘密鍵のファイル名
# -subj に完全修飾ドメイン名(FQDN) 今回は「*.example.jp」 詳しくは少し下の'補足1'を参照
# -out に出力されるCSRのファイル名
openssl req \
    -new \
    -config openssl.cnf \
    -key privkey.pem \
    -subj '/CN=*.example.jp' \
    -out csr.pem

# 公開鍵に署名してもらう (公開鍵はひとつ前のコマンドでCSRに格納されています)
# -m にメールアドレス
# -d にFQDN 今回は「*.example.jpとexample.jp」 詳しくは少し下の'補足2'を参照
# --csr にひとつ前で指定したCSRのファイル名
# --manual-auth-hook にトークンをDNSに追加するスクリプト
# --manual-cleanup-hook にトークンをDNSから削除するスクリプト
certbot certonly \
    -n \
    --manual \
    --agree-tos \
    --manual-public-ip-logging-ok \
    -m 'admin@example.jp' \
    -d '*.example.jp' \
    -d 'example.jp' \
    --preferred-challenges=dns \
    --csr csr.pem \
    --manual-auth-hook ./dns-auth.sh \
    --manual-cleanup-hook ./dns-cleanup.sh

# サーバ証明書をリネームする
# この場合、実行時の日付ディレクトリに生成物が移動されます
DESTDIR=$(date +'%F')
mkdir $DESTDIR
mv privkey.pem $DESTDIR/
mv 0000_cert.pem $DESTDIR/cert.pem
mv 0000_chain.pem $DESTDIR/chain.pem
mv 0001_chain.pem $DESTDIR/fullchain.pem
メインのスクリプトはここまでです。
まだ実行しても正常に動作しません。
2. opensslのコンフィグ
openssl.cnfを作成します。
コピペして末尾2行を書き換えてください。
今回は最小限の設定しませんが、コピー元は/etc/pki/tls/openssl.cnfにあります。
[ req ]
default_md              = sha256
distinguished_name      = req_distinguished_name
string_mask             = utf8only
req_extensions          = v3_req

# サブジェクトの初期値を設定
# opensslコマンドの-subjオプションで指定しているため空欄のままで大丈夫です
[ req_distinguished_name ]
commonName_default      =

[ v3_req ]
basicConstraints        = CA:FALSE
keyUsage                = nonRepudiation,digitalSignature,keyEncipherment
subjectAltName          = @alt_names

# 以下のFQDNは任意のものに置き換えてください 今回は「*.example.jpとexample.jp」
[ alt_names ]
DNS.1   = *.example.jp
DNS.2   = example.jp
3. DNSSECの鍵を生成
nsupdateコマンドを使用してトークンをDNSサーバのレコードに追加、削除するための鍵ペアを生成します。
# # -n HOST に任意の名前 今回は「_acme-challenge.example.jp」
# # ドメイン名にするのが無難です

# dnssec-keygen -r /dev/urandom -a HMAC-SHA256 -b 128 -n HOST _acme-challenge.example.jp
K_acme-challenge.example.jp.+163+25871


# # 実行すると2種類のファイルが生成されます。
# # [出力された文字列].key と [出力された文字列].private

# ls | grep _acme-challenge.example.jp
K_acme-challenge.example.jp.+163+25871.key
K_acme-challenge.example.jp.+163+25871.private
4. トークンをDNSサーバのレコードに追加するスクリプト
dns-01認証で発行されるトークンをDNSサーバのレコードに追加する処理を書きます。
BINDの場合はnsupdateコマンドを使用しますが、Route 53などは環境に応じた処理に置き換えてください。
Cloudflare DNSのサンプルはCertbotのドキュメント1にあります。
# !/bin/bash

# -k に項番号3で生成されたファイル名 今回は「K_acme-challenge.example.jp.+163+25871.private」
# server に更新するのDNSサーバのIPアドレスまたはドメイン名 今回は「ns1.example.jp」
# update に更新する処理 ドメイン名は環境に応じて置き換えてください。
# ドメイン名の最後に「.」を忘れずに入れてください。 今回は「_acme-challenge.example.jp.」
# $CERTBOT_VALIDATIONにトークンが代入されています。
cat << EOF | nsupdate -k 'K_acme-challenge.example.jp.+163+25871.private'
server ns1.example.jp
update add _acme-challenge.example.jp. 3600 TXT $CERTBOT_VALIDATION
send
EOF

# 反映されるまで適当に待つ
sleep 30
5. トークンをDNSサーバのレコードから削除するスクリプト
dns-01認証終了後にDNSサーバからレコードを削除する処理を書きます。
項番号4と同様に環境に応じて置き換えてください。
# !/bin/bash

# 項番号4のコメントに同じ
cat << EOF | nsupdate -k 'K_acme-challenge.example.jp.+163+25871.private'
server ns1.example.jp
update delete _acme-challenge.example.jp.
send
EOF
DNSサーバの設定
nsupdateコマンドを受け入れるようにDNSサーバの設定を変更します。
# # サーバ証明書生成スクリプトの作成の項番号3で生成されたファイルを開いて
# # Key の値をコピーします 今回は「thisISdnsSECexampleKEY==」
# cat K_acme-challenge.example.jp.+163+25871.private
Private-key-format: v1.3
Algorithm: 163 (HMAC_SHA256)
Key: thisISdnsSECexampleKEY==
Bits: AAA=
Created: 20201119190706
Publish: 20201119190706
Activate: 20201119190706
以下、DNSサーバ
# named.conf にDNSSECの鍵を追記する
# key に項番号3で指定した値 今回は「_acme-challenge.example.jp.」
# 項番号3で指定した値が含まれていないとエラーになるみたいです
# secret にひとつ前でコピーしたKey 今回は「thisISdnsSECexampleKEY==」
key "_acme-challenge.example.jp." {
    algorithm    hmac-sha256;
    secret       "thisISdnsSECexampleKEY==";
};
# ドメインの更新を許可する
# key にひとつ前で設定した名前を指定する 今回は「_acme-challenge.example.jp.」
zone "example.jp" {
    type    master;
    # ...(省略)...
    allow-update { key _acme-challenge.example.jp.;
}
基本的なDNSサーバの設定は他のサイトを参考にしてください。
テスト
サーバ証明書を発行する前にDNS-01認証のテストを行います。
cert-update.shに--dry-runのオプションを追加して一度実行します。
# ...省略...
# certbotコマンドの末尾に--dry-runを追記します
certbot certonly \
    -n \
    --manual \
    --agree-tos \
    --manual-public-ip-logging-ok \
    -m 'admin@example.jp' \
    -d '*.example.jp' \
    -d 'example.jp' \
    --preferred-challenges=dns \
    --csr csr.pem \
    --manual-auth-hook ./dns-auth.sh \
    --manual-cleanup-hook ./dns-cleanup.sh
    --dry-run
    # ↑ 追記
# ...省略...
実行後に以下のように表示されればテストは成功です。
# ./update-cert
Saving debug log to /var/log/letsencrypt/letsencrypt.log
Plugins selected: Authenticator manual, Installer None
Performing the following challenges:
dns-01 challenge for example.jp
dns-01 challenge for example.jp
Running manual-auth-hook command: ./dns-auth.sh
Running manual-auth-hook command: ./dns-auth.sh
Waiting for verification...
Cleaning up challenges
Running manual-cleanup-hook command: ./dns-cleanup.sh
Running manual-cleanup-hook command: ./dns-cleanup.sh

IMPORTANT NOTES:
 - The dry run was successful.
mv: '0000_cert.pem' を stat できません: そのようなファイルやディレクトリはありません
mv: '0000_chain.pem' を stat できません: そのようなファイルやディレクトリはありません
mv: '0001_chain.pem' を stat できません: そのようなファイルやディレクトリはありません
The dry run was successful.と表示されなかった場合はエラーの内容から該当箇所を修正してください。
--dry-runオプションはサーバ証明書が発行されないためmvコマンドでエラーが表示されています。
テストに成功したら--dry-runオプションを外して実行します。
update-cert.shにサーバ証明書のシンボリックリンクを張る処理やサービス再起動の処理を追記してもいいと思います。
cronの設定
ここまで実装したらスクリプトの実行も自動化します。
サーバ証明書の有効期限が3ヶ月のため2ヶ月に1度サーバ証明書を更新します。
下記の例は2,4,6,8,10,12月の18日午前3時36分に更新されます。
認証サーバが混み合わないように0時0分などを避けて適当な日時にしておきます。
出力を/dev/nullに捨てるのはやめましょう。
36 3 18 2,4,6,8,10,12 * /root/cert/update-cert.sh >> /var/log/update-cert.log
参考サイト
User Guide — Certbot 1.10.0.dev0 documentation
Bind9でDynamicDNSを構築 - K'z Arch@K'z Style(ケイズ・スタイル)
-
User Guide — Certbot 1.10.0.dev0 documentationのPre and Post Validation Hooks項 ↩

