本記事はRaspberry Pi Advent Calendar 2017 23日目『AlexaとGoogle Assistantの両方が召喚されているRaspberry Pi』のちょっとした続きです。
(2018/2/11追記)
Alexa、Google Assistantの並行動作の方法を探しにいらした方は、新しくこんなものを書いているので、こちらもどうぞ。
ReSpeakerと共に働くAlexaとGoogle Assistant
https://qiita.com/Dimeiza/items/2d9d17f94145bd6fa520
前回までのあらすじ
AlexaをRaspberry Piに召喚したことに気をよくした、あるプログラマが、
調子に乗ってGoogle AssistantをRaspberry Piに召喚しつつ、同時に住まわせることにも成功したのだった。
『満足した』と言っていたはずなのだが…。
発端
http://japanese.engadget.com/2017/12/22/google-assistant-sdk/
新たにGoogle Assistant SDKが対応したのは、日本、英国、ドイツ、カナダ(英/仏)、オーストラリアなど。すでにこれらの国ではGoogleアシスタントが使えるようになっているものの、SDKの言語対応によって各国のハードウェアメーカーが自社製品にその国の言葉のGoogleアシスタント機能を組み込めるようになります。また、SDKそのものも4月に出たオリジナルのバージョンより改善が含まれているとのこと。
Google Assistant SDKのインストール
インストール手順自体は公式サイトのやり方にそのまま従えばよいです。
デバイス登録を済ませ、googlesamples-assistant-hotwordと、googlesamples-assistant-pushtotalkが実行できれば問題ありません。
(1/5追記)
1/5時点で、Google Assistantアプリによる設定変更が、google Assistant Library for Pythonに反映されるようになっていました。
なので、現時点では
- Google Assistantアプリをスマホにインストールして起動
- 『設定』画面のデバイスリストから、登録されたデバイスを選択
- 『アシスタントの言語』から『日本語(日本)』を選択
以上を実施するだけで、googlesamples-assistant-hotwordでも日本語で対話できるようになる(はず)です。1
はず、というのは、私はこれで確認したものですから。
インストールスクリプト付きだったり、サービス登録可能だったり、(決められた)GPIOでLEDを点灯できたりと、なかなか気が利く実装のようでした。2
というわけで、以降の記述は、2017/12時点で、Google Assistantアプリの言語設定が動作に反映されていなかった時の(今はやる意味が薄くなった)ダーティハックですので、ご興味があれば参考程度にご覧ください。
サンプルアプリの機能
上記の2つを動かすとわかるんですが、サンプルアプリはそれぞれ重要な部分を別々に持っているんです3。
- googlesamples-assistant-hotwordはwake word detection
- googlesamples-assistant-pushtotalkは"Languageの指定が可能な"APIの実行
googlesamples-assistant-hotwordは"Hey, Google!"と言ってやるとハンズフリーで会話をしてくれるんですが、受け答えはすべて英語。
公式によるとGoogle Assistantアプリで設定変更できるらしいのです。
で、実際Google Assistantでその画面を出して変更したのですが、

現時点(12/28)では、この状態でもhotwordは英語にしか答えず、英語をしゃべってしまうのです。
一方、pushtotalkはコマンドラインオプションからもわかる通り、各国語の入出力に対応しているんですが、
--lang Language code of the Assistant [default: en-US]
キー入力がwake upのトリガーになっていて、手動でwake upしてやらないと動いてくれません。
AlexaとGoogle AssistantをWake up wordで動かすことに慣れてしまうと、わざわざキーボードのそばに寄って行ってWake upとかやってられないわけです(すっかり飼いならされている)4。
つまり、
- Wake wordでwake upしつつも、受け答えは日本語でやってほしい
という、サンプルアプリのいいとこ取りをしたい(Google Homeと同じようにふるまってほしい)、という欲求と野心が湧いてくるわけです。
考えられる方法は2つ
- hotwordを多言語対応にする。
- pushtotalkをwake wordに対応させる。
まともに開発しようというなら、ちゃんとしたクライアントを開発すべきところですが、まぁそこまでのやる気はありません。
とりあえずhotwordから見てみることにしました。
hotwordの多言語対応化
ところがここで絶望を味わうわけです。
まず、hotwordにおけるユーザとのインタラクションはこんな感じになっています。
    with Assistant(credentials, args.device_model_id) as assistant:
        events = assistant.start()
        print('device_model_id:', args.device_model_id + '\n' +
              'device_id:', assistant.device_id + '\n')
        if args.project_id:
            register_device(args.project_id, credentials,
                            args.device_model_id, assistant.device_id)
        for event in events:
            process_event(event, assistant.device_id)
かいつまんで言うと、Assistantというクラスのインスタンスをassistantとして生成した後、start()すると、assistantはWake wordの検出から会話の終了に至るまで、ユーザとの会話を自前で処理しつつ、状態をイベントストリームとして通知する(eventsに入る)ので、UI側ではこれを順次処理する(for event in events:)という流れになっているようでした。
hotwordが呼び出しているgoogle提供のライブラリ(Assistant)は、"Google Assistant Library for Python"の方です。
このライブラリは上述の通り、クライアントを生成してからstart()することで、wake word detectionからGoogleとの通信まで、ライブラリ側が一通りのことをやってくれるのですが、API仕様を見てもわかる通り、languageを指定する場所がないのです。
じゃあライブラリ内を見てみようと思って対応するファイルを開くと、こういう作りなわけです。
LIBRARY_NAME = 'libassistant_embedder.so'

…

    def _load_lib(self):
        """Dynamically loads the Google Assistant Library.

        Automatically selects the correct shared library for the current
        platform and sets up bindings to its C interface.
        """
        lib_path = os.path.join(os.path.dirname(__file__), LIBRARY_NAME)
        self._lib = cdll.LoadLibrary(lib_path)

…
他のAPIを見てもわかりますが、このライブラリ、インスタンス生成時にsoファイル(共有ライブラリ)をロードしたのち、共有ライブラリを呼び出しているだけだったりします。
さすがにバイナリの共有ライブラリをいじるわけにもいかんしなぁ…と、ここで挫折を余儀なくされました。
pushtotalkのwake word対応
pushtotalkの前処理はいろいろあるんですが、ユーザとのインタラクションはこの辺です。
        # If no file arguments supplied:
        # keep recording voice requests using the microphone
        # and playing back assistant response using the speaker.
        # When the once flag is set, don't wait for a trigger. Otherwise, wait.
        wait_for_user_trigger = not once
        while True:
            if wait_for_user_trigger:
                click.pause(info='Press Enter to send a new request...')
            continue_conversation = assistant.assist()
            # wait for user trigger if there is no follow-up turn in
            # the conversation.
            wait_for_user_trigger = not continue_conversation

            # If we only want one conversation, break.
            if once and (not continue_conversation):
                break
wait_for_user_triggerがonceの場合、enterキーの入力を待ってassistant.assist()を実行する(ユーザとの会話を処理する)、という流れを無限ループ化しています。
待てよ?
- pushtotalkではlanguageを指定できる。
- pushtotalkではWake up eventだけが手動であとは自動。イベントの発生タイミングを自前で制御することができる。
- hotwordではWake up wordのイベント(ON_CONVERSATION_TURN_STARTED)を発生させることができる。
ということはですよ。
- Google Assistant Library for PythonでWake up wordのイベントだけを発生させ、それをトリガーにしてpushtotalkの会話(assistant.assist())を動作させればいいんじゃないか?
と思ったわけです。
つまり…どういうことだってばよ?
こういうことです。
from google.assistant.library import Assistant
from google.assistant.library.event import EventType

……

    hotword = Assistant(credentials, device_model_id)
    with SampleAssistant(lang, device_model_id, device_id,
                         conversation_stream,
                         grpc_channel, grpc_deadline,
                         device_handler) as assistant:
        # If file arguments are supplied:
        # exit after the first turn of the conversation.

        if input_audio_file or output_audio_file:
            assistant.assist()
            return
        # If no file arguments supplied:
        # keep recording voice requests using the microphone
        # and playing back assistant response using the speaker.
        # When the once flag is set, don't wait for a trigger. Otherwise, wait.

        wait_for_user_trigger = not once
        events = hotword.start()
        print('device_model_id:', device_model_id + '\n' +
              'device_id:', hotword.device_id + '\n')

        for event in events:
            if event.type == EventType.ON_CONVERSATION_TURN_STARTED:
                print("conversation start!")
                hotword.stop_conversation()
                continue_conversation = assistant.assist()
                print("conversation stop!")
            else:
                print(event)

if __name__ == '__main__':
    main()
Google Assistant Library for Python側のAssistantをhotwordとしてインスタンス化します。で、これをstart()させてイベントを発生させる、というのはhotword.pyの作りと同じです。
イベント処理のループの中で、ON_CONVERSATION_TURN_STARTEDを検出し、この発生をトリガーとして、pushtotalk側のassistant.assist()を実行して会話を処理させます。
assistant.assist()は会話の終了後制御を戻してくるので、終わったらループに戻り、次のhotwordイベントを待つ、という流れです。
ここでポイントなのが、hotword.stop_conversation()です。assistant.assist()前にこれを実行することで、hotwordが以降の会話を待ち受けないようにしつつ、初期状態に戻して、次のwake word発生を待たせるという作りになっています。
格好をつける
今回使っているサンプルアプリはAIYの時のようにLEDやwake up音がないので、ちょっとおめかししましょう。いつものローテクノロジーの出番です。
        os.system('gpio -g mode 25 out')
        for event in events:
            if event.type == EventType.ON_CONVERSATION_TURN_STARTED:
                os.system('gpio -g write 25 1')
                os.system('paplay /home/pi/sdk-folder/third-party/snowboy/resources/ding.wav 1>/dev/null 2>/dev/null ')
                print("conversation start!")
                hotword.stop_conversation()
                continue_conversation = assistant.assist()
                print("conversation stop!")
                os.system('gpio -g write 25 0')
            else:
                print(event)

if __name__ == '__main__':
    main()
あとは、コマンドラインからlangを指定してpushtotalkを実行するだけです。
googlesamples-assistant-pushtotalk --project-id <<my-dev-project>> --device-model-id <<my-model>> --lang ja-JP
やってみた
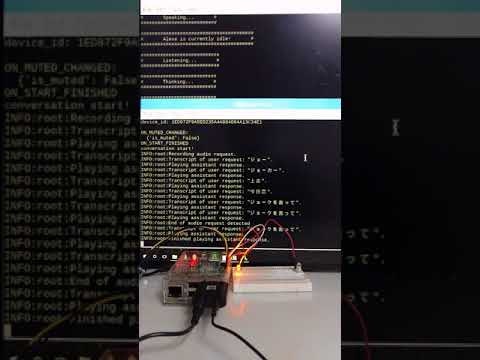
まさかこんな簡単にできるわけが…(以下動画)。
…びっくりするほど簡単に動いてしまいました。
注意
前回同様これもやっつけコードですので、過剰な期待は禁物です。
突然止まったりしても、泣いたり石を投げないようにしてください。
おわりに
…もう買わなくていいんじゃないか、と半ば本気で思い始めてきました。
これで年末年始、両アシスタントと日本語でイチャイチャできそうです。
それでは、皆様もRaspberry Piと、スマートスピーカーを引き続きお楽しみください。
-
Hotwordの場合、最初の応答はおそらく音量が低いはずです。音量の変更はGoogle Homeと同じく音声で実行できます。『Hey, google! 音量を最大にして』と言ってやれば音量を最大にしてくれます。 ↩
-
LEDとピンヘッダをプリント基板に移植していて、GassistPiのデフォルトGPIO番号だと都合が悪かったので、main.pyに手を入れてGPIO番号を変更して運用しています。 ↩
-
両アシスタントとも、wake word detectionの取り扱いだけ独立しているんですよね。Alexaは外部ライブラリ(Sensory)に外出ししていて、Google Assistantは自前で持ってきていますが、いずれも独立したバイナリライブラリとして提供していて手が入れづらい、という点は共通しています。 ↩
-
Web側のレイヤ視点だとあまり意識しませんが、実際にデバイスを構成してみると、Wake word detectionはスマートスピーカーに不可欠なコア技術だなぁ、と体感しました。 ↩
