確認時の環境
Xcode 9.2 / iOS 11.2 / Swift 4
実装イメージ
Headerをタップでセクション全部を伸縮、セル内のボタン押下でそのセルだけ伸縮するようなリストを作ってみます。

Headerタップでセクションを伸縮させてみる
UITableViewHeaderFooterViewを継承したクラスを作成
タップしたら、自作のdelegateをfireするだけのシンプルな作りです。
protocol ExpandableHeaderViewDelegate {
    func toggleSection(header: ExpandableHeaderView, section: Int)
}

class ExpandableHeaderView: UITableViewHeaderFooterView {

    @IBOutlet weak var titleLabel: UILabel!
    @IBOutlet weak var iconImageView: UIImageView!

    var delegate: ExpandableHeaderViewDelegate?
    var section: Int!

    override func awakeFromNib() {
        self.addGestureRecognizer(UITapGestureRecognizer(target: self, action: #selector(selectHeaderAction)))
    }

    @objc func selectHeaderAction(gestureRecognizer: UITapGestureRecognizer) {
        let cell = gestureRecognizer.view as! ExpandableHeaderView
        delegate?.toggleSection(header: self, section: cell.section)
    }

    override func layoutSubviews() {
        super.layoutSubviews()
    }

}
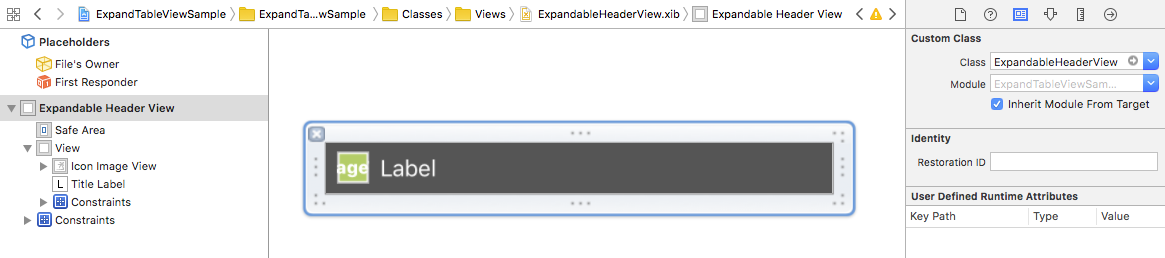
Xibファイルを作成
xibで以下のようなViewを作りました。
前に作ったExpandableHeaderViewを忘れずに登録しておきましょう。
実装してみる
大事なところだけ書きます。
class ViewController: UIViewController {

    @IBOutlet weak var tableView: UITableView!

    override func viewDidLoad() {
        super.viewDidLoad()

        let nib = UINib(nibName: "ExpandableHeaderView", bundle: nil)
        tableView.register(nib, forHeaderFooterViewReuseIdentifier: "ExpandableHeaderView")

        tableView.dataSource = self

    }
}
extension ViewController: UITableViewDataSource {
    func tableView(_ tableView: UITableView, heightForHeaderInSection section: Int) -> CGFloat {
        return 44
    }

    func tableView(_ tableView: UITableView, heightForFooterInSection section: Int) -> CGFloat {
        return 2
    }

    func tableView(_ tableView: UITableView, viewForHeaderInSection section: Int) -> UIView? {
        let header = self.tableView.dequeueReusableHeaderFooterView(withIdentifier: "ExpandableHeaderView") as! ExpandableHeaderView
        header.titleLabel.text = sections[section].title
        header.section = section
        header.delegate = self
        header.iconImageView.backgroundColor = sections[section].expanded ? .red : .yellow
        return header
    }
}
extension ViewController: ExpandableHeaderViewDelegate {
    func toggleSection(header: ExpandableHeaderView, section: Int) {
        sections[section].expanded = !sections[section].expanded

        // ヘッダー自体の変更が可能
        header.iconImageView.backgroundColor = sections[section].expanded ? .red : .yellow

        tableView.beginUpdates()

        // セクション内のセルを全部リロードして、expandを表現
        for i in 0 ..< sections[section].elements.count {
            tableView.reloadRows(at: [IndexPath(row: i, section: section)], with: .automatic)
        }

        tableView.endUpdates()
    }
}
セル自体を伸縮させてみる
UITableViewCellを継承したクラスを作成
カスタムセルの作り方・使い方は、既にたくさん情報が転がってますので割愛。
class ExpandableCell: UITableViewCell {

    @IBOutlet weak var mainView: UIView!
    @IBOutlet weak var subView: UIView!

    @IBOutlet weak var mainLabel: UILabel!
    @IBOutlet weak var subLabel: UILabel!

    @IBOutlet weak var expandButton: UIButton!

    override func awakeFromNib() {
        super.awakeFromNib()
    }

    override func setSelected(_ selected: Bool, animated: Bool) {
        super.setSelected(selected, animated: animated)
    }

    func expand() {
        if self.subView.isHidden {
            self.subView.isHidden = false
            self.subLabel.isHidden = false
        }
    }

    func contract() {
        if !self.subView.isHidden {
            UIView.animate(withDuration: 0.3) {
                self.subLabel.isHidden = true
                self.subView.isHidden = true
            }
        }
    }
}
縮小する方だけアニメーションしてくれなかったので、自分で付けて解決。
Storyboard上でCellをレイアウト
StackViewを使った実装です。
Buttonに接続するActionは、Cellの方ではなく、ViewControllerの方で接続します。
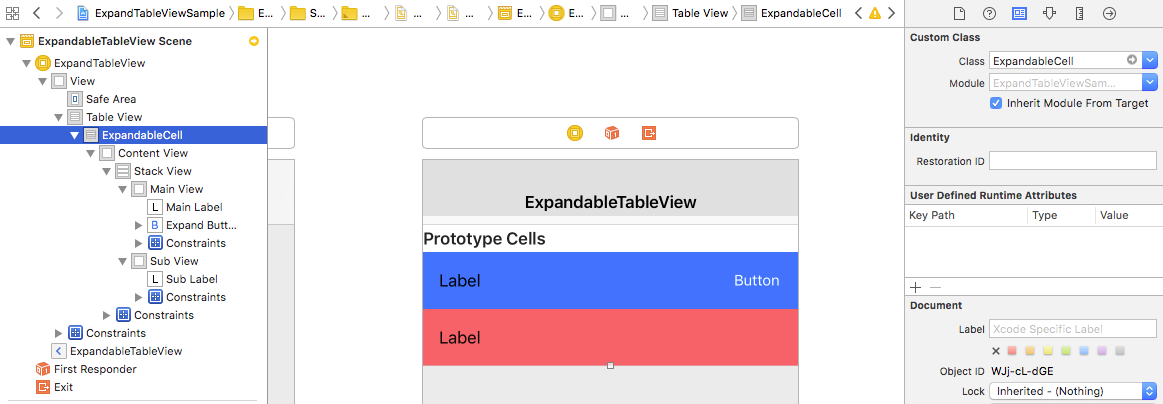
青の方が常に表示されるView、赤の方が出たり隠れたりするViewです。
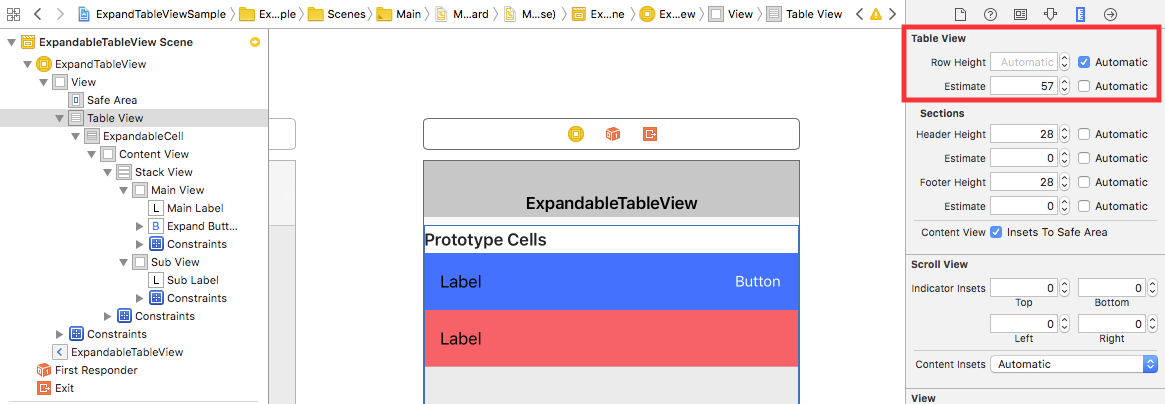
細かい設定
(赤・青両方とも高さを57ptに設定するケースです)
Cellの高さ
TableViewの設定で、Cellの高さを最低57pt、Cellの高さは自動にしておきます。
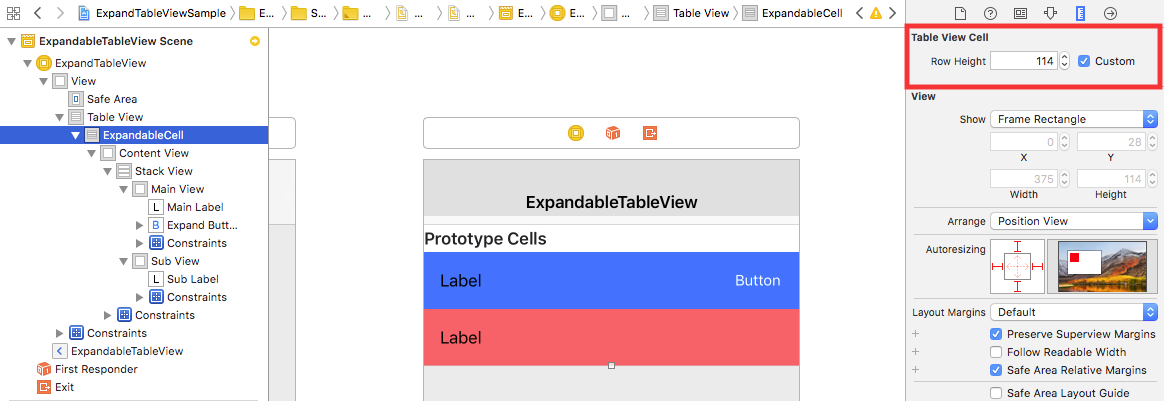
各Viewの高さ
Cellの高さは倍の114ptに設定します。
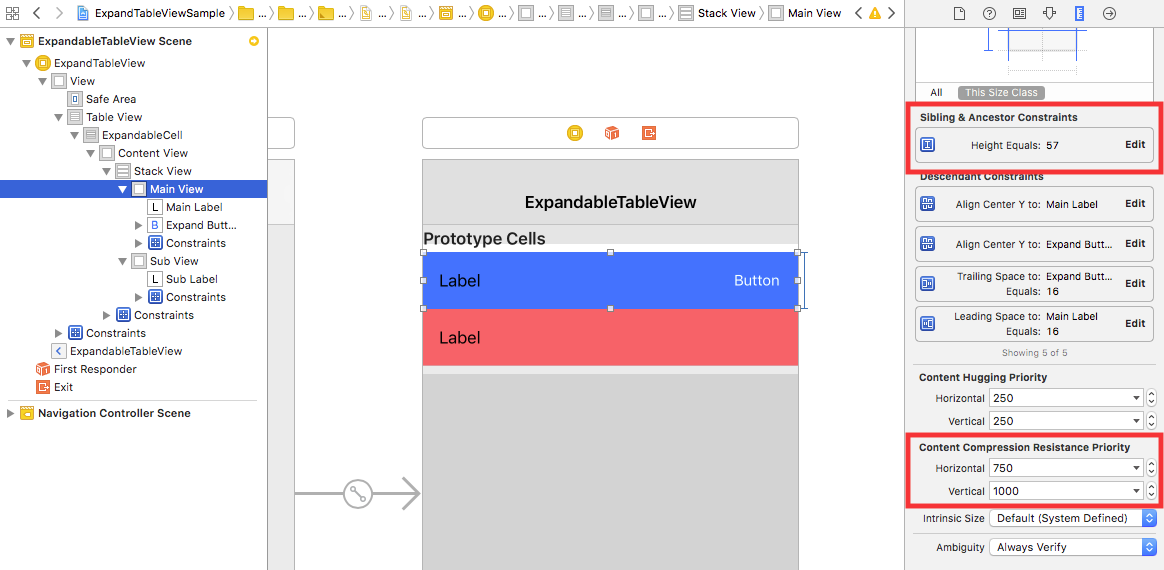
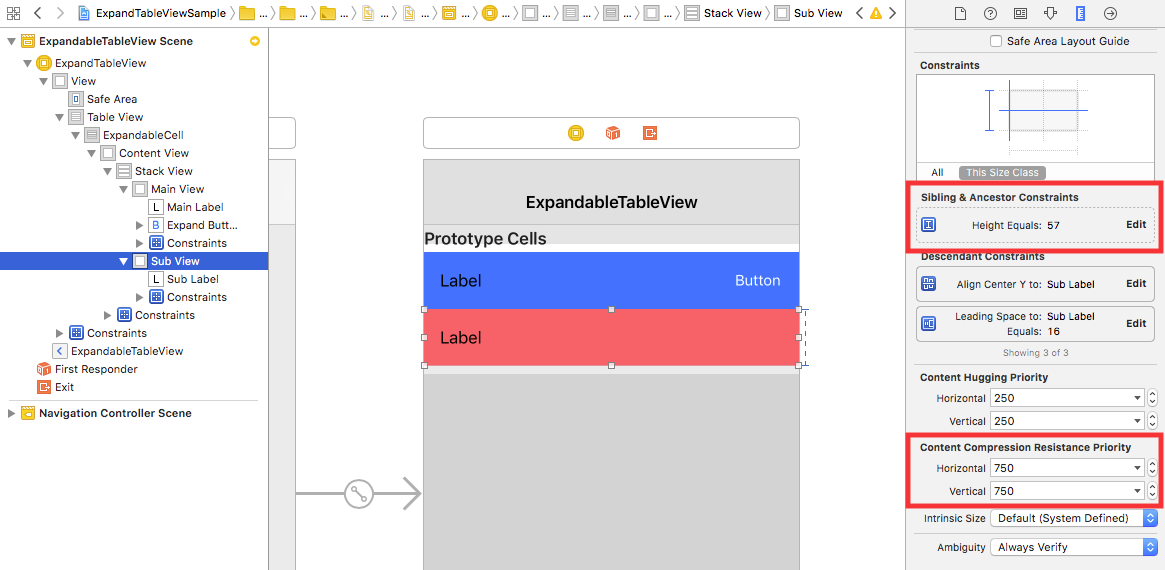
各Viewの制約
Viewの制約で、高さを57pt固定にします。
その際、heightのPriorityと、Content Compression Resistance Priority(今回はVerticalのみ)の2箇所を、以下の通り設定してください。
常に表示される側はpriorityをrequired(1000)、伸縮する方はpriorityをhigh(750)に設定します。
これによって、Cellの高さが変わったりStackView内でhiddenになる時、変更されるViewを伸縮する方に仕向けることができます。
使ってみる
大事なところだけ書きます。
class ViewController: UIViewController {

    @IBOutlet weak var tableView: UITableView!

    override func viewDidLoad() {
        super.viewDidLoad()
        tableView.dataSource = self
    }

    @IBAction func expandButtonDidTap(_ sender: UIButton) {
        // button -> view -> stackView -> TableCell
        let cell = sender.superview?.superview?.superview?.superview as! ExpandableCell

        guard let indexPath = tableView.indexPath(for: cell) else { return }

        sections[indexPath.section].elements[indexPath.row].expanded = !sections[indexPath.section].elements[indexPath.row].expanded

        tableView.beginUpdates()

        if sections[indexPath.section].elements[indexPath.row].expanded {
            cell.expand()
        } else {
            cell.contract()
        }

        tableView.endUpdates()
    }

}
extension ViewController: UITableViewDataSource {

    func tableView(_ tableView: UITableView, cellForRowAt indexPath: IndexPath) -> UITableViewCell {
        let cell = tableView.dequeueReusableCell(withIdentifier: "ExpandableCell") as! ExpandableCell

        cell.mainLabel.text = sections[indexPath.section].elements[indexPath.row].title
        cell.subLabel.text = "\(sections[indexPath.section].elements[indexPath.row].title!)-Sub"

        cell.subView.isHidden = !self.sections[indexPath.section].elements[indexPath.row].expanded

        return cell
    }

}
おわりに
StackView、ほんと便利。
参考になれば幸いです。
(あとで整理してGitHubに上げたいと思います)
(追記)GitHubに上げました。
https://github.com/Todate/ExpandTableViewSample