1. はじめに
Yoloは、とっても扱いやすいフレームワークで、すぐに物体検出ができますが、やっぱり自分が検出したいものは、自分の用意したデータで学習させるしかないですよね。
ということで、学習させてみました。
2. やること
データセットを作るのは、たいへんですので、既存のデータセットを使わせてもらい、学習の手順を確認したいと思います。
学習は、マシンパワーが必要そうですから、やっぱりGPUを使いたいところです。ですので、Google Colaboratoryを使います。
3. やってみる
3.1 まずは、準備
新しいノートブックを作り、Googleドライブをマウントします。
from google.colab import drive
drive.mount('/content/drive')
yolo_train というフォルダの中で作業します。
%cd /content/drive/My Drive/Colab Notebooks
%mkdir yolo_train
%cd yolo_train
Yoloをクローンしてきます。
!git clone https://github.com/ultralytics/yolov5
%cd yolov5
必要なパッケージをインストールします。
!pip install -r yolov5/requirements.txt
いろいろ準備します。
import torch
from IPython.display import Image, clear_output
from utils.google_utils import gdrive_download
Yoloがちゃんと動くか、物体検出してみます。
以下を実行すると、ジダンが検出されます。
!python detect.py --weights yolov5s.pt --img 416 --conf 0.4 --source ./data/images/
Image(filename='runs/detect/exp/zidane.jpg', width=600)
ちゃんとできましたよね?
3.2 学習
はい、やっと準備ができましたので、ここから本題です。
まずは、rboflowのPublic Datasetsから学習用データをとってきます。サイコロの目を検出させるための学習用データセットです。すでにYOLOv5用に編集されていますから、ダウンロードするだけですぐに使えます。
Downloadsのmedium-colorを選びます。
Available Download Formatsで「YOLO v5 PyTorch」を選びます。
データをダウンロードするかダウンロードのコードを得るか選べます。今回は、ダウンロードのコードを取得して直接GoogleDriveに保存するため、ダウンロードコードを得ることにします。[show download code]を選択して[continue]を押すと、ダウンロードするコードが表示されます。
ノートブックに戻り、以下の通りダウンロードと展開をします。今回は、diceというフォルダにデータを入れました。
torch.hub.download_url_to_file('<<ダウンロードコード>>', 'tmp.zip')
!unzip -q tmp.zip -d ../dice/ && rm tmp.zip
diceのフォルダ内にあるdata.yamlを少しだけ変更します。学習用データと検証データが分かれていないので、同じデータを使います。
train: ../dice/export/images
val: ../dice/export/images

nc: 6
names: ['1', '2', '3', '4', '5', '6'
もう、これで準備完了です。驚くほど簡単です。
学習してみます。
# Train YOLOv5s on dice for 10 epochs
!python train.py --img 640 --batch 16 --epochs 200 --data ../dice/data.yaml --cfg ./models/yolov5s.yaml --weights "" --name dice --nosave --cache
画像点数が少ないため、エポック数を200ぐらいにしないと、物体検出ができませんでした。学習時間は、1時間ほどかかりました。
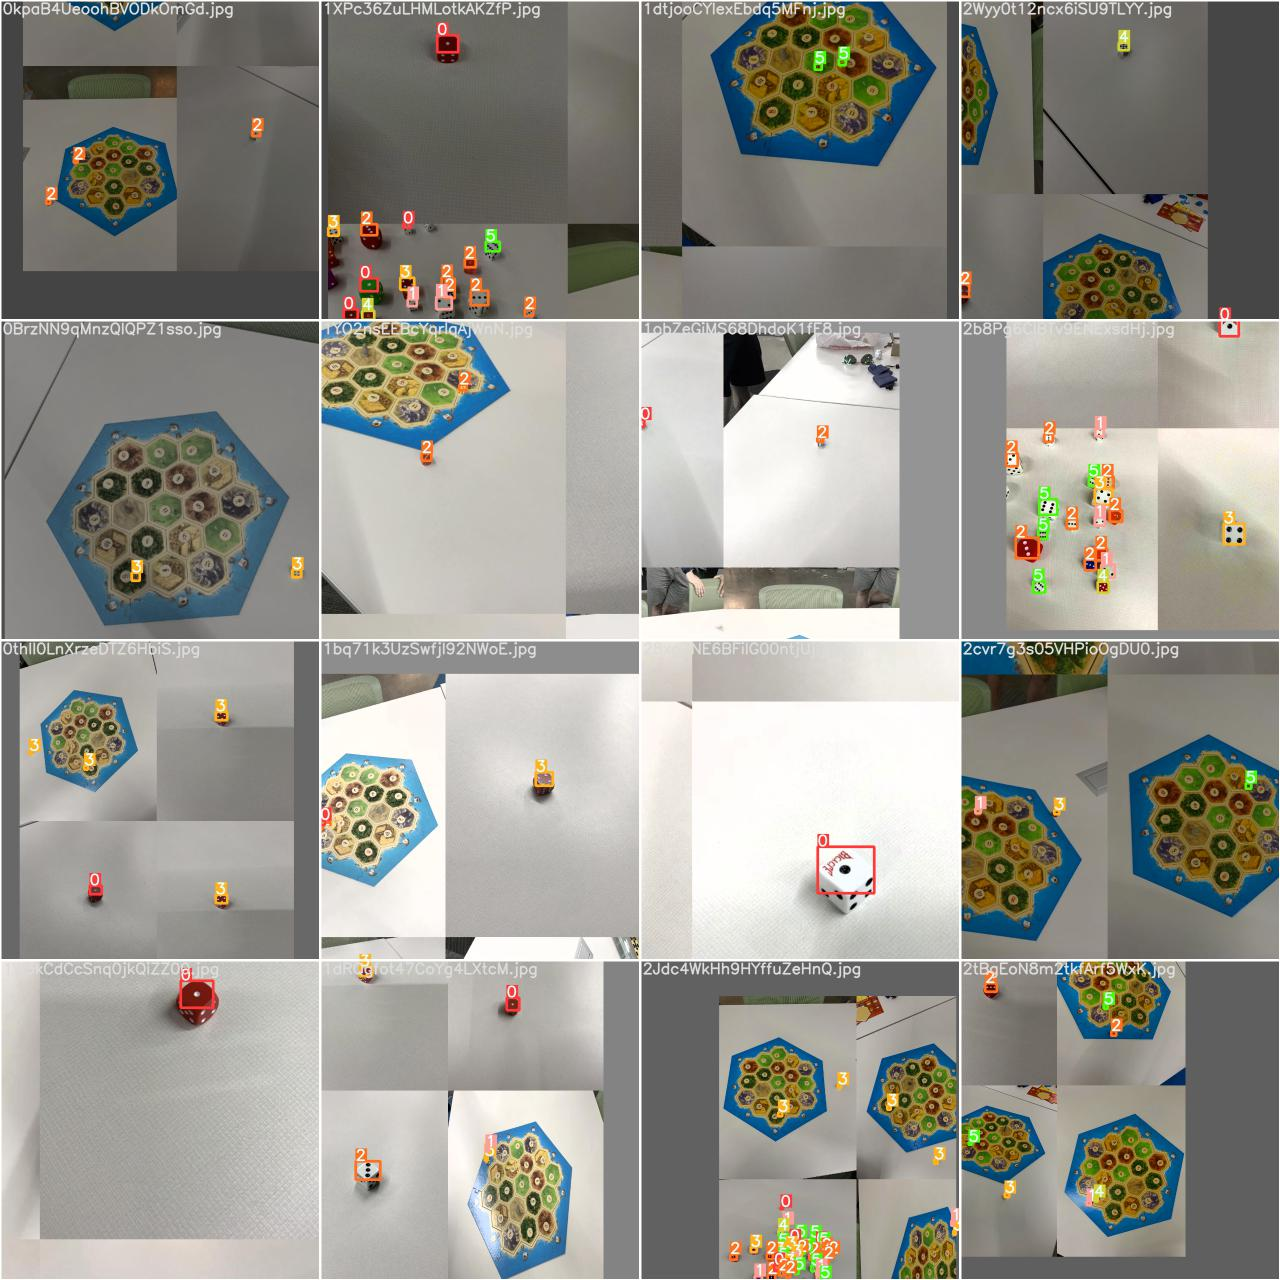
結果は、runs/train/diceの中に入っています。ちょっと見てみましょう。
Image(filename='runs/train/dice/train_batch0.jpg', width=800)
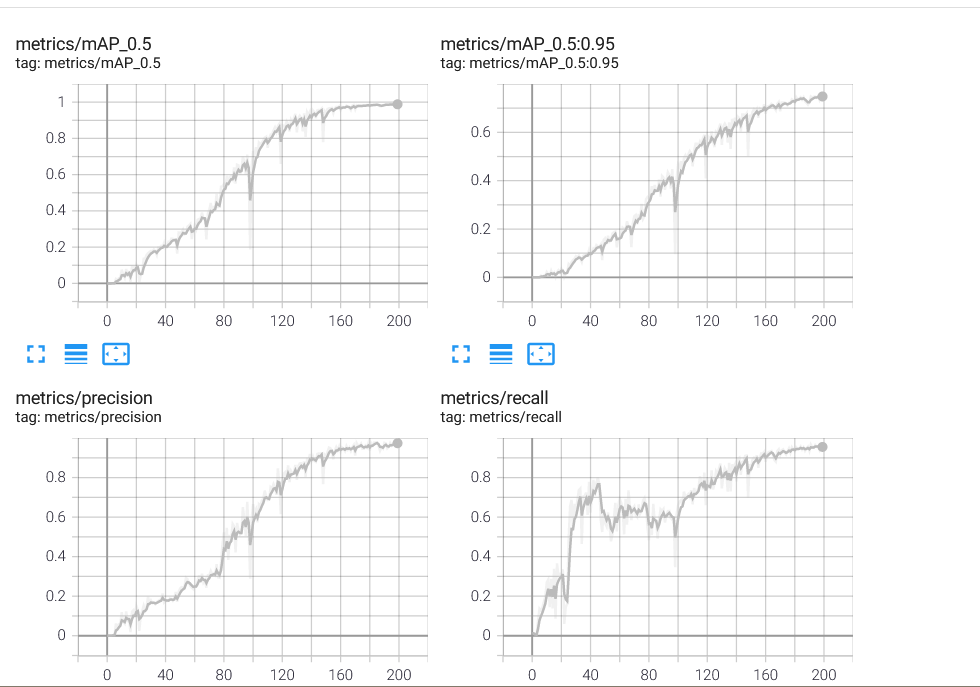
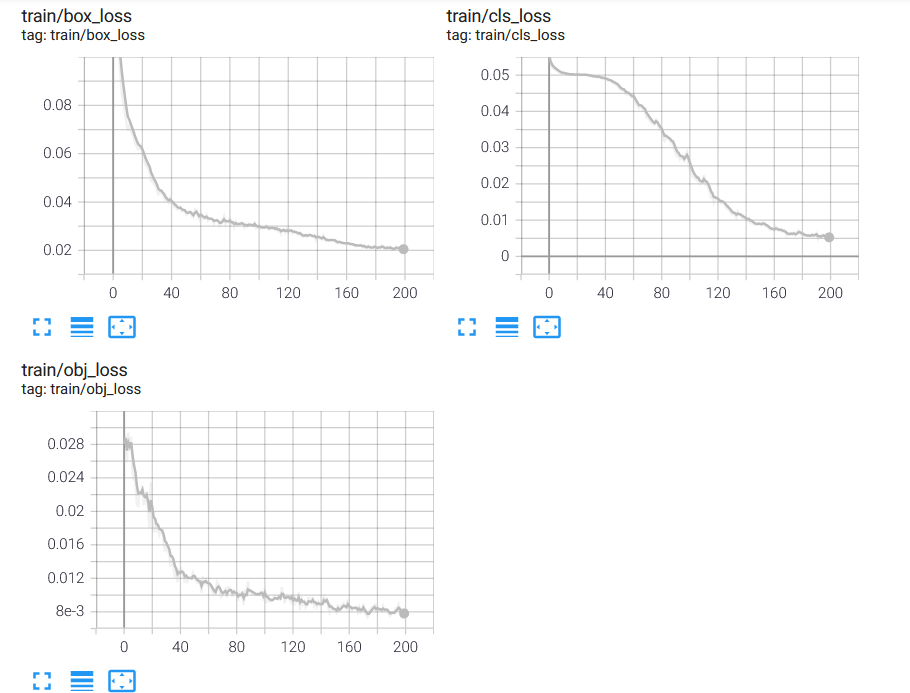
Tensorbordで結果を見てみます。
%load_ext tensorboard
%tensorboard --logdir "runs"
なかなかいいのではないでしょうか?
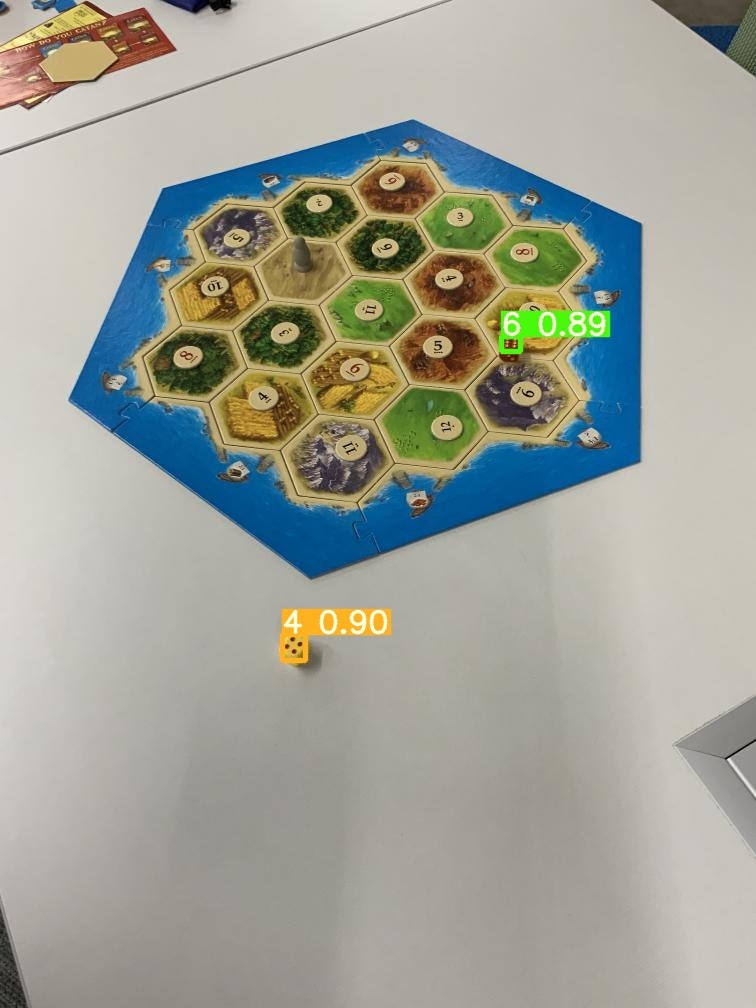
では、サイコロの目を検出してみます。
!python detect.py --weights runs/train/dice/weights/last.pt --source ../dice/dice.jpg
Image(filename='runs/detect/exp/dice.jpg', width=800)
ちゃんと検出できてきますね!
こんなに簡単に学習できるなんて感激です。
お疲れさまでした!


