はじめに
ログイン周りをdeviseを使って実装していたWebサービスがありました。それをアプリ化することになったのですが、deviseはWeb用に作られているのでアプリではその仕組みは使えません。
困ったなーと思いいろいろググってみるとdevise_token_authというgemがあることを知りました。
devise_token_auth
スターは2000以上あるんですが、Qiitaのタグ数は4という。
実装にあたってはこれらの記事を参考にしようと思いましたが、どちらもdeviseですでにwebを実装していて、そのあとアプリ化するという私の状況とは異なります。
devise token auth を使って簡単に早くAPIを作る 1
Rails5 + devise token authで作る 認証API
私のような状況での実装方法が書かれた記事があまり見当たらなかったので今回ここに残そうと思います。
手順
Gemのインストール
gem 'devise_token_auth'
$ bundle install
devise_token_authの諸々の準備
$ rails g devise_token_auth:install User auth

Running via Spring preloader in process 3685
      create  config/initializers/devise_token_auth.rb
      create  db/migrate/20180401103356_devise_token_auth_create_users.rb
      insert  app/models/user.rb
      insert  app/controllers/application_controller.rb
        gsub  config/routes.rb
GitHubのマニュアルに書いてある通りにこのコマンドを打ったはいいのですが、すでにdeviseを導入しているのでUserモデルはあるんですよね。なので、このままマイグレートしても失敗するのは目に見えてます。どうしたらいいのか、ここで数時間詰まりました。
が、マニュアルをみるとしっかり書いてありました。
① https://github.com/lynndylanhurley/devise_token_auth#faq
Can I use this gem alongside standard Devise?
Yes! But you will need to enable the support of separate routes for standard Devise. So do something like this:
I already have a user, how can I add the new fields?
Check Setup migrations for an existing User table
言われた通りにやりましょう。
まずは①のほう。
DeviseTokenAuth.setup do |config|
  # config.enable_standard_devise_support = false
end
ここはよくわからないのですが、私の場合はもともとコメントアウトされてました。なのでいじりませんでした。
Rails.application.routes.draw do

  # standard devise routes available at /users
  # NOTE: make sure this comes first!!!
  devise_for :users

  # token auth routes available at /api/v1/auth
  namespace :api do
    scope :v1 do
      mount_devise_token_auth_for 'User', at: 'auth'
    end
  end

end
devise_for :usersを先に書いてねと言っています。
また、先ほど行ったrails g devise_token_auth:install User authによって自動的に挿入された以下の部分のコメントアウトも忘れずに。
Rails.application.routes.draw do
  # mount_devise_token_auth_for 'User', at: 'auth'
次に②のほう。
[Setup migrations for an existing User table]
(https://devise-token-auth.gitbook.io/devise-token-auth/faq#i-already-have-a-user-how-can-i-add-the-new-fields)
ここにさきほどの私の「すでにUserモデルがあるけどどうするの?」という懸念を解決してくれる方法が書いてあります。
先ほど生成されたcreate db/migrate/20180401103356_devise_token_auth_create_users.rbの中身を消し、リンク先(以下)のコードで置き換えればOK。
# create migration by running a command like this (where `User` is your USER_CLASS table):
  # `rails g migration AddTokensToUsers provider:string uid:string tokens:text`

  def up
    add_column :users, :provider, :string, null: false, default: 'email'
    add_column :users, :uid, :string, null: false, default: ''
    add_column :users, :tokens, :text

    # if your existing User model does not have an existing **encrypted_password** column uncomment below line.
    # add_column :users, :encrypted_password, :null => false, :default => ""

    # the following will update your models so that when you run your migration

    # updates the user table immediately with the above defaults
    User.reset_column_information

    # finds all existing users and updates them.
    # if you change the default values above you'll also have to change them here below:
    User.find_each do |user|
      user.uid = user.email
      user.provider = 'email'
      user.save!
    end

    # to speed up lookups to these columns:
    add_index :users, [:uid, :provider], unique: true
  end

  def down
    # if you added **encrypted_password** above, add here to successfully rollback
    remove_columns :users, :provider, :uid, :tokens
  end
これでマイグレート
$ rails db:migrate
トークン発行に関する設定を変える
  # config.change_headers_on_each_request = true
  config.change_headers_on_each_request = false
falseにしましょう。コメントアウトもしくはtrueだとリクエストのたびにトークンが変わってしまうので、今回はfalseにしておきます。
これで準備完了のはずです。
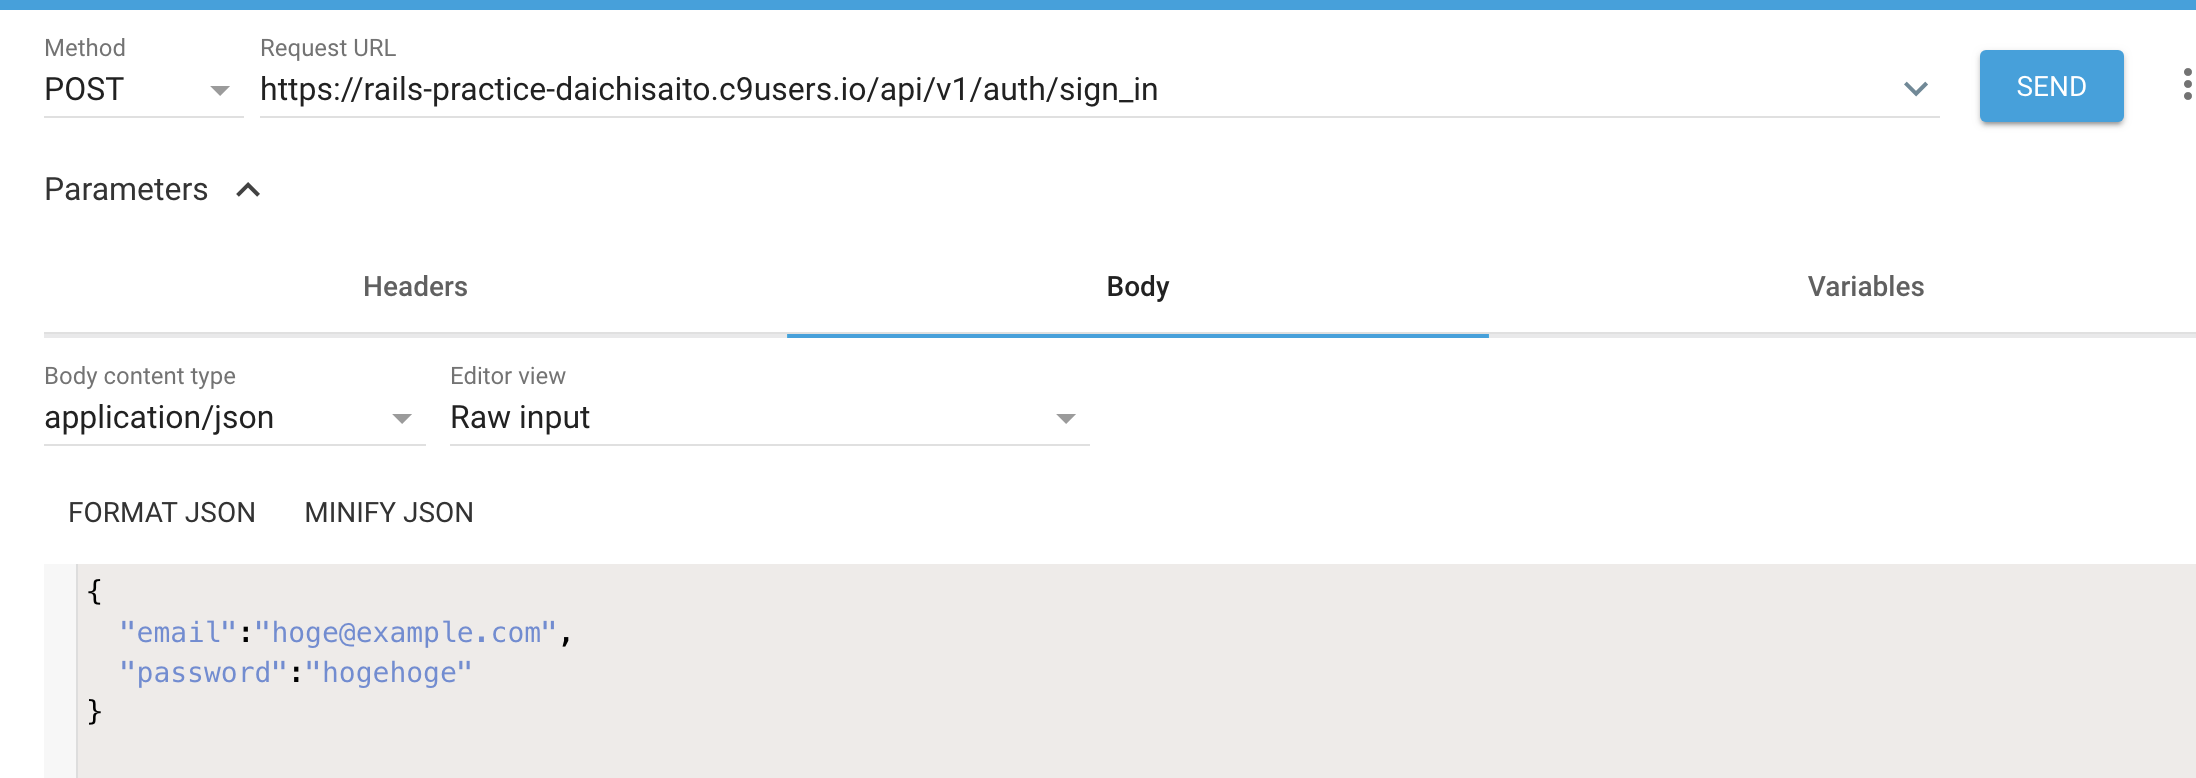
試しにログイン用のAPIを投げてみましょう。
リクエストを投げてみる
※すでに
emailがhoge@example.com
passwordがhogehoge
のユーザーがいる前提です。

・devise_token_authでのログインエンドポイントは/api/v1/auth/sign_inです。なのでここ宛にPOSTします
・json形式でリクエストを投げるのでcontent-typeはapplication/jsonにしてください
・リクエストボディとしてemailとpasswardを設定してください。
これでリクエストを投げます。
するとステータスコード200でレスポンスが返ってくるはずです。
レスポンスヘッダーに認証情報が含まれて返却されます。

この中の
・access-token
・client
・uid
を次回からのリクエストヘッダーに入れてあげることで認証が実現します。
普通のdeviseと同じようにbefore_action :authenticate_user!やcurrent_userが使えて便利です。
さいごに
あまりにdevise_token_authを使った例が少なかったので、そもそもdeviseですでにwebを実装していて、そのあとアプリ化するという状況においてこのアプローチは間違ってるのかな?とも考えてしまいます。。
もっといい方法があればぜひ教えて頂きたいです。