Amazon Inspectorとは
- FAQ: https://aws.amazon.com/jp/inspector/faqs/
- Amazon Inspector は マネージドのEC2 インスタンス/ECRのimageをスキャンして、インストールされているソフトウェアの脆弱性とネットワーク到達性の問題がないか調べるツール
前提
-
Amzon Inspector v2が出ていてそちらの最新バージョンを使用する
-
Amazon Inspector Classicという旧バージョンもあるようだが、設定項目が多く少し面倒。
スキャン対象
- マネージドEC2インスタンス
- コンテナワークロード(ECRのimage)
Amazon InspectorをONにすると、これらのリソースが自動でスキャンされるようになる。
スキャン項目
- パッケージの脆弱性
- Network Reachility
- https://docs.aws.amazon.com/ja_jp/inspector/latest/user/findings-types.html
EC2のパッケージ脆弱性のスキャンを行う場合、こちらに記載の通りEC2インスタンスがマネージドインスタンスである必要がある
また、EC2インスタンスにてこちらに記載の対応OSを使用している必要がある。
Q: How can I install and configure the Amazon Systems Manager Agent?
To successfully scan Amazon EC2 instances for software vulnerabilities, Amazon Inspector requires that these instances are managed by the AWS Systems Manager (SSM) and the SSM agent. See Systems Manager prerequisites in the AWS Systems Manager User Guide for instructions to enable and configure AWS Systems Manager. For information about managed instances, see the Managed Instances section in the AWS Systems Manager User Guide.
一方で、Network Reachabilityのスキャンについては上述のような前提条件はないため、SSMエージェントのインストールは不要であり、対応OSの制限もない。
https://docs.aws.amazon.com/inspector/latest/user/enable-disable-scanning-ec2.html
Amazon Inspector does not require the SSM Agent to scan Amazon EC2 instances for open network paths. There are no prerequisites for this type of scanning.
スキャンのタイミング
- Inspectorによるスキャンは自動で行われる
- 現状の機能として手動スキャンは提供されてない
Amazon Inspector automatically discovers and scans Amazon EC2 instances and container images residing in Amazon Elastic Container Registry (Amazon ECR) for software vulnerabilities and unintended network exposure.
Amazon Inspector initiates vulnerability scans of EC2 instances in the following situations:
As soon as the EC2 instance is discovered by Amazon Inspector
When you launch a new instance
When you install new software on an existing instance
When Amazon Inspector adds a new common vulnerabilities and exposures (CVE) item to its database
Network reachability scans for EC2 instances are performed once every 24 hours.
導入手順
EC2にAWS Systems Manager(SSM) エージェントのインストール
- パッケージ脆弱性のスキャンを行うためには、EC2インスタンスがマネージドインスタンスである必要があるためSSMエージェントをインストールする必要がある
インストール
- 公式: https://docs.aws.amazon.com/ja_jp/systems-manager/latest/userguide/sysman-manual-agent-install.html
- 公式: https://docs.aws.amazon.com/ja_jp/systems-manager/latest/userguide/agent-install-al2.html
SSM Agent はデフォルトで 2017 年 9 月以降の Amazon Linux ベース Amazon Machine Images (AMIs) にインストールされています。SSM Agent もデフォルトで Amazon Linux 2 AMIs と Amazon Linux 2 ECS 最適化ベース AMIs にインストールされています。その他のバージョンの Linux では、手動で SSM Agent をインストールする必要があります。
- EC2サーバ内でSSMエージェントがインストールされているか確認
- 元々インストール自体はされていた(AmazonLinux2だとデフォルトで入ってる模様)
- ただ、最新のバージョンに更新しないとマネージドインスタンスにならなかったので、インストールコマンドを再度実行した
$ yum list installed | grep ssm
amazon-ssm-agent.x86_64        3.0.529.0-1.amzn2              @amzn2-core

$ sudo yum install -y https://s3.amazonaws.com/ec2-downloads-windows/SSMAgent/latest/linux_amd64/amazon-ssm-agent.rpm

$ sudo systemctl status amazon-ssm-agent
● amazon-ssm-agent.service - amazon-ssm-agent
   Loaded: loaded (/etc/systemd/system/amazon-ssm-agent.service; enabled; vendor preset: enabled)
   Active: active (running) since 水 2022-07-20 12:03:18 JST; 11s ago
-
インストールした後、各EC2インスタンスに紐づくIAMロールにAmazonSSMManagedInstanceCoreの権限を追加
-
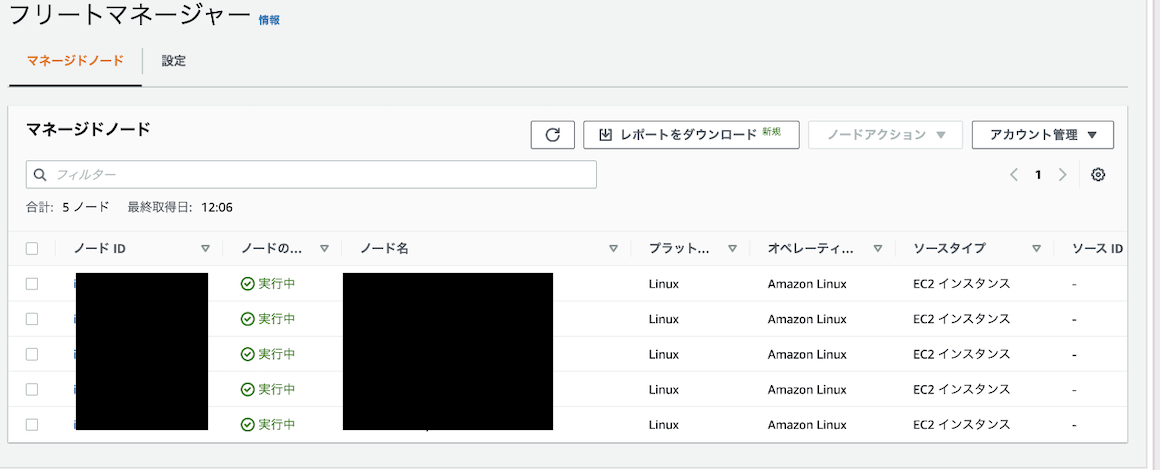
すると、フリートマネージャーにもマネージドインスタンスとして出現したことを確認
-
Amazon Inspectorの設定
- https://dev.classmethod.jp/articles/amazon-inspector-v2-released/
- Amzon Inspector v2になってEC2にInspectorエージェントをインストールする必要がなくなった
- ターゲットとテンプレートを作成してスキャンを実行するという設定も必要なくなった
- v2では最初に有効化という作業を行ったら、あとは自動的でスキャンという優れもの
- マネージドインスタンスのみスキャンされていることを確認

- scanされていることがわかる

サーバーに紐づくIAMロールに権限追加
- EC2をマネージドインスタンス化するために「AmazonSSMManagedInstanceCore」をEC2のロールに紐付け
- これを紐付けないとマネージドインスタンス化しない
Amazon Inspectorで検知した内容をSecurityHub経由でslackチャンネルに送信する機構
- Inspectorのスキャンにより潜在的な脆弱性が検出された場合にはFindingが生成され、Findingに関するイベントはEventBridgeに送信される
Amazon Inspector creates an event for Amazon EventBridge for newly generated findings, newly aggregated findings, and changes in the state of findings. Events are emitted on a best-effort basis.
-
EventBridgeを経由してSlackへ通知する機構を構築する
-
Inspectorで検知→SecurityHubに統合→EventBridge→SNS topic→subscription→chatbotの流れでスラックに通知する
- Inspectorを有効化すると自動でSecurityHubに統合されるので特にその辺りの設定は不要
-
公式: https://docs.aws.amazon.com/ja_jp/inspector/latest/user/findings-managing-automating-responses.html
-
https://dev.classmethod.jp/articles/notify-inspector-v2-findings-using-chatbot/
CDKでリソース作成(Typescript)
SecurityHub経由で通知するパターン
- stackを作成するスクリプト
import * as cdk from 'aws-cdk-lib'
import * as sns from 'aws-cdk-lib/aws-sns'
import * as iam from 'aws-cdk-lib/aws-iam'
import * as events from 'aws-cdk-lib/aws-events'
import * as targets from 'aws-cdk-lib/aws-events-targets'

export interface InspectorFindingStackprops {}

export class InspectorFindingStack extends cdk.Stack {
  public readonly snsTopicInspectorFinding: sns.Topic

  // Inspector Finding SNS Topic
  private createSnsTopicInspectorFinding(name: string): sns.Topic {
    const accountId = cdk.Stack.of(this).account

    const snsInspectorFinding = new sns.Topic(this, `${name}`, {
      displayName: 'Inspector Finding Notification',
      topicName: name
    })

    snsInspectorFinding.addToResourcePolicy(
      new iam.PolicyStatement({
        sid: 'default_statement',
        effect: iam.Effect.ALLOW,
        principals: [new iam.AnyPrincipal()],
        actions: [
          'SNS:GetTopicAttributes',
          'SNS:SetTopicAttributes',
          'SNS:AddPermission',
          'SNS:RemovePermission',
          'SNS:DeleteTopic',
          'SNS:Subscribe',
          'SNS:ListSubscriptionsByTopic',
          'SNS:Publish',
          'SNS:Receive'
        ],
        resources: [snsInspectorFinding.topicArn],
        conditions: {
          StringEquals: {
            'AWS:SourceOwner': accountId
          }
        }
      })
    )
    snsInspectorFinding.addToResourcePolicy(
      new iam.PolicyStatement({
        sid: 'SNSPublishingPermissions',
        effect: iam.Effect.ALLOW,
        principals: [new iam.ServicePrincipal('events.amazonaws.com')],
        actions: ['SNS:Publish'],
        resources: [snsInspectorFinding.topicArn]
      })
    )
    return snsInspectorFinding
  }

  // Inspector EventBridge
  private createInspectorFindingEvent(name: string, sns: sns.Topic): void {
    const InspectorFindingRule = new events.Rule(this, `${name}-InspectorFinding`, {
      eventPattern: {
        source: ['aws.securityhub'],
        detailType: ['Security Hub Findings - Imported'],
        detail: {
          findings: {
            ProductName: ['Inspector'],
            RecordState: ['ACTIVE'],
            Severity: {
              Label: ['CRITICAL']
            }
            // スコアと重要度ラベルの関係
            // 0 ... INFORMATIONAL
            // 0.1 - 3.9 ... LOW
            // 4.0 - 6.9 ... MEDIUM
            // 7.0 - 8.9 ... HIGH
            // 9.0 - 10.0 ... CRITICAL
          }
        }
      },
      ruleName: name
    })
    InspectorFindingRule.addTarget(new targets.SnsTopic(sns))
  }

  constructor(scope: cdk.App, id: string, props?: cdk.StackProps) {
    super(scope, id, props)

    this.snsTopicInspectorFinding = this.createSnsTopicInspectorFinding(
      `${id}-sns-topic-inspector-finding`
    )
    this.createInspectorFindingEvent(`${id}-inspector-finding-event`, this.snsTopicInspectorFinding)
  }
}
- 初期化してスタックのインスタンスを生成してCDKを実行する
- chatbotのスタックを作るtsファイルは別で作成しても良いが今回は紙面の都合上chatbotの作成/snsトピックへの紐付けは手動でやる前提
#!/usr/bin/env node
import * as cdk from 'aws-cdk-lib'
import { InspectorFindingStack } from '../lib/inspector-finding-stack'

const app = new cdk.App()
const prefix = app.node.tryGetContext('prefix') // コマンドの引数から取得

const inspectorFindingStack = new InspectorFindingStack(app, `${prefix}-inspector-finding`)
- CDK実行
$ cdk bootstrap # 新規でCDKを実行する場合のみ
$ cdk --app 'npx ts-node --prefer-ts-exts bin.ex/inspector.ts' synth -c prefix=${プロジェクト名}
$ cdk --app 'npx ts-node --prefer-ts-exts bin.ex/inspector.ts' diff -c prefix=${プロジェクト名}
$ cdk --app 'npx ts-node --prefer-ts-exts bin.ex/inspector.ts' deploy ${スタック名} -c prefix=${プロジェクト名}
SecurityHubを経由せず直接Inspectorから通知する場合
- イベントルール以外は同じ
eventPattern: {
        source: ['aws.inspector2'],
        detailType: ['Inspector2 Finding'],
        detail: {
          status: ['ACTIVE'],
          severity: ['MEDIUM,HIGH,CRITICAL']
          // スコアと重要度ラベルの関係
          // 0 ... INFORMATIONAL
          // 0.1 - 3.9 ... LOW
          // 4.0 - 6.9 ... MEDIUM
          // 7.0 - 8.9 ... HIGH
          // 9.0 - 10.0 ... CRITICAL
        }