本投稿内容はこちらのYouTube動画の内容に沿って行いました。
カスタム後のiTerms2
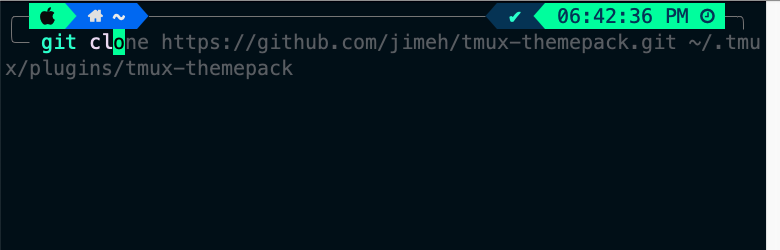
アイコンや時間表示などオシャレにカスタムできました。
コマンドサジェストのプラグインも導入しており、これから使い倒していけそうです。
実施環境
mac OS Big Sur
バージョン 11.5.1
Homebrew, Gitはインストール済み
iTerm2をインストール
brew install --cask iterm2
Oh My Zshをインストール
sh -c "$(curl -fsSL https://raw.github.com/ohmyzsh/ohmyzsh/master/tools/install.sh)"
Oh My ZshのTheme(PowerLevel10K)をインストール
git clone https://github.com/romkatv/powerlevel10k.git $ZSH_CUSTOM/themes/powerlevel10k
~/.zshrcファイルの"ZSH_THEME"の値を以下に書き換える
ZSH_THEME="powerlevel10k/powerlevel10k"
変更を反映
source ~/.zshrc
Meslo Nerd Fontをインストール
iTerm2を開くとMeslo Nerd Fontをインストールするかどうかのプロンプトが表示されるのでy押してダウンロードし、一度iTerm2を終了する。
PowerLevel10Kの設定を行う
Prompt Style      -> 3:Rainbow
Character set     -> 1:Unicode
Show Current Time -> 3:12-hour format
Prompt Separators -> 1:angled
Prompt Heads      -> 1:Sharp
Prompt Tails      -> 1:Flat
Prompt height     -> 2:Two lines
Prompt Connection -> 3:Solid
Prompt Frame      -> 4:Full
Connection & Frame Color -> 1:Lightest
Prompt Spacing    -> 2:Spare
Icons             -> 2:Many icons
Prompt Flow       -> 1:Concise
Enable Transient Prompt -> n:no
ターミナルのフォントサイズを大きくする
- iTerm2のpreferenceを開く
- Profiles > Textを選択する
- フォントサイズを20pxに変更する
iTerm2のTheme Colorsをカスタムする
-
iTerm2を開く
-
動画投稿主さんのCustom Themeをダウンロードする
curl https://raw.githubusercontent.com/josean-dev/dev-environment-files/main/coolnight.itermcolors --output ~/Downloads/coolnight.itermcolors -
iTerm2 preferencesを開く
-
Profiles > Colorsを選択する
-
ダウンロードしたcolor profile(coolnight)をインポートする
-
インポートしたcolor profileを選択する
ZSHのプラグインをダウンロードする
zsh-autosuggestionsをインストール
git clone https://github.com/zsh-users/zsh-autosuggestions ${ZSH_CUSTOM:-~/.oh-my-zsh/custom}/plugins/zsh-autosuggestions
zsh-syntax-highlightingをインストール
git clone https://github.com/zsh-users/zsh-syntax-highlighting.git ${ZSH_CUSTOM:-~/.oh-my-zsh/custom}/plugins/zsh-syntax-highlighting
~/.zshrcファイルのプラグイン記載を以下の通りに変更する
plugins=(git zsh-autosuggestions zsh-syntax-highlighting web-search)
変更を反映
source ~/.zshrc
以上でiTerm2のセットアップは完了です。