はじめに
アドベントカレンダー楽しい🐟
以前、 「Power AppsでGoogle Books APIを使ったバーコードリーダーを作ってみた」 のタイトルで
記事を書かせていただきました。
Google Books APIで取得した情報を、Notionに追加する仕組みができたので紹介させてください。
Notion API
NotionにはAPIが用意されています。
Get startedをクリック。
All English・・・
- https://www.notion.com/my-integrations にアクセスします。
- ログインメニューが出るのでログインしましょう。
- 下記の画面から
+ 新しいインテグレーションをクリック
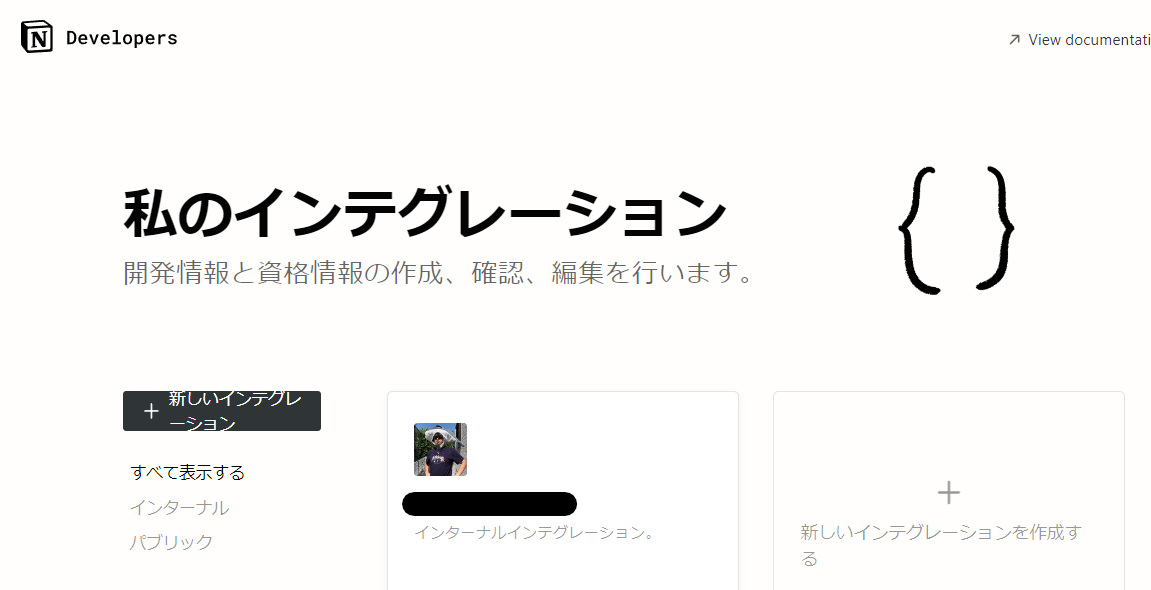
- インテグレーションの設定、APIで実行できる範囲を設定できます。
- 完了するとシークレット = トークン が発行されます。APIキーですね。
こちらを使えばNotionのデータベースに連携することが可能です。
APIによる編集を実装するためには
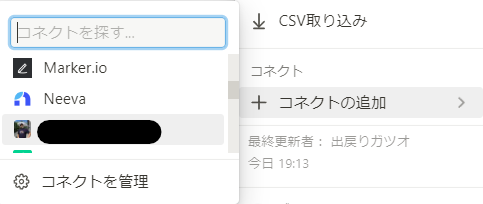
- 実際にAPIによる編集等を行うNotionのページにアクセスします。
[・・・]画面右上の三点リーダーをクリックし、コネクタにて自分で名前を付けたインテグレーションを選択します。
こちらで事前準備は完了です!
フロー
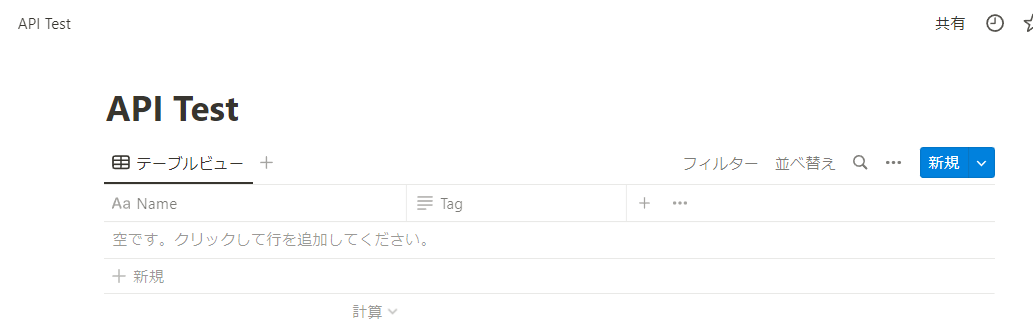
今回のテーマはNotionの特定のDBにデータをPOSTすることです。
これをPower Automateで実現します。
検証のためにGoogle Apps ScriptとPythonでもチャレンジしたのでコードを載せておきます。
Google Apps Script
function postNotionDB() {
  const dbId   = '***databaseID***';
  const token  = '***secretキー***';
  const url = 'https://api.notion.com/v1/pages';

  const json = {
    parent: {
      database_id: dbId,
    },
    properties: {
      "Name": {
        "title": [{
          "text": {
            "content": "GAS"
          }
        }]
      },
      "Tag": {
        "rich_text": [{
          "text": {
            "content": "Success"
          }
        }]
      }
    }
  }

  const options = {
    "method": "POST",
    "headers": {
      "Content-type": "application/json",
      "Authorization": "Bearer " + token,
      "Notion-Version": '2022-06-28',
    },
    "payload": JSON.stringify(json),
  };

  UrlFetchApp.fetch(url, options);
}
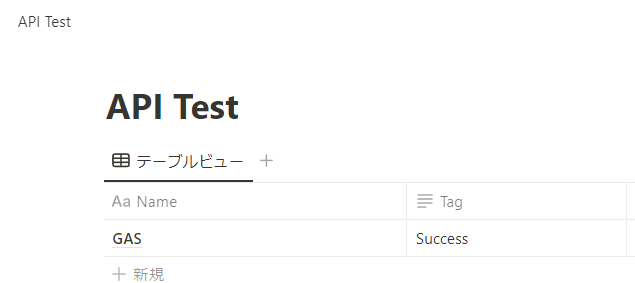
-
Result
Python
import os
import yaml
import requests

## yamlにdatabaseのId、トークンを格納

dir_path = os.path.dirname(__file__)
conf_path = os.path.join(dir_path,'__config__.yaml')

with open(conf_path, encoding='utf-8') as f:
	   config = yaml.safe_load(f)

url = 'https://api.notion.com/v1/pages'
headers = {
        'Content-Type'  : 'application/json',
        'Authorization' :'Bearer ' + config['notion_parameter']['secret_key'],
        'Notion-Version': '2022-06-28',
        }

json = {
    'parent': {
      'database_id': config['notion_parameter']['test_database_id']
    },
    'properties': {
      'Name': {
        'title': [
        {
            'text': {
            'content': 'Python'
            }
            }
        ],
      },
      'Tag': {
        'rich_text': [
        {
            'text': {
            'content': 'success API'
            }
            }
        ],
      }
    }
  }

res = requests.post(url, json=json, headers=headers)
print(res.text)
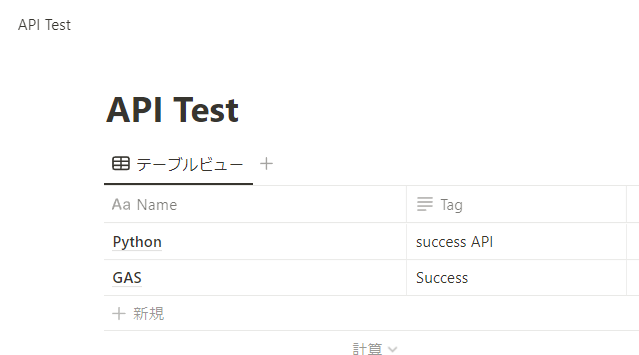
-
Result
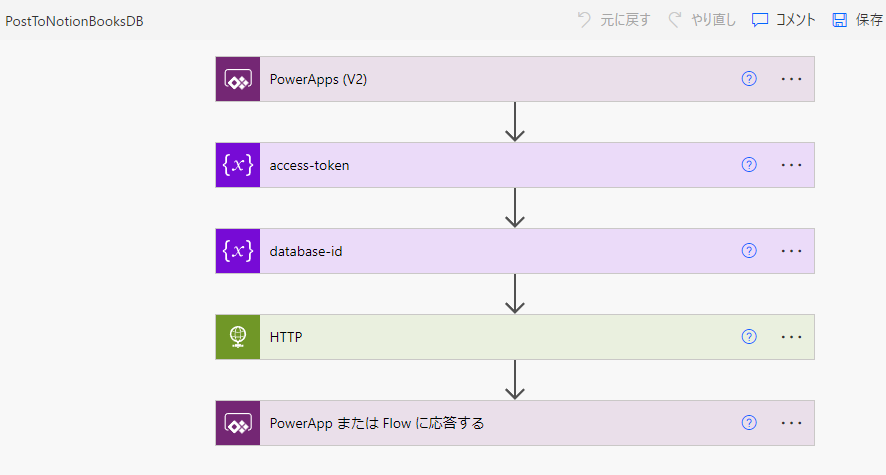
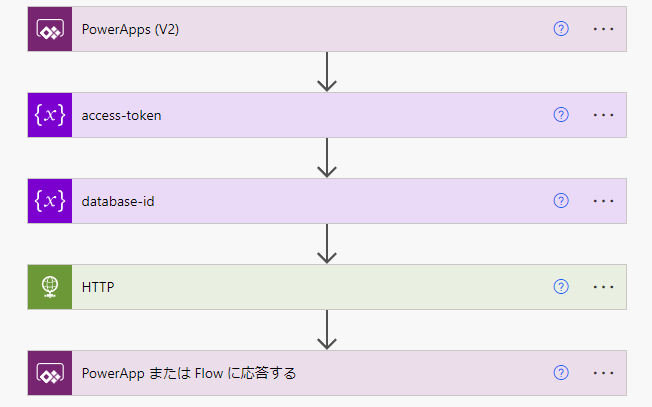
Power Automate
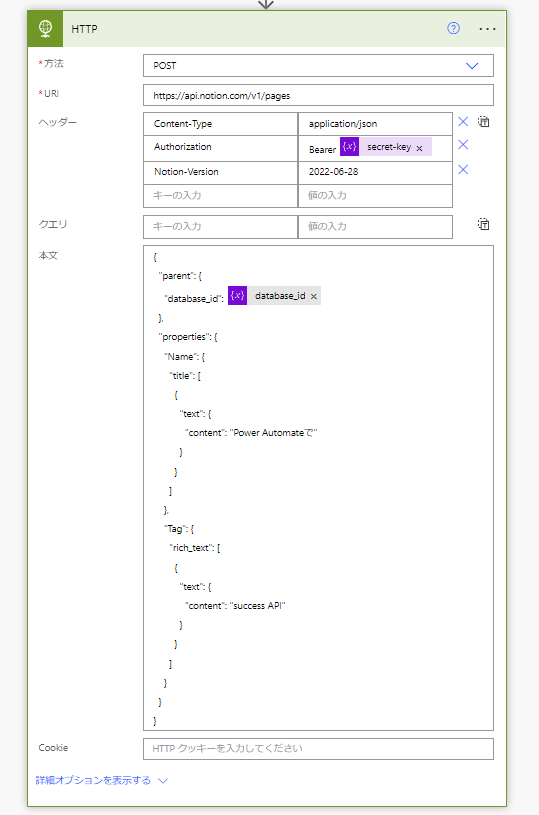
アクセストークンとデータベースIDは変数で設定しています。
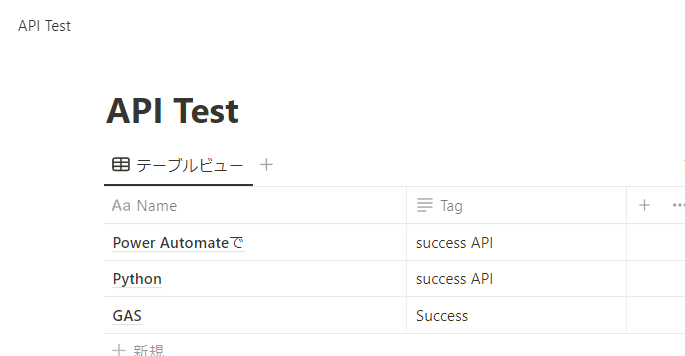
-
Result
bodyに格納するJSON Formatを確認するためには
上記で作法はわかりましたが、実際にPOSTする際のFormatを調べる方法はどうすればいいだろう?
となった際には下記のHTTP requestをPOSTします。GETではなくPOSTです。
-
こちらのHTTP requestを実行すると

-
長いJSONが返ってきます。"parent"を含めてでdatabaseの行の情報が大体わかります。
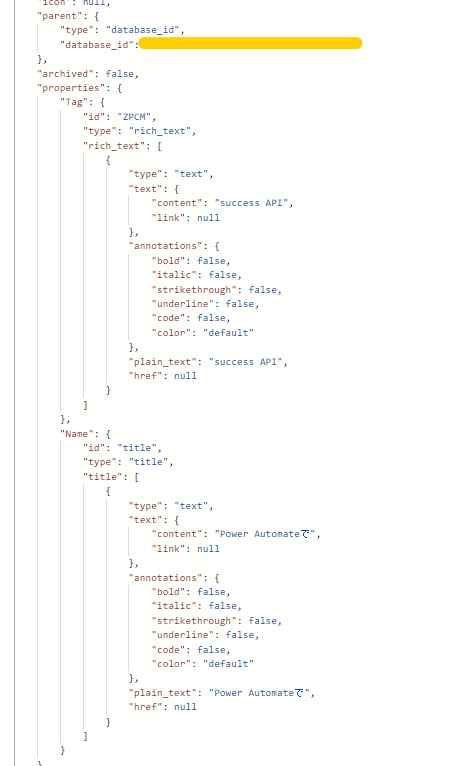
返ってきたJSONに合わせてオブジェクトの型を構成することでAPI連携が実現できます。
{
  "parent": {
    "database_id": "database-id"
  },
  "properties": {
    "Name": {
      "title": [
        {
          "text": {
            "content": "##入力したい情報 NAME列##"
          }
        }
      ]
    },
    "Tag": {
      "rich_text": [
        {
          "text": {
            "content": "##入力したい情報 Tag列##"
          }
        }
      ]
    }
  }
}
colorやidといった部分は特に必要がない部分ですので、削って問題ありません。
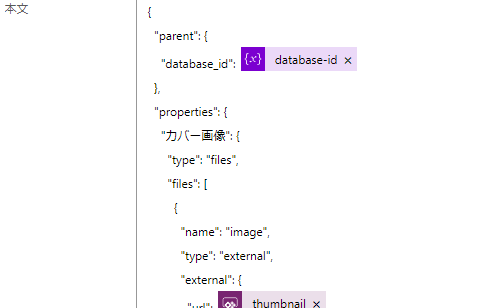
Power Appsでデータの受け渡しを設定する
- Power Automateでフローを作ります。
- HTTPにてデータベースに合わせたJSONを定義し、本文に入れ込みます
Power Appsに設定!
- Submitに当たるボタンのOnSelectプロパティに下記の様な式を設定します。
UpdateContext({_code:PostToNotionBooksDB.Run(results.thumbnail,inpTitle.Text,inpAuthors.Text,inpPublisher.Text)});
- UpdateContext変数にてフローから戻り値が設定できます。
HTTPの状態コードから失敗した場合や成功した場合の定義ができるので、いろいろテストしてみてください。
最後に
今回はNotion DBにPower Appsの情報を、Power AutomateのHTTPアクションにて、Notion APIを活用することによって実現することが出来ました。
バーコードによる入力簡素化ができて、筆者はスーパーハッピーです!
Power Platformは兎に角、いろいろなつながりを活かして自分が欲しいものを欲しい時に作れる!そういった魅力があります!
是非ビジネスを中心に自分の周りの「あれしたい」「こうしたい」を実現してみていただければと思います!
良いPower Lifeを!アディオス!