はじめに
LinuxサーバーやPCにNVIDIA GPUが搭載されており、グラフィカルインターフェースなしでSSHを使用してファン速度を調整したい場合、このガイドがその方法を提供します。騒音の低減、効率の向上、またはハードウェアの冷却を目的とするかに関係なく、このガイドを使えば簡単に設定が可能です。
(GUIは不要、SSHで完結)(おそらく最もシンプルな方法)
スクリプトのリンク: https://github.com/RoversX/nvidia_fan_control_linux/
クイックスタートガイド
環境設定
-
Python仮想環境を作成
python3 -m venv fan source fan/bin/activate -
pynvmlライブラリをインストール
pip3 install pynvml -
ファンコントロールスクリプトをダウンロード
wget https://raw.githubusercontent.com/RoversX/nvidia_fan_control_linux/main/nvidia_fan_control.py -
スクリプトのパラメータを調整
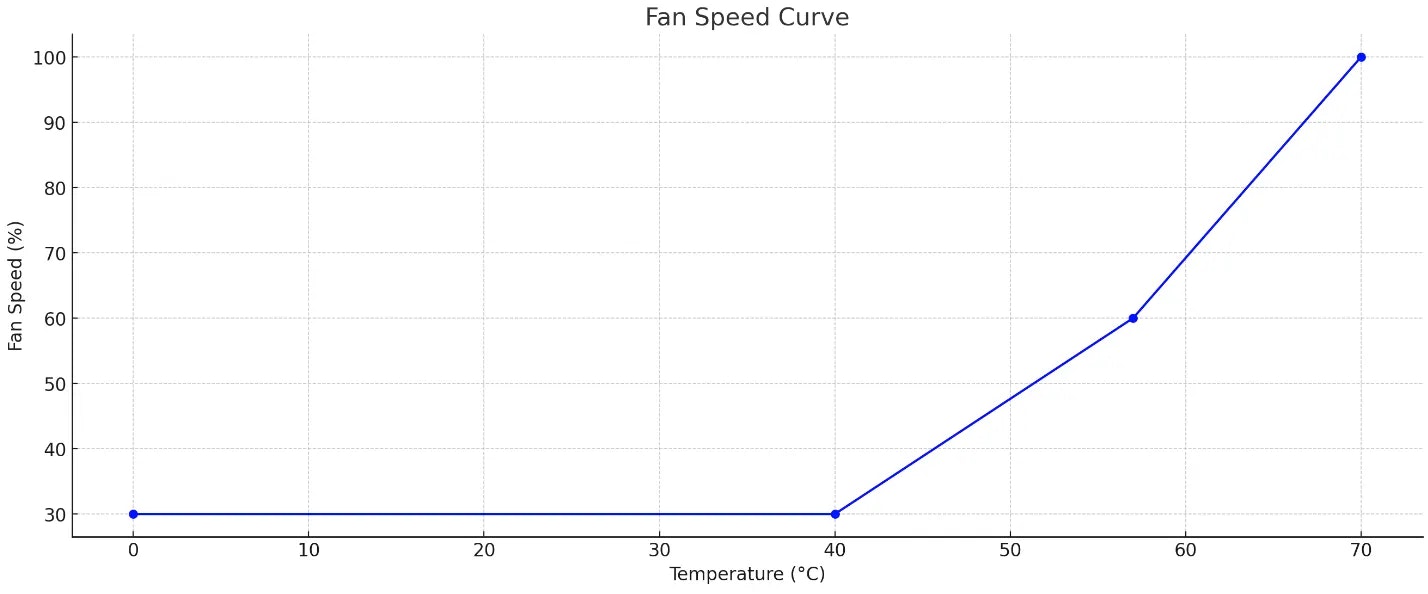
# ファンカーブの設定
temperature_points = [0, 40, 57, 70]
fan_speed_points = [27, 40, 80, 100]

# CPU負荷軽減のためのスリープ時間
sleep_seconds = 5
スクリプトの設定
スクリプトの起動を簡単にするため、次のようなfan.shスクリプトを作成します。
nano fan.sh
エディタが開いたら、以下の内容をコピーして貼り付けてください:
#!/bin/bash

# 仮想環境を有効化するためにsudo権限を使用
sudo bash <<EOF
source /home/x/Workspace/fan/bin/activate
python /home/x/Workspace/fan/nvidia_fan_control.py
deactivate
EOF
ファンコントロールの起動
設定が完了したら、以下のコマンドでファン速度の制御を開始します:
./fan.sh
出力例
スクリプト実行後、以下のような出力が表示されます:
x@x:~$ ./fan.sh
[sudo] password for x:
============================================================
Driver Version: 535.183.01
GPU 0: NVIDIA GeForce RTX 2080 Ti
Fan Count: 1
============================================================
Temperature: 42°C
Total Curve Point: 4
Current Curve Point: 2
Previous_Curve_Point: 1
Fan_Speed: 45%
============================================================
Temperature_Delta: 17
Fan_Speed_Delta: 40
Temperature_Increment: 2
Fan_Speed_Increment: 4.705882352941177
Previous_Temperature: 42°C
Step_Down_Temperature: 37
============================================================
この出力により、GPUの温度やファン速度の状態が確認でき、適切な条件で動作しているかどうかがわかります。
このスクリプトは、https://github.com/Cippo95/nvidia-fan-control に基づき改良されており、一部のコードは https://gist.github.com/AlexKordic/65f031b708177a01a002cc19f0d7298c のものを利用しています。
finally:
    # 自動ファンコントロールにリセット
    for handle, fan_count in zip(handles, fan_counts):
        for i in range(fan_count):
            nvmlDeviceSetDefaultFanSpeed_v2(handle, i)
    nvmlShutdown()
結論
この手順に従えば、GUIを使用せずにLinuxでNVIDIA GPUのファン速度を簡単に制御できるようになります。特にリモート管理やサーバー環境での使用に適しています。
Zenn での初公開: https://zenn.dev/closex/articles/a179489b47fdd3
