Anomalibの基本トピック
Anomalibの概要
Anomalibは最新の異常検知(anomaly detection)のアルゴリズムを取り扱うことを目的とするDeepLearningのライブラリです。詳しくは下記のドキュメントなどを参照ください。
インストール
$ pip install anomalib
Anomalibは上記を実行することでPyPIから入手することができます。NumPyやMatplotlib含め、いくつかのライブラリが合わせて必要です。NumPyはバージョン1系統、Matplotlibは3.7.0以下のバージョンでないと動かないのでご注意ください。
動作確認
Anomalibの動作確認にあたって、以下では上記の「Anomalib in 15 Minutes」の実行を行います。
# 1. Import required modules
from anomalib.data import MVTec
from anomalib.engine import Engine
from anomalib.models import EfficientAd

# 2. Create a dataset
# MVTec is a popular dataset for anomaly detection
datamodule = MVTec(
    root="./datasets/MVTec",  # Path to download/store the dataset
    category="bottle",  # MVTec category to use
    #train_batch_size=32,  # Number of images per training batch
    train_batch_size=1,  # Number of images per training batch
    eval_batch_size=32,  # Number of images per validation/test batch
    num_workers=8,  # Number of parallel processes for data loading
)

# 3. Initialize the model
# EfficientAd is a good default choice for beginners
model = EfficientAd()

# 4. Create the training engine
engine = Engine(max_epochs=10)  # Train for 10 epochs

# 5. Train the model
engine.fit(datamodule=datamodule, model=model)
上記を実行することでAnomalibの学習を行うことができ、10エポックの学習にあたってはGeForce RTX 2080 Tiの環境で数分ほどかかります。上記ではEfficientAdというmodelが用いられており、学習コードをそのまま動かすとValueError: train_batch_size for EfficientAd should be 1.のようなエラーが出たので上記のコードではtrain_batch_sizeを1に設定して実行しました。次に推論コードは下記を実行すれば良いです。
# 1. Import required modules
from pathlib import Path
import matplotlib.pyplot as plt

from anomalib.data import PredictDataset
from anomalib.engine import Engine
from anomalib.models import EfficientAd

# 2. Initialize the model and load weights
model = EfficientAd()
engine = Engine()

# 3. Prepare test data
# You can use a single image or a folder of images
dataset = PredictDataset(
    path=Path("datasets/MVTec/bottle/test/good/"),
    image_size=(256, 256),
)

print(type(dataset))

# 4. Get predictions
predictions = engine.predict(
    model=model,
    dataset=dataset,
    ckpt_path="results/EfficientAd/MVTec/bottle/latest/weights/lightning/model.ckpt",
)

# 5. Access the results
if predictions is not None:
    for prediction in predictions:
        image_path = prediction["image_path"]
        anomaly_map = prediction["anomaly_maps"]  # Pixel-level anomaly heatmap
        pred_label = prediction["pred_labels"]  # Image-level label (0: normal, 1: anomalous)
        pred_score = prediction["pred_scores"]  # Image-level anomaly score
学習済みmodelの場所があまりわかりやすくないので、注意しておくと良いと思います。また、predictionはDict型であるのでprediction.image_pathからprediction["image_path"]に修正して実行しました。
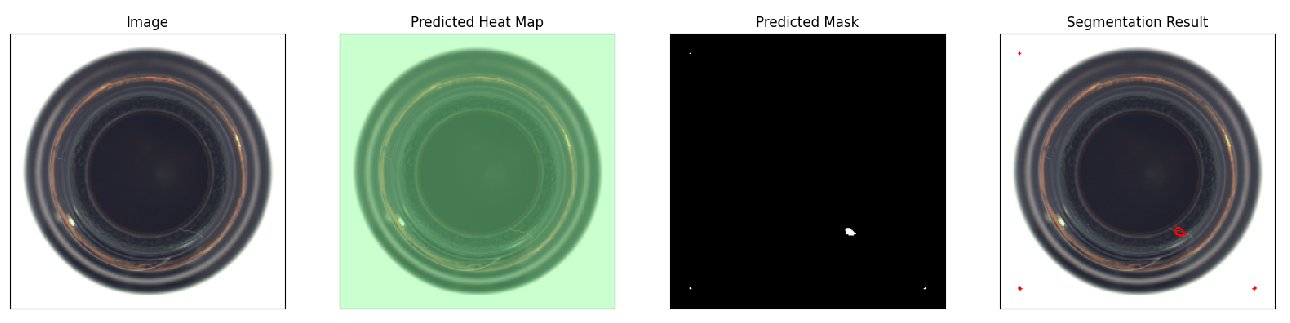
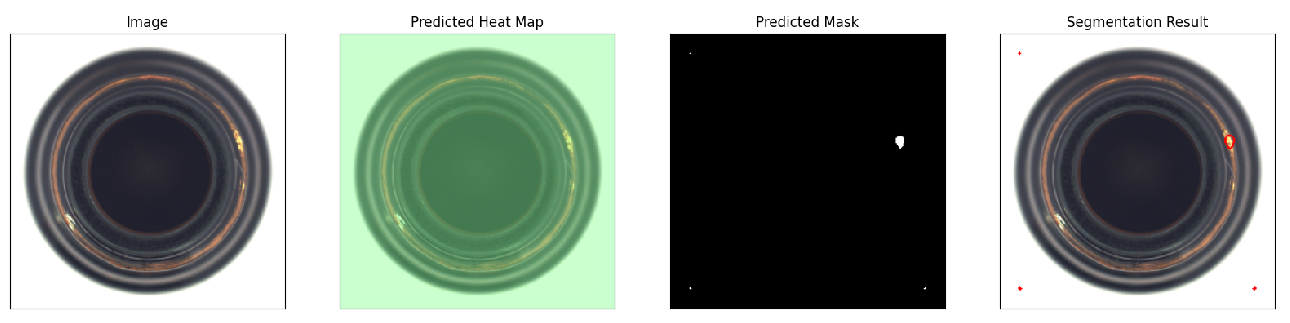
推論の結果、results/EfficientAd/latest/images/下に下記のようなファイルが出力されます。
追加で知っておくと良いトピック
Anomalibのmodel一覧

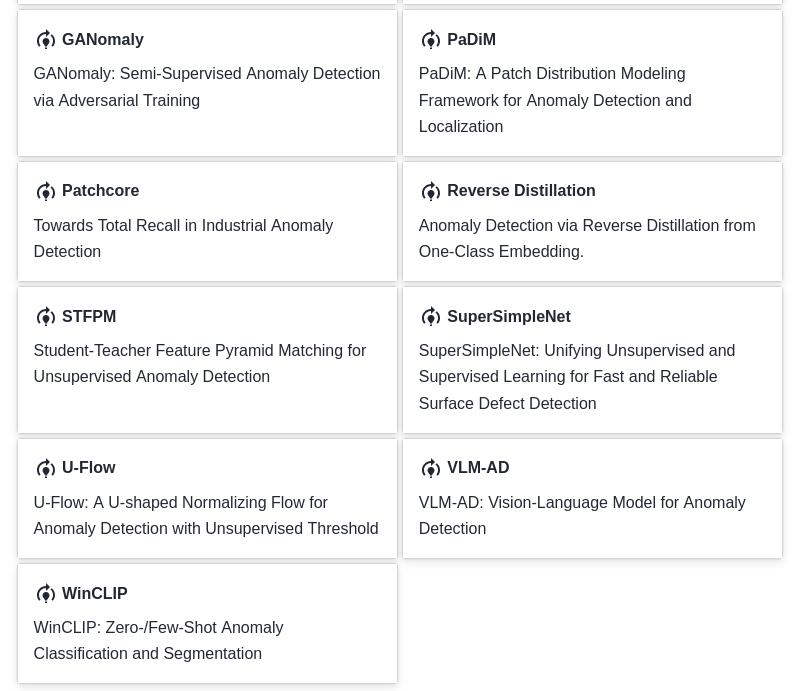
https://anomalib.readthedocs.io/en/latest/markdown/guides/reference/models/image/index.html
Anomalibのmodelの一覧は上記より確認できます。前節の例では下記のEfficient ADが用いられています。
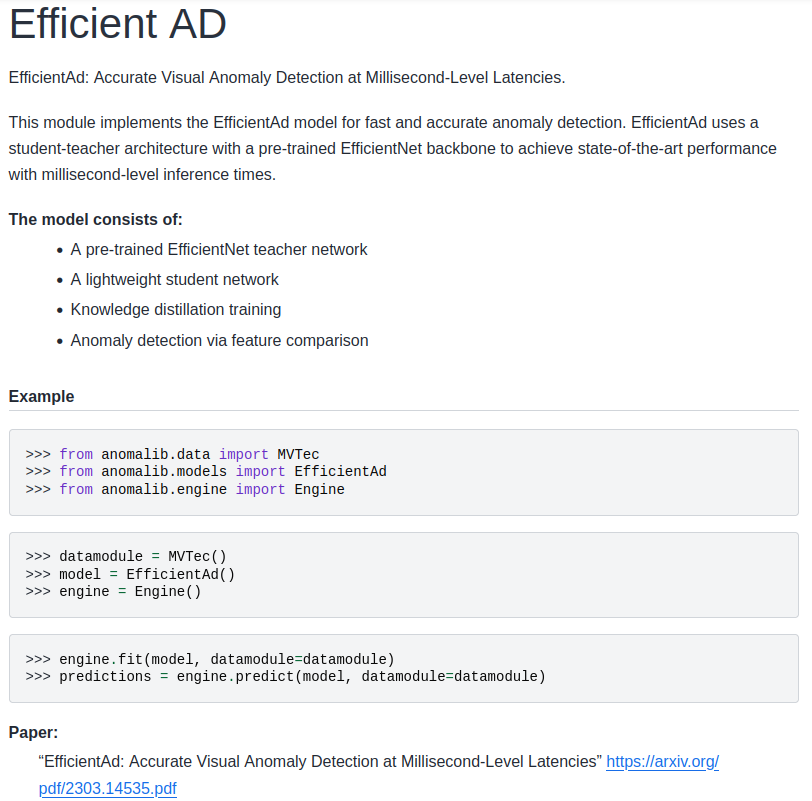
https://anomalib.readthedocs.io/en/latest/markdown/guides/reference/models/image/efficient_ad.html