はじめに
本記事はGitHub Actionsでc++プロジェクトのビルド&ユニットテストを自動化してみる試みです。
テストフレームワークとしてgoogletest、ビルドツールはCMakeを利用します。
GitHub Actionsとsubmoduleを使ったCI環境構築の参考になれば幸いです。
適当なc++プロジェクトを作成
適当なc++プロジェクトを作成。
c++ライブラリはコア処理を行うソースとApiを記述するソースを別で用意。
.
└── GitHubActionsTest
    ├── CMakeLists.txt
    ├── include
    │   └── libSampleApi.h
    ├── src
    │   ├── include
    │   │   └── libSampleCoreLib.h
    │   ├── libSampleApi
    │   │   └── libSampleApi.cpp
    │   ├── libSampleCoreLib
    │   │   └── libSampleCoreLib.cpp
    ├── test
    │   └── test.cpp
    └── third_party
        └── googletest
googletestをadd submoduleする
用意しておいたthird_party/googletestフォルダ以下にgoogletestをadd submoduleする。
cd GitHubActionsTest
mkdir third_party
cd third_party/
git submodule add git@github.com:google/googletest.git googletest
cd googletest
git checkout release-1.8.1
testコードを書く
動作チェックのため適当にSuccessになるようなテストを実装。
# include "libSampleApi.h"
# include "gtest/gtest.h"
TEST(libSampleTestSuite, libSampleConformanceTest) {
	EXPECT_EQ(1, 1);
}
CMakeLists.txtを作成
add_subdirectoryでgoogletestのビルドを指示し、add_libraryでライブラリのビルドを指示する。
testプロジェクトにはテスト対象のライブラリとgtest_mainをリンクする。
cmake_minimum_required(VERSION 3.1)
# CMake setup for main library and sample executable
project(CMake_test)
add_subdirectory(third_party/googletest/googletest)
add_library(libSampleApi STATIC
    src/libSampleApi/libSampleApi.cpp
    src/libSampleCoreLib/libSampleCoreLib.cpp
)
add_executable(test
    test/test.cpp
)
target_link_libraries(test
    libSampleApi
    gtest_main
)
target_include_directories(test PUBLIC
    ./include
    third_party/googletest/googletest/include
)
GitHub Actionsの設定
Personal Access Tokenの取得
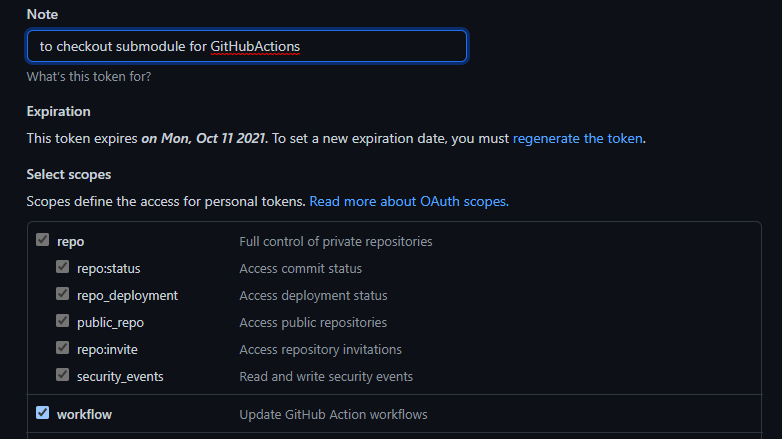
Personal Access Token(PAT)はGitHub Actions上でパスワードに代わりに使用する個人アクセストークンです。
公式ドキュメントに従い取得しましょう。その際repoとworkflowにチェックを付けます。
取得した値をメモしておきます。
Personal Access Tokenの設定
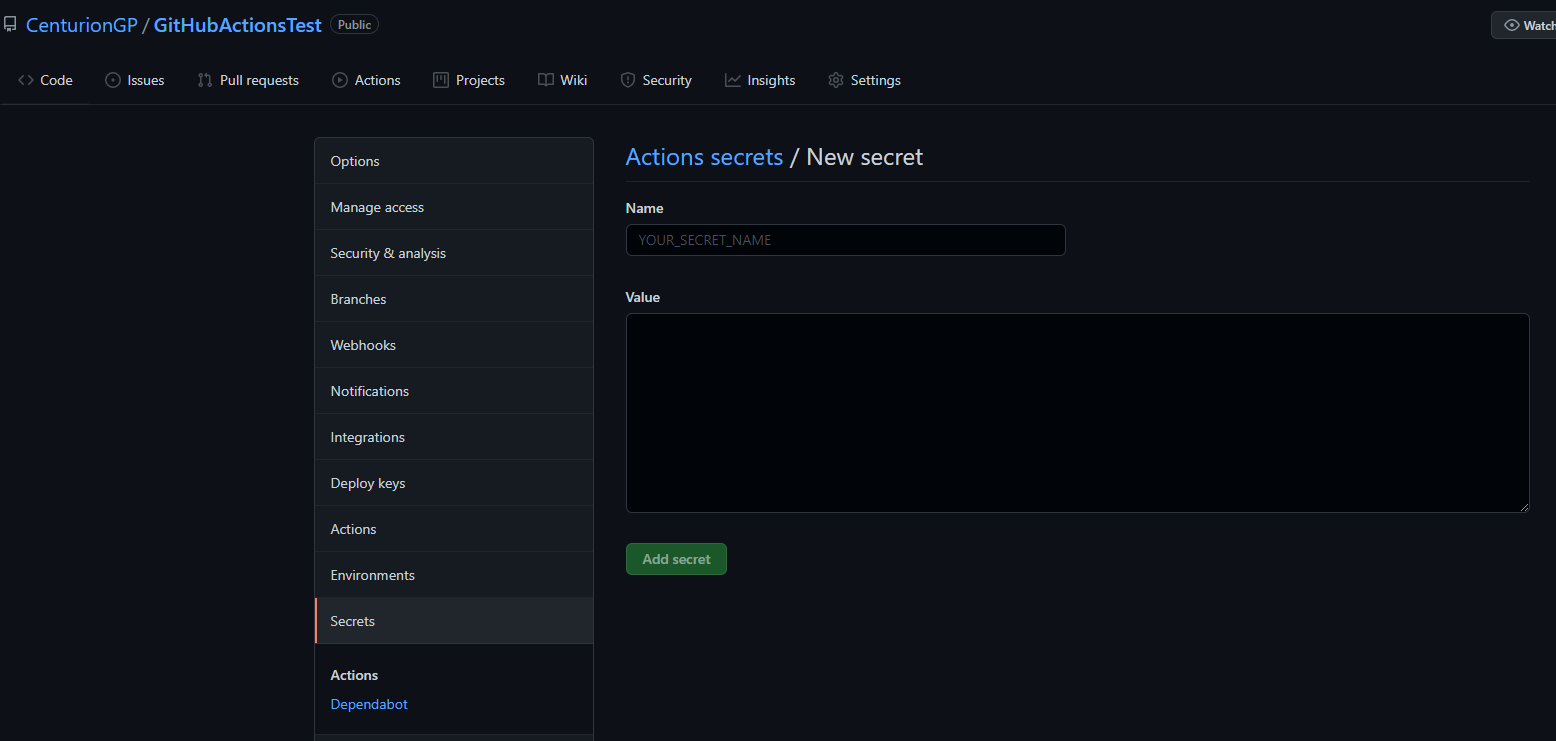
c++プロジェクトのrepositoryに取得したPATを設定します。
Nameは後で分かりやすいように、SUBMODULE_TOKENなどを設定。
先程メモした値をvalueにコピペします。
GitHub Actionsの作成
repositoryホームからActions->New Workflowへ進み、CMake based projectsのSet up this workflowへ進む。
ここでやる事は以下。
- submoduleのチェックアウト(本記事ではgoogletest)
- 自分のリポジトリのチェックアウト
- CMake confitgure
- build
- unitテストの実行
設定しておいたPATをsubmoduleのチェックアウト時に利用します。
token: ${{secrets.SUBMODULE_TOKEN}}の記述でOK。
name: CMake build and unit test

on: pull_request

env:
  BUILD_TYPE: Release

jobs:
  build:
    strategy:
      matrix:
        platform: [ubuntu-latest, macos-latest, windows-latest]
    runs-on: ${{matrix.platform}}

    steps:
    - name: Checkout submodule
      uses: actions/checkout@v2
      with:
        fetch-depth: 0
        token: ${{secrets.SUBMODULE_TOKEN}}
        submodules: true

    - uses: actions/checkout@v2
    - name: Configure CMake

    - name: Build
      # Build your program with the given configuration
      run: cmake --build ${{github.workspace}}/build --config ${{env.BUILD_TYPE}}

    - name: Test on Windows
      # test execution on windows-latest
      id: windows
      if: matrix.platform == 'windows-latest'
      run: ./build/${{env.BUILD_TYPE}}/test.exe

    - name: Test on ubuntu
    # test execution on ubuntu-latest
      id: ubuntu
      if: matrix.platform == 'ubuntu-latest'
      run: ./build/test

    - name: Test on macos
    # test execution on macos-latest
      id: macos
      if: matrix.platform == 'macos-latest'
      run: ./build/test
動作テスト
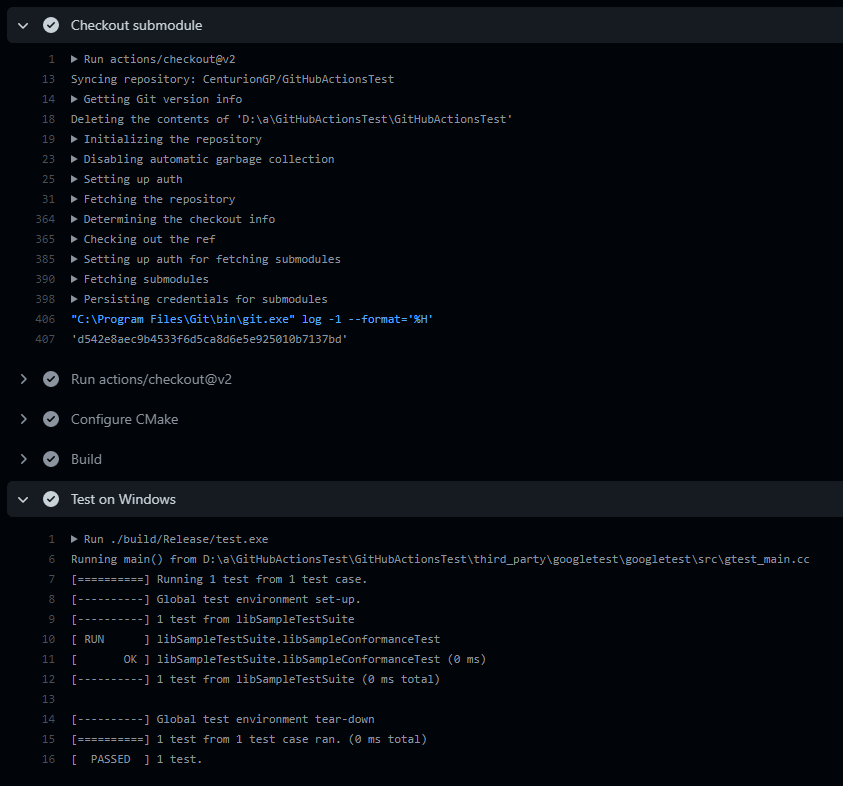
試しにpull_requestを作成しActionsのログを見てみると、うまく動作し、googletestのログが表示されている事がわかります。
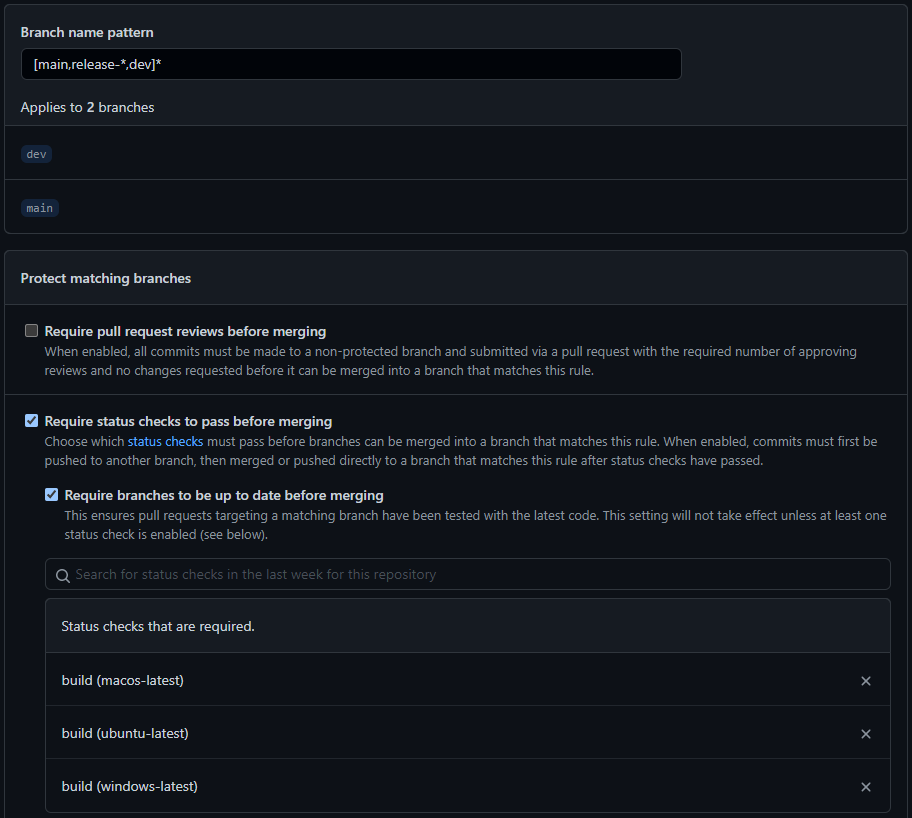
Branch Protectionの設定
mainブランチなどにpull_requestした時に自動でテストを実行して、successのときのみmergeを許可するように設定します。
複数のブランチを指定したい時には[main,release-*,dev]*のように記述します。
Require status checks...にチェックを入れ、テストしたいjob名を入力します。
Include administratorsにもチェックを入れておくとよいでしょう。
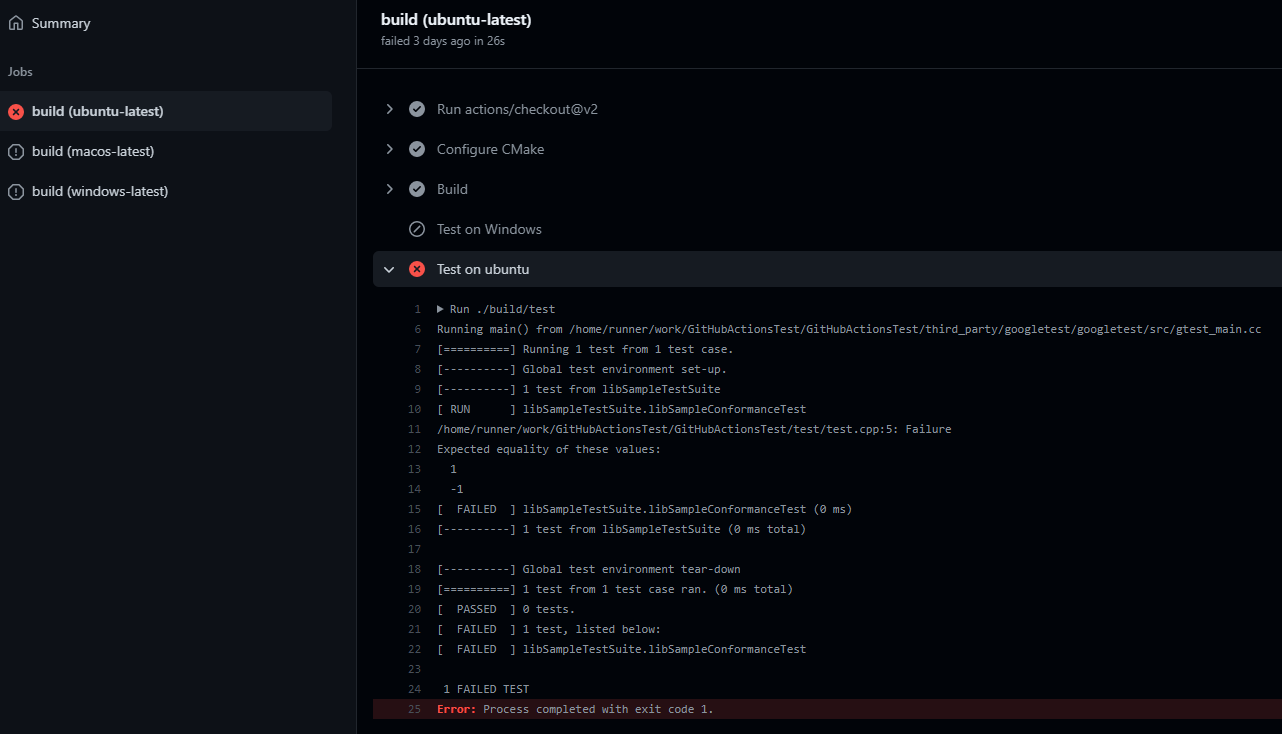
unitテストが失敗した時はjobが失敗しpull_requestボタンが押せなくなります。