シェーダの勉強の勉強中です。
自作ポストエフェクト作ってみました。
実装
Shader "Custom/SplitPixel" {
        Properties {
        _MainTex ("Source", 2D) = "white" {}
        _Size ("Size", int) = 30
    }
    SubShader {
        Pass{
            CGPROGRAM
            #pragma vertex vert_img
            #pragma fragment frag
            #include "UnityCG.cginc"

            struct v2f {
                float4 pos : SV_POSITION;
                float2 uv : TEXCOORD0;
            };

            sampler2D _MainTex;
            float _Size;

            fixed4 frag(v2f i) : SV_TARGET {
				float u = i.uv.x;
				float v = i.uv.y;
				float interval = 1.0 / _Size;
				int x = u / interval;
				int y = v / interval;
				u = (interval * x) + (interval * (x + 1)) - u;
				v = (interval * y) + (interval * (y + 1)) - v;
				return tex2D(_MainTex, float2(u, v));
            }
            ENDCG
        }
    }
    FallBack Off
}
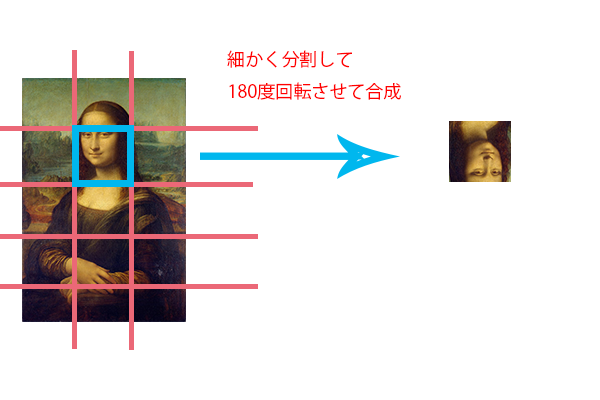
何をしているかというと画像を分割して180度回転させているだけです。
細かさは自分で設定できます。
イメージ画像
Instagramで見つけ、面白そうだったので実装してみた。
使い方
1.PostEffect.csをMainCameraに追加。
2.マテリアルを追加。
PostEffect.cs
using UnityEngine;
using System.Collections;

public class PostEffect : MonoBehaviour {

	public Material pixel;

	void OnRenderImage(RenderTexture src, RenderTexture dest)
	{
		Graphics.Blit (src, dest, pixel);
	}
}

GitHub
Shaderの勉強を始めたばかりなので、訂正箇所あればコメントください!