はじめに
Google Colaboratoryとは
機械学習をするときに便利なGoogle Colab(グーグルコラボ)があります。
Google Colabは、「色々可視化しながらPythonを書ける」+「実行環境を提供してくれる」Webサービスです(Jupyter Notebookベースになっています)
Google Colabでは高性能GPUが無料で使用できるので、機械学習に向いていて便利です。
面倒なことを解決しよう
そんなColabでも一点面倒なのが、外部ファイルの操作です。
例えばGoogle Driveに保存してあるデータを使用したいときがあります。
このためには、colab上のサーバにファイルを読み込む必要があり(colab上のファイルの操作はこちら)、colab特有の記述をする必要あります。
この文章を読めば、そんな外部ファイルの操作方法が一通りわかります。
操作方法チートシート
ローカルファイルの操作方法
google.colab.filesを用いて、ローカルファイルとやり取りすることができます。
この1行は必要
from google.colab import files
colab -> ローカル (書き込み)
# colab上でファイル作成
with open('sample.txt', 'w') as f:
  f.write('some content')
# Colab -> ローカル
files.download('sample.txt')
ローカル -> colab (読み込み)
files.upload()
Google Driveの操作方法
drive.google.com 上のファイルを操作する方法は3つあります。簡単な順に
- drive.mountを用いて、google driveをマウントする方法
- PyDriveを用いる方法
- Google Drive REST APIを用いる方法
です。(番号が大きい方が具体的な操作が可能です)
drive.mountを用いる方法
colab上にあるファイルとして読み書きができます(普段のPythonのファイル読み書きの文法と同じように扱うことができます)。
[ drive.mount()の引数 ] /My Drive/ がドライブのルートディレクトリになります。
たった2行でマウント可能(この2行は必要)
(認証方法がわからない人はこちら)
from google.colab import drive
drive.mount('/content/drive')
colab -> drive (書き込み)
# もしsampleフォルダがないと以下のファイル書き込みができないので、下準備をしている
import os
if not os.path.exists('/content/drive/My Drive/sample'):
  !mkdir /content/drive/My\ Drive/sample # IPythonでは!以降にコマンド操作が可能

# colab -> drive (書き込み)
with open('/content/drive/My Drive/sample/sample.txt', 'w') as f:
  for _ in range(0, 3):
    f.write('you can create a new file on google drive.\n')
colab -> drive (上書き)
with open('/content/drive/My Drive/sample/sample.txt', 'a') as f:
  f.write('you can append text.')
drive -> colab (読み込み)
with open('/content/drive/My Drive/sample/sample.txt', 'r') as f:
  print(f.read())
PyDriveを用いる方法
PyDriveでは読み書き以外に、削除・メタデータの操作・クエリを用いたファイル名のリスト化などができます。
認証してPyDriveのクライアントを作成(この10行は必要)
(認証方法がわからない人はこちら)
!pip install --upgrade --quiet PyDrive   # パッケージ管理システムpipを用いたPyDriveのインストール

from pydrive.auth import GoogleAuth
from pydrive.drive import GoogleDrive
from google.colab import auth
from oauth2client.client import GoogleCredentials
auth.authenticate_user()
gauth = GoogleAuth()
gauth.credentials = GoogleCredentials.get_application_default()
drive = GoogleDrive(gauth)
colab -> drive (書き込み)
file1 = drive.CreateFile({'title': 'pydrive_sample.txt'})   # GoogleDriveFileインスタンスの生成
file1.SetContentString('you can create a new file on google drive.')
file1.Upload()
drive -> colab (読み込み)
file2 = drive.CreateFile({'id': file1.get('id')})   # ファイル読み込みにはidが必要(google driveファイルのURLの末端部分)
print('Downloaded content:\n {}'.format(file2.GetContentString()))
メタデータ操作
( リファレンス から、メタデータの全てのキーを調べられる)
print(file2['title'])
print(file2['labels'])
print(file2['selfLink'])
ファイルの削除
file2.Trash()   # ゴミ箱へ
file2.UnTrash()   # 戻す
file2.Delete()   # 完全削除
フォルダ下にアップロード(少し複雑)
## フォルダ作成
folder = drive.CreateFile({
    'title': 'pydrive_sample',
    'mimeType': 'application/vnd.google-apps.folder'})
folder.Upload()

## ファイル配置
file3 = drive.CreateFile({
    'title': 'sample.txt',
    'parents': [{
        'kind': 'drive#fileLink',
        'id': folder['id']}]})   # フォルダidが必要
file3.SetContentString('this is a sample file in the pydrive_sample folder.')
file3.Upload()
ファイルのリスト化
(クエリの細かい文法は リファレンス から)
file_list = drive.ListFile({'q': "'root' in parents and trashed=false"}).GetList()
for file in file_list:
  print('title:{}, id:{}'.format(file['title'], file['id']))
Google Drive REST APIを用いる方法
PyDriveはGoogle Drive APIのラッパーなので、このAPIを用いるとPyDriveより具体的なことができます。
例えば、ファイルの変更を検知するなどができます。
(細かい仕様はリファレンスから)
認証してDrive APIクライアントを作成(この4行は必要)
from google.colab import auth
auth.authenticate_user()
from googleapiclient.discovery import build
drive_service = build('drive', 'v3')
colab -> drive(書き込み)
# colob上にデータ作成
with open('/tmp/api_sample.txt', 'w') as f:
  f.write('tihs is a sample file created by api.')

# ファイルアップロード
from googleapiclient.http import MediaFileUpload
file_metadata = {
    'name': 'api_sample.txt',
    'mimeType': 'text/plain'}
media = MediaFileUpload(
    '/tmp/api_sample.txt',
    mimetype='text/plain',
    resumable=True)
file = drive_service.files().create(
    body=file_metadata,
    media_body=media,
    fields='id').execute()
Google Spread Sheetsの操作方法
sheets.google.com上のファイルを操作できます。
認証をする(この7行は必要)
リンクをクリックして、出てきたコードをコピーしてフォームへ貼る
(認証方法がわからない人はこちら)
!pip install --upgrade --quiet gspread
from google.colab import auth
auth.authenticate_user()

import gspread
from oauth2client.client import GoogleCredentials
gc = gspread.authorize(GoogleCredentials.get_application_default())
colab -> sheets(書き込み・上書き)
# ファイル作成
sh = gc.create('sample spreadsheet')

# シート取得
worksheet = gc.open('sample spreadsheet').sheet1

# 単独セル更新
worksheet.update_acell('A1', 'sample')

# まとめてセル更新
cells = worksheet.range('A1:B8')
cells[0].value = 'column1'   # cells[0]: A1,  cells[1]: A2, cells[3]: B1, ...
cells[1].value = 'column2'
import random
for cell in cells[2:]:
  cell.value = random.randint(1, 10)
worksheet.update_cells(cells)
sheets -> colab(読み込み)
# シートからデータ取得
worksheet = gc.open('sample spreadsheet').sheet1

# 単独のセルを取得
v = worksheet.acell('A1').value
print(v)

# 二次元配列としてデータ取得
rows = worksheet.get_all_values()
print(rows)

# pandasパッケージを用いてデータフレーム作成
import pandas as pd
df = pd.DataFrame.from_records(rows)
補足
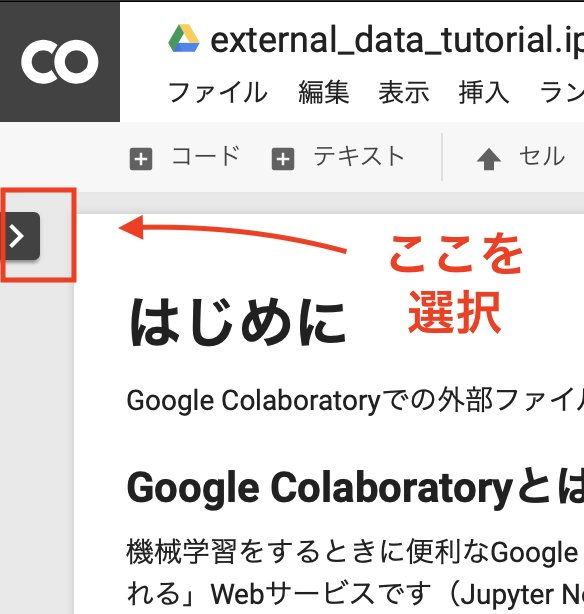
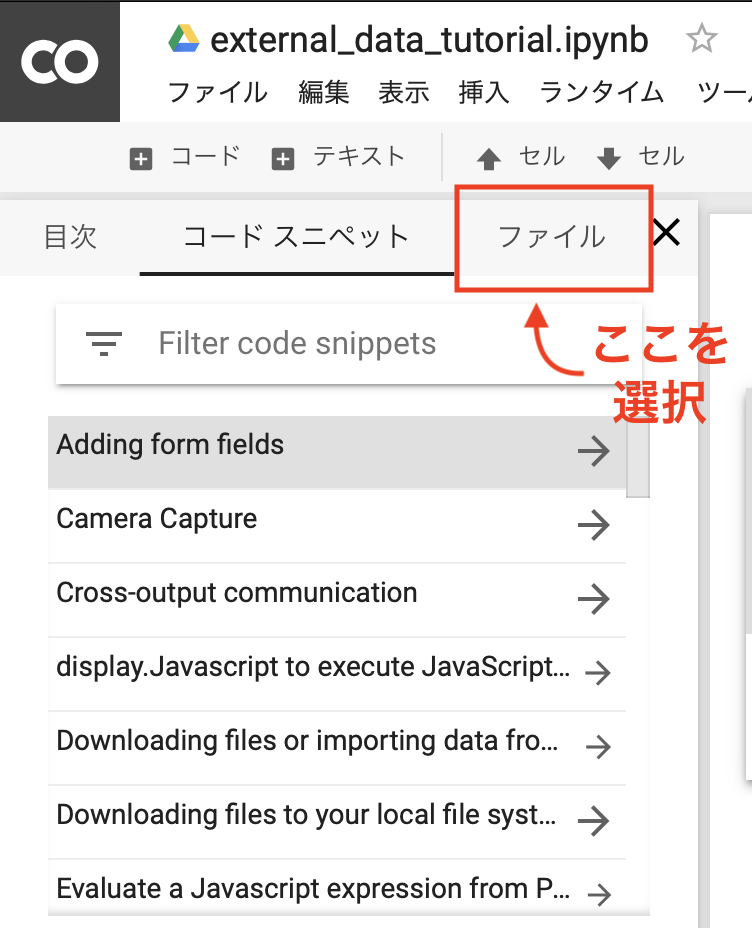
colab上のファイルの見るには
colab上にあがったファイルは、ブラウザの左側にある>マークをクリックして一番右のファイルをクリックするとGUIで見ることができます。
もちろんサーバにあげられているファイルなので、コマンドライン操作やosパッケージなどを用いて操作することができます。
認証方法
リンクをクリックする

スコープを許可する

コードをコピーする
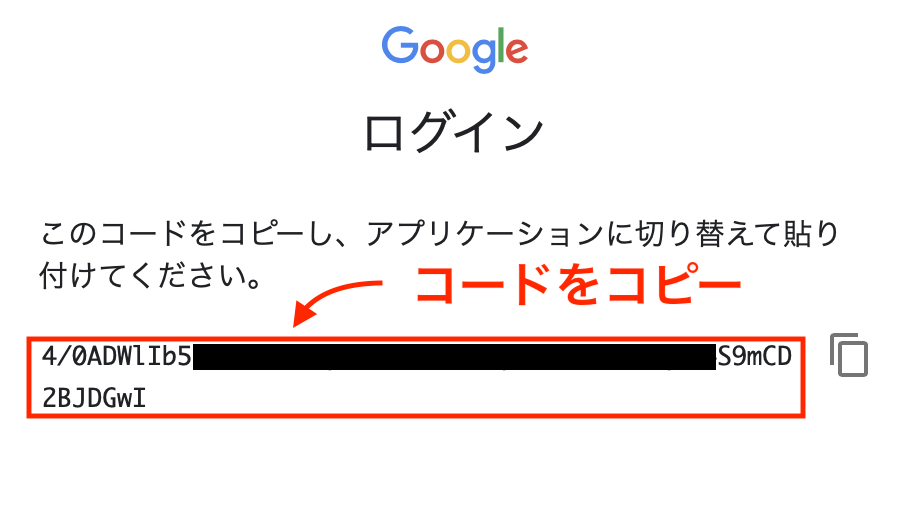
フォームに貼り付けて、エンターキーを押す
