はじめに
Nuxt.js Rails Dockerでプロジェクト進めてる時に
共通部分をcomponents化してメンテ性、可読性の向上を行なったのでその備忘録
共通部分をcomponent化するメリット
- 第一にまずコード量が減る
- 変更箇所が統一されメンテ性が向上する
- 使い回しができる
ゴール
今回はわかりやすくログインフォームで実装します
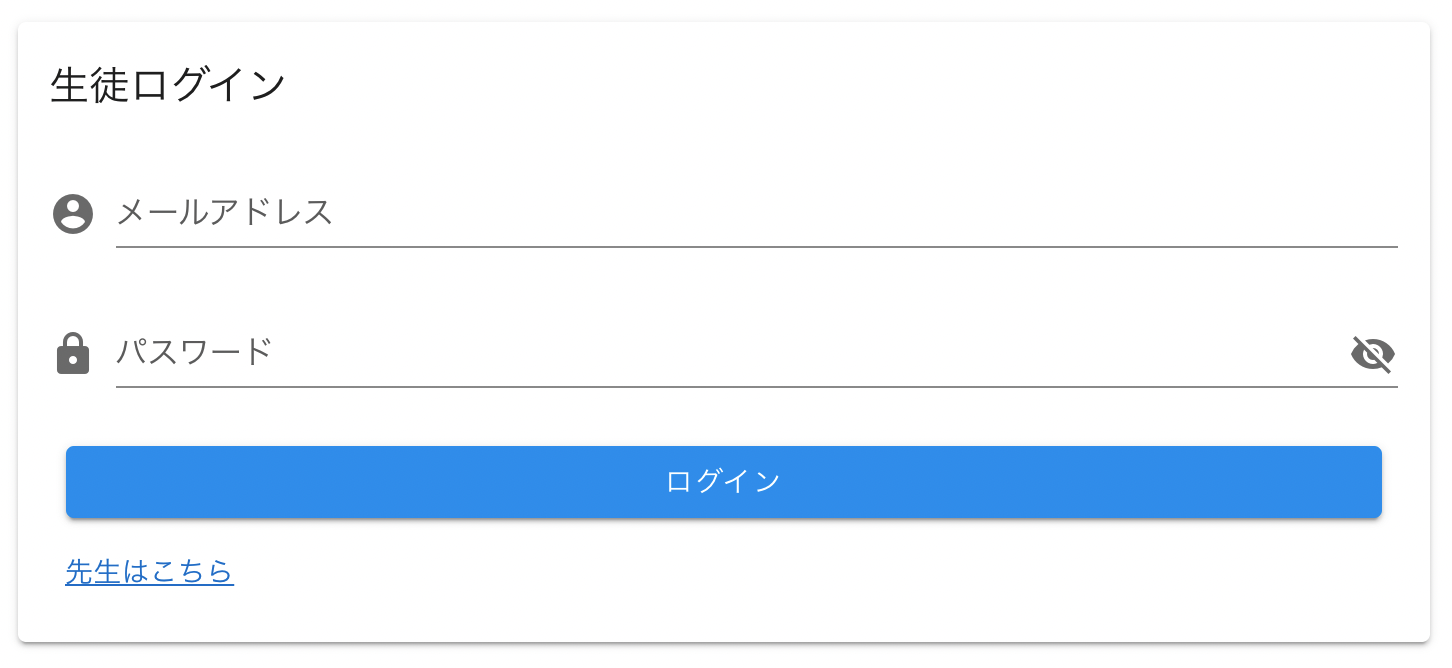
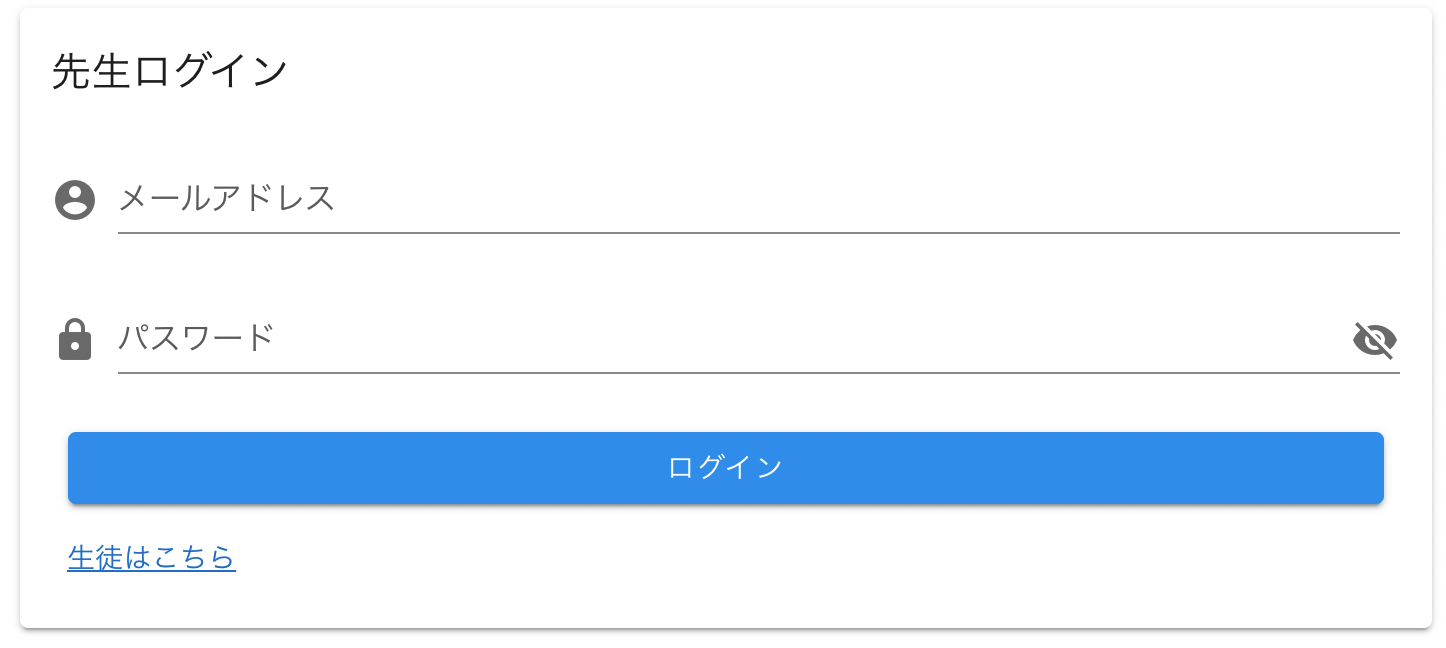
先生用のフォームと生徒用のフォームでわかれていると仮定します
(生徒用のフォーム)
(先生用のフォーム)
Propsでページごとに変更する箇所
【タイトル】 生徒ログイン ⇆ 先生ログイン
【リンク名前】 先生はこちら ⇆ 生徒はこちら
【リンクURL】 '/teacher' ⇆ '/student'
【ログインURL】 'api/v1/teacher/sign_in' ⇆ 'api/v1/student/sign_in'
今回はこの4つの項目を親ページからcomponentへ送って表示を変更させます
ログインフォーム実装
Nuxt.js
components/LoginFrom.vue
<template>
  <v-main>
    <v-container>
      <v-row justify="center" align="center">
        <v-col cols="10">
          <v-card>
            <v-card-title>
              {{ title }}
            </v-card-title>
            <v-card-text>
              <v-form>
                <v-text-field
                  v-model="login_info.email"
                  prepend-icon="mdi-account-circle"
                  label="メールアドレス"
                />
                <v-text-field
                  v-model="login_info.password"
                  :type="showPassword ? 'text' : 'password'"
                  :append-icon="showPassword ? 'mdi-eye' : 'mdi-eye-off'"
                  prepend-icon="mdi-lock"
                  label="パスワード"
                  @click:append="showPassword = !showPassword"
                />
              </v-form>
              <v-card-actions>
                <v-btn
                  block
                  color="info"
                >
                  ログイン
                </v-btn>
              </v-card-actions>
              <v-card-actions>
                <router-link :to="link">
                  {{ linkTitle }}
                </router-link>
              </v-card-actions>
            </v-card-text>
          </v-card>
        </v-col>
      </v-row>
    </v-container>
  </v-main>
</template>

<script>
export default {
  props: {
    title: {
      type: String,
      required: true
    },
    linkTitle: {
      type: String,
      required: true
    },
    link: {
      type: String,
      required: true
    },
    loginUrl: {
      type: String,
      required: true
    }
  },

  data () {
    return {
      showPassword: false,
      login_info: {
        email: '',
        password: ''
      }
    }
  }
}
</script>
pages/teacher_login.vue
<template>
  <LoginForm
    :title="title"
    :link-title="link_title"
    :link="link"
    :login-url="login_url"
  />
</template>

<script>
import LoginForm from '~/components/LoginForm.vue'

export default {
  components: {
    LoginForm
  },
  data () {
    return {
      title: '先生ログイン',
      link_title: '生徒はこちら',
      link: '/student_login',
      login_url: '/api/v1/teacher/sign_in'
    }
  }
}
</script>
pages/teacher_login.vue
<template>
  <LoginForm
    :title="title"
    :link-title="link_title"
    :link="link"
    :login-url="login_url"
  />
</template>

<script>
import LoginForm from '~/components/LoginForm.vue'

export default {
  components: {
    LoginForm
  },
  data () {
    return {
      title: '生徒ログイン',
      link_title: '先生はこちら',
      link: '/teacher_login',
      login_url: '/api/v1/student/sign_in'
    }
  }
}
</script>
おまけ
componentsへデータを送る時は
teacher_login.vue(抜粋)
:link-title=link_tile
といったようにケバブケースとスネイクケースで書いている
又、受け取る時は
LoginForm.vue(抜粋)
 linkTitle: {
      type: String,
      required: true
    },
とキャメルケースで受け取りを行っている
JavaScriptでは【キャメルケース】
HTMLでは【ケバブケース】など
表記表現に違いがある為このような書き方になっている
ESLintなど入れとけば警告で教えてくれるからいれるべき
ではお疲れ様でした