はじめに
本記事では、Oracle CloudのAutonomous JSON Database(以下AJD)に、
OCIのComputeインスタンス上のNode.jsアプリケーションから接続する方法を紹介します。
前提条件
Autonomous JSON DatabaseのDatabaseバージョン:19.5.0.0.0
ComputeインスタンスのOS:Oracle Linux 7.9
Oracle Instant Clientのインストール
まずはComputeインスタンスに、Oracle Instant Clientをインストールします。
OCIのOracle LinuxはyumリポジトリからOracle Instant Clientをインストールすることが可能ですが、
今回は最新版のOracle Instant Client (2021/5/28時点ではInstant Client21.1) をインストールしたいため、以下URLから各種zipファイルをダウンロードします。
https://www.oracle.com/jp/database/technologies/instant-client/linux-x86-64-downloads.html
- instantclient-basic-linux.x64-18.3.0.0.0dbru.zip
- instantclient-sqlplus-linux.x64-18.3.0.0.0dbru.zip
任意のディレクトリ(今回は/home/opc/oracle )にダウンロードしたzipファイルを置きます。
$ pwd
/home/opc/oracle

$ ls -la
total 78320
drwxrwxr-x.  2 opc opc     4096 May 20 14:43 .
drwx------. 13 opc opc     4096 May 20 14:43 ..
-rw-r--r--.  1 opc opc 79250994 May 20 14:01 instantclient-basic-linux.x64-21.1.0.0.0.zip
-rw-r--r--.  1 opc opc   936169 May 20 14:01 instantclient-sqlplus-linux.x64-21.1.0.0.0.zip
zipファイルを展開し、SQL*Plusのバイナリファイルと共有ライブラリのPATHを通します。
$ unzip instantclient-basic-linux.x64-21.1.0.0.0.zip
$ unzip instantclient-sqlplus-linux.x64-21.1.0.0.0.zip

$ ls -la
total 78324
drwxrwxr-x.  3 opc opc     4096 May 20 14:45 .
drwx------. 13 opc opc     4096 May 20 14:43 ..
drwxrwxr-x.  3 opc opc     4096 May 20 14:45 instantclient_21_1
-rw-r--r--.  1 opc opc 79250994 May 20 14:01 instantclient-basic-linux.x64-21.1.0.0.0.zip
-rw-r--r--.  1 opc opc   936169 May 20 14:01 instantclient-sqlplus-linux.x64-21.1.0.0.0.zip

$ export PATH=/home/opc/oracle/instantclient_21_1:$PATH
$ export LD_LIBRARY_PATH=/home/opc/oracle/instantclient_21_1:$LD_LIBRARY_PATH
Walletのダウンロードと接続確認
ドキュメントを参考に、AJDを作成します。
https://docs.oracle.com/cd/E83857_01/paas/autonomous-json-database/ajdug/autonomous-provision.html#GUID-0B230036-0A05-4CA3-AF9D-97A255AE0C08
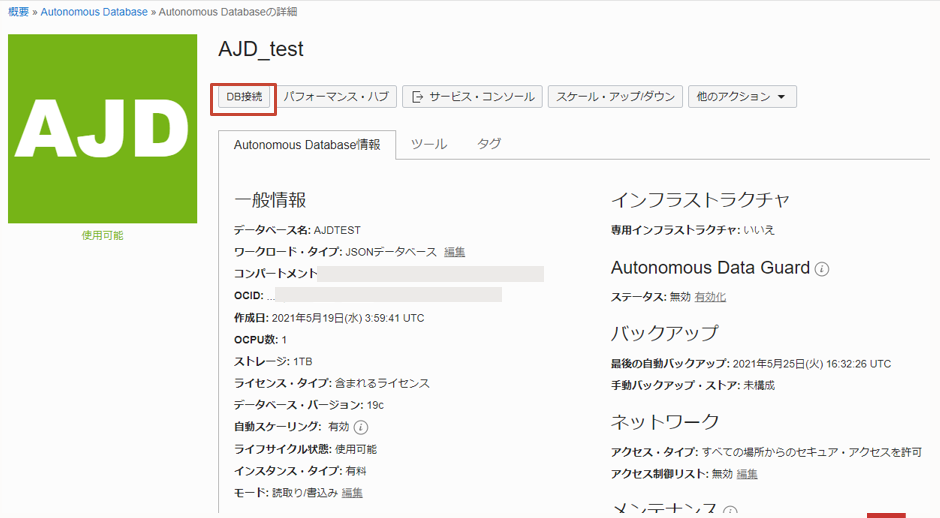
作成したAJDのWalletファイルをダウンロードします。
AJDの詳細画面の「DB接続」をクリックします。
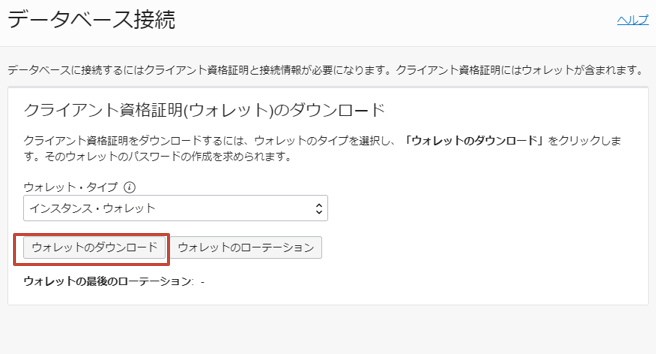
「ウォレットのダウンロード」をクリックします。
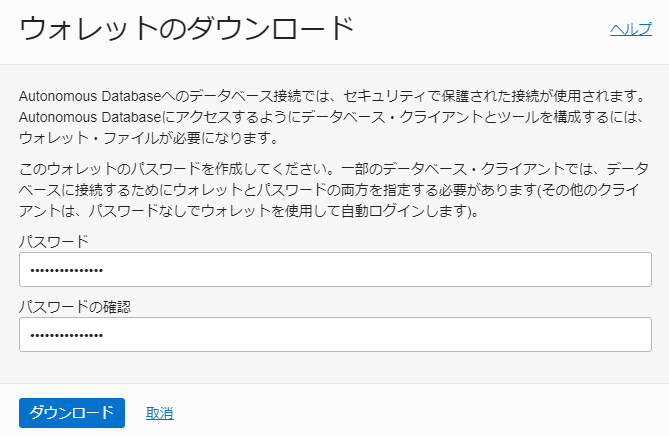
ウォレットのパスワードを入力し、「ダウンロード」をクリックします。
ダウンロードしたWalletファイルを、/home/opc/wallet上に展開します。
$ pwd
/home/opc/wallet

$ ls -la
total 24
drwxrwxr-x. 2 opc opc    32 May 20 08:12 .
drwx------. 8 opc opc  4096 May 20 08:12 ..
-rw-r--r--. 1 opc opc 20366 May 20 07:26 Wallet_AJDTEST.zip

//Walletファイルをunzip
$ unzip Wallet_AJDTEST.zip

$ ls -la
total 68
drwxrwxr-x. 2 opc opc  4096 May 20 07:35 .
drwx------. 7 opc opc  4096 May 20 07:33 ..
-rw-rw-r--. 1 opc opc  6661 May 20 07:26 cwallet.sso
-rw-rw-r--. 1 opc opc  6616 May 20 07:26 ewallet.p12
-rw-rw-r--. 1 opc opc  3242 May 20 07:26 keystore.jks
-rw-rw-r--. 1 opc opc   691 May 20 07:26 ojdbc.properties
-rw-rw-r--. 1 opc opc   317 May 20 07:26 README
-rw-rw-r--. 1 opc opc   114 May 20 07:26 sqlnet.ora
-rw-rw-r--. 1 opc opc  1796 May 20 07:26 tnsnames.ora
-rw-rw-r--. 1 opc opc  3335 May 20 07:26 truststore.jks
-rw-r--r--. 1 opc opc 20366 May 20 07:26 Wallet_AJDTEST.zip
sqlnet.oraのWALLET_LOCATIONのDIRECTORYをWalletファイルの展開先(/home/opc/wallet)に変更します。
WALLET_LOCATION = (SOURCE = (METHOD = file) (METHOD_DATA = (DIRECTORY="/home/opc/wallet")))
SSL_SERVER_DN_MATCH=yes
TNS_ADMIN環境変数に/home/opc/walletをセットします。
$ export TNS_ADMIN=/home/opc/wallet
tnsnames.oraで接続サービス名を確認し、SQL*PlusでAJDに接続確認を行います。
$ sqlplus admin/'password'@ajdtest_low

SQL*Plus: Release 21.0.0.0.0 - Production on Thu May 20 15:00:59 2021
Version 21.1.0.0.0

Copyright (c) 1982, 2020, Oracle.  All rights reserved.

Last Successful login time: Thu May 20 2021 14:48:28 +00:00

Connected to:
Oracle Database 19c Enterprise Edition Release 19.0.0.0.0 - Production
Version 19.5.0.0.0

SQL>
無事にAJDに接続することができました。
アプリケーション用ユーザーの作成
SQL*PlusでAJDに接続し、Node.jsアプリケーションから接続するユーザーを作成します。
SQL> CREATE USER appuser IDENTIFIED BY "パスワード" DEFAULT TABLESPACE data TEMPORARY TABLESPACE temp account unlock quota unlimited on data;

User created.
作成したappuserに下記の権限を付与します。
grant  connect
     , resource
     , create session
     , create table
     , create procedure
     , create sequence
     , create trigger
     , create view
     , create synonym
     , alter  session
     , create type
     , soda_app
     to appuser;
appuserでデータベースへの接続確認を行います。
$ sqlplus appuser@ajdtest_low

SQL*Plus: Release 18.0.0.0.0 - Production on Thu May 20 08:24:03 2021
Version 18.3.0.0.0

Copyright (c) 1982, 2018, Oracle.  All rights reserved.

Enter password:

Connected to:
Oracle Database 19c Enterprise Edition Release 19.0.0.0.0 - Production
Version 19.5.0.0.0

SQL> show user;
USER is "APPUSER"
Node.jsアプリケーションからAJDへの接続
Node.jsの公式サイトで紹介されている、NodeSourceのリポジトリを追加して、yumでインストールをします。
//バージョンはLTS (2021/5/20 時点ではv14.17.0) を指定
$ curl -fsSL https://rpm.nodesource.com/setup_lts.x | sudo bash -
$ sudo yum install -y nodejs

//バージョンを確認
$ node -v
v14.17.0
アプリケーション用のディレクトリを作成し、npm initでpackage.jsonを作成します。
$ mkdir app
$ cd app
$ npm init
This utility will walk you through creating a package.json file.
It only covers the most common items, and tries to guess sensible defaults.

See `npm help init` for definitive documentation on these fields
and exactly what they do.

Use `npm install <pkg>` afterwards to install a package and
save it as a dependency in the package.json file.

Press ^C at any time to quit.
package name: (app)
version: (1.0.0)
description:
entry point: (index.js)
test command:
git repository:
keywords:
author:
license: (ISC)
About to write to /home/opc/app/package.json:

{
  "name": "app",
  "version": "1.0.0",
  "description": "",
  "main": "index.js",
  "scripts": {
    "test": "echo \"Error: no test specified\" && exit 1"
  },
  "author": "",
  "license": "ISC"
}


Is this OK? (yes)

$ ls -la
total 8
drwxrwxr-x.  2 opc opc   26 May 20 09:25 .
drwx------. 11 opc opc 4096 May 20 09:25 ..
-rw-rw-r--.  1 opc opc  199 May 20 09:25 package.json
アプリケーションディレクトリに移動し、node-oracledbライブラリをインストールします。
$ cd app
$ npm install oracledb
コードを書いていきます。下記の記事のサンプルコードを参考にしました。
https://blogs.oracle.com/opal/writing-nodejs-apps-for-oracle-autonomous-json-database
const oracledb = require('oracledb');

// The general recommendation for simple SODA usage is to enable autocommit
oracledb.autoCommit = true;

async function run() {
    let connection;

    try {
        connection = await oracledb.getConnection(
            {
                user: 'appuser',
                password: process.env.MYPW,
                connectString: 'ajdtest_low' //AJDの接続サービス名
            });

        // SODAオブジェクトを作成
        const soda = connection.getSodaDatabase();

        // SODA Collectionの作成
        collection = await soda.createCollection("mycollection");

        // ドキュメントをInsert
        content = { name: "Matilda", address: { city: "Melbourne" } };
        doc = await collection.insertOneAndGet(content);
        const key = doc.key;
        console.log("The key of the new SODA document is: ", key);

        // ドキュメントの取得
        doc = await collection.find().fetchArraySize(0).key(key).getOne(); // A SodaDocument
        content = doc.getContent();                                        // A JavaScript object
        console.log(content);

    } catch (err) {
        console.error(err);
    } finally {
        if (connection) {
            try {
                await connection.close();
            } catch (err) {
                console.error(err);
            }
        }
    }
}

run();
AJDのアプリケーションユーザのパスワードを環境変数MYPWにセットします。
$ export MYPW="パスワードを入力"
test.jsを実行します。
$ node test.js
The key of the new SODA document is:  214C0B27FE324F32BF7C871BDB6EA404
{ name: 'Matilda', address: { city: 'Melbourne' } }
無事にNode.jsからAJDに接続し、データを投入・取得することができました。
参考リンク
https://blogs.oracle.com/opal/writing-nodejs-apps-for-oracle-autonomous-json-database
https://oracle.github.io/node-oracledb/doc/api.html#sodadocgetcontent
https://docs.oracle.com/cd/E83857_01/paas/autonomous-json-database/ajdug/autonomous-provision.html#GUID-0B230036-0A05-4CA3-AF9D-97A255AE0C08