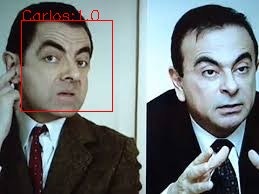
はじめに
日産自動車の元会長、カルロス・ゴーン氏が保釈条件を破ってレバノンに渡航したニュースが話題です。
ずっと前から、思っていたのですが、Mr.ビーンと似てますよね・・・
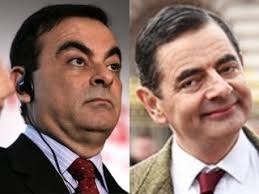
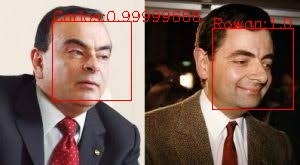
左:カルロス・ゴーン
右:Mr.ビーン(Rowan Atkinson)
年末年始で休みだったので、ちょっとした分類器をニューラルネットワークを使って作ってみました。
ググれば2人の画像はたくさん出てくるのでCNNでも良かったのですが、
今回は別のアプローチとして、顔のランドマークの位置を元に分類を行いたいと思います。
コーディングは雑です、予めご了承ください。
GitHubにソースコードと使った画像データをあげてます。
face_identification
環境
- Ubuntu 16.04
- Python 2.7
- Keras 1.14.0
- OpenCV 3.4.2
処理の流れ
- OpenCVのcascadeを使って顔検出
- 検出した顔の領域を元に、dlibを使って68点のランドマークを推定
- 68点の位置を分類器に入力
- 出力が0ならカルロス、1ならMr.ビーン
データセットの作成
カルロスとビーンの顔写真をそれぞれ10枚ずつ用意します。
20枚だけだと心許ないので、それぞれの画像をリサイズして水増しします。
顔認識にはopencvのcascade、ランドマーク推定にはdlibを使います。
※ランドマーク推定はこちらの記事を参考にさせていただきました。(PythonでOpenCVの顔認識を試してみた)
# !/usr/bin/env python
# coding:utf-8
import cv2
import dlib
import numpy as np

cascade_path = "~/face_identification/model/haarcascade_frontalface_alt.xml"
cascade = cv2.CascadeClassifier(cascade_path)

model_path = "~/face_identification/model/shape_predictor_68_face_landmarks.dat"
predictor = dlib.shape_predictor(model_path)
detector = dlib.get_frontal_face_detector()

image_file_dir = "~/face_identification/images/carlos/"
# image_file_dir = "~/face_identification/images/rowan/"

save_file_path = "~/face_identification/dataset/carlos.csv"
# save_file_path = "~/face_identification/dataset/rowan.csv"

face_landmarks = []
for n in range(10):
	#image_file_name = "carlos"+str(n)+".jpeg"
	image_file_name = "rowan"+str(n)+".jpeg"

	raw_img = cv2.imread(image_file_dir+image_file_name)
	original_width, original_height = raw_img.shape[:2]
	multiple_list = [0.5, 0.75, 1.0, 1.25, 1.5, 1.75, 2.0]
	for m in multiple_list:
		size = (int(original_height*m), int(original_width*m))
		img = cv2.resize(raw_img, size)

		gray_img = cv2.cvtColor(img, cv2.COLOR_RGB2GRAY)
		faces = cascade.detectMultiScale(gray_img)

		if len(faces) != 0:
			for(x, y, width, height) in faces:
				cv2.rectangle(img, (x, y), (x+width, y+height), (0, 0, 255), 1)
				rects = detector(gray_img, 1)
				landmarks = []
				for rect in rects:
					landmarks.append(np.array([[p.x, p.y] for p in predictor(gray_img, rect).parts()]))

				for landmark in landmarks:
					face_landmark = []
					for i in range(len(landmark)):
						cv2.drawMarker(img, (landmark[i][0], landmark[i][1]), (21, 255, 12))
                                                #座標の位置を正規化				landmark_x = (landmark[i][0]-x)*100.00/width
						landmark_y = (landmark[i][1]-y)*100.00/height
						face_landmark.append(landmark_x)
						face_landmark.append(landmark_y)
					face_landmarks.append(np.array(face_landmark).flatten())


		cv2.imshow("viewer", img)
		key = cv2.waitKey(100)

print "finish"
np_dataset = np.array(face_landmarks)
np.savetxt(save_file_path, np_dataset)
カルロスとゴーン、それぞれの顔のランドマークをcsvファイルに出力します。
(dataset_generator.pyのコメントアウトの部分を入れ替えて2回実行してください。)

顔のランドマークは68点取れます。
各点のx,y座標を順に配列に格納しています(したがってひとつの顔から取れる値は68×2=136個)
また、顔のサイズによって座標の値が大きく変わるので、正規化しています。
ココらへんの理解はまだ微妙です。(いい方法があれば教えてください)
ネットワークの構成
Kerasでシンプルなfeed forward型のニューラルネットワークを作ります。
中間層が3つの簡単な構成です。
# !/usr/bin/env python
# coding:utf-8
from keras.models import Sequential
from keras.layers import Activation, Dense, Dropout

class DNNModel():
    def __init__(self):
        self.model = Sequential()
        self.model.add(Dense(1024, input_dim=136))
        self.model.add(Activation('relu'))
        self.model.add(Dropout(0.1))

        self.model.add(Dense(512))
        self.model.add(Activation('relu'))
        self.model.add(Dropout(0.1))

        self.model.add(Dense(256))
        self.model.add(Activation('relu'))
        self.model.add(Dropout(0.1))

        self.model.add(Dense(2))#正解ラベルの数に合わせる
        self.model.add(Activation('softmax'))
学習
# !/usr/bin/env python
# coding:utf-8
import numpy as np
import keras

from network_model import DNNModel
from keras.optimizers import RMSprop, SGD, Adam
from keras.utils import to_categorical
from keras.utils import np_utils

carlos_data_path = "~/face_identification/dataset/carlos.csv"
rowan_data_path = "~/face_identification/dataset/rowan.csv"

weight_file_path = "~/face_identification/model/weight.hdf5"

landmarks = []
labels = []

with open(carlos_data_path, "r") as f:
	carlos_lines = f.read().split("\n")
	f.close()

with open(rowan_data_path, "r") as f:
	rowan_lines = f.read().split("\n")
	f.close()

for i in range(len(carlos_lines)-1):
	carlos_line = carlos_lines[i].split(" ")
	landmarks.append(np.array(carlos_line).flatten())
	labels.append(0) #カルロスは0

for i in range(len(rowan_lines)-1):
	rowan_line = rowan_lines[i].split(" ")
	landmarks.append(np.array(rowan_line).flatten())
	labels.append(1) #Mr.ビーンは1

landmarks = np.asarray(landmarks).astype("float32")
labels = np_utils.to_categorical(labels, 2)

model = DNNModel().model
model.summary()
model.compile(loss='binary_crossentropy', optimizer=Adam(lr=0.0001), metrics=['accuracy'])

history = model.fit(landmarks, labels,
    batch_size=64,
    epochs=3000)

model.save_weights(weight_file_path)
print "model was saved."
学習は5分もかからずに終わると思います。
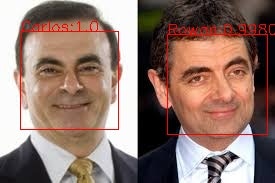
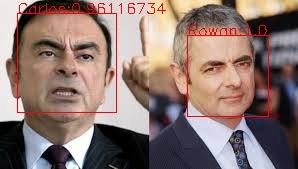
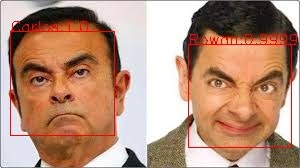
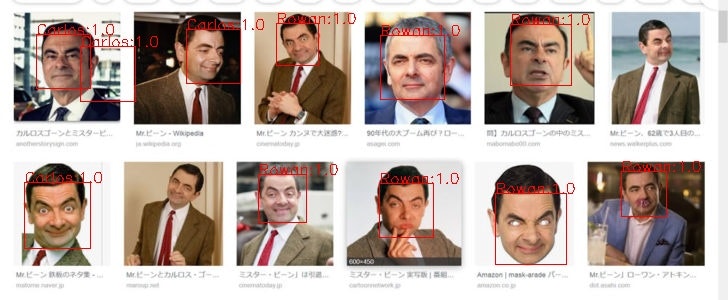
結果
# !/usr/bin/env python
# coding:utf-8
import cv2
import dlib
import numpy as np
import tensorflow as tf

from network_model import DNNModel

cascade_path = "~/face_identification/model/haarcascade_frontalface_alt.xml"
cascade = cv2.CascadeClassifier(cascade_path)

model_path = "~/face_identification/model/shape_predictor_68_face_landmarks.dat"
predictor = dlib.shape_predictor(model_path)
detector = dlib.get_frontal_face_detector()

trained_model_path = "~/face_identification/model/weight.hdf5"
model = DNNModel().model
model.load_weights(trained_model_path)
graph = tf.get_default_graph()

test_image_path = "~/face_identification/images/test.jpeg"
result_image_path = "~/face_identification/images/result.jpeg"

img = cv2.imread(test_image_path)
gray_img = cv2.cvtColor(img, cv2.COLOR_RGB2GRAY)
faces = cascade.detectMultiScale(gray_img, minSize=(30, 30))

if len(faces) != 0:
	for(x, y, width, height) in faces:
		cv2.rectangle(img, (x, y), (x+width, y+height), (0, 0, 255), 1)
		rects = detector(gray_img, 1)
		landmarks = []
		for rect in rects:
			landmarks.append(np.array([[p.x, p.y] for p in predictor(gray_img, rect).parts()]))

		for landmark in landmarks:
			input_data = []
			face_landmark = []
			for i in range(len(landmark)):
				landmark_x = (landmark[i][0]-x)*100.00/width
				landmark_y = (landmark[i][1]-y)*100.00/height
				face_landmark.append(landmark_x)
				face_landmark.append(landmark_y)

			face_landmark = np.array(face_landmark).flatten()
			input_data.append(face_landmark)
			with graph.as_default():
				pred = model.predict(np.array(input_data))

			result_idx = np.argmax(pred[0])
			if result_idx == 0:
				text = "Carlos:" + str(pred[0][result_idx])
			else:
				text = "Rowan:" + str(pred[0][result_idx])

		#文字の書き込み
		cv2.putText(img, text, (x, y), cv2.FONT_HERSHEY_SIMPLEX, 0.5,(0,0,255))


# cv2.imshow("viewer", img)
cv2.imwrite(result_image_path, img)
終わりに
カルロス・ゴーンは手強い。
