はじめに
この記事ではinteractions.pyというモジュールを使用してDiscord Botを作りたい人向けです。
#04ではEmbedについて解説していきたいと思います。
Embedを作る
では実際に作っていきましょう。
embed=interactions.Embed(title="Title", description="Description", color=0xfdc700)
embed.add_field(name="テスト1", value="Test1", inline=True)
embed.add_field(name="テスト2", value="Test2", inline=True)
embed.add_field(name="テスト3", value="Test3", inline=True)
await ctx.send(embeds=embed)
こちらがEmbedのプログラムですが、このプログラムをいちいち書いたりするのはめんどくさいですよね?
そんな人には「Discord Embed Generator」です。
こちらのwebサイトでは簡単にEmbedが作れます。では実際に作っていきましょう。
Webサイトを使って作る
Webサイトを開くとこの様な画面が出てきます。
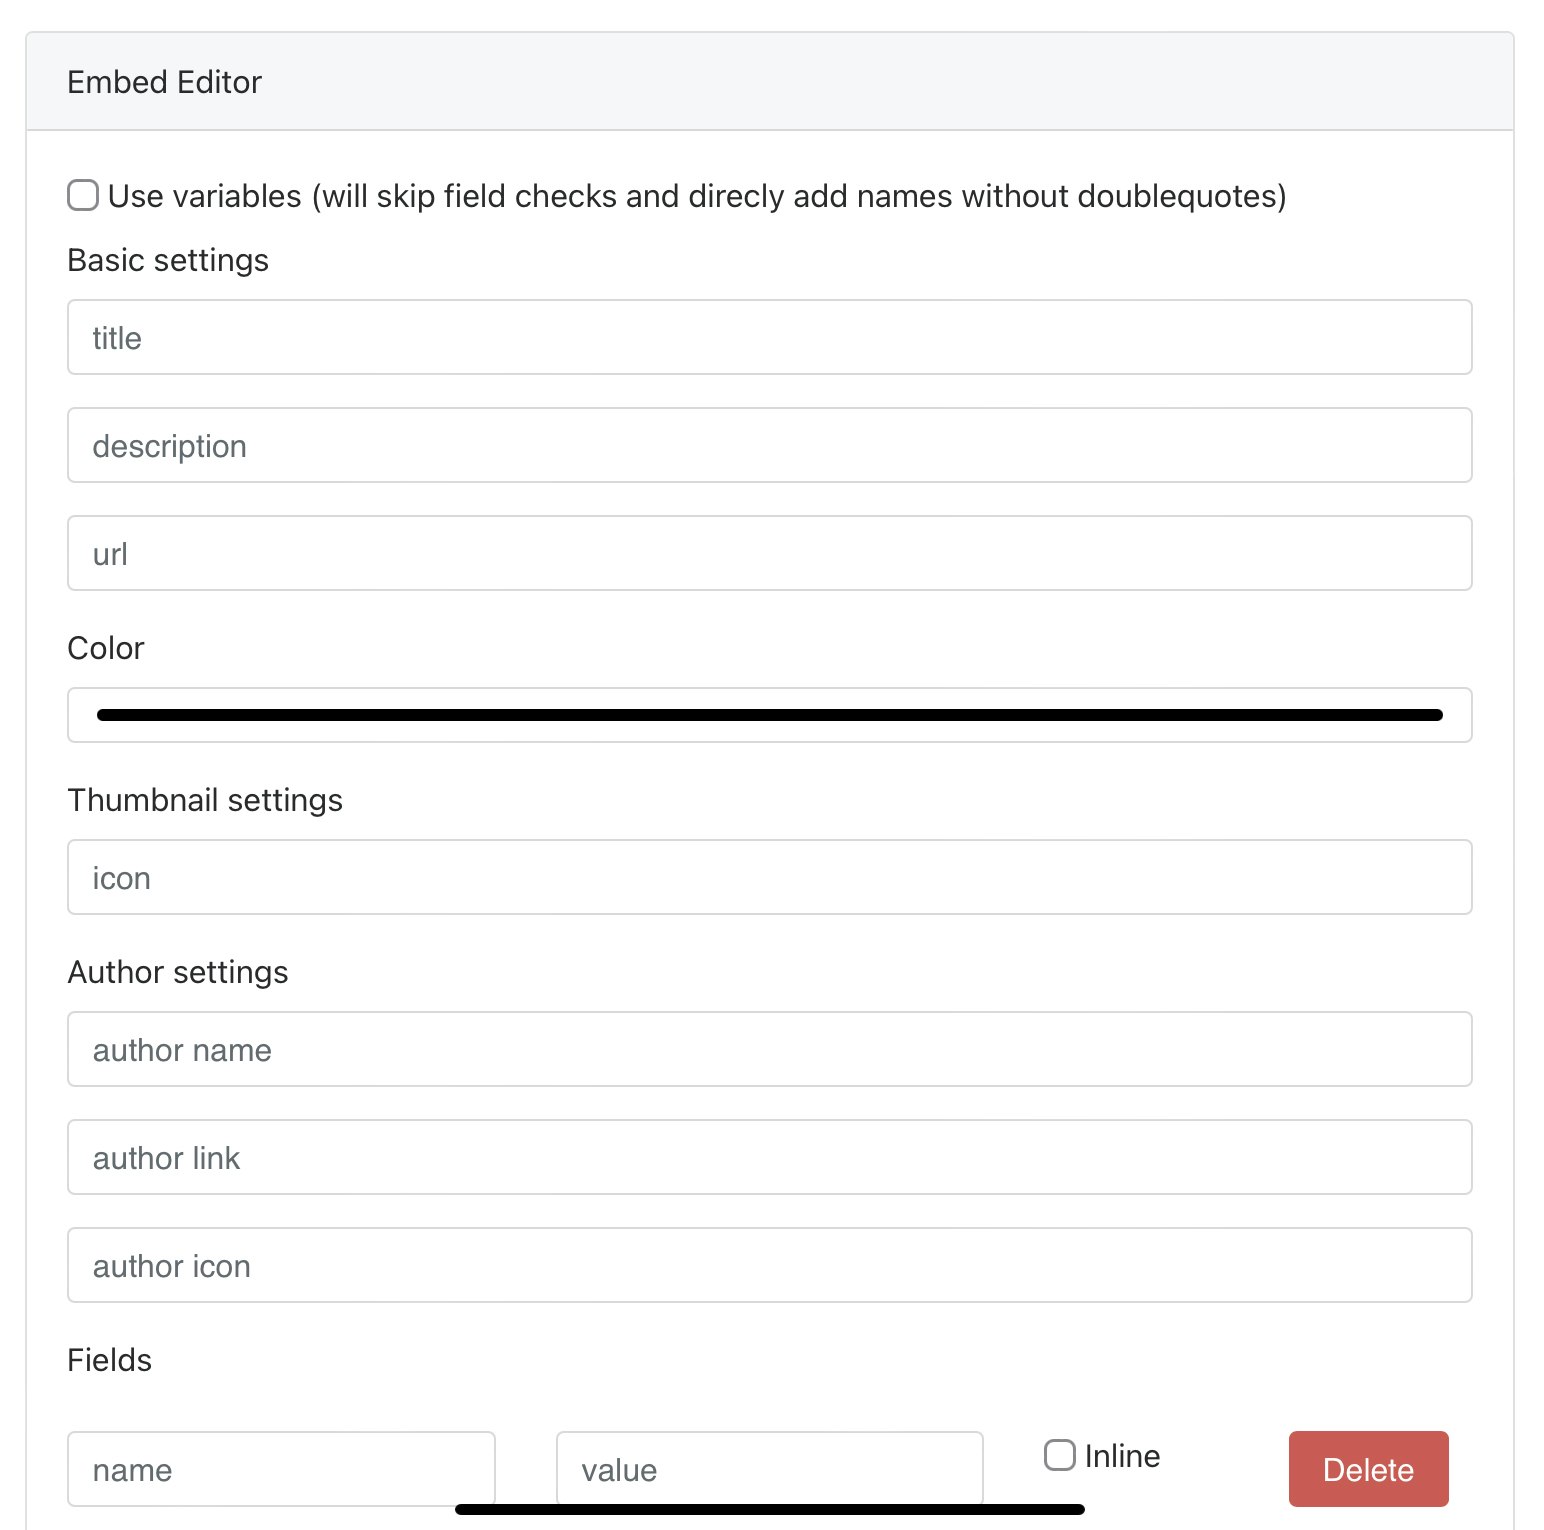
使い方はとっても簡単で、自分の追加したい項目をそのまま書き込むだけです。
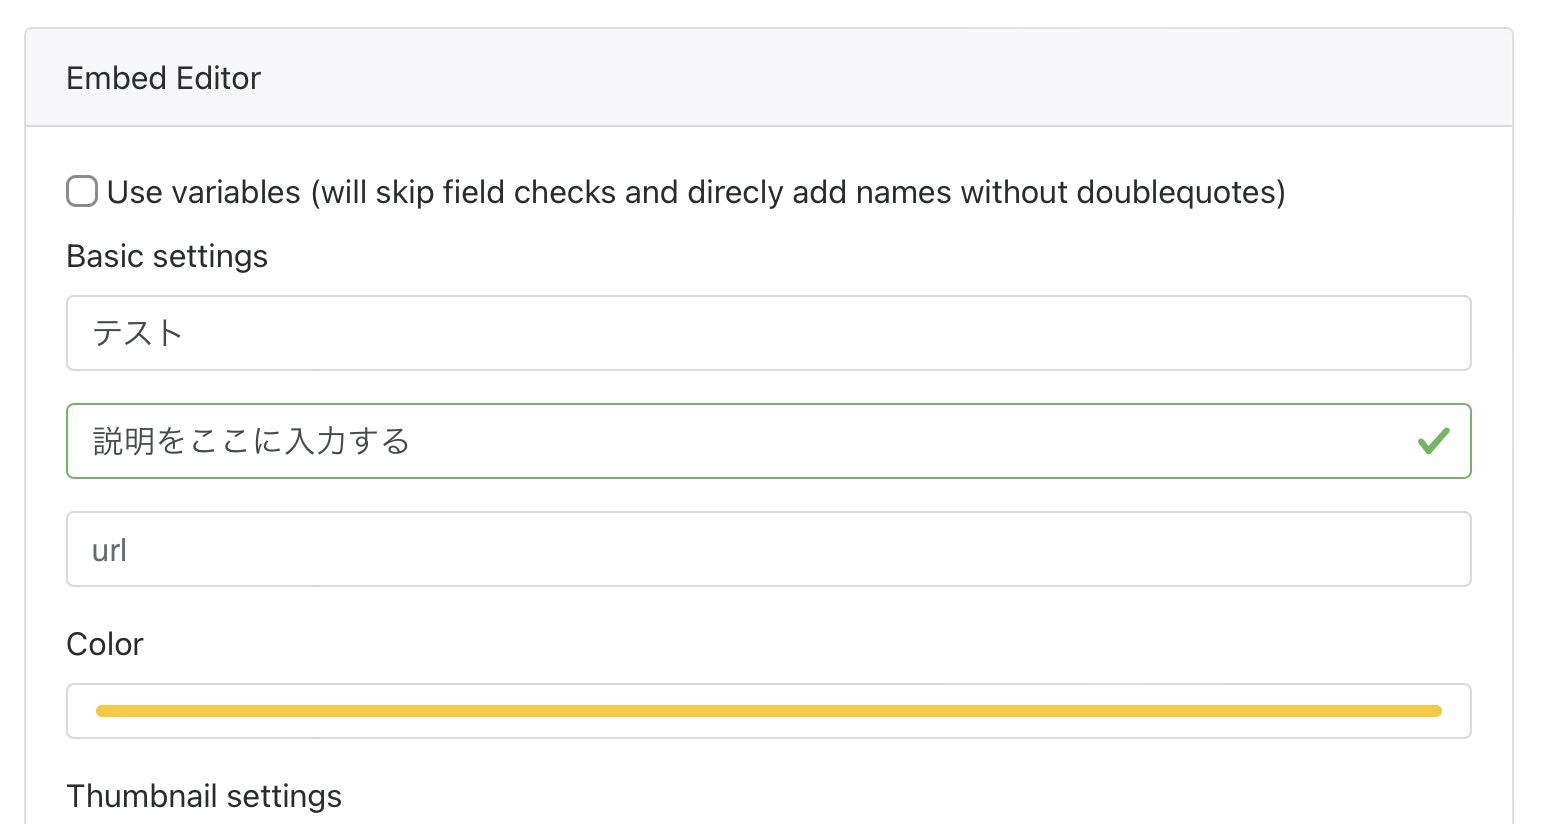
試しにこんな感じにしてみました。下の方に行くとプログラムがあるのでそれをコピペして貼り付けましょう。
embed=discord.Embed(title="テスト", description="説明をここに入力する", color=0xfdc700)
await ctx.send(embed=embed)
自分はこの様な感じになりましたが、このままではまだ動きません。
動く様にするには embed=discord... の部分を embed=interactions... に変え、 embed=embed を embeds=embed に変えれば動きます。
embed=interactions.Embed(title="テスト", description="説明をここに入力する", color=0xfdc700)
await ctx.send(embeds=embed)
これでやっと動きます。f5を押して実行してみましょう。
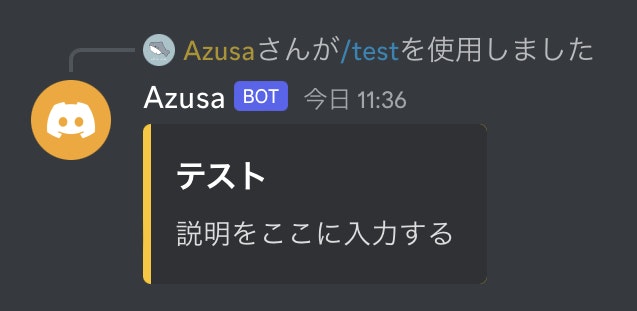
このようにEmbedが送信されたら完成です。お疲れ様でした。
最後に
今回はembedについて解説しました。
次回はSlashCommandの応用などについて解説していきたいと思います。
もし分からないところがあれば Azusa#5812 に気軽にDMしてください。
Discordサーバー
この度、bot開発者が話し合えるようなDiscordサーバーを開設しました!
ぜひ見に来てください!