Face APIとは
Microsoftが提供するAPIで、顔画像から年齢・性別・感情といった特徴や顔認証といった機能を持っています。
デモはこちら
今回はVisual Studioを使って、デモのようなFace APIを活用したデスクトップアプリを開発します。
参考にするサンプルプログラム
Face APIのAPIキーを取得(AzurePortalでの作業)
1.ポータルにアクセスし、上の検索窓にFaceと入力してでてきたMarketplaceのFaceをクリック。

2.必要な項目を入力して[作成]。価格レベルはF0だと無料。S0だと有料になります。
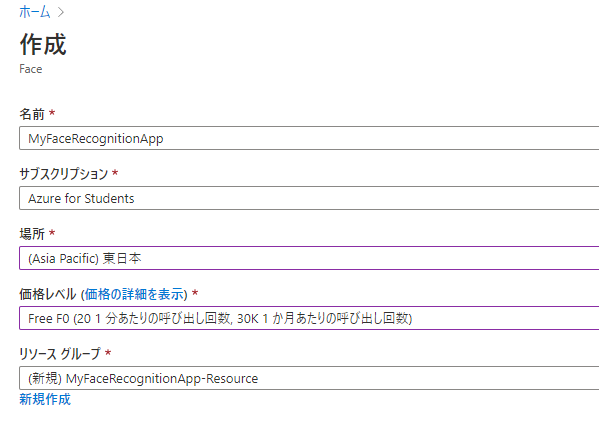
3.デプロイが完了したら、検索窓に名前を検索したり、すべてのリソースから作成した項目をクリックし、APIキーとエンドポイントをメモ。(昔はエンドポイントが場所ごとに異なってたんですが、今はエンドポイントの項目をそのまま使うだけでいいみたいです。)

Visual Studioの前準備
Visual StudioはAzureを用いた開発のためのツールやSDKを用意しています。準備としてそれらをインストールしておきます。
Visual Studio Installerの詳細→変更から、Azureの開発にチェックを入れて[変更]をクリックしてインストールします。

アプリを作る
1.プロジェクトの新規作成
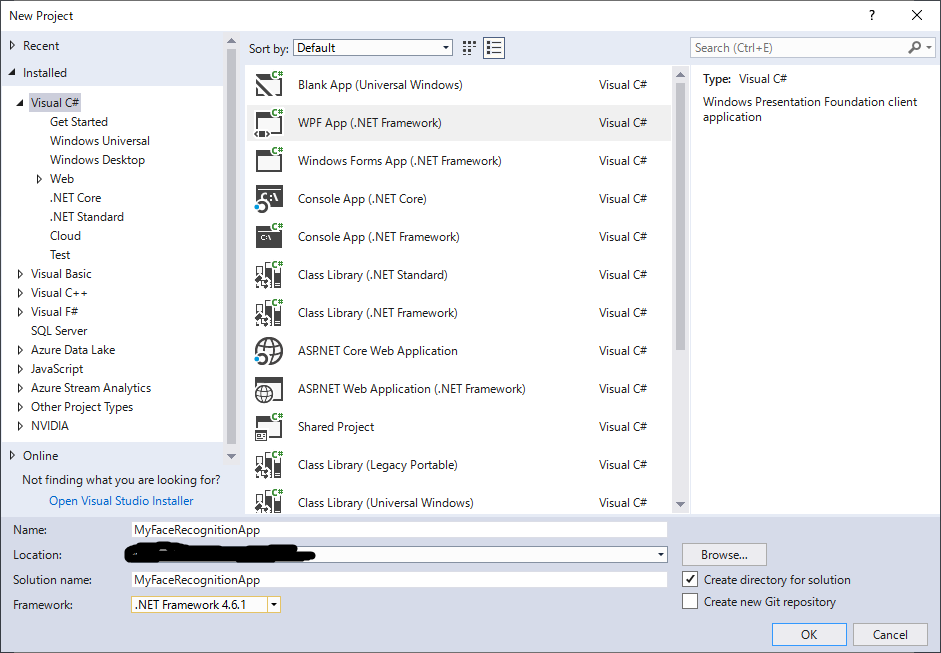
Visual Studioを開いて、File->New->Projectとクリックし、新しいプロジェクトを作成します。Visual C#の中にある**WPF App (Visual C#)**を選択。
WPF Appが見つからない場合は、Visual Studioの前準備と同じ手順で、.NETデスクトップ開発をインストールしてください。
2.MainWindow.xaml
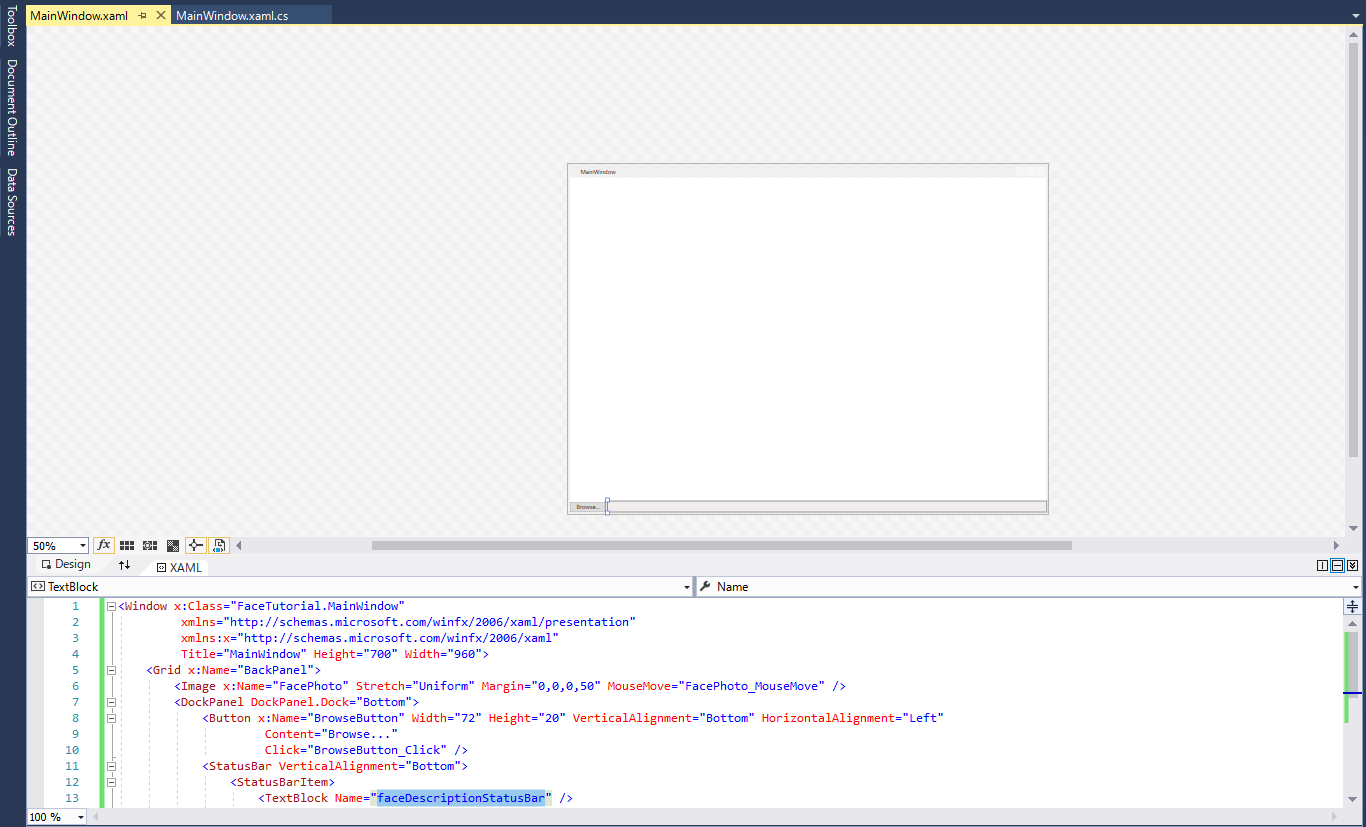
Visual StudioのWPFアプリ開発は、GUIの設計と内部動作のコーディングをそれぞれ行います。GUIはボタンやテキストボックスをポチポチ配置することもできますが、サンプルプログラム通りにの見た目にしたいのでXAML(htmlみたいなもの)を編集します。Name="XXX"と書いてある部分は、コーディングの時に同じ名前を使ってボタンがクリックされたときの動作や、画像を表示するコンポーネントを指定するときに使うので、サンプルプログラム通りに使うのが良いと思います。
<Window x:Class="FaceTutorial.MainWindow"
         xmlns="http://schemas.microsoft.com/winfx/2006/xaml/presentation"
         xmlns:x="http://schemas.microsoft.com/winfx/2006/xaml"
         Title="MainWindow" Height="700" Width="960">
    <Grid x:Name="BackPanel">
        <Image x:Name="FacePhoto" Stretch="Uniform" Margin="0,0,0,50" MouseMove="FacePhoto_MouseMove" />
        <DockPanel DockPanel.Dock="Bottom">
            <Button x:Name="BrowseButton" Width="72" Height="20" VerticalAlignment="Bottom" HorizontalAlignment="Left"
                     Content="Browse..."
                     Click="BrowseButton_Click" />
            <StatusBar VerticalAlignment="Bottom">
                <StatusBarItem>
                    <TextBlock Name="faceDescriptionStatusBar" />
                </StatusBarItem>
            </StatusBar>
        </DockPanel>
    </Grid>
</Window>
3.MainWindow.xaml.csの編集
GUIの動作を定義します。とりあえずサンプルプログラムのMainWindow.xaml.csと同じようにコーディング。
エラーが出たので1つずつ解決。

-
1,2行目 using Microsoft.Azure.XXX と 25,26,30行目 Faceに関するコード
- 原因:using Mictosoft.Azure.CognitiveServices.Vision.Faceがない
- 解決法:Tools->NuGet Package Manager->Manage NuGet Packages for Solutionとクリック。Browseで「Microsoft.Azure.CognitiveServices.Vision.Face」と入力し、Include prereleaseにチェックを付けて、画像と同じパッケージを自分のアプリにチェックを入れてインストール。
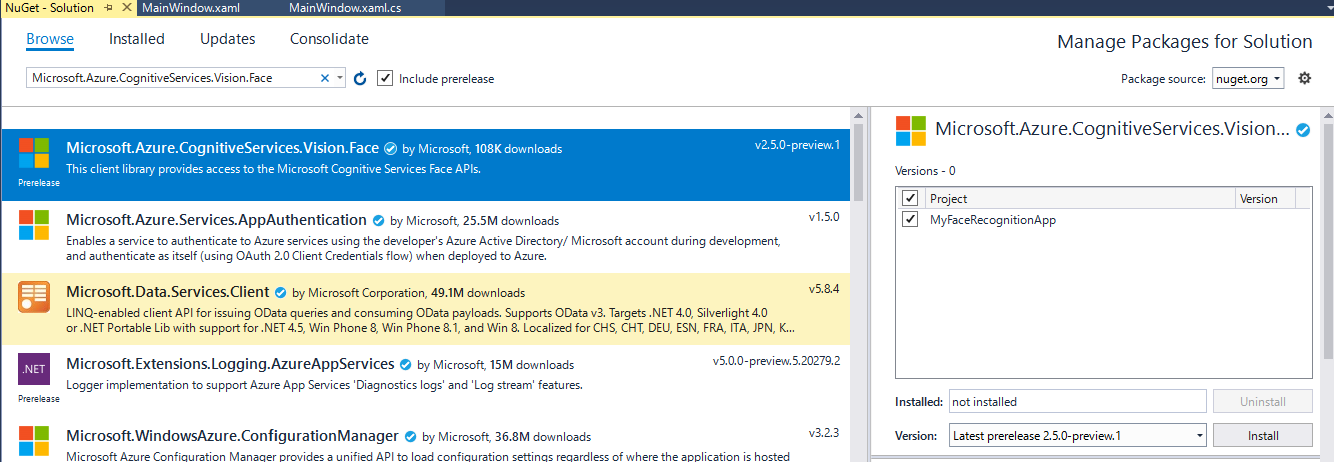
検索しても出てこない場合は、右上にある歯車マークを押して、以下の画像を参考にnuget.orgを自分で追加してください

-
21,23行目 Environment.GetEnvironmentVariables("XXX")
- 原因:定数が入力されていない
- 解決法:メモしておいたAPIキーとエンドポイントを直接入力。
private const string subscriptionKey = "自分のAPIキー";
private const string faceEndpoint = "https://myfacerecognitionapp.cognitiveservices.azure.com/";
4.実行
F5で実行します。画像はThis Person Does Not Existから
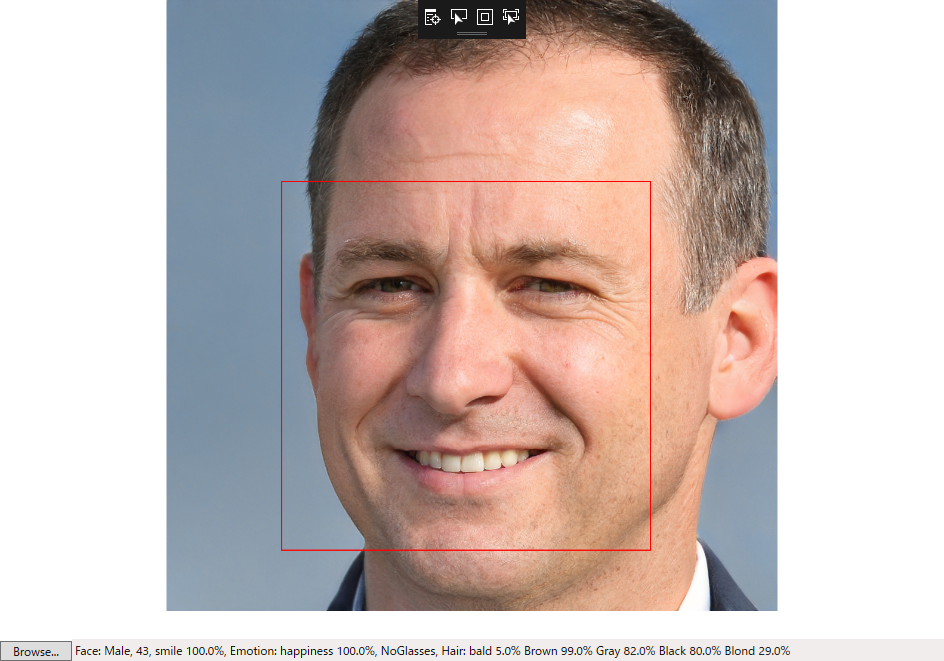
ちゃんと認識しました。
