オープン前のGoogle除けなど、一時的に関係者限定のサイトにするためにBasic認証を設定したいんだよな、というシーンがあるかと思います。
コンテンツ側で htaccess とかで設定してもいいのですが、配信がCloudflare経由になっているなら、Cloudflare Workers でも実現できますよ、ということでメモしておこうと思います。
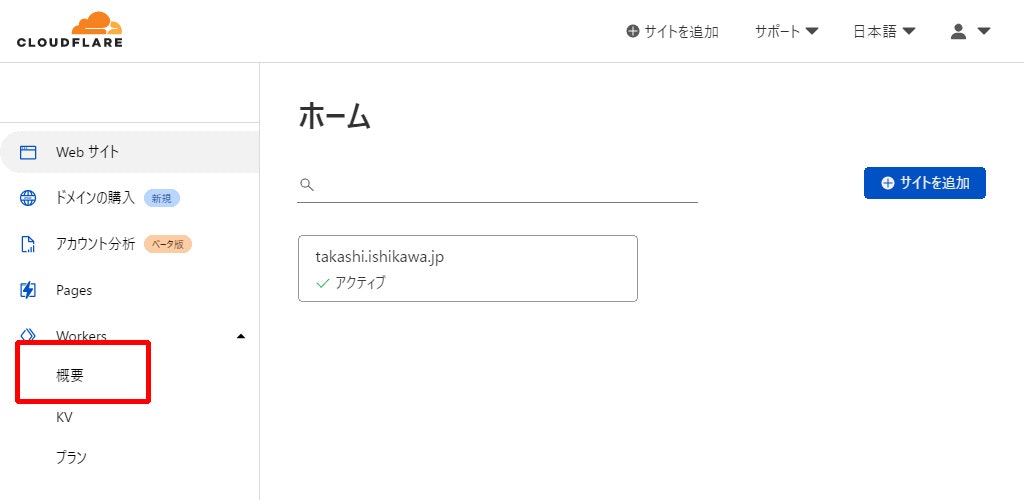
まずはWorkersを作成します。
初めての場合は、ベースとなるサブドメインの設定やプランの選択を行うウィザードが表示されると思いますので、画面の手順に従ってセットアップを行います。
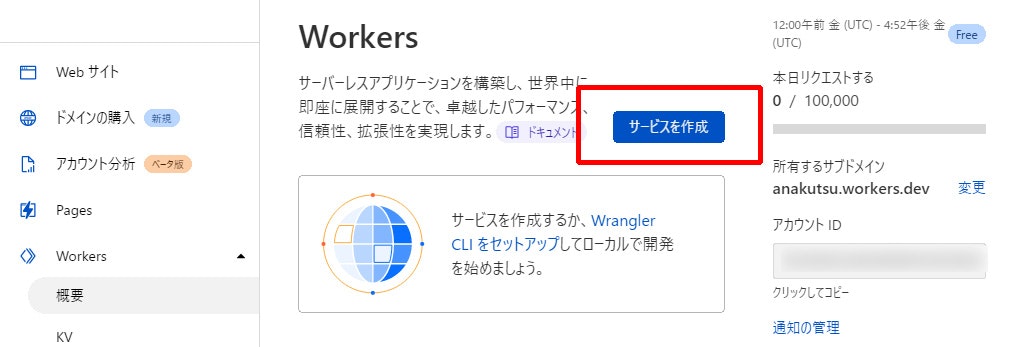
「サービスを作成」ボタンを選択します。
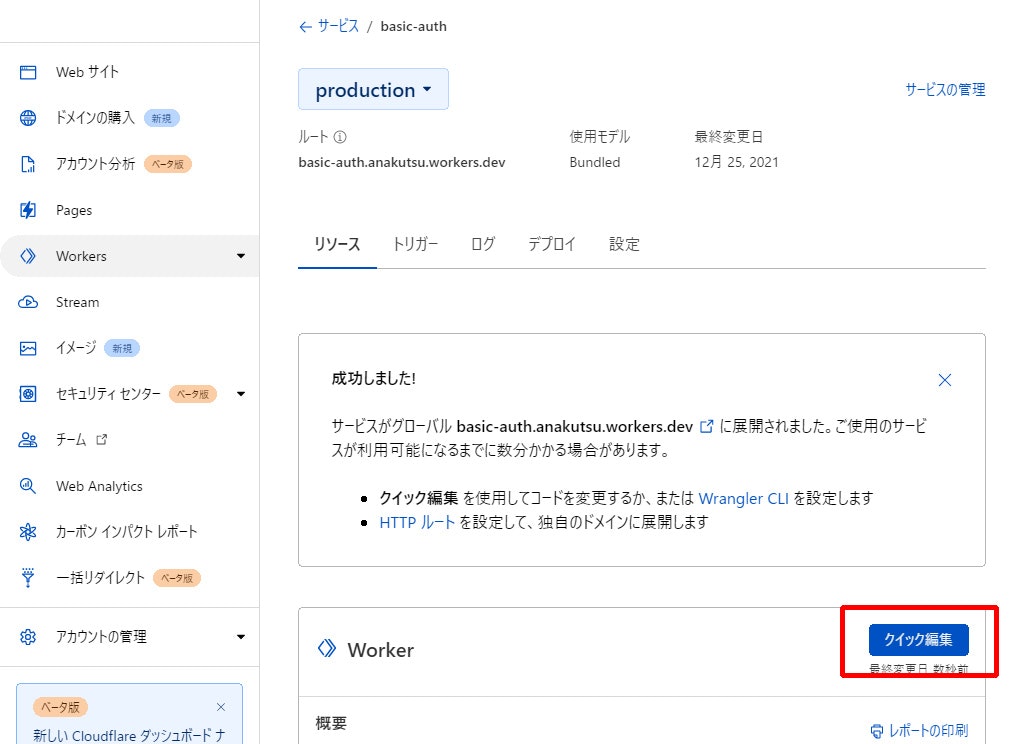
適当にサービス名を設定して「サービスの作成」ボタンを選択します。

「クイック編集」ボタンを選択してコードエディタを開きます。
プログラムはCloudflare Workersのサンプルにもズバリのコードがあるので、これを参考にしましょう。
サンプルはオリジンレスで動かす前提になっているので、これをサイトエッジで動かす前提として、認証後は通常通りオリジンにリクエストが流れるよう調整します。
/**
 * Shows how to restrict access using the HTTP "Basic" schema.
 * @see https://developer.mozilla.org/en-US/docs/Web/HTTP/Authentication
 * @see https://tools.ietf.org/html/rfc7617
 *
 * A user-id containing a colon (":") character is invalid, as the
 * first colon in a user-pass string separates user and password.
 */
const BASIC_USER = 'admin'
const BASIC_PASS = 'admin'

/**
 * Receives a HTTP request and replies with a response.
 * @param {Request} request
 * @returns {Promise<Response>}
 */
async function handleRequest(request) {
  const { protocol, pathname } = new URL(request.url)

  // In the case of a "Basic" authentication, the exchange
  // MUST happen over an HTTPS (TLS) connection to be secure.
  if ('https:' !== protocol || 'https' !== request.headers.get('x-forwarded-proto')) {
    throw new BadRequestException('Please use a HTTPS connection.')
  }

  // The "Authorization" header is sent when authenticated.
  if (request.headers.has('Authorization')) {
    // Throws exception when authorization fails.
    const { user, pass } = basicAuthentication(request)
    verifyCredentials(user, pass)

    // Only returns this response when no exception is thrown.
    return fetch(request)
  }

  // Not authenticated.
  return new Response('You need to login.', {
    status: 401,
    headers: {
      // Prompts the user for credentials.
      'WWW-Authenticate': 'Basic realm="Please input id and password.", charset="UTF-8"'
    }
  })
}

/**
 * Throws exception on verification failure.
 * @param {string} user
 * @param {string} pass
 * @throws {UnauthorizedException}
 */
function verifyCredentials(user, pass) {
  if (BASIC_USER !== user) {
    throw new UnauthorizedException('Invalid username.')
  }

  if (BASIC_PASS !== pass) {
    throw new UnauthorizedException('Invalid password.')
  }
}

/**
 * Parse HTTP Basic Authorization value.
 * @param {Request} request
 * @throws {BadRequestException}
 * @returns {{ user: string, pass: string }}
 */
function basicAuthentication(request) {
  const Authorization = request.headers.get('Authorization')

  const [scheme, encoded] = Authorization.split(' ')

  // The Authorization header must start with "Basic", followed by a space.
  if (!encoded || scheme !== 'Basic') {
    throw new BadRequestException('Malformed authorization header.')
  }

  // Decodes the base64 value and performs unicode normalization.
  // @see https://datatracker.ietf.org/doc/html/rfc7613#section-3.3.2 (and #section-4.2.2)
  // @see https://dev.mozilla.org/docs/Web/JavaScript/Reference/Global_Objects/String/normalize
  const decoded = atob(encoded).normalize()

  // The username & password are split by the first colon.
  //=> example: "username:password"
  const index = decoded.indexOf(':')

  // The user & password are split by the first colon and MUST NOT contain control characters.
  // @see https://tools.ietf.org/html/rfc5234#appendix-B.1 (=> "CTL = %x00-1F / %x7F")
  if (index === -1 || /[\0-\x1F\x7F]/.test(decoded)) {
    throw new BadRequestException('Invalid authorization value.')
  }

  return {
    user: decoded.substring(0, index),
    pass: decoded.substring(index + 1),
  }
}

function UnauthorizedException(reason) {
  this.status = 401
  this.statusText = 'Unauthorized'
  this.reason = reason
}

function BadRequestException(reason) {
  this.status = 400
  this.statusText = 'Bad Request'
  this.reason = reason
}

addEventListener('fetch', event => {
  event.respondWith(
    handleRequest(event.request).catch(err => {
      const message = err.reason || err.stack || 'Unknown Error'

      return new Response(message, {
        status: err.status || 500,
        statusText: err.statusText || null,
        headers: {
          'Content-Type': 'text/plain;charset=UTF-8',
          // Disables caching by default.
          'Cache-Control': 'no-store',
          // Returns the "Content-Length" header for HTTP HEAD requests.
          'Content-Length': message.length,
        }
      })
    })
  )
})
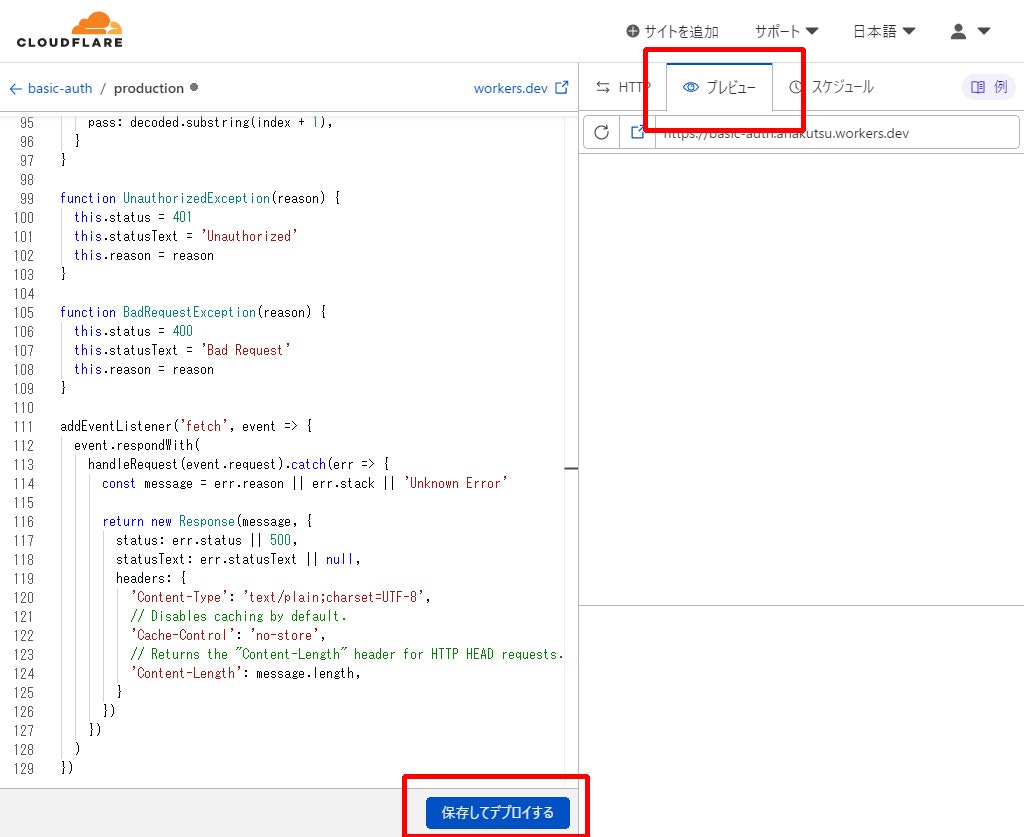
プレビューでBasic認証のダイアログが表示されることまで確認したら「保存してデプロイ」を選択します。
保存したら次はサイトの設定です。アカウントホームに戻って、Basic認証を設定したいサイトを選択します。

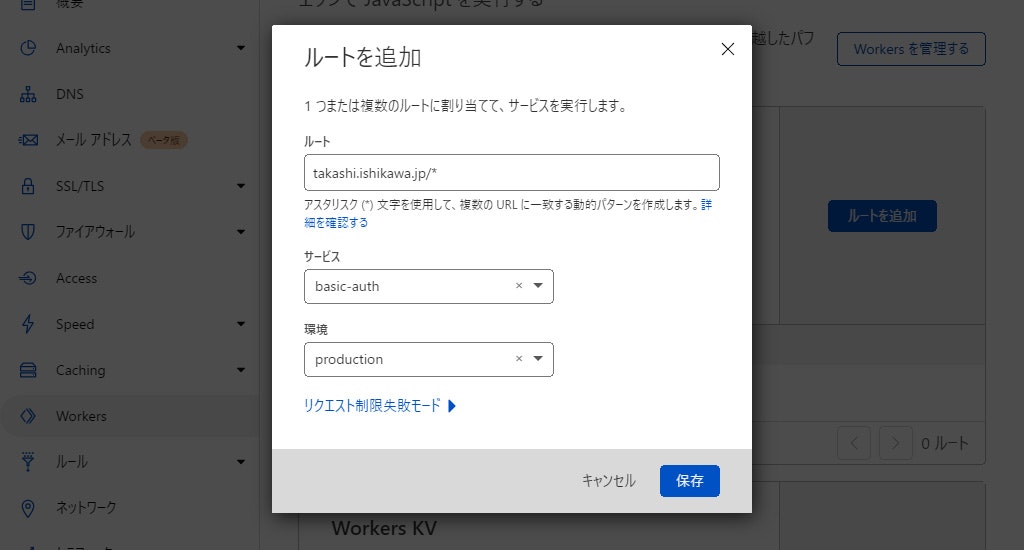
メニューから「Workers」を選択して、「ルートを追加」を選択します。
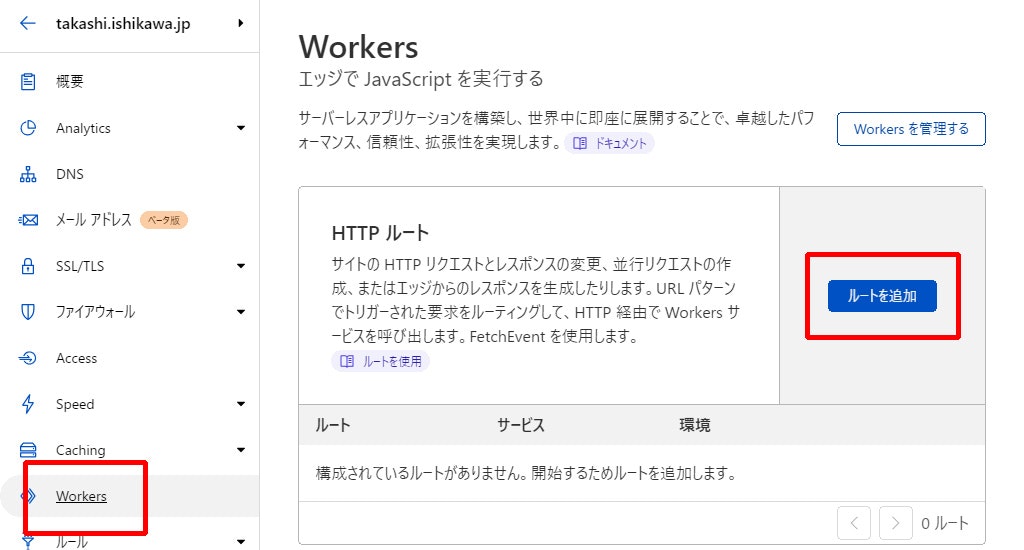
ルートには「[ドメイン]/*」を入力、サービスは先程作成したWorkersのサービスを選択、環境は「production」を選択して、「保存」ボタンを選択します。
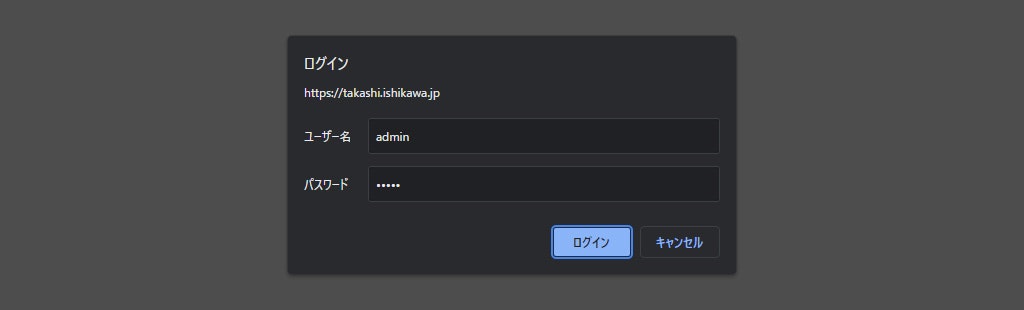
これですべて設定は完了です。
実際にアクセスしてBasic認証が設定されていることを確認しましょう。
設定箇所に慣れてしまえば、 htaccess でいちいちサーバーにファイル設置して・・・、など作業するよりも早くてかんたんなのではないでしょうか!?