恥ずかしながら AWS CloudFormation をまだ使ったことがなかったので、トライしてみました。
目指すもの
AWS CloudFormationだけでLinuxサーバー構築
できるだけ設定はパラメーターとして外出しする
作成するサーバーには一般的な監視設定(死活監視・リソース監視)も入れた状態で完成させる
- VPC作成
- サブネット作成
- インターネットゲートウェイ作成
- ルートテーブル設定 & ルート設定
- キーペア作成
- EC2作成(Amazon Linux 2023)
- CloudWatch設定
- AWS Backup設定
詳細設定
| 項目 | 設定内容 |
|---|---|
| リージョン | 大阪(ap-northeast-3) |
| VPC IPv4 CIDRブロック | 192.168.0.0/16 |
| サブネット IPv4 CIDRブロック | 192.168.1.0/24 |
| OS | Amazon Linux 2023 (2023/7/16時点の最新) |
| EC2 インスタンスタイプ | t3.micro |
| セキュリティグループ | ICMPと443ポートへのアクセス許可(0.0.0.0) アウトバウンド前許可 |
| CloudWatch | システムチェックエラー(発生時にサーバー再起動させる) CPU使用率80%以下 CPUCreditBalance 50以下 |
| AWS Backup | 毎日03:00に取得し、7世代保持する |
目指す構成

事前準備
アラート通知用のSNSトピックだけは作成しました
(ここもCloudFormationにしたい)
実際に作ったコード
CloudFormation-VPC-EC2.yaml
AWSTemplateFormatVersion: '2010-09-09'
Description: VPC-EC2-tamplate

#####################################################################
# Parameters Setting
#####################################################################
Parameters:
  Region:
    Description: Region
    Type: String
    Default: ap-northeast-3
  SystemName:
    Description: ServerName
    Type: String
    Default: hogehoge
  VpcCidrBlock:
    Description: CidrBlock
    Type: String
    Default: '192.168.0.0/16'
  SubnetCidrBlock:
    Description: CidrBlock
    Type: String
    Default: '192.168.1.0/24'
  Ec2ImageId:
    Description: Amazon Linux 2023 AMI
    Type: String
    Default: ami-0ca0742afa9ee482f
  Ec2InstanceType:
    Description: Ec2 InstanceType
    Type: String
    Default: t3.micro
  SNSTopicName:
    Description: SNS Topic Name
    Type: String
    Default: arn:aws:sns:ap-northeast-3:{アカウントID}:hogehoge-topic
  IAMRoleName:
    Description: IAM Role Name
    Type: String
    Default: SSM-Policy

#####################################################################
# Resources
#####################################################################
Resources:
# Network Setting
  Vpc:
    Type: 'AWS::EC2::VPC'
    Properties:
      CidrBlock: !Sub ${VpcCidrBlock}
      Tags:
        - Key: 'Name'
          Value: !Sub ${SystemName}-vpc

  Subnet:
    Type: 'AWS::EC2::Subnet'
    Properties:
      CidrBlock: !Sub ${SubnetCidrBlock}
      AvailabilityZone: !Sub ${Region}a
      MapPublicIpOnLaunch: true
      Tags:
        - Key: 'Name'
          Value: !Sub ${SystemName}-subnet
      VpcId: !Ref Vpc

  InternetGateway:
    Type: 'AWS::EC2::InternetGateway'
    Properties:
      Tags:
      - Key: 'Name'
        Value: !Sub ${SystemName}-igw

  AttachGateway:
    Type: 'AWS::EC2::VPCGatewayAttachment'
    Properties:
      VpcId: !Ref Vpc
      InternetGatewayId: !Ref InternetGateway

  RouteTable:
    Type: 'AWS::EC2::RouteTable'
    Properties:
      Tags:
        - Key: 'Name'
          Value: !Sub ${SystemName}-rt
      VpcId: !Ref Vpc
  Route:
    Type: 'AWS::EC2::Route'
    DependsOn: InternetGateway
    Properties:
      RouteTableId: !Ref RouteTable
      DestinationCidrBlock: 0.0.0.0/0
      GatewayId: !Ref InternetGateway
  SubnetRouteTableAssociation:
    Type: AWS::EC2::SubnetRouteTableAssociation
    Properties:
      SubnetId: !Ref Subnet
      RouteTableId: !Ref RouteTable

# IamRole Setting
  IamRole:
    Type: AWS::IAM::Role
    Properties:
      AssumeRolePolicyDocument
        Version: 2012-10-17
        Statement:
          - Effect: Allow
            Action:
              - sts:AssumeRole
            Principal:
              Service:
                - ec2.amazonaws.com
      ManagedPolicyArns:
        - arn:aws:iam::aws:policy/AmazonSSMManagedInstanceCore
      RoleName: !Sub ${SystemName}-role

# EC2 Setting
  NewKeyPair:
    Type: 'AWS::EC2::KeyPair'
    Properties:
      KeyName: !Sub ${SystemName}-key-pair

  SecurityGroup:
    Type: "AWS::EC2::SecurityGroup"
    Properties:
      GroupDescription: !Sub ${SystemName}-SecurityGroup
      VpcId: !Ref Vpc
      Tags:
        - Key: 'Name'
          Value: !Sub ${SystemName}-sg
      SecurityGroupIngress:
        # http
        - IpProtocol: tcp
          FromPort: 443
          ToPort: 443
          CidrIp: 0.0.0.0/0
        # ICMP
        - IpProtocol: icmp
          FromPort: -1
          ToPort: -1
          CidrIp: 0.0.0.0/0

  ElasticIP:
    Type: AWS::EC2::EIP
    Properties:
      Domain: vpc

  InstanceProfile:
    Type: AWS::IAM::InstanceProfile
    Properties:
      Path: "/"
      Roles:
      - !Ref IamRole

  EC2Instance:
    Type: 'AWS::EC2::Instance'
    Properties:
      ImageId: !Ref Ec2ImageId
      InstanceType: !Ref Ec2InstanceType
      NetworkInterfaces:
        - AssociatePublicIpAddress: "true"
          DeviceIndex: "0"
          SubnetId: !Ref Subnet
          GroupSet:
            - !Ref SecurityGroup
      IamInstanceProfile: !Ref InstanceProfile
      BlockDeviceMappings:
        - DeviceName: '/dev/xvda'
          Ebs:
            VolumeType: 'gp2'
            VolumeSize: 8
      Tags:
        - Key: 'Name'
          Value: !Sub ${SystemName}-ec2-instance'
      KeyName: !Ref NewKeyPair

  IPAssoc:
    Type: AWS::EC2::EIPAssociation
    Properties:
      InstanceId: !Ref EC2Instance
      EIP: !Ref ElasticIP

# CloudWatch Setting
  StatusCheckFailedActionReboot:
    Type: AWS::CloudWatch::Alarm
    Properties:
      AlarmActions:
        - !Ref SNSTopicName
        - !Sub "arn:aws:automate:${Region}:ec2:recover"
      AlarmName: !Sub ${SystemName}_StatusCheckFailed_Action-Reboot
      MetricName: StatusCheckFailed_System
      Namespace: AWS/EC2
      Statistic: Average
      Period: 60
      EvaluationPeriods: 1
      Threshold: 0
      TreatMissingData: missing
      OKActions:
        - !Ref SNSTopicName
      ComparisonOperator: GreaterThanThreshold
      Dimensions:
        - Name: InstanceId
          Value: !Ref EC2Instance
  CPUCreditBalanceUnder50:
    Type: AWS::CloudWatch::Alarm
    Properties:
      AlarmActions:
        - !Ref SNSTopicName
      AlarmName: !Sub ${SystemName}_CPUCreditBalance_Under50
      MetricName: CPUCreditBalance
      Namespace: AWS/EC2
      Statistic: Average
      Period: 60  #[s]
      EvaluationPeriods: 2
      Threshold: 50
      TreatMissingData: missing
      OKActions:
        - !Ref SNSTopicName
      ComparisonOperator: LessThanOrEqualToThreshold
      Dimensions:
        - Name: InstanceId
          Value: !Ref EC2Instance
  CPU80PercentOver:
    Type: AWS::CloudWatch::Alarm
    Properties:
      AlarmActions:
        - !Ref SNSTopicName
      AlarmName: !Sub ${SystemName}_CPU_80%Over
      MetricName: CPUUtilization
      Namespace: AWS/EC2
      Statistic: Average
      Period: 300  #[s]
      EvaluationPeriods: 2
      Threshold: 80
      TreatMissingData: missing
      OKActions:
        - !Ref SNSTopicName
      ComparisonOperator: GreaterThanOrEqualToThreshold
      Dimensions:
        - Name: InstanceId
          Value: !Ref EC2Instance

# AWS Backup Setting
  BackupVaultforEC2:
    Type: "AWS::Backup::BackupVault"
    Properties:
      BackupVaultName: !Sub ${SystemName}-BackupVault

  BackupPlan:
    Type: "AWS::Backup::BackupPlan"
    Properties:
      BackupPlan:
        BackupPlanName: !Sub ${SystemName}-BackupPlan
        AdvancedBackupSettings:
          -
            ResourceType: EC2
            BackupOptions:
              WindowsVSS: disabled
        BackupPlanRule:
          -
            RuleName: RuleForDailyBackups
            TargetBackupVault: !Ref BackupVaultforEC2
            ScheduleExpression: "cron(00 12 * * ? *)"
            Lifecycle:
              DeleteAfterDays: 7
    DependsOn: BackupVaultforEC2

  TagBasedBackupSelection:
    Type: AWS::Backup::BackupSelection
    Properties:
      BackupSelection:
        SelectionName: !Sub ${SystemName}
        IamRoleArn: !Sub "arn:aws:iam::{アカウントID}:role/service-role/AWSBackupDefaultServiceRole"
        Resources:
          - "*"
        Conditions:
          StringEquals:
            - ConditionKey: aws:ResourceTag/Name
              ConditionValue: !Sub ${SystemName}
      BackupPlanId: !Ref BackupPlan
    DependsOn: BackupPlan
実際に適応
-
以下の手順でアクセス
AWSポータル → 「CloudFormation」 → 「スタックの作成」 → 「テンプレートファイルのアップロード」 -
作成したyamlファイルのアップロードをして「次へ」をクリック
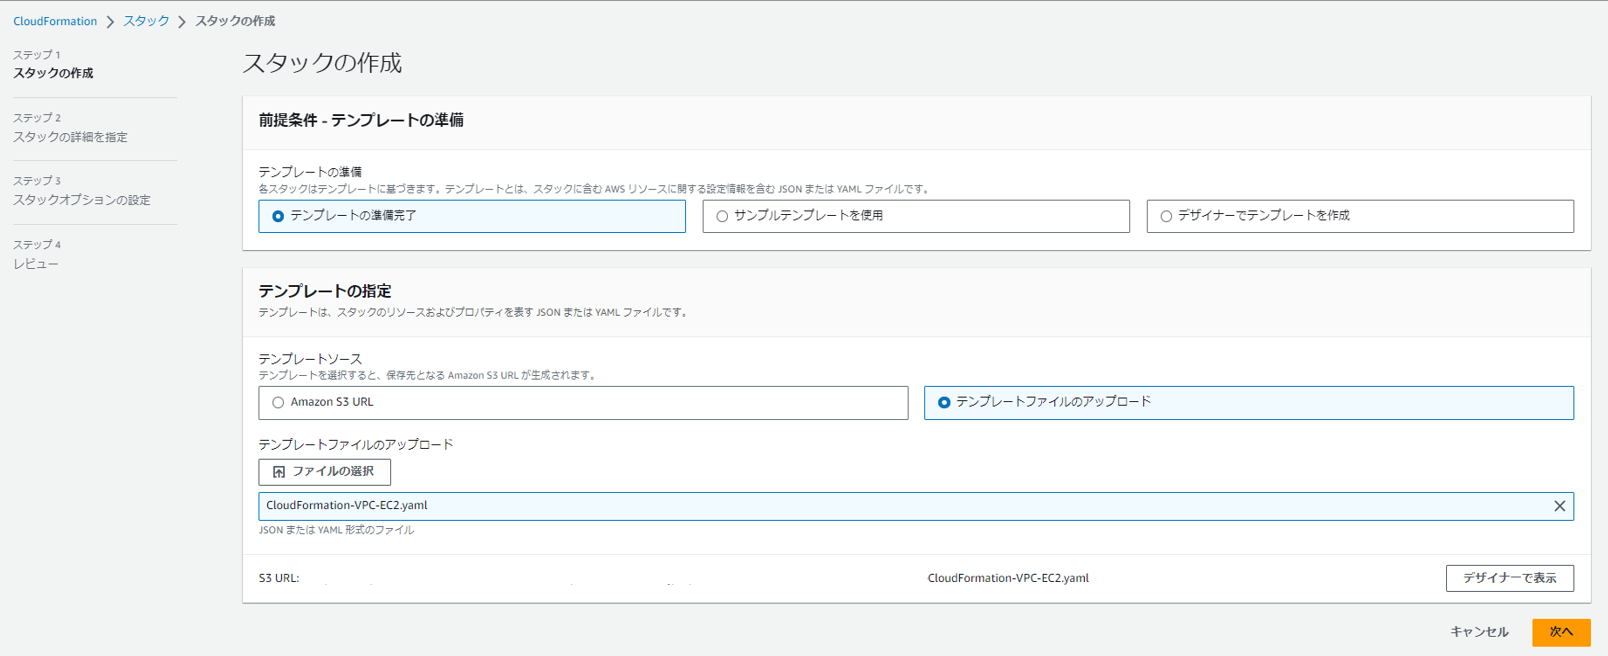
※エラーが有る場合はここで引っかかるのでファイルを見直す!
-
特に設定無しで「次へ」をクリックし続ける
-
最後にiAMに関するチェックボックスが出るので、チェックして「送信」をクリック

-
進捗が表示されるので、完了するまで待つ

-
完成!
構築自体は5分もかかりませんでした。かなり早い!
感想
ものすごく簡単にサーバーが出来て感動しました。
コードを読み取らせた時点でエラー出るので、エラーハンドリングも楽チンでした。
構築の進捗が表示され、引っかかった部分もわかりやすくエラーメッセージがでるのも丁寧でわかりやすいです。
今まで避けてたのもったいないぐらい便利でしたので、今後はどんどん利用していきたいです。