前回の記事:macのhomebrewでnodebrew入れてからnode.jsを入れるまで
今回はvue.jsの環境構築やりたいと思います
vue.jsとは
シンプルさを売りにしているVue.jsはMVVMのフレームワークです
双方向データバインディングを実現することに特化しています
下記の記事がとても参考になりますので手を出す前には是非とも読んでおきましょう
1、npmの下準備
npmを使えるものにしてあげましょう
$ npm init
nameとかversionとか色々と聞かれますが、今回は使えるようにするだけなので全て空白でEnterして、最後の質問のIs this ok?(yes)にyesとだけ答えてます
すると~/直下にpackage.jsonが作成されます
これで下準備おk
2、vue.jsのインストール
$ npm install vue
npm WARN userName@1.0.0 No description
npm WARN userName@1.0.0 No repository field.

+ vue@2.5.11
added 1 package in 1.347s
WARN出てますが、npm initの時に設定していないのだから当たり前です
無視、無視
3、vue-cliのインストール
CLI(command Line Interface)は開発に必要なツールとかをまとめてウェーイにしてくれる有難い存在のScaffoldingツールです
フロントエンドは開発するために様々なツールと仲良くならないといけませんが、CLIは余計なことしないで始められるようにしてくれる初心者の友達です
インストールも超簡単
$ npm install --global vue-cli
npm WARN deprecated coffee-script@1.12.7: CoffeeScript on NPM has moved to "coffeescript" (no hyphen)

+ vue-cli@2.9.2
added 264 packages in 10.034s
こちらもWARN出てますがcoffee-scriptはdeprecated(廃止予定)ですとの警告なので無視してます
インストール後に確認のために以下を打ってみます
$ vue list

  Available official templates:

  ★  browserify - A full-featured Browserify + vueify setup with hot-reload, linting & unit testing.
  ★  browserify-simple - A simple Browserify + vueify setup for quick prototyping.
  ★  pwa - PWA template for vue-cli based on the webpack template
  ★  simple - The simplest possible Vue setup in a single HTML file
  ★  webpack - A full-featured Webpack + vue-loader setup with hot reload, linting, testing & css extraction.
  ★  webpack-simple - A simple Webpack + vue-loader setup for quick prototyping.
これでおk
4、vue.jsのプロジェクト作成
プロジェクト作成はvue init webpack <project name>で行います
今回のサンプルプロジェクトはhello-vueとして作成しました
$ vue init webpack hello-vue
設定項目
Project Name:プロジェクトの名前
Project description:プロジェクトの詳細
Author:作者名

Vue build:どうやってビルドする?
Vue router:vue-router使う?
Use ESLint to lint your code:あなたのコードにlint使う?
Setup unit tests:なんのユニットテスト使う?
Setup e2e tests with Nightwatch:NightwatchによるE2Eテストする?
Should we run `npm install` for you after the project has been created? (recommended):runの時はnpm使うやろ?
use arrow keyって出てくるんですがこれは矢印キー使って選択しろってことです
選択肢では矢印で動かして色ついてるところでエンターをターンッ!
Buildの設定
Vue build(Use arrow key)
>Runtime + Compiler: recommended for most users<選んでエンター>
 Runtime-only: about 6KB lighter min+gzip, but templates (or any Vue-
 specific HTML) are ONLY allowed in .vue files - render functions are
 required elsewhere
Runtime + Compiler: recommended for most usersを選択しました
設定ではStandaloneと表示されるようになります
Vue-routerの設定
vue-routerは公式で使えって言われてるそうなので使うように設定しました
Lintの設定
Lint = 静的解析ツール(汚い言葉使うと怒られるやつ)
本当はLintを使うと綺麗なコードが書けるようになるのですが今回はサンプルなので割愛しました
Unit testの設定
ユニットテストはやっておきたいので設定することにしました
以下の3択から今回はJestを選んでます
>Jest<選んでエンター>
 Karma and Mocha
 none(configure it yourself)
runさせる時は何使うん?
NPMを使っているので素直にNPM選択します
Should we run `npm install` for you after the project has been created? (recommended)

❯ Yes, use NPM
  Yes, use Yarn
  No, I will handle that myself
最終形態
? Project name hello-vue
? Project description this is hello world
? Author Alex
? Vue build standalone
? Install vue-router? Yes
? Use ESLint to lint your code? No
? Set up unit tests Yes
? Pick a test runner jest
? Setup e2e tests with Nightwatch? No
? Should we run `npm install` for you after the project has been created? (recommended) npm

   vue-cli · Generated "hello-vue".


# Installing project dependencies ...
# ========================

<中略>

# Project initialization finished!
# ========================

To get started:

  cd hello-vue
  npm run dev
設定は完了!
5、作成したプロジェクトを動かす
次は作られたディレクトリに移動してnpm run devを叩きます
$ cd hello-vue
$ npm run dev

 DONE  Compiled successfully in 3561ms                                                                 15:33:54

 I  Your application is running here: http://localhost:8080
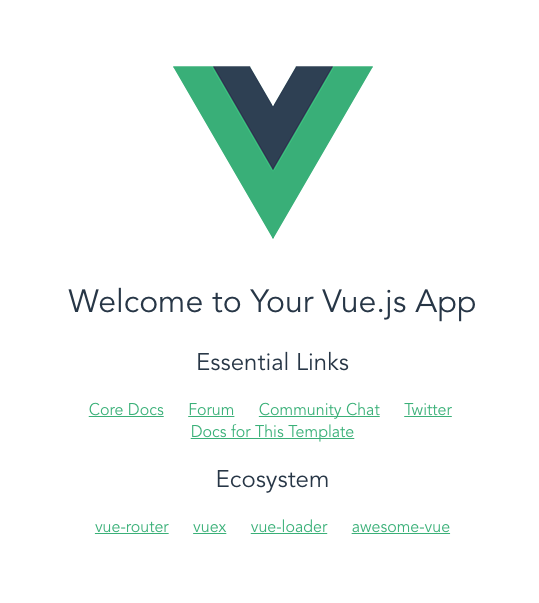
ブラウザのアドレスバーにhttp://localhost:8080を打ち込んでみます
これで動作確認できました
お疲れ様です
6、プロジェクトを停止させる
npm run devで起動させたサーバをストップするときはCtrl + Cで停止させます
