前回のTCAの記事では、TCAのFeatureの動作方法を概観し、最小限のFeatureとそのテストを実装しました。この記事では、Bindingの処理方法と、Dependenciesを使用して依存性をreducerから切り離す方法について、より詳しく見ていきます。
Bindingに関して
Bindingと通常の状態の違い
前回の記事では、「ボタンのタップ」 -> 「Action の送信」 -> 「State の更新」 -> 「UI の更新」というフローを実装し、「UI に状態を反映させる」という課題を解決しました。ただし、「状態を使って UI を更新する」という方法だけでなく、SwiftUI では @Binding を使用して、ある状態をコントロールにバインドし、UI から直接状態を変更することもできます。SwiftUI では、ほとんどの状態を表すコントロールにこのようなモードがあります。たとえば、TextField は String のバインド Binding<String> を受け取り、Toggle は Bool のバインド Binding<Bool> を受け取ることができます。
Bindingという仕組みを使って、ある状態を他のviewに渡すと、そのviewは直接状態を変更する能力を持つようになりますが、これはTCAの規定であるreducerで状態を変更することに反します。このような場合、TCAではView Storeに特殊な"バインド関係"に変換するための方法を追加します。例えば、Counterの例で、数字を表示するTextを直接入力できるTextFieldに変更してみましょう。
TCAでの単一のバインディングの実装方法
まず、ActionとReducerに、文字列値を受け取ってカウントを設定する機能を追加します。
public enum Action: Equatable {
  case increment
  case decrement
+ case setCount(String)
  case reset
}

public var body: some ReducerProtocol<State, Action> {
  Reduce { state, action in
    switch action {
    // ...
+   case .setCount(let text):
+     if let value = Int(text) {
+       state.count = value
+     }
+     return .none
    // ...
}
次に、元々のTextを下記のTextFieldに置き換えます。
var body: some View {
  WithViewStore(store) { viewStore in
    // ...
-   Text("\(viewStore.count)")
+   TextField(
+     String(viewStore.count),
+     text: viewStore.binding(
+       get: { String($0.count) },
+       send: { CounterReducer.Action.setCount($0) }
+     )
+   )
+     .frame(width: 40)
+     .multilineTextAlignment(.center)
      .foregroundColor(colorOfCount(viewStore.count))
  }
}
viewStore.bindingメソッドは、getとsendの2つのパラメータを受け取ります。これらは現在のView StoreとバインドされたViewの型に関連するジェネリック関数です。特殊化(ジェネリックをこの文脈で具体的な型に変換すること)した後は、
- get: (Counter) -> Stringは、Viewオブジェクト(ここではTextField)にデータを提供する役割を担います。
- send: (String) -> CounterActionは、Viewが新しい値を送信した場合に、View Storeが理解できるようにViewから送信された値を変換し、それをトリガーとしてcounterReducerを呼び出す役割を担います。
bindingからsetCountイベントを受け取ったcounterReducerは、状態の更新にreducerを再度使用し、UIを駆動する通常のTCAループに戻ります。
- 従来のSwiftUIでは、状態を取得するために$記号を使用すると、実際にはprojectedValueが呼び出されます。viewStore.bindingでは、View StoreをObservedObjectにラップし、カスタムのprojectedValueを使用して入力されたgetとsendをBindingに設定することで内部的に機能します。内部的には、状態を保持するために内部ストレージを使用し、この詳細を隠蔽します。外部的には、アクションを通じて状態の変更を送信します。この変更をキャプチャし、それに応じて更新し、最終的に新しい状態をgetを使用してbindingに再度設定することは、開発者が保証する必要があります。
コードの簡略化
少しリファクタリングを行います。現在のbindingのgetは、$0.countから生成されたStringであり、reducer内でstate.countを設定するためには、まずStringからIntに変換する必要があります。このようなモードとビューの表現形式に関連する部分を、View ModelとしてCounterのextensionに抽出し、簡略化します。
extension CounterReducer.State {
  var countString: String {
    get { String(count) }
    set { count = Int(newValue) ?? count }
  }
}
reducer内のStringを変換する部分をcountStringに置き換えます。
public var body: some ReducerProtocol<State, Action> {
  Reduce { state, action in
    switch action {
    // ...
    case .setCount(let text):
-     if let value = Int(text) {
-       state.count = value
-     }
+     state.countString = text
      return .none
    // ...
}
Swift 5.2では、KeyPathが関数として使用できるようになりました。そのため、\CounterReducer.State.countStringの型は(Counter) -> Stringと見なすことができます。同時に、Swift 5.3では、enum caseも関数として使用できます。CounterReducer.Action.setCountは(String) -> CounterReducer.Action。これら2つはちょうどbindingの2つのパラメータの要件を満たしているため、バインディングを作成する部分をさらに簡素化できます:
// ...
  TextField(
    String(viewStore.count),
    text: viewStore.binding(
-     get: { String($0.count) },
+     get: \.countString,
-     send: { CounterReducer.Action.setCount($0) }
+     send: CounterReducer.Action.setCount
    )
  )
// ...
最後に、.setCountに対するテストを追加することを忘れないでください!
複数のバインド値
もしFeature内に複数のバインド値がある場合、例のようにActionを追加してbindingにsendする必要があります。これは毎回同じテンプレートコード追加する事になる、TCAでは@BindingStateとBindableActionを設計し、複数のバインディングの書き方を簡単にしました。具体的には、以下の3つのステップに分かれます。
- State内にUIとバインドする必要がある変数に@BindingStateを追加します。
- アクションをBindableActionとして宣言し、特別なケースbinding(BindingAction)を追加します。
- Reducerで.bindingを追加します
- BindingReducer()を追加します
直接コードを使用して説明すると、以下のようになります。
// 1
public struct CounterReducer: ReducerProtocol
+ @BindingState var foo: Bool = false
+ @BindingState var bar: String = ""
}

// 2
- public enum Action: Equatable {
+ public enum Action: Equatable, BindableAction {
+    case binding(BindingAction<State>)
}

// 3
public var body: some ReducerProtocol<State, Action> {
  Reduce { state, action in
    switch action {

    // ...
+   case .binding:
+     return .none
    // ...
    }
  }
  // 4
+ BindingReducer() //Apply bindable state mutations
}
このような操作を行うと、View内で標準のSwiftUIのような方法を使って、$を使用してprojected valueを取得してBindingを実行できるようになります:
public struct CounterView: View {
  public let store: StoreOf<CounterReducer>
  var body: some View {
    WithViewStore(store) { viewStore in
+     Toggle("Toggle!", isOn: viewStore.binding(\.$foo))
+     TextField("Text Field!", text: viewStore.binding(\.$bar))
    }
  }
}
このようにすることで、複数のバインド値があっても、1つの.binding Actionで対応することができます。このコードが動作するのは、BindableActionがBindingAction -> Selfというシグネチャを要求し、bindingという名前の関数を必要とするためです:
public protocol BindableAction {
  /// The root state type that contains bindable fields.
  associatedtype State

  /// Embeds a binding action in this action type.
  ///
  /// - Returns: A binding action.
  static func binding(_ action: BindingAction<State>) -> Self
}
Swiftの新機能であるenum caseを関数として使用することで、コードを非常に簡潔でエレガントにすることができます。
.binding アクションをテストする
.bindingをテストする時は実際普通のActionと違わないのですが、受け取るものはBindingAction<State>なので中身をBindingしたstateをあげます。
func test() {
    let store = TestStore(
        initialState: CounterReducer.State(),
        reducer: CounterReducer()
    )

    store.send(.binding(.set(\.$toggleState, true))) { state in
        state.toggleState = true
    }
}
DependencyKey
数字当てゲーム
Counterの例に戻ります。数字を入力する方法があるので、数字を当てる小さなゲームを作ってみましょう!
- 数字当てゲーム:プログラムが-100から100の範囲で数字をランダムに選び、ユーザーが数字を入力し、プログラムがその数字が正しいかどうかを判断します。正しくない場合、フィードバックとしてhigherまたはlowerと返し、ユーザーに次の数字の入力を求めます。
最も簡単な方法は、Counterにランダムな数値を保持するためのプロパティを追加することです:
public struct State: Equatable, Identifiable {
  var count: Int = 0
+ let secret = Int.random(in: -100 ... 100)
}
countとsecretの関係をチェックし、答えを返します:
extension CounterReducer.State {
    enum CheckResult {
        case lower, equal, higher
    }
    var checkResult: CheckResult {
        if count < secret { return .lower }
        if count > secret { return .higher }
        return .equal
    }
}
このモデルがあれば、viewでcheckResultを使用して、結果を表すラベルを表示できます:
public var body: some View {
    WithViewStore(store, observe: { $0 }) { viewStore in
        VStack {
+           checkLabel(with: viewStore.checkResult)
            HStack {
                Button("-") { viewStore.send(.decrement) }
                // ...
}


func checkLabel(with checkResult: CounterReducer.State.CheckResult) -> some View {
    switch checkResult {
    case .lower:
        return Label("Lower", systemImage: "lessthan.circle")
            .foregroundColor(.red)
    case .higher:
        return Label("Higher", systemImage: "greaterthan.circle")
            .foregroundColor(.red)
    case .equal:
        return Label("Correct", systemImage: "checkmark.circle")
            .foregroundColor(.green)
    }
}
DependencyKey
このUIで正解を当てると、Resetボタンは推測をゼロに戻すことができますが、新しいゲームを始めることはできません。これは少し退屈かもしれません。ResetボタンをNew Gameボタンに変更してみましょう。
UIとCounterActionで既に.reset動作が定義されているため、いくつかの名前の変更を行います。
public enum Action: Equatable, BindableAction {
  // ...
- case reset
+ case playNext
}

public struct CounterView: View {
  // ...
  var body: some View {
    // ...
-   Button("Reset") { viewStore.send(.reset) }
+   Button("Next") { viewStore.send(.playNext) }
  }
}
その後、Reducerでこの状況を処理します。
public struct State: Equatable, Identifiable {
  var count: Int = 0
- let secret = Int.random(in: -100 ... 100)
+ var secret = Int.random(in: -100 ... 100)
}

public var body: some ReducerProtocol<State, Action> {
  // ...
- case .reset:
+ case .playNext:
    state.count = 0
+   state.secret = Int.random(in: -100 ... 100)
    return .none
  // ...
}
アプリを実行し、_printChangesの出力を観察すると、すべて正常に見えます!素晴らしいです。
常にCmd + Uでテストを実行する習慣を身につけることが大切です。この場合、テストがコンパイルエラーになっていることがわかります。最後のタスクは、元の.resetテストを修正することです。これも簡単です:
func testReset() throws {
- store.send(.reset) { state in
+ store.send(.playNext) { state in
    state.count = 0
  }
}
失敗の可能性が高いです:

これは、.playNextがcountをリセットするだけでなく、新しいsecretをランダムに生成するためです。TestStoreは、sendクロージャが終了するときのstateと、実際にreducerが操作したstateを比較してアサートするため、前者は適切なsecretを設定していないため等しくなく、テストが失敗することになります。
TCA提供したDependencyKeyを使う
TCAでは、テスト可能性を保証するために、reducerは純粋関数でなければなりません。つまり、同じ入力(state、actionの組み合わせ)に対しては、常に同じ出力(ここではstateとeffectですが、後の記事でeffectの役割に触れます)が生成されなければなりません。
.playNextを処理する際に、Int.randomは明らかに毎回同じ結果を返すことはできないため、reducerがテストできなくなる原因にもなります。TCAはDependencyKeyを使って(以前のバージョンはEnvironmentとゆう物ありますが、今はも推薦しません。)このような外部依存関係(DI)に対応します。
reducer内部に外部状態への依存関係がある場合DependencyKeyを介して注入することができます。これにより、実際のアプリと単体テストで異なる環境を使用できるようになります、TCAがすでに作成済みのDependencyKeyがあります:
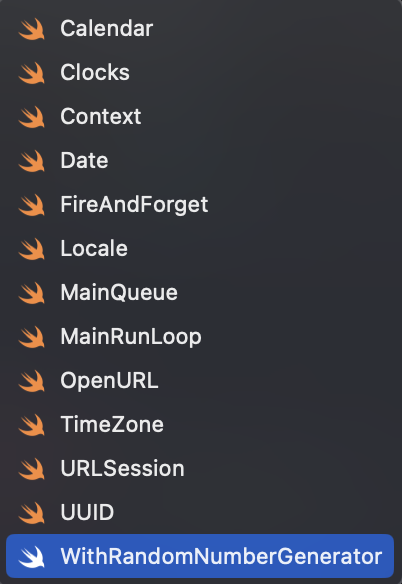
WithRandomNumberGenerator使ってもいいですが、ここは自分たちで作って見ましょう:
struct GenerateRandom {
    var generateRandomInt: (ClosedRange<Int>) -> Int
}

extension GenerateRandom: DependencyKey {
    static var liveValue: GenerateRandom {
        return .init(generateRandomInt: { Int.random(in: $0) })
    }
    static let testValue = Self(
        generateRandomInt: unimplemented("\(Self.self).generateRandomInt")
    )
}

extension DependencyValues {
    var generateRandom: GenerateRandom {
        get { self[GenerateRandom.self] }
        set { self[GenerateRandom.self] = newValue }
    }
}
DependencyKeyについてはこちらの記事で詳しく書かれています、詳細知りたい方はぜひ見てください。
あとは@Dependencyを使って外部依頼を注入できる:
    @Dependency(\.withRandomNumberGenerator) var number
    // ...
        case .playNext:
            state.count = 0
-           state.secret = Int.random(in: -100 ... 100)
+           state.secret = generateRandom.generateRandomInt(-100 ... 100)
            return .none
テストを修正しましょう、unimplementedのtestValueを補充して、4のみ返す事関数にします。テストをそれに合わせます:
func testSetCount() async throws {
        let store = TestStore(
            initialState: CounterReducer.State(),
            reducer: CounterReducer()
        )
+       store.dependencies.generateRandom.generateRandomInt = { _ in 4 }
    // ...
    store.send(.playNext) { state in
-       state.count = 0
+       state = Counter(count: 0, secret: 4)
    }
}
実行するとテストクリアになるはずです。
最後
random 系列以外にも、呼び出し環境の変化(時間、場所、各種外部状態など)によって reducer 純関数特性が破られる外部依存関係は、すべて DependencyKey の範疇に含まれるべきです。よくあるものは、UUID の生成、現在の Date の取得、ある実行キュー (例えば main queue) の取得、Core Location を使用した現在位置情報の取得、ネットワークフレームワークを利用したネットワークリクエストの送信などです。
これらのうち、いくつかは同期的に完了することができます。例えば、例に挙げた Int.random。一方、位置情報の取得やネットワークリクエストの送信など、結果を得るには一定時間を要するものもあります。