サーマルプリンタでさまざまなものを印刷するときに使うコードを忘れてしまうので備忘録です。
Adafruit Thermal Printer library のサンプルコードを参考にしています。
使用したサーマルプリンタ
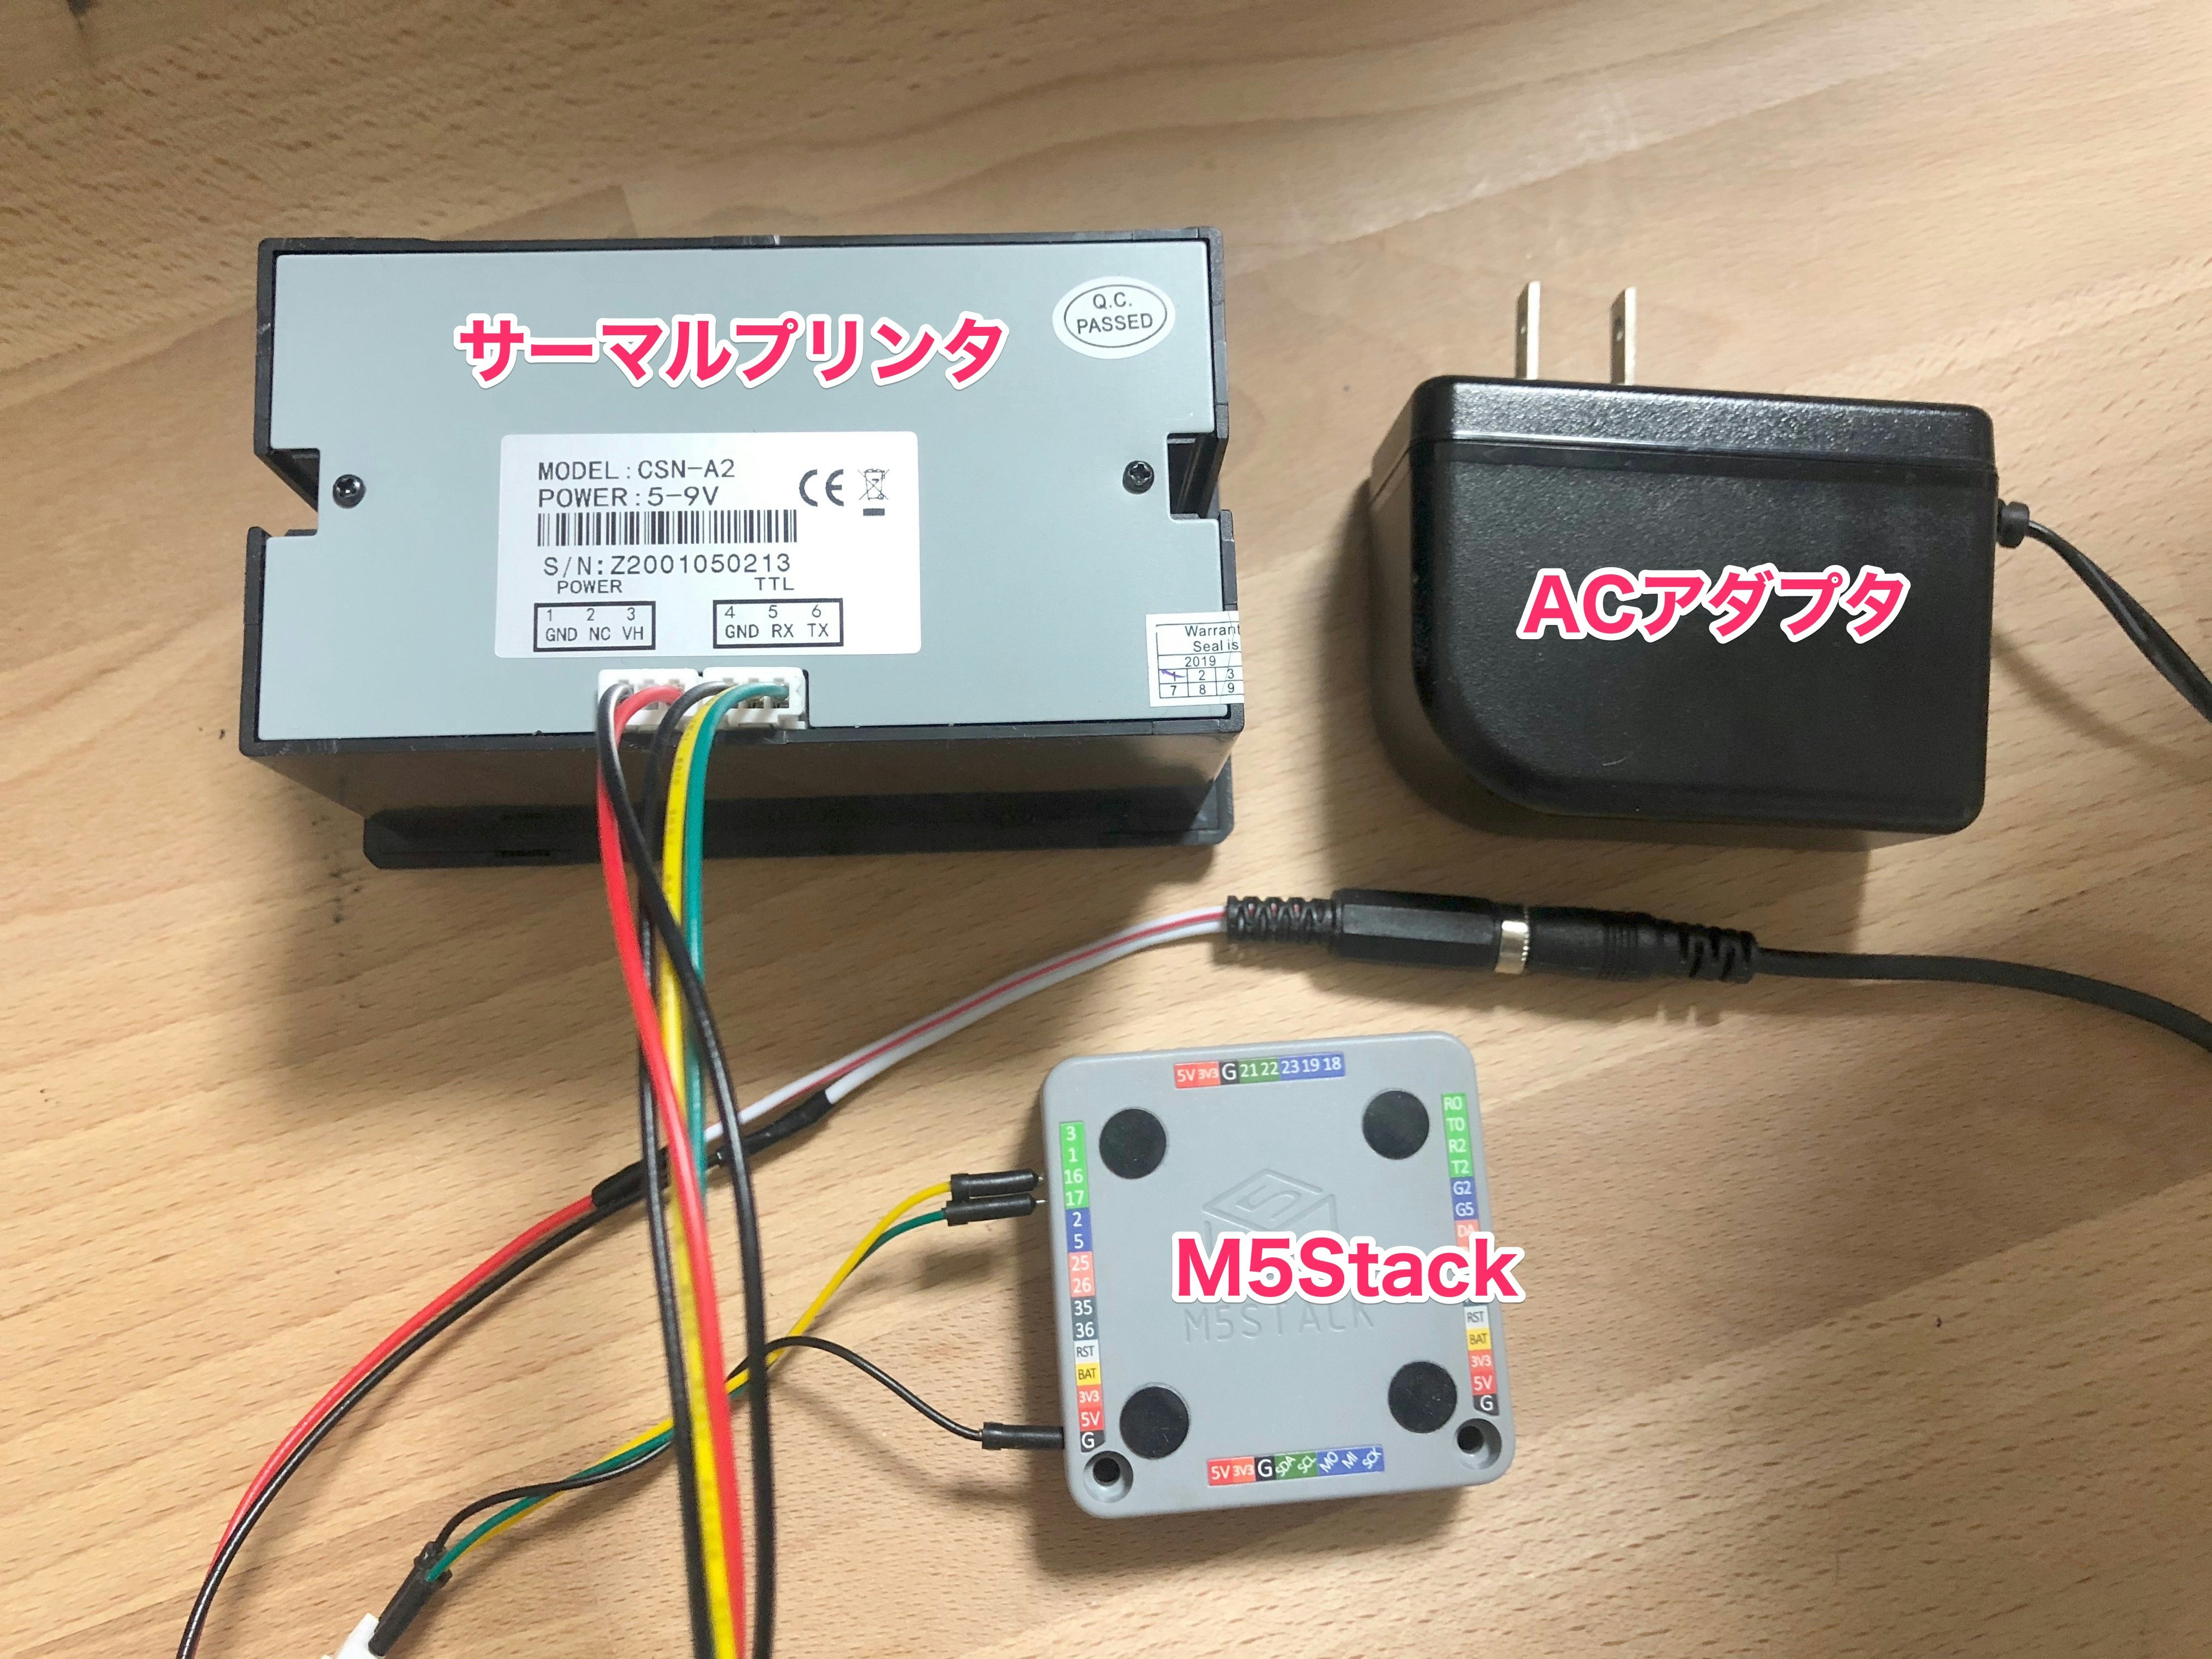
スイッチサイエンスで購入したもの(サーマルプリンタ CSN-A2-T)を使用しています。
M5Stackで印刷した際は上の図のようにセッティングしました。(Arduinoの場合は黄色のコードを6,緑のコードを7へ差し込む)
また、初期設定としてAdafruit Thermal Printer libraryをインストールします。M5Stackで使用する際はEspSoftwareSerialのライブラリもインストールしておきましょう。
コード一覧
基本の文字/画像のプリント(参考:A_printertest)
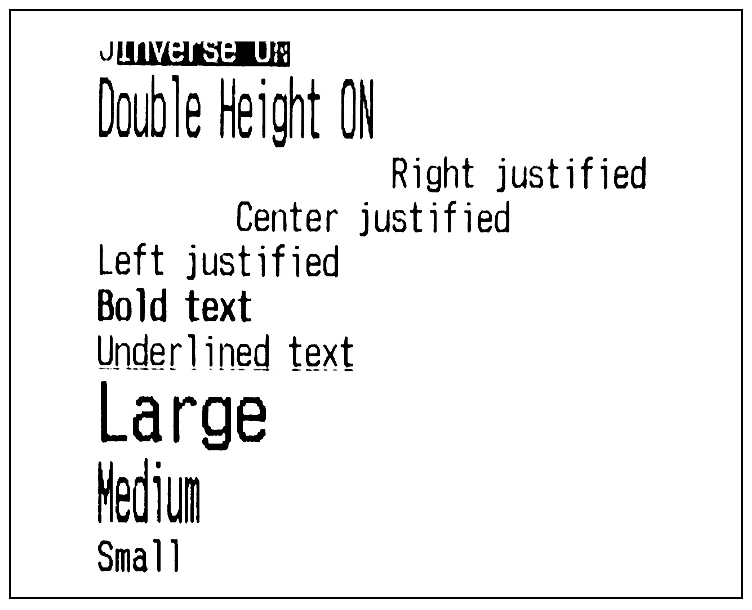
白抜き文字
黒背景で白抜きの文字
// 白抜き文字設定
printer.inverseOn();
// プリント
printer.println(F("Inverse ON"));

// 設定をデフォルトに戻す
printer.inverseOff();
高さ2倍文字
高さが2倍の文字
// 高さ2倍設定
printer.doubleHeightOn();
// プリント
printer.println(F("Double Height ON"));

// 設定をデフォルトに戻す
printer.doubleHeightOff();
右・中央・左寄せ
それぞれの寄せの文字
// 右寄せ
printer.justify('R');
printer.println(F("Right justified"));

// 中央寄せ
printer.justify('C');
printer.println(F("Center justified"));

// 左寄せ
printer.justify('L');
printer.println(F("Left justified"));
太字
太字の文字
// 太字の設定をする
printer.boldOn();
// プリント
printer.println(F("Bold text"));

// 設定をデフォルトに戻す
printer.boldOff();
アンダーラインのある文字
アンダーラインのある文字
// アンダーラインの設定をする
printer.underlineOn();
// プリント
printer.println(F("Underlined text"));

// 設定をデフォルトに戻す
printer.underlineOff();
文字サイズ
文字の大きさ3種類
// Lサイズ
printer.setSize('L');
printer.println(F("Large"));

// Mサイズ
printer.setSize('M');
printer.println(F("Medium"));

// Sサイズ
printer.setSize('S');
printer.println(F("Small"));
行間サイズ
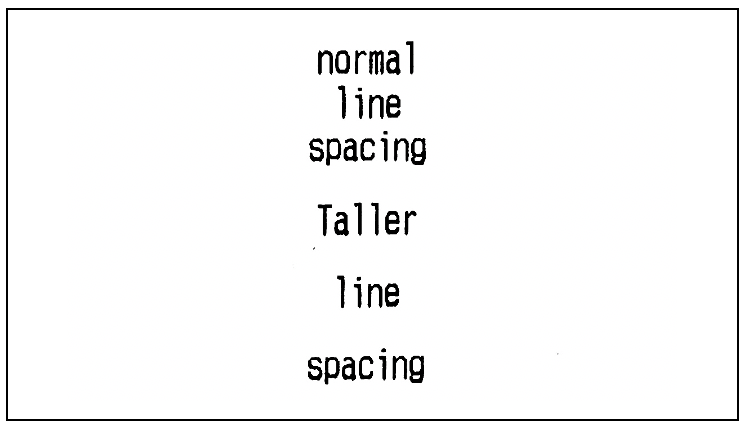
行間のサイズを変更する
// 通常サイズの行間
printer.println(F("normal\nline\nspacing"));

// 大きいサイズの行間
printer.setLineHeight(50);
printer.println(F("Taller\nline\nspacing"));

// 行間サイズをデフォルトに戻す
printer.setLineHeight();
ビットマップ画像
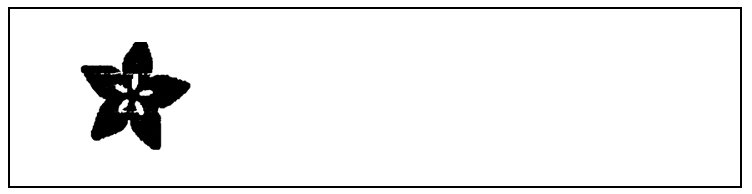
画像を印刷する際には、別ファイルにビットマップ化した画像データを保存して呼び出します。
ビットマップ画像化する際には ファイル->スケッチ例->Adafruit Thermal Printer library->Processing->bitmapImageConvert に格納されているProcessingコードを活用できます。
このファイルをProcessingで開き、実行して画像を選択するとProcessingのコンソールに
Loading image...
Writing output to 画像パス
Done!
と表示され、新しくビットマップ化された 画像ファイル名.h ファイルが生成されます。
中のファイルを見てみると以下のようになっています。
画像データの設定ファイルの中身
# ifndef _adalogo_h_
# define _adalogo_h_

# define adalogo_width  75
# define adalogo_height 75

static const uint8_t PROGMEM adalogo_data[] = {
  0x00,0x00,0x00,0x00,0x00,0xe0,0x00,0x00,0x00,0x00,
  0x00,0x00,0x00,0x00,0x01,0xf0,0x00,0x00,0x00,0x00,
  0x00,0x00,0x00,0x00,0x03,0xf0,0x00,0x00,0x00,0x00,
  // 途中省略 //
  0x00,0x00,0x00,0x00,0x00,0x00,0x1c,0x00,0x00,0x00
};

# endif // _adalogo_h_
このファイルをArduinoに書き込むファイルで呼び出し、width,height,dataを引数として渡すことで印刷ができるようになります。
// 画像データのファイルを読み込む
# include "adalogo.h"

// 画像の幅と高さ、ビットマップデータを引数として渡す
printer.printBitmap(adalogo_width, adalogo_height, adalogo_data);
また、写真などの画像はそのまま印刷すると濃淡がわかりにくくなるため、こちらのサイトなどで誤差拡散法などを用いて画像を加工したのちにビットマップ化を行うと綺麗な印刷ができるようになります。
QRコード
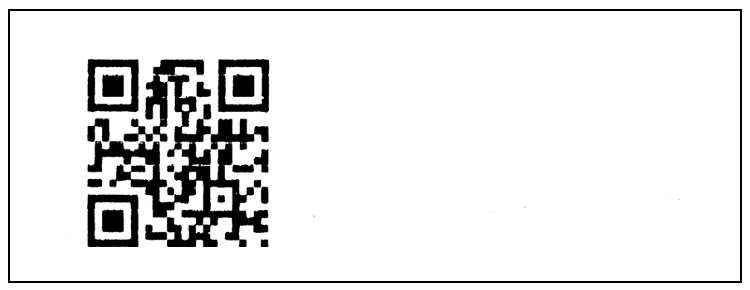
別ファイルにQRコードデータを保存して呼び出す
// QRコードデータのファイルを読み込む
# include "adaqrcode.h"

// QRコードの幅と高さ、QRコードデータを引数として渡す
printer.printBitmap(adaqrcode_width, adaqrcode_height, adaqrcode_data);
QRコードデータの設定ファイルの中身
# ifndef _adaqrcode_h_
# define _adaqrcode_h_

# define adaqrcode_width 135
# define adaqrcode_height 135

static const uint8_t PROGMEM adaqrcode_data[] = {
    0x00, 0x00, 0x00, 0x00, 0x00, 0x00, 0x00, 0x00, 0x00, 0x00, 0x00, 0x00,
    0x00, 0x00, 0x00, 0x00, 0x00, 0x00, 0x00, 0x00, 0x00, 0x00, 0x00, 0x00,
    0x00, 0x00, 0x00, 0x00, 0x00, 0x00, 0x00, 0x00, 0x00, 0x00, 0x00, 0x00,
    // 途中省略 //
    0x00, 0x00, 0x00, 0x00, 0x00, 0x00, 0x00, 0x00, 0x00, 0x00, 0x00, 0x00,
    0x00, 0x00, 0x00};

# endif // _adaqrcode_h_
特殊な文字コードのプリント(参考:B_charsets)
関数dumpを以下のように設定すると文字コードのすべての文字の一覧を表示できるようになります。
void dump() {
  uint8_t major, minor, c;

  printer.println(F("        01234567  89ABCDEF"));
  for(major=0; major<16; major++) {
    printer.print(F("     "));
    printer.print(major, HEX);
    printer.print(F("- "));
    for(minor=0; minor<16; minor++) {
      c = (major << 4) | minor;
      if(c < 32) c = ' '; // Skip control codes!
      printer.write(c);
      if(minor == 7) printer.print(F("  "));
    }
    printer.println();
  }
}
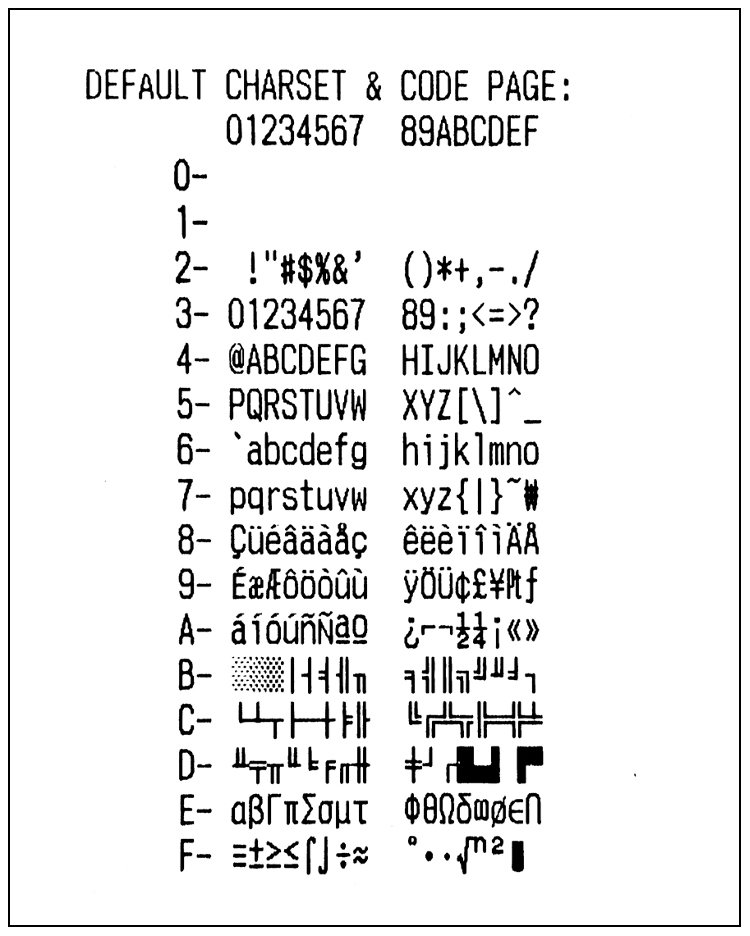
// デフォルトの文字コードをすべて一覧で印刷
dump();
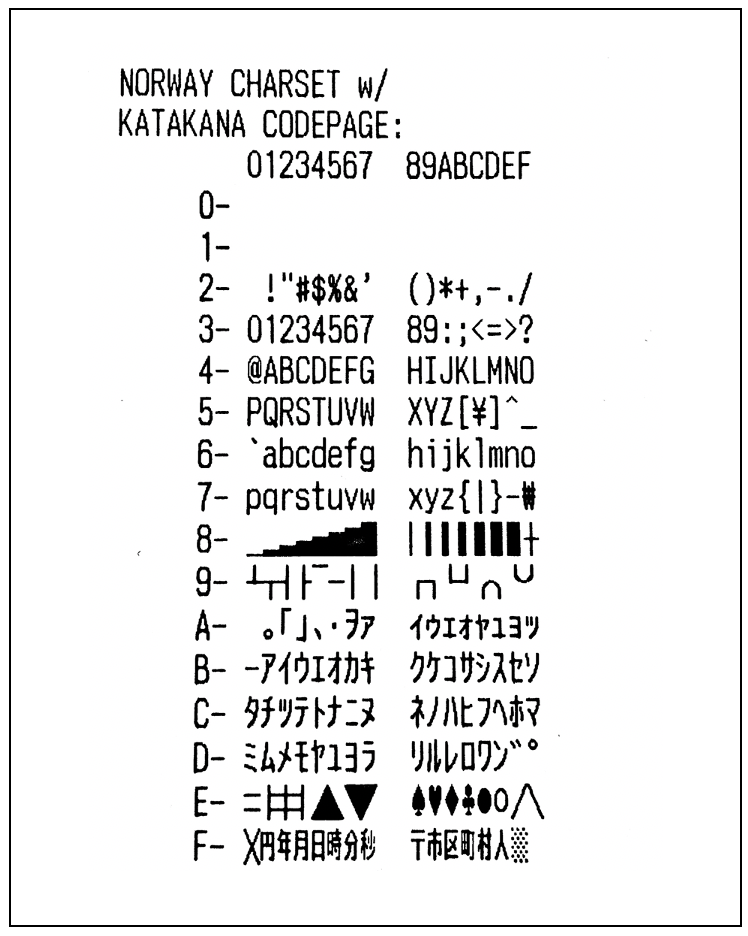
// ノルウェー語の文字コードを設定する
// Charset selection alters a few chars in ASCII 0x23-0x7E range.
printer.setCharset(CHARSET_NORWAY);

// カタカナ文字コードを設定する
// Code page selects alt symbols for 'upper' ASCII 0x80-0xFF.
// There's a TON of these, best to check datasheet!
printer.setCodePage(CODEPAGE_KATAKANA);

// 変更した文字コードの文字をすべて一覧で印刷
dump();
バーコードのプリント(参考:C_barcodes)
バーコードのサイズ変更
// バーコードの高さ設定
printer.setBarcodeHeight(100);
// UPC_Aでバーコードのプリント
printer.printBarcode("123456789123", UPC_A);
UPC_A
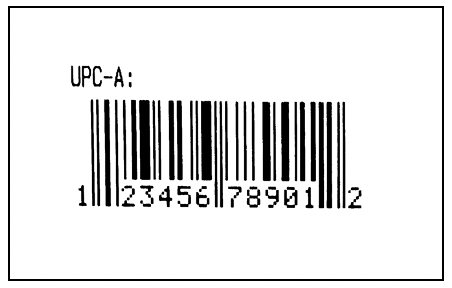
// UPC-A: 12 digits
printer.printBarcode("123456789012", UPC_A);
EAN-13
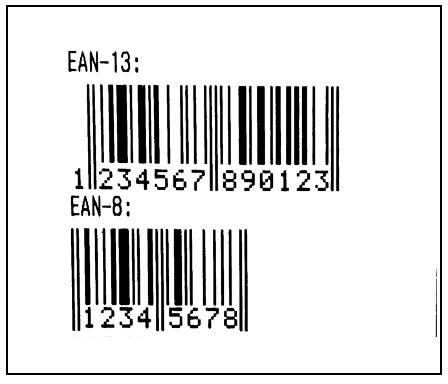
// EAN-13: 13 digits (same as JAN-13)
printer.printBarcode("1234567890123", EAN13);
EAN-8
// EAN-8: 8 digits (same as JAN-8)
printer.printBarcode("12345678", EAN8);
CODE 39
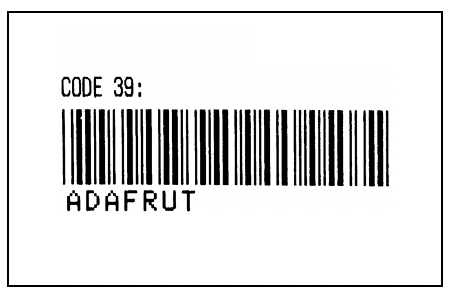
// CODE 39: variable length w/checksum?, 0-9,A-Z,space,$%+-./:
printer.printBarcode("ADAFRUT", CODE39);
文字数は7文字が限度でした。(それ以上だと印刷できません)
ITF
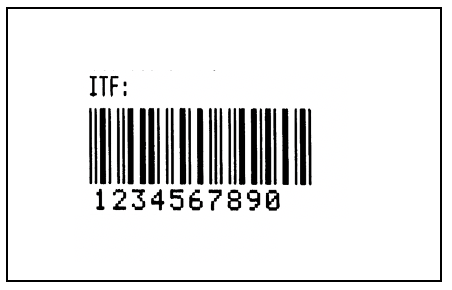
// ITF: 2-254 digits (# digits always multiple of 2)
printer.printBarcode("1234567890", ITF);
CODABAR
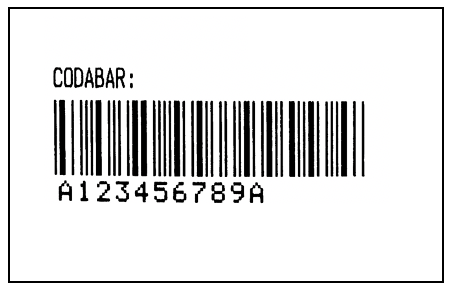
// CODABAR: variable length 0-9,A-D,%+-./:
printer.printBarcode("1234567890", CODABAR);
CODE 93
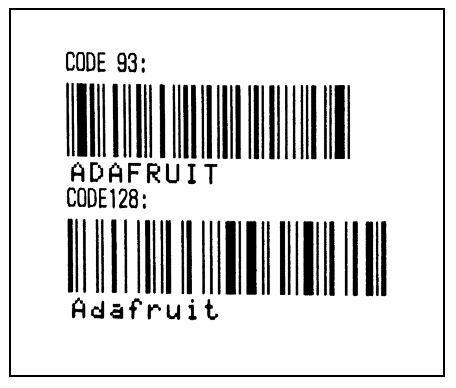
// CODE 93: compressed version of Code 39?
printer.printBarcode("ADAFRUIT", CODE93);
CODE128
// CODE 128: 2-255 characters (ASCII 0-127)
printer.printBarcode("Adafruit", CODE128);