1.はじめに
どうも、ARIの名古屋支社に勤務している愛知県民です♪
(/・ω・)/
Qiitaで面白そうなイベントがやっていたので、参加ボタンをポチりました。
SDKやAPIを使ってZoomをカスタマイズできるみたいです。
何かできないか考えて、Zoomは参加者に増減があった時に誰が増えた or 減ったのか分からない気がしたので、
今回はZoomのSDKを使って会議の参加時・退出時にポップアップを表示する方法について
まとめてみたいと思います!
Zoomについて勉強中の方の参考になれば幸いです。
(*^^)v
2.用語の説明
2.1.Zoomとは
Zoomとは、米国のZoomビデオコミュニケーションズが開発・提供するWeb会議ツールです。
Zoomの利用はPCではWebブラウザとアプリで利用でき、タブレットやスマートフォンはアプリを使って利用できます。
またPCやスマートフォン、タブレットなどに搭載されているカメラ・マイクでHDビデオで高画質、音声出力も高音質で、
スムーズにオンラインで会議を行うことができます。Zoomでは主に
・Web会議
・研修やセミナー、イベント
・学校の授業
などで活用されています。
出典:https://jp.vcube.com/zoom/knowhow/007
3.前提条件
以下に前提条件を示します。
- Zoomアカウントが作成済であること
- コマンドプロンプトにてnpmコマンドが使用できること
- コマンドプロンプトにてnodeコマンドが使用できること
4.SDKの実装
では早速、構築していきたいと思います。
今回はZoomの会議室に参加・退出した時に以下のポップアップを表示するようにします。
(「愛知県民」の部分が各人のユーザ名になります。)
4.1.以下記事の「MeetingSDKの事前準備について」に記載のある手順をすべて実施します。
SDK Key および SDK Secret をメモ帳等にコピーしてください。
4.2.エクスプローラーを開き、任意の場所にフォルダを作成します。
以降の手順では、下記の構成となるようにフォルダやファイルを作成します。
手順4.2で作成したフォルダ
├ public/
│ ├ js/
│ │ └index.js
│ └ index.html
└.env
└index.js
4.3.以下記事の「Client view」に記載のある手順を参考に、
「3. 次に「public」フォルダを作り「index.html」名でファイルを用意します。」
まで実施します。
4.4.「public」フォルダ内に「js」フォルダを作成します。
4.5.「js」フォルダ内に「index.js」ファイルを作成し、以下のコードを張り付けます。
window.addEventListener('DOMContentLoaded', function(event) {
console.log('DOM fully loaded and parsed');
websdkready();
});
function websdkready() {
console.log("ready");
const zoomMeetingSDK = document.getElementById('zmmtg-root')
zoomMeetingSDK.style.display = 'none';
console.log("checkSystemRequirements");
console.log(JSON.stringify(ZoomMtg.checkSystemRequirements()));
ZoomMtg.preLoadWasm();
//WHEN JOIN IS CLICKED
document.getElementById("join_meeting").addEventListener("click", async function (e) {
e.preventDefault();
console.log("click join");
var meetingid = document.getElementById("meeting_number").value;
getSignature(meetingid,0,function(signature){
console.log(signature);
var name = document.getElementById("display_name").value;
var meetingpwd = document.getElementById("meeting_pwd").value;
var leaveUrl = "./";
//SDK Keyを入力してください
const sdkKey = "★★★";
ZoomMtg.prepareJssdk();
ZoomMtg.init({
leaveUrl: leaveUrl,
disableCORP: !window.crossOriginIsolated, // default true
success: function () {
console.log("signature: ", signature);
zoomMeetingSDK.style.display = 'block';
ZoomMtg.inMeetingServiceListener('onUserJoin', function (data) {
console.log("onUserJoinに関するデータ:",data);
if(data["userName"]==name){
window.alert(name+"さん、会議にようこそ!");
}else{
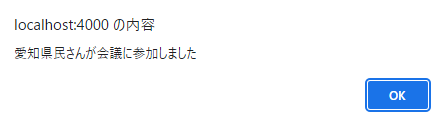
window.alert(data["userName"]+"さんが会議に参加しました");
}
});
ZoomMtg.inMeetingServiceListener('onUserLeave', function (data) {
console.log("onUserLeaveに関するデータ:",data);
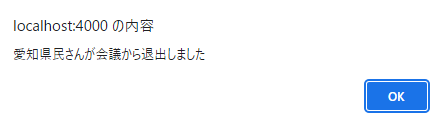
window.alert(data["userName"]+"さんが会議から退出しました");
});
ZoomMtg.join({
meetingNumber: meetingid,
userName: name,
signature: signature,
sdkKey: sdkKey,
passWord: meetingpwd,
success: function (res) {
console.log("join meeting success");
},
error: function (res) {
console.log(res);
},
});
},
error: function (res) {
console.log(res);
},
});
});
});
// GET SIGNATURE FOR WEBSDK
function getSignature(meeting_number, role, callback){
var xhr = new XMLHttpRequest();
xhr.onreadystatechange = function() {
if (xhr.readyState == XMLHttpRequest.DONE) {
console.log(xhr.responseText);
const obj = JSON.parse(xhr.responseText);
if(callback) callback(obj.signature);
}
}
xhr.open('POST', '/', true);
xhr.setRequestHeader('content-type', 'application/json');
const body = '{"meetingNumber":"' + meeting_number +'", "role":"'+ role +'"}';
xhr.send(body);
};
};
36~43行目が、ユーザがWeb会議室に参加した時のポップアップを定義するコードとなります。
本人には「XXXさん、会議にようこそ!」というポップアップを表示し、
その他の参加者には「XXXさんが会議に参加しました」 というポップアップを表示します。
            ZoomMtg.inMeetingServiceListener('onUserJoin', function (data) {
              console.log("onUserJoinに関するデータ:",data);
              if(data["userName"]==name){
                window.alert(name+"さん、会議にようこそ!");
              }else{
                window.alert(data["userName"]+"さんが会議に参加しました");
              }
            });
45~48行目が、ユーザがWeb会議室から退出した時のポップアップを定義するコードとなります。
参加者に「XXXさんが会議から退出しました」というポップアップを表示します。
            ZoomMtg.inMeetingServiceListener('onUserLeave', function (data) {
              console.log("onUserLeaveに関するデータ:",data);
              window.alert(data["userName"]+"さんが会議から退出しました");
            });
4.6.前手順でコピーしたコードの27行目にある「★★★」の部分にt手順4.1でコピーしたSDK Keyを入力し、ファイルを保存します。
        //SDK Keyを入力してください
        const sdkKey = "★★★";
4.7.コマンドプロンプトを開き、以下のコマンドを実行します。
cd (手順4.2で作成したフォルダのパス)
4.8.コマンドプロンプトにて以下のコマンドを実行し、必要なパッケージをインストールします。
npm install express body-parser crypto cors jsrsasign
npm install dotenv --save
4.9.コマンドプロンプトにて以下のコマンドを実行し、プログラムを起動します。
node index.js
4.10.「Zoom Meeting SDK for Web. running on port: 4000!」と表示されれば成功です。
 |
|---|
5.動作確認
最後に動作確認をしていきます。
以下では、4節の手順を実施したPCを「PC_1」とし、PC_1とは別のPCを「PC_2」とします。
1台のPCで試すことも可能ですが、説明が難しくなったので、PCを2台使う体で記載します・・・
5.1.自分自身が参加したときのポップアップ
5.1.1.「PC_2」にて、Zoomアカウントを持つユーザを使用し、Zoomのミーティングを開始します。
5.1.2.画面下部の参加者の右にある矢印を選択し、「招待」を選択します。
 |
|---|
5.1.3.「招待のコピー」を選択します。
 |
|---|
5.1.4.コピーした情報をメール等でPC_1に共有します。
Zoomミーティングに参加する
https://zoom.us/j/98814923194?pwd=XXXX

ミーティングID: 123 1234 1234
パスコード: XXX
5.1.5.「PC_1」にて、ブラウザを開き、「http://localhost:4000/」に接続します。
 |
|---|
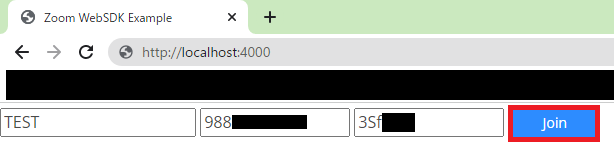
5.1.6.以下の表のとおりに入力し、「Join」を選択します。
| 項目 | 入力内容 |
|---|---|
| Name | (任意) |
| Meeting Number | (手順5.1.4で共有されたミーティングID) |
| Meeting Password | (手順5.1.4で共有されたパスコード) |
Meeting Numberはスペースを省いた数字11桁を入力してください。
 |
|---|
5.1.7.「Join」を選択します。
 |
|---|
5.1.8.接続中の画面が数秒間表示されます。
 |
|---|
5.1.9.Zoomの会議室に接続されると、PC_1の画面上部にポップアップが表示されます。
 |
|---|
5.2.他の参加者が退出したときのポップアップ
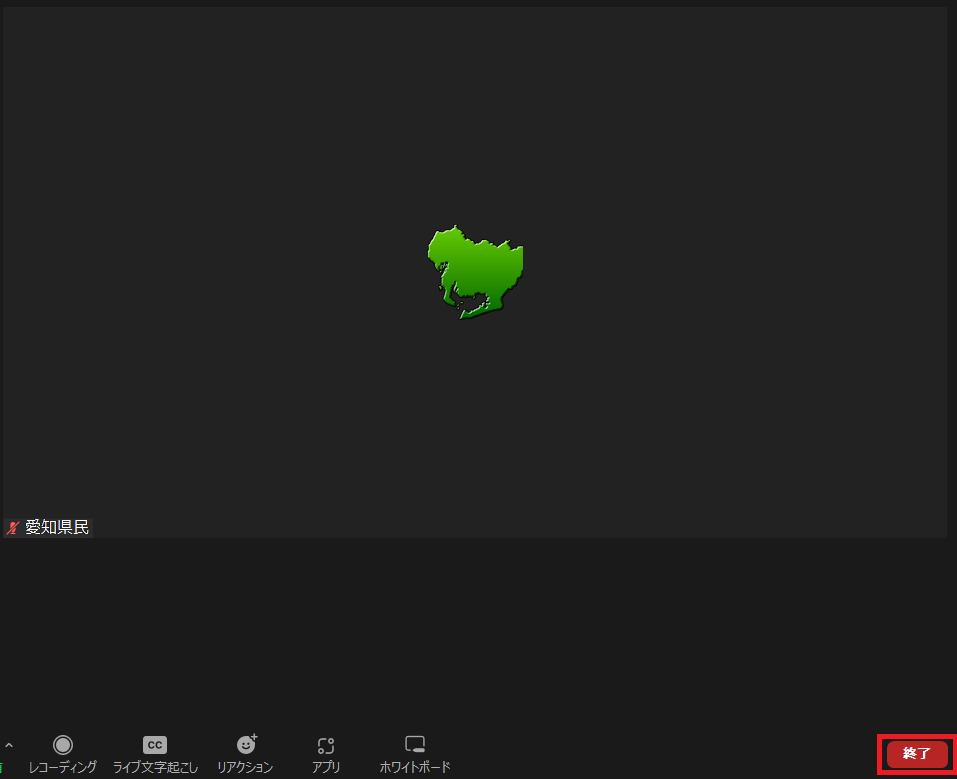
5.2.1.「PC_2」にて、「終了」を選択します。
 |
|---|
5.2.2.「ミーティングを退出」を選択します。
 |
|---|
5.2.3.「割り当てて退出する」を選択します。
 |
|---|
5.2.4.PC_1の画面上部にポップアップが表示されます。
 |
|---|
5.3.他の参加者が参加したときのポップアップ
5.3.1.再度「PC_2」にて、Zoomの会議室に接続します。
5.3.2.PC_1の画面上部にポップアップが表示されます。
 |
|---|
6.おわりに
ここまで読んで下さり、ありがとうございます!!!
(^^)
自分はZoomを日常的に使用しているので、
今回の様なカスタマイズができて楽しかったです♪
(:3_ヽ)_
また、以下のサイトに使用できるメソッドがまとめられているので、
気になった方は確認してみてください!