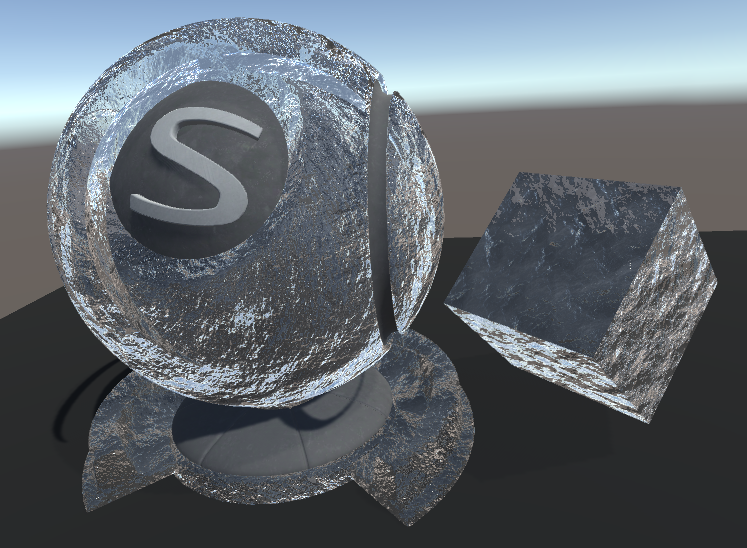
UnityのAmplify Shader Editor(ASE)の練習としてそれっぽい氷のShaderを作ってみた.
環境
Unity 2017.3.1f1
Amplify Shader Editor 1.5.2
完成図
作り方
とりあえず完成形をイメージ
- 透明にしたい.
- 氷っぽい質感.
- 周りからの光を反射出来たらそれっぽい.
ノードの(雑な)説明
Output Node
最終的に出力されるものをまとめたノード.
要素が多く理解しきっていないので変更したところだけ.
- Shader Name
- MyShader/IceShader
- このShaderの名前.ファイル名と同じにしておく.
- "/"で名前を区切ることで階層構造にすることができる.自分で作ったものをまとめておきたいときに使うとよさげ.
- MyShader/IceShader
- Blend Mode
- Transparent
- Opacity(不透明度)とRefraction(屈折)の出力が使えるようになる.
- Transparent
Texture Sample
テクスチャを扱うノード.
ショートカットはTキー
今回は2つのTextureノードを使用.
- Texture(Albedo)
- ASEのアセットに含まれていたfoam-distortion-001.pngを利用.
- Normal Map(Normal)
- Default Textureの項目をBumpに変更.
- Albedoで用いたテクスチャをこちらのサイトを用いてNormal Mapにしたものを使用.
Texture Coordinates
テクスチャのUVをごちゃごちゃさせたいときに必要なベースになるノード.
ショートカットはUキー
Tiling(テクスチャを並べる)やOffset(テクスチャをずらす)の調節ができる.
Color
色を扱うノード.
ショートカットは5キー
今回はOutputのEmissionに接続することで発光させる色を指定.
Float
浮動小数点を扱うノード.
ショートカットは2キー
ParameterのTypeを変更可能
今回は4つのFloatを使用
- Metallic
- 0-1で指定
- 金属光沢的なもの
- Smoothness
- 0-1で指定
- なめらかさ
- Refraction
- 0-1で指定
- 屈折率
- Opacity
- 0-1で指定
- 透過率
ParametersのType
FloatやColorなどのノードはTypeによってインスペクター上などからアクセスを制限することができる.
| Type | 雑な説明 |
|---|---|
| Constant | そのShader内で定数として使える |
| Property | ShaderやUnityEditorのInspector上,およびScriptからアクセスできる |
| Instanced property | ScriptからアクセスできてIncetanceとして生成 |
| Global | Scriptからアクセスできるpublic static的なやつ |
A set of ways the value behaves in different situations.
Constant: the value is assigned directly in shader code and can't be dynamically changed.
Property: the value becomes available in the properties of the material that uses the shader and can be changed in the material inspector or by script.
Instanced Property: the value can only be set by script and this defines the shader as an instanced shader. ( see more here: GPU Instancing )
Global: the value can only be set by script and this defines a static variable that is shared between all shaders that use it. It's useful to change a value globally.
まとめ
ASEの練習もかねてとりあえずHello world的な.間違ってる可能性大.

