記事の目的
仲間内で遊んでもらうためにゲームを開発するので、そこで必要となったUnityの知識を書きなぐり、主に自分で読み直す用に投稿していきます
今回の内容
ゲームオブジェクトのコンポーネントのenable
主にUIのCanvasに対する処理
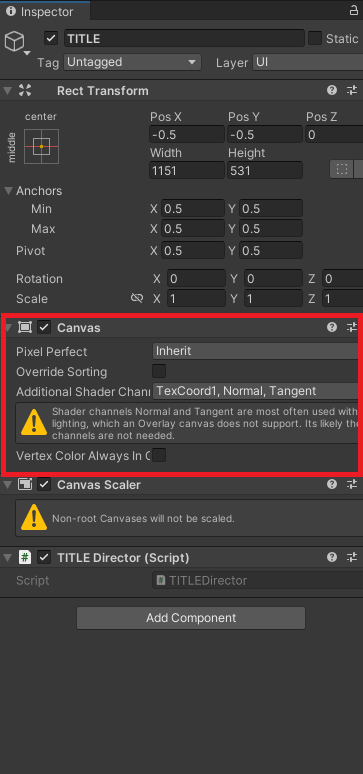
CanvasはコンポーネントにあるCanvasのチェックボックスを外すとその子アイテムが非表示化される。
これを用いて、UIの画面遷移を演出できる はず
開発中の実際の画面
スクリプトの書き方例
this.gameObject.GetCompornent<Canvas>.enable = false;
これはこのスクリプトを当てたゲームオブジェクト(UI)のCanvasを非表示させるスクリプト
まあもしかしたらthisはいらないかもしれないけどおまじないは大事
this.gameObjectで対象となるゲームオブジェクトを指定
GetCompornent<Canvas>メソッドでそのゲームオブジェクトのコンポーネントから、Canvasを指定
enableで表示の可否を
falseで非表示にする
こんなかんじ
例えばこれを
if (input.GetMouseButton(0))
{
    this.gameObject.GetCompornent<Canvas>.enable = false;
}
とすると、その画面で右クリックをするとUIが非表示化されるようになる。
他のゲームオブジェクトに適用したい場合は
Canvas canvas = GameObject.Find("gameobject").GetCompornent<Canvas>
if (input.GetMouseButton(0))
{
    canvas.enable = false;
}
とするとGameObject.Find("オブジェクト名")で指定したゲームオブジェクトのCanvasを非表示化してくれる。
ちなみにCanvas canvasは変数になっているので、わかりやすい名前を付けておいた方がCanvasでゲシュタルト崩壊しなくて済む(一敗)
以降20230724追記
具体的なUI画面の変遷方法について
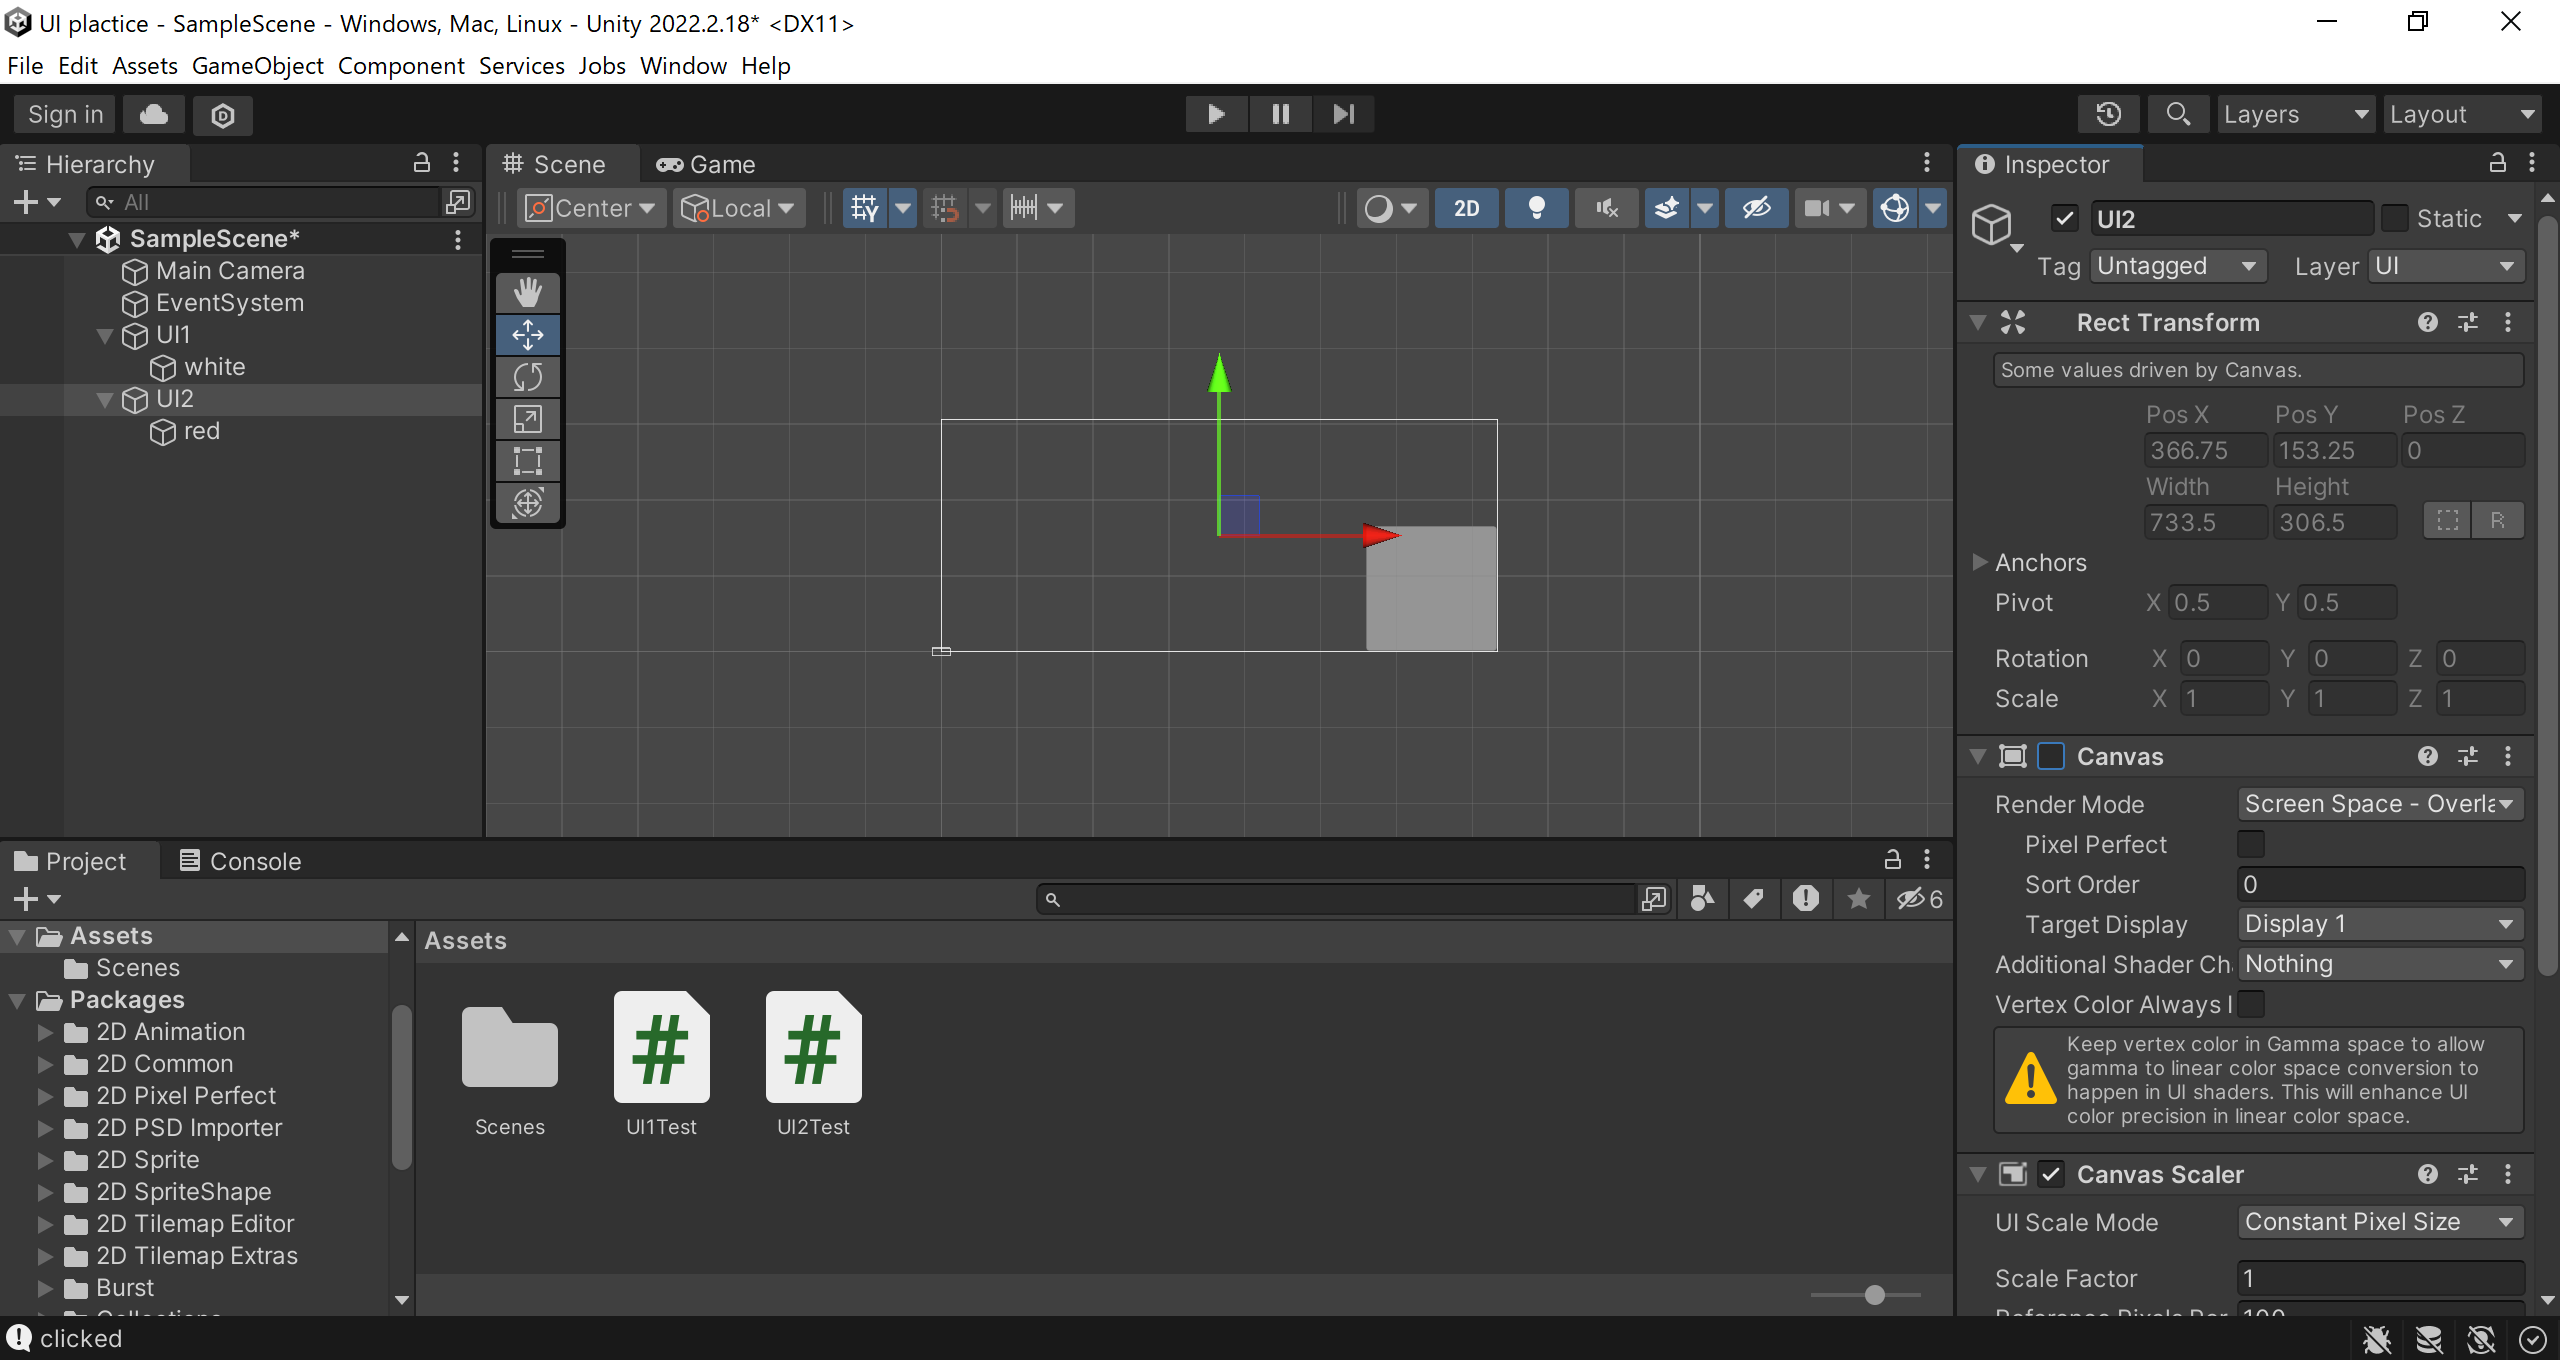
UI1はCanvasにチェックマークが入っています。
UI2は見てわかる通りCanvasのチェックが外れているので、シーンプレビューには描写されていません。
ここで、UI1とUI2を切り替えたいです。
といった場合、
using System.Collections;
using System.Collections.Generic;
using UnityEngine;
using UnityEngine.EventSystems;
using UnityEngine.UI;

public class UI1Test : MonoBehaviour
{
    // Start is called before the first frame update
    void Start()
    {
        Cursor.visible = true;
        Cursor.lockState = CursorLockMode.None;
    }

    // Update is called once per frame
    void Update()
    {
        Canvas UI2canvas=GameObject.Find("UI2").GetComponent<Canvas>();

        GraphicRaycaster ray = GetComponent<GraphicRaycaster>();
        PointerEventData point = new PointerEventData(EventSystem.current);
        point.position = Input.mousePosition;
        List<RaycastResult> target = new List<RaycastResult>();
        ray.Raycast(point, target);
        if(target.Count > 0 )
        {
            if(Input.GetMouseButtonDown(0))
            {
                this.gameObject.GetComponent<Canvas>().enabled = false;
                UI1canvas.enabled = true;
                Debug.Log("clicked");
            }
        }
    }
}
こんなコードを書くことで、UIを切り替えることができます。
void Start部分のコードは、
Cursor.visible = true

