1. はじめに
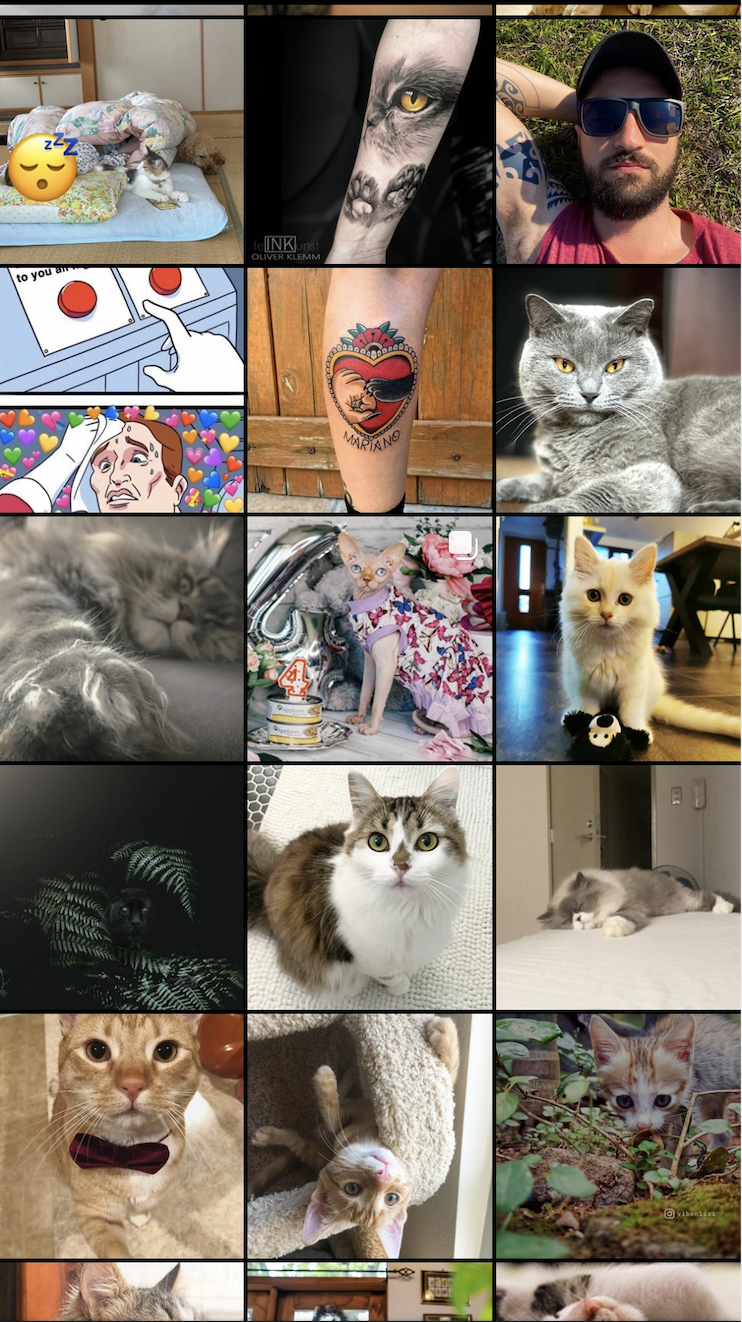
Aidemy研修生のATcatです。皆さんはInstagramを使うことはありますか?僕はインスタを使って猫の画像をよく眺めることがあるのですが、猫の画像を探してる最中に下の図ように猫の画像以外も混じってしまうことがよくあります。そこで猫の画像だけみたい私は、インスタ側のシステムを変更することは難しいですし、専用のアプリケーションを作成するには時間が足りないので、インスタで”猫”とされている画像を取得して猫の画像のみを抽出できるようなシステムを作ってみました。
2. 物体検出
今回猫の画像を抽出するために物体検出を用いたのですが、この物体検出という技術について簡単に説明します。
画像中の着目したい物体があるとき,画像全体における特徴から何が写っているかのみを識別する技術を画像認識といいますが、物体検出では、どこに何が写っているかまでを識別する技術です。つまり、画像中に含まれる物体について物体中注目すべき物体が何であるかということと、その物体がどこにあるのかまで特定し、バウンディングボックスという矩形によって表すものです。セマンティックセグメンテーションという技術もありますが、これはピクセルごとに分類するものでより複雑なものとなります。
今回はGoogleの事前学習済みモデルを用いての実装を行いましたが、理由として一からモデルを構築し学習するにはデータセットの用意や学習時間、適切なクラス数の設定などに膨大な時間がかかることから、業界では事前学習済みモデルを利用されることが非常に多いためです。
3. 事前準備
まずは、インスタから猫の画像を集めるために#猫と#catのハッシュタグから画像収集を行うことにしました。その際、Instagram ScraperというAPIを用いて行いました。
pip install instagram-scraper
としてまずpipでインストールを行います。
Instagram Scraperでは特定のユーザーの投稿を取得することや指定したハッシュタグで投稿されている画像や動画を取得することができます。
今回は次のように実行しました。
# !/bin/sh
instagram_login_user='' # あなたのユーザーネーム
instagram_login_pass='' # あなたのパスワード

target_tag='cat' #スクレイピング対象のタグ

instagram-scraper \
 --login_user $instagram_login_user \
 --login_pass $instagram_login_pass \
 --tag $target_tag \
 --media-types image \ #取得するデータタイプの指定
 --maximum 100 \ #取得するデータの最大数
 --latest \ #最後にスクレイピングしたところから始める
取得する数を200として設定しました。
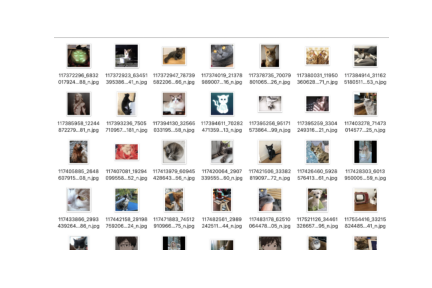
このように画像が取得できました。
4. 実装
次に取得した画像を物体検出によって猫であるかを判別します。
ここではGoogleの事前学習済みモデルであるFaster R-CNNとSSDをTensorflow Hubを通してGoogle Colaboratoryを利用して実装を行いました。
今回下記のサイトを参考に実装しました。
https://qiita.com/code0327/items/3b23fd5002b373dc8ae8
ここでの流れとしては、事前学習済みモデルをTensorflow Hubを通して取得して定義し、インスタで取得した猫の画像に対して物体検出を行います。その後猫を検出した場合にのみ検出結果を示す画像を出力するようにします。
まず、インポートと学習済みモデルの選択をします。
# For running inference on the TF-Hub module.
import tensorflow as tf
import tensorflow_hub as hub
import os
import glob
import time
import numpy as np
import matplotlib.patheffects as pe
import matplotlib.pyplot as plt
import tempfile
from six.moves.urllib.request import urlopen
from six import BytesIO
import numpy as np
from PIL import Image
from PIL import ImageColor
from PIL import ImageDraw
from PIL import ImageFont
from PIL import ImageOps

# SSDかFaster R-CNNを選択
# module_handle = 'https://tfhub.dev/google/openimages_v4/ssd/mobilenet_v2/1'
module_handle = 'https://tfhub.dev/google/faster_rcnn/openimages_v4/inception_resnet_v2/1'

detector = hub.load(module_handle).signatures['default']
物体検出を行った結果の画像化は次のようにします。
def showImage(img, r, imgfile, min_score=0.1):
  fig = plt.figure(dpi=150,figsize=(8,8))
  ax = plt.gca()
  ax.tick_params(axis='both', which='both', left=False,
                 labelleft=False, bottom=False, labelbottom=False)
  ax.imshow(img)

  decode = np.frompyfunc( lambda p : p.decode("ascii"), 1, 1)

  boxes =       r['detection_boxes']
  scores =      r['detection_scores']
  class_names = decode( r['detection_class_entities'] )

  n = np.count_nonzero(scores >= min_score)

  # class_names に対応した 色の準備
  class_set = np.unique(class_names[:n])
  colors = dict()
  cmap = plt.get_cmap('tab10')
  for i, v in enumerate(class_set):
    colors[v] =cmap(i)

  # 矩形を描画 スコアが低いものから描画
  img_w = img.shape[1]
  img_h = img.shape[0]
  for i in reversed(range(n)):
    text = f'{class_names[i]} {100*scores[i]:.0f}%'
    color = colors[class_names[i]]
    y1, x1, y2, x2 = tuple(boxes[i])
    y1, y2 = y1*img_h, y2*img_h
    x1, x2 = x1*img_w, x2*img_w

    # 枠
    r = plt.Rectangle(xy=(x1, y1), width=(x2-x1), height=(y2-y1),
                      fill=False, edgecolor=color, joinstyle='round',
                      clip_on=False, zorder=8+(n-i) )
    ax.add_patch( r )

    # タグ:テキスト
    t = ax.text(x1+img_w/200, y1-img_h/300, text, va='bottom', fontsize=6, color=color,zorder=8+(n-i))
    t.set_path_effects([pe.Stroke(linewidth=1.5,foreground='white'), pe.Normal()])
    fig.canvas.draw()
    r = fig.canvas.get_renderer()
    coords = ax.transData.inverted().transform(t.get_window_extent(renderer=r))
    tag_w = abs(coords[0,0]-coords[1,0])+img_w/100
    tag_h = abs(coords[0,1]-coords[1,1])+img_h/120

    # タグ:背景
    r = plt.Rectangle(xy=(x1, y1-tag_h), width=tag_w, height=tag_h,
                      edgecolor=color, facecolor=color,
                      joinstyle='round', clip_on=False, zorder=8+(n-i))
    ax.add_patch( r )
  #保存
  plt.savefig('/content/save/'+imgfile)
  plt.close()
min_score以上の信頼度を出したものに対して矩形によって囲みローカライズするようにしています。
最後に検出を行う関数の定義を行います。
import time
import numpy as np
import PIL.Image as Image

def run_detector(detector, path,img_file):
  # 画像を読み込んで detector に入力できる形式に変換
  img = Image.open(path+img_file) # Pillow(PIL)
  if img.mode == 'RGBA' :
    img = img.convert('RGB')
  converted_img = img.copy()
  converted_img = converted_img.resize((227,227),Image.LANCZOS) # 入力サイズに縮小
  converted_img = np.array(converted_img, dtype=np.float32)     # np.arrayに変換
  converted_img = converted_img / 255. # 0.0 ~ 1.0 に正規化
  converted_img = converted_img.reshape([1,227,227,3])
  converted_img = tf.constant(converted_img)

  t1 = time.time()
  result = detector(converted_img) # 一般物体検出(本体)
  t2 = time.time()
  print(f'検出時間 : {t2-t1:.3f} 秒' )

  # 結果をテキスト出力するための準備
  r = {key:value.numpy() for key,value in result.items()}
  boxes =       r['detection_boxes']
  scores =      r['detection_scores']
  decode = np.frompyfunc( lambda p : p.decode('ascii'), 1, 1)
  class_names = decode( r['detection_class_entities'] )

  # スコアが 0.25 以上の結果(n件)についてテキスト出力
  print(f'検出オブジェクト' )
  n = np.count_nonzero(scores >= 0.25 )
  for i in range(n):
    y1, x1, y2, x2 = tuple(boxes[i])
    x1, x2 = int(x1*img.width), int(x2*img.width)
    y1, y2 = int(y1*img.height),int(y2*img.height)
    t = f'{class_names[i]:10} {100*scores[i]:3.0f}%  '
    t += f'({x1:>4},{y1:>4}) - ({x2:>4},{y2:>4})'
    print(t)
  #猫を検出したとき出力
    if "Cat" in t:
      showImage(np.array(img), r, img_file,min_score=0.25) # 検出結果を画像にオーバーレイ
  return t2-t1
今回は特に猫を検出した場合に出力するようにしたいので、"Cat"のクラスが検出された場合に画像が出力されるようにしました。
5. 結果
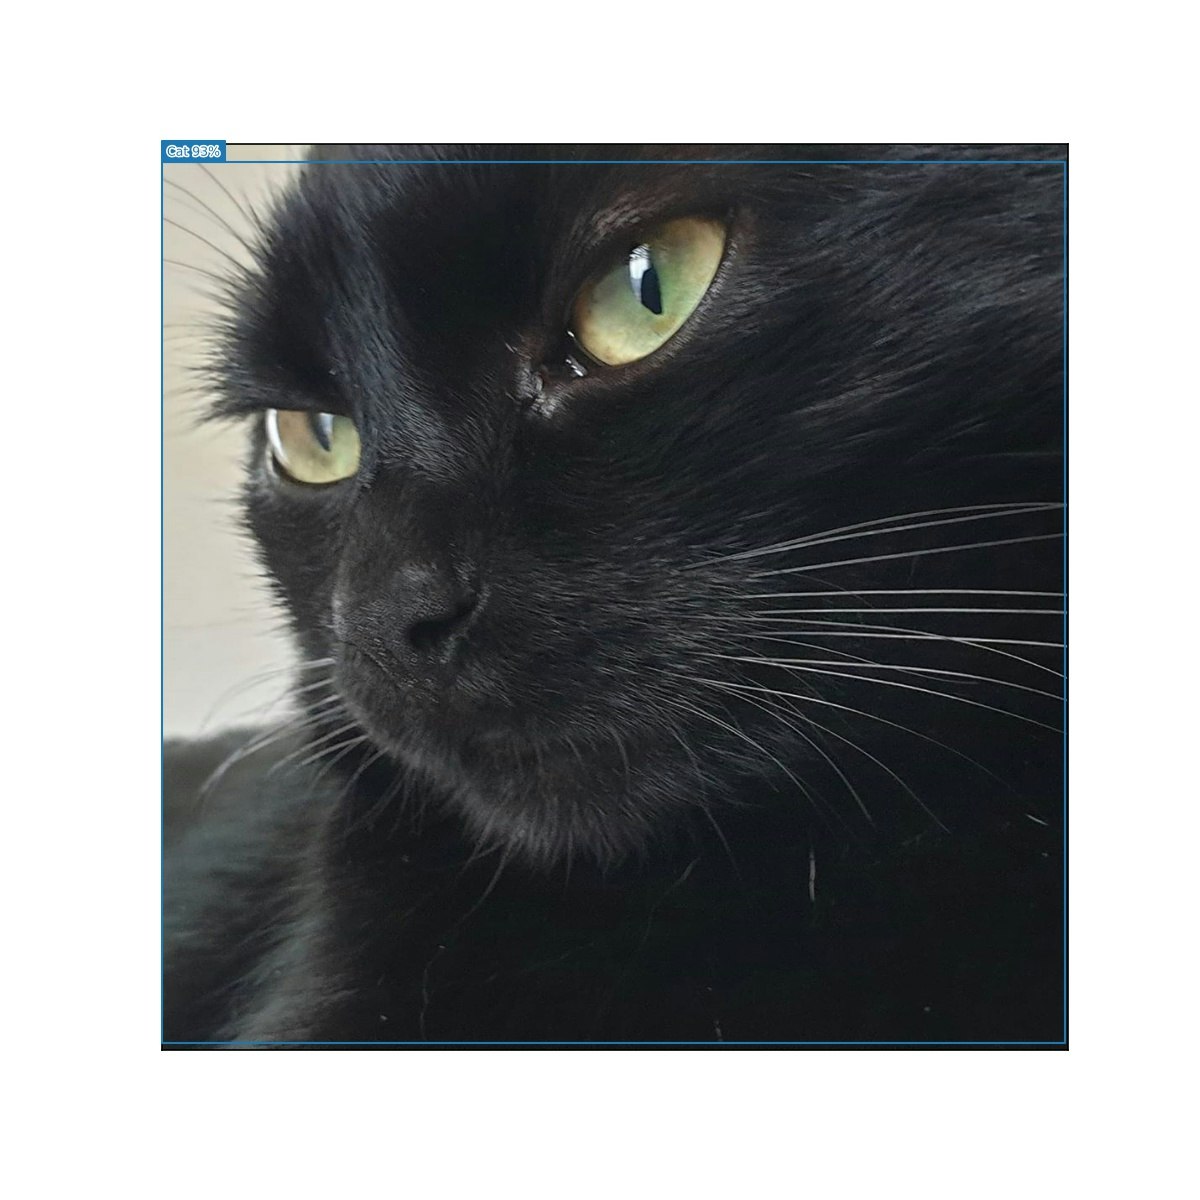
今回の結果としてFaster R-CNNで行った結果は100枚中73枚検出して出力を行っていました。両方で検知できた例がこちらになります。

この図で左側がSSDの結果,右側がFaster R-CNNの結果となります。検出にかかった時間はSSDが平均0.23秒、Faster R-CNNが平均1.30秒でした。
また、SSDの方は74枚という結果でした。枚数は近いのですが,猫と検出した画像でかぶっていないものが意外と多く検出方法による画像の得意不得意があるということがよくわかったと思います。どちらの結果もほとんど猫以外の画像が含まれていなかったので猫の画像のみを拾ってくるという点では成功したと言えるでしょう。猫ではないのに取得してしまった例として次のような画像がありました。
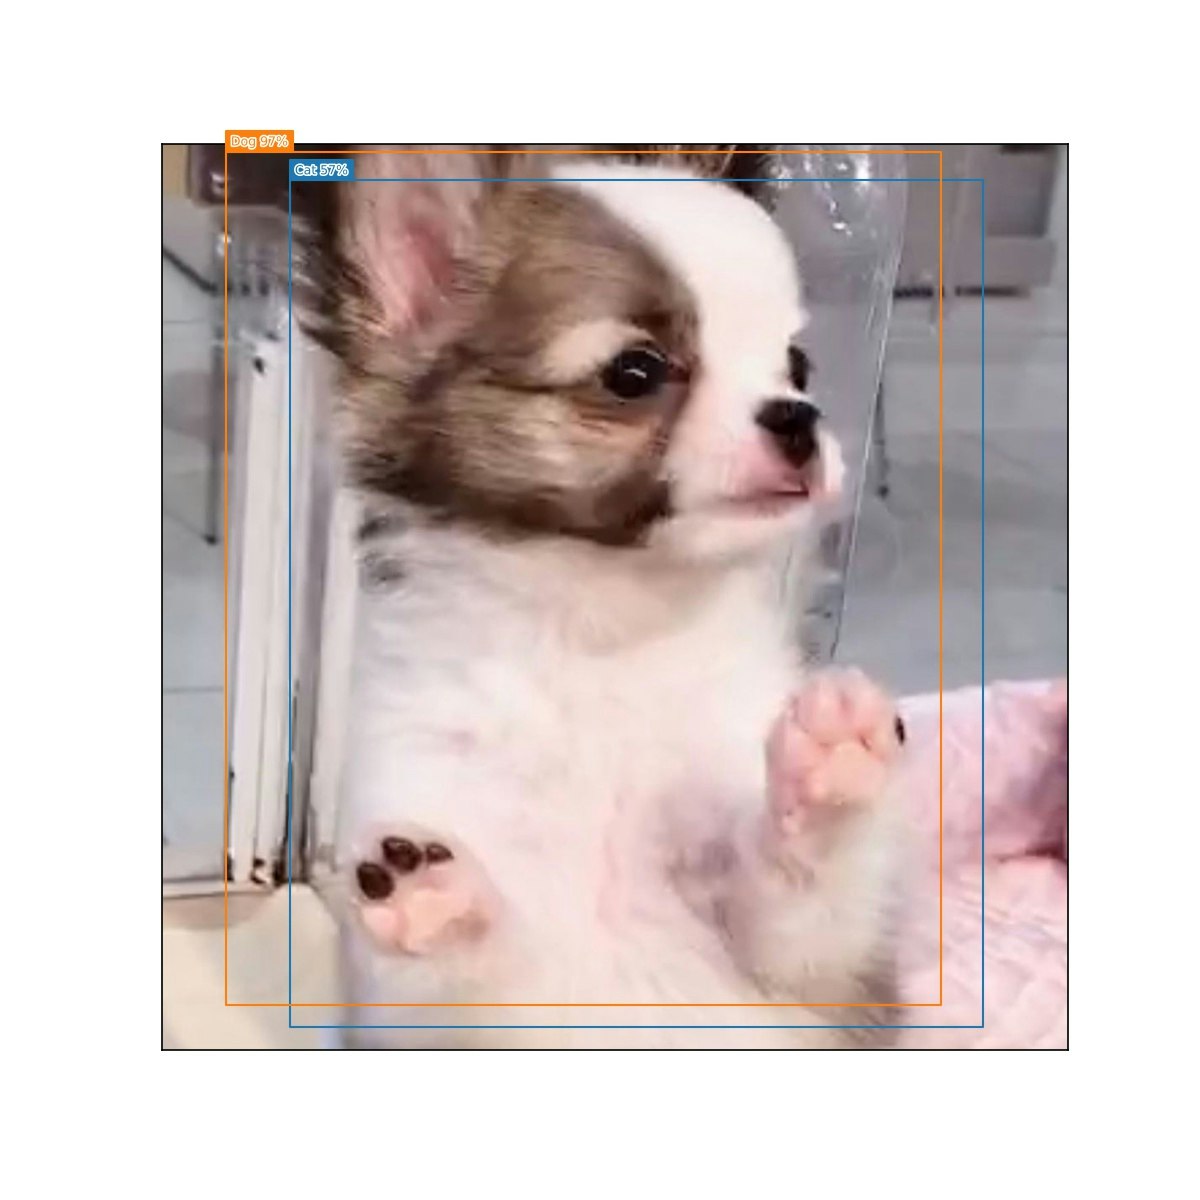
一覧でみたら猫かと思ったのですがよく見ると犬でした。
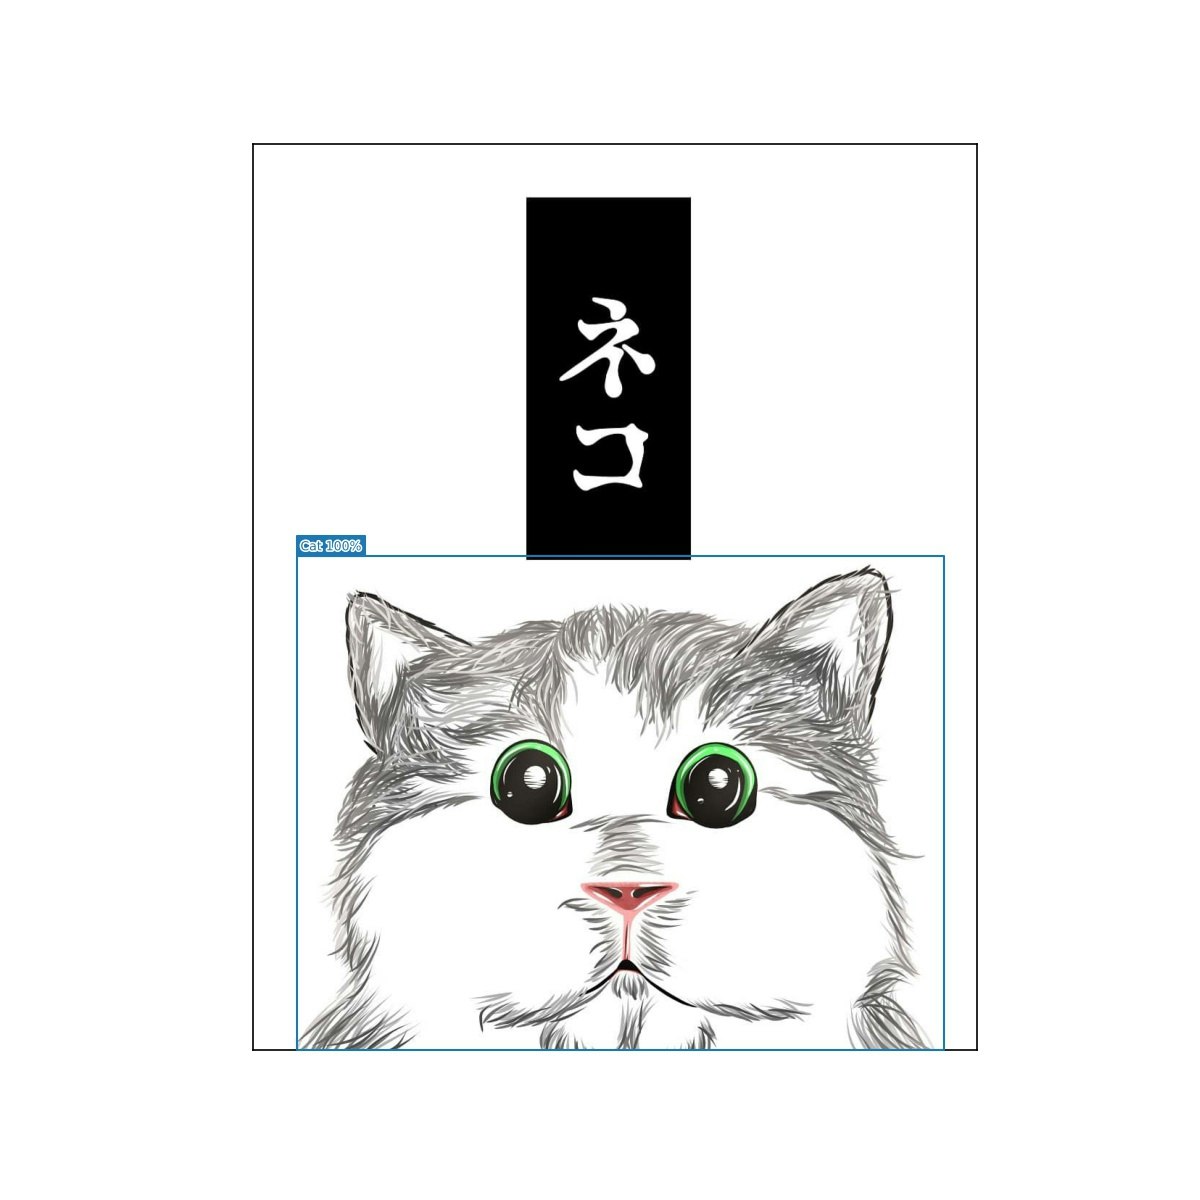
また、猫と検出した画像の中でも珍しいのが絵の猫を検出しているものでした。絵の猫でも検出できるというのはなかなか面白いと思いましたが、絵の猫と本物の猫の判別となるとそこでの学習が必要になるのでクラスの設定も難しそうです。
まとめ
猫の画像を検出してそれ以外の画像を拾わないようにすることができました。しかし、それぞれの検出法では漏れがあることがわかったので、今後は両方を併用しての取得や、今流行りのDETRやYOLOv5を利用しての物体検出を実装して割り出すものやセマンティックセグメンテーションで画像中の猫の部分のみ抽出できるようなシステムづくりも挑戦してみたいと思います。
最後までお付き合いいただきありがとうございました!
参考にしたサイト
https://qiita.com/code0327/items/3b23fd5002b373dc8ae8
https://github.com/arc298/instagram-scraper
https://githubja.com/rarcega/instagram-scraper