はじめに
Life is Tech! Tokai Advent Calendar 2020の17日目を担当します,Androidメンターのあみだです!
今回はAndroidでSocket通信をする話です.
最近はクラウドを経由してデータをやりとりすることが多く,わざわざSocketを使って通信することは滅多にないと思いますが,クラウド上にデータを上げたくない場合や直接通信がしたい場合などのレアケースにおいては使うことになるかと思います.
では,さっそく本題に入っていきましょう!
Socket通信とは
ざっくりと説明すると,サーバとクライアントが通信するために接続口(Socket)を作ってやりとりをする方式です.
基本的にはサーバ側が通信を行うポート番号を指定して待機し,クライアント側がサーバのIPアドレスとポート番号を元に接続しに行くことで,二者間で用いるSocketを作成します.
Socketに対してデータを流し込むことで送信を行い,流し込まれたデータを受け取ることで受信を行います.
このSocketですが,実はBluetoothに対しても用意されており,Socketの作成以降は同様に扱えます.
なので今回はWi-Fi経由とBluetooth経由の両方でSocketを作成して通信したいと思います.
実装
全体はGithubを参考にしてください.
またこのコードはBluetoothとWi-Fiのモジュールが搭載されていることを前提に書いているため,モジュール非搭載の端末やエミュレータで起動すると落ちます.
実機であればほぼ問題ないと思いますが,エミュレータはBluetoothに対応していないことが多いので要注意です.
前提
BluetoothとWi-Fiを使うために以下のパーミッションが必要になります.
<uses-permission android:name="android.permission.BLUETOOTH" />
<uses-permission android:name="android.permission.BLUETOOTH_ADMIN" />

<uses-permission android:name="android.permission.INTERNET" />
<uses-permission android:name="android.permission.ACCESS_WIFI_STATE" />
また通信処理はメインスレッドでは行えないため,Coroutineを使って別スレッドで行います.
そのためgradleにimplementation 'androidx.lifecycle:lifecycle-runtime-ktx:2.2.0-rc01'を追加しています.
MainActivity
MainActivityでは通信のに用いるインターフェースが有効かどうか,またWi-Fiであれば接続されているかを確認しています.
もしどこかに不備があればそれを表示し,サーバ画面とクライアント画面に遷移するためのボタンを無効化します.
クラス外に定義してある定数は後ほど使います.
const val STR_UUID: String = "5E7B99D0-F404-4425-8125-98A2265B4333"
const val PORT: Int = 55913

class MainActivity : AppCompatActivity() {
    override fun onCreate(savedInstanceState: Bundle?) {
        super.onCreate(savedInstanceState)
        setContentView(R.layout.activity_main)

        val parent: ConstraintLayout = findViewById(R.id.constraint_layout)
        val buttonServer: Button = findViewById(R.id.button_server)
        val buttonClient: Button = findViewById(R.id.button_client)

        val btAdapter: BluetoothAdapter = BluetoothAdapter.getDefaultAdapter()
        val wifiManager: WifiManager = applicationContext.getSystemService(WIFI_SERVICE) as WifiManager
        var checkIf: Boolean = true

        if(!btAdapter.isEnabled){
            Snackbar.make(parent, "Bluetoothが無効", Snackbar.LENGTH_SHORT).show()
            checkIf = false
        }

        if(!wifiManager.isWifiEnabled){
            Snackbar.make(parent, "Wi-Fiが無効", Snackbar.LENGTH_SHORT).show()
            checkIf = false
        }

        if(wifiManager.connectionInfo.ipAddress == 0){
            Snackbar.make(parent, "IPアドレスが無効", Snackbar.LENGTH_SHORT).show()
            checkIf = false
        }

        if(!checkIf) {
            buttonServer.isEnabled = false
            buttonClient.isEnabled = false
        }

        buttonServer.setOnClickListener {
            val intent: Intent = Intent(this, ServerActivity::class.java)
            startActivity(intent)
        }

        buttonClient.setOnClickListener {
            val intent: Intent = Intent(this, ClientActivity::class.java)
            startActivity(intent)
        }
    }
}
ServerActivity
サーバ側のActivityです.メッセージを受信したらTextViewに表示します.
Wi-Fi経由とBluetooth経由で受信待機を行う関数を,それぞれ別のスレッドで行っています.
Coroutineに関してはイマイチしっかりと理解しきれていないので,間違った使い方であればご指摘いただきたいです.
またWifiManagerから取得できるIPアドレスはInt型なので,ipToStringにて分かりやすい表記に変換しています.
この処理はこちらを参考にしています.
class ServerActivity : AppCompatActivity() {
    var textMessage: TextView? = null
    var btSrvSoc: BluetoothServerSocket? = null
    var btSoc: BluetoothSocket? = null
    var btDis: DataInputStream? = null
    var ipSrvSoc: ServerSocket? = null
    var ipSoc: Socket? = null
    var ipDis: DataInputStream? = null

    override fun onCreate(savedInstanceState: Bundle?) {
        super.onCreate(savedInstanceState)
        setContentView(R.layout.activity_server)

        textMessage = findViewById(R.id.text_message)
        val textIp: TextView = findViewById(R.id.text_ip)

        textIp.text = ipToString( (applicationContext.getSystemService(WIFI_SERVICE) as WifiManager).connectionInfo.ipAddress )

        lifecycleScope.launchWhenResumed { startBtSrv() }
        lifecycleScope.launchWhenResumed { startIpSrv() }
    }

    private suspend fun startBtSrv() = withContext(Dispatchers.IO) {
        try {
            val btAdapter: BluetoothAdapter = BluetoothAdapter.getDefaultAdapter()
            btSrvSoc = btAdapter.listenUsingRfcommWithServiceRecord("BtIpComm", UUID.fromString(STR_UUID))

            while (true) {
                btSoc = btSrvSoc?.accept()
                btDis = DataInputStream(BufferedInputStream(btSoc?.inputStream))
                try {
                    while (true) {
                        val msg = btDis?.readUTF()
                        withContext(Dispatchers.Main) {
                            textMessage?.text = "$msg from Bluetooth"
                        }
                    }
                } catch (e: Exception) {
                } finally {
                    btDis?.close()
                    btSoc?.close()
                }
            }
        }catch (e: Exception){}
    }

    private suspend fun startIpSrv() = withContext(Dispatchers.IO){
        try {
            ipSrvSoc = ServerSocket(PORT)
            ipSrvSoc?.reuseAddress = true

            while (true) {
                ipSoc = ipSrvSoc?.accept()
                ipDis = DataInputStream(BufferedInputStream(ipSoc?.inputStream))

                try {
                    while (true) {
                        val msg = ipDis?.readUTF()
                        withContext(Dispatchers.Main) {
                            textMessage?.text = "$msg from Wi-Fi"
                        }
                    }
                } catch (e: Exception) {
                } finally {
                    ipDis?.close()
                    ipSoc?.close()
                }
            }
        }catch (e: Exception){}
    }

    private fun ipToString(i: Int): String {
        return "${i and 0xFF}.${i shr 8 and 0xFF}.${i shr 16 and 0xFF}.${i shr 24 and 0xFF}"
    }

    override fun onDestroy() {
        super.onDestroy()
        try {
            btDis?.close()
            btSoc?.close()
            btSrvSoc?.close()
            ipDis?.close()
            ipSoc?.close()
            ipSrvSoc?.close()
        }catch (e: Exception){}
    }
}
受信待機関数内では,はじめに待受用のSocketを作成します.
Wi-Fi経由であれば使用するポート番号を,Bluetooth経由であれば使用するUUIDを指定します.
どちらも既に用途が決まっている値以外であれば任意に設定することが出来ますが,サーバ側・クライアント側の両方で一致させる必要があります.
最も外側のWhileループではクライアント側の接続を待機しています.
接続された場合は入力用の口であるInputStreamを取得します.
このInputStreamはバイトしか扱えないため,そのままであれば受け取ったバイトを変換していく必要があります.
しかしそれではあまりに面倒なので,BuffInputStreamでバッファリングし,プリミティブ型で扱えるようにするDataInputStreamでラップします.
次のWhileループではメッセージを待機しています.
今回はString型のメッセージを受信する予定なのでreadUTFを利用しています.
メッセージが来た場合はそれを変数に代入してTextViewに表示しています.
表示まで実行したところでまたメッセージ待ちの状態に戻り,接続が維持されている限りひたすらに受信を行い続けます.
クライアント側から接続が切断された場合にはreadUTFが例外を発生させますが,try-catchによって例外が処理されループが終了します.
あまりよろしくないですが,今回は例外に対応しないので握りつぶしています.
メッセージ待機のループから抜けると最も外側のWhileループによって接続待機がはじまるので,このActivityが開かれている間は接続待機とメッセージ待機を繰り返します.
ClientActivity
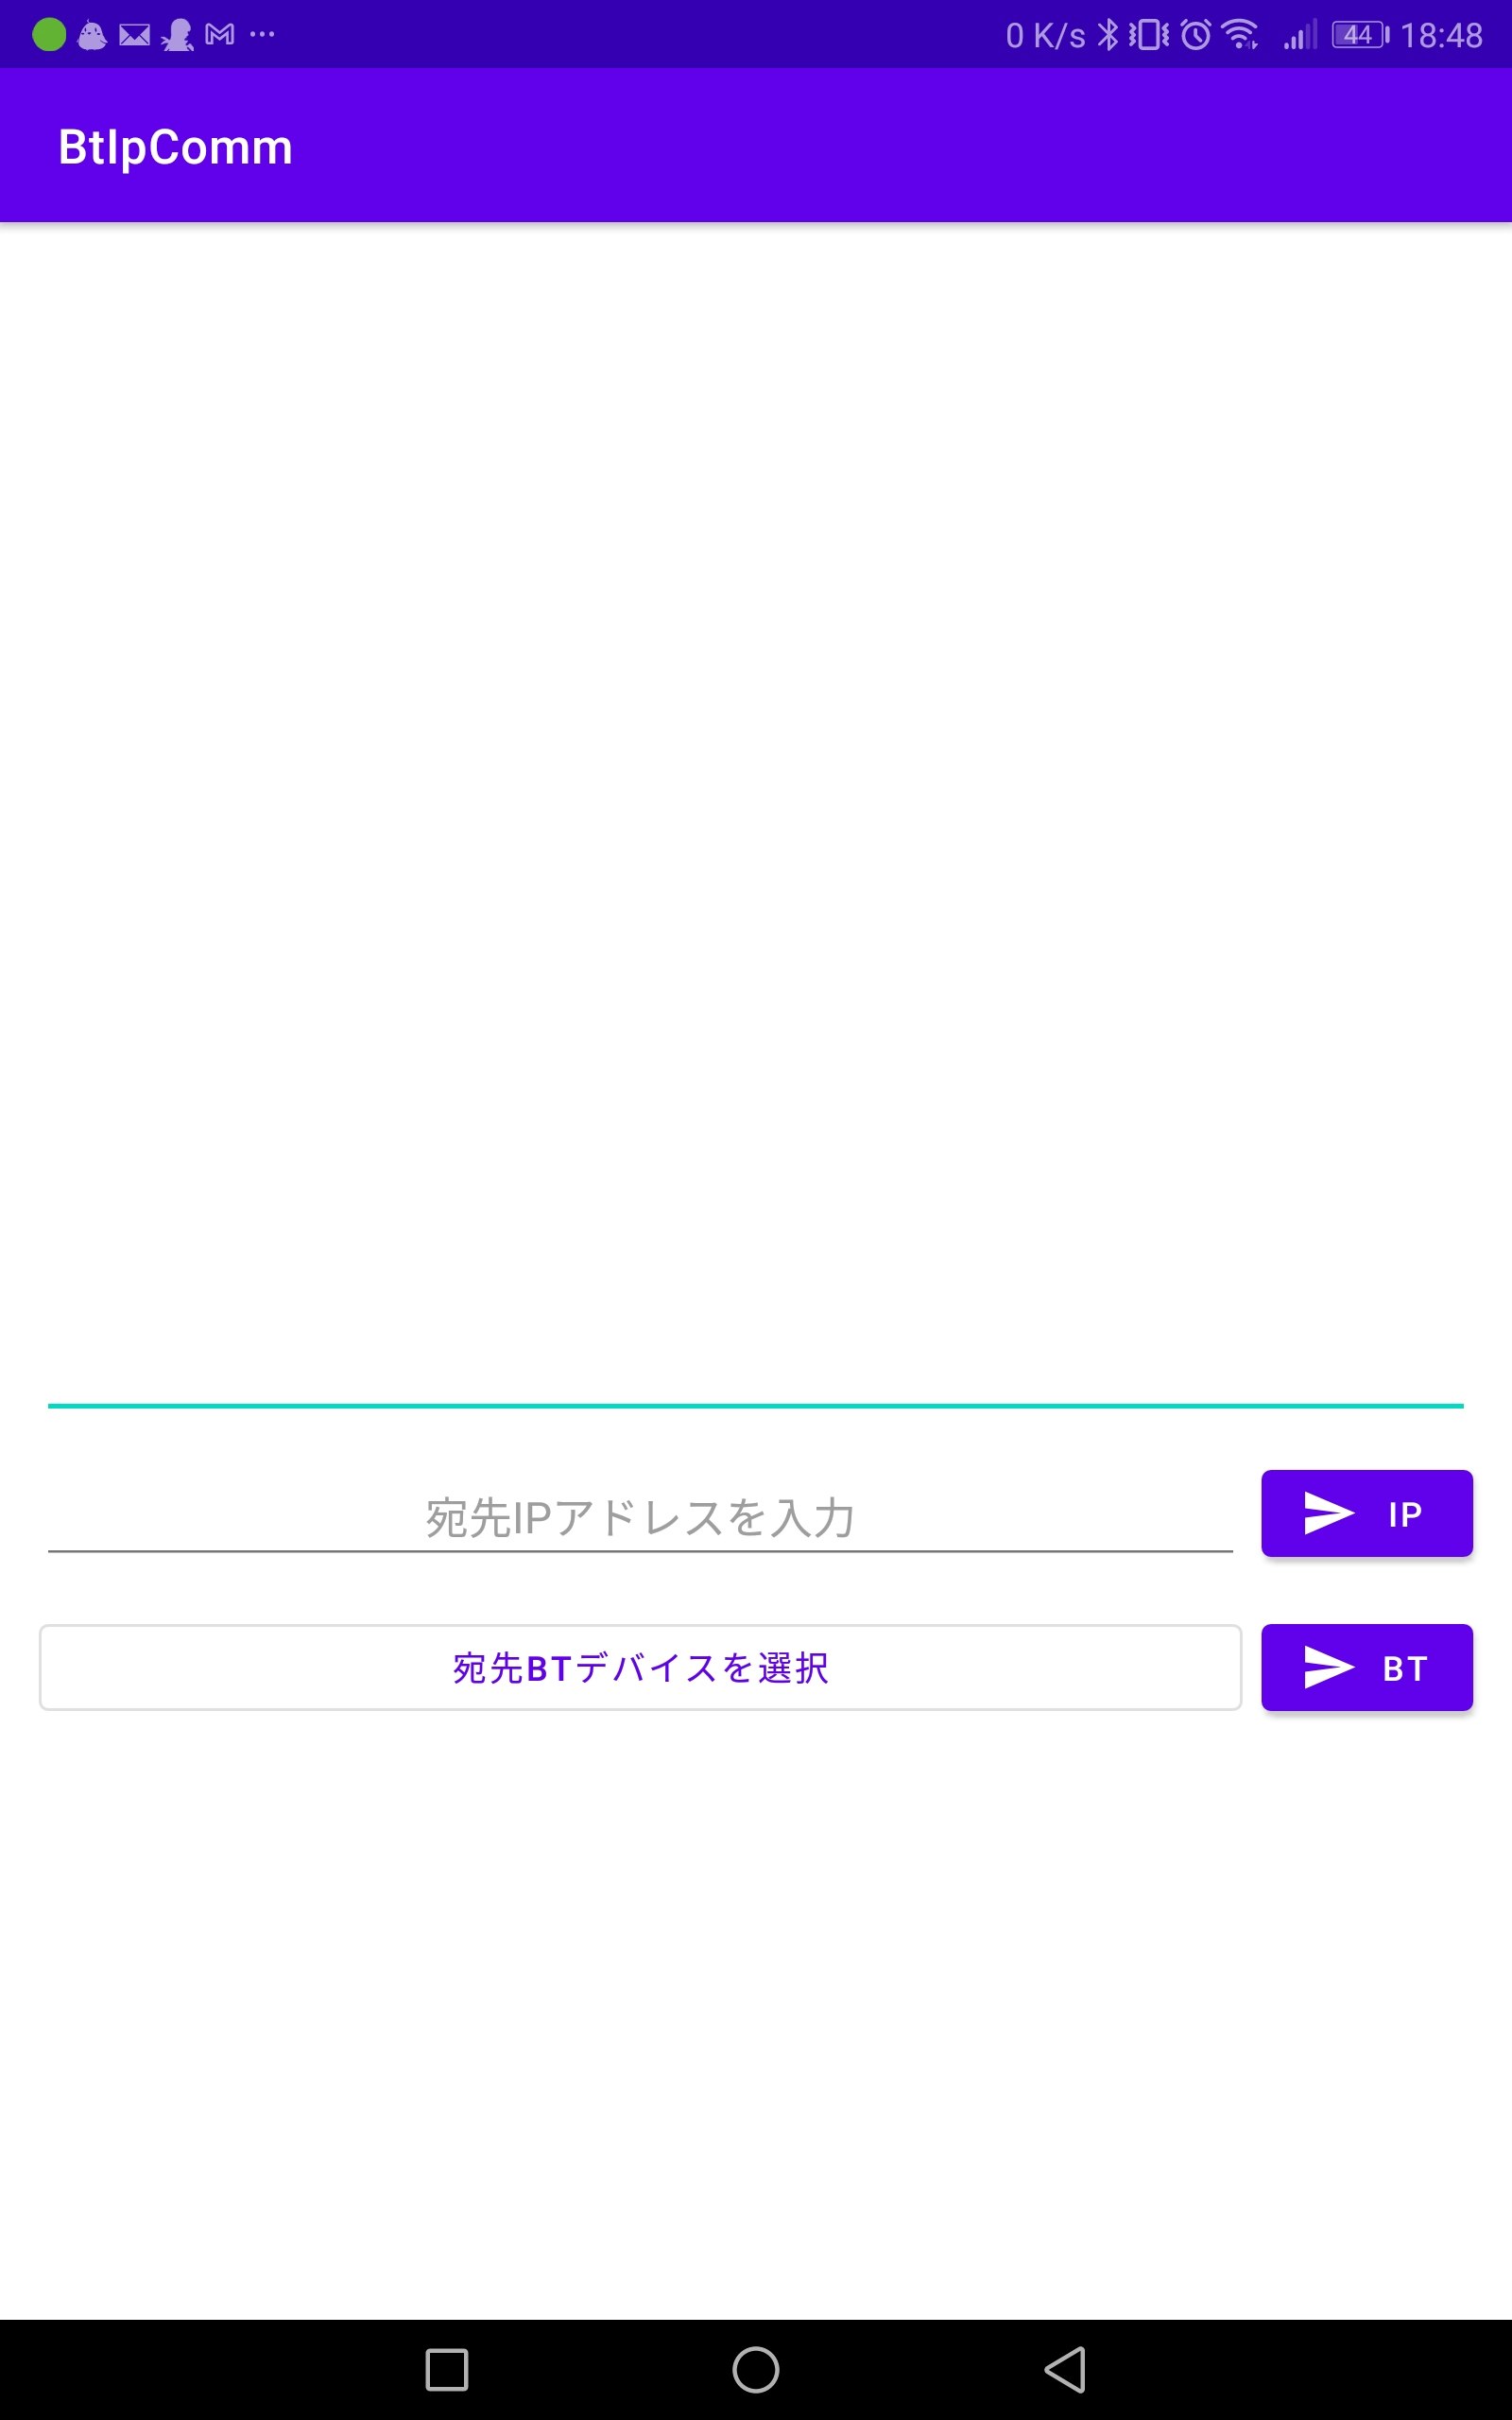
クライアント側のActivityです.接続先を設定して送信ボタンを押すことでEditTextの内容が送信されます.
今回は色々と手を抜いて簡単化のためにBluetooth通信を行う端末をペアリング済みのものから取得するようにしていますが,BluetoothDeviceさえ取得できれば良いので機器探索を行ってもよいと思います.
またDialogFragmentではなくAlertDialogを利用しているため,画面回転などによって落ちます.きちんと作るのであればDialogFragmentを利用しましょう.
class ClientActivity : AppCompatActivity() {
    var btSoc: BluetoothSocket? = null
    var btDos: DataOutputStream? = null
    var ipSoc: Socket? = null
    var ipDos: DataOutputStream? = null
    var btDevice: BluetoothDevice? = null

    override fun onCreate(savedInstanceState: Bundle?) {
        super.onCreate(savedInstanceState)
        setContentView(R.layout.activity_client)

        val btAdapter: BluetoothAdapter? = BluetoothAdapter.getDefaultAdapter()
        val btDeviceList: List<BluetoothDevice>? = btAdapter?.bondedDevices?.toList()
        val deviceNameList:MutableList<String> = mutableListOf()

        val parent: ConstraintLayout = findViewById(R.id.layout_client)
        val editMessage: EditText = findViewById(R.id.edit_message)
        val buttonSelectBtDevice: Button = findViewById(R.id.button_select_bt_device)
        val buttonSendBt: Button = findViewById(R.id.button_send_bt)
        val editIpAddr: EditText = findViewById(R.id.edit_ip_addr)
        val buttonSendIp: Button = findViewById(R.id.button_send_ip)

        btDeviceList?.forEach { deviceNameList.add(it.name) }

        buttonSelectBtDevice.setOnClickListener {
            try{
                btDos?.close()
                btSoc?.close()
            }catch (e: Exception){}

            btSoc = null

            AlertDialog.Builder(this)
                    .setTitle("接続デバイスを選択")
                    .setItems(deviceNameList.toTypedArray()) { _, which ->
                        btDevice = btDeviceList?.get(which)
                        buttonSelectBtDevice.text = deviceNameList[which]
                    }
                    .show()
        }

        editIpAddr.doOnTextChanged { _, _, _, _ ->
            try {
                ipDos?.close()
                ipSoc?.close()
            }catch (e: Exception){}

            ipSoc = null
        }

        buttonSendBt.setOnClickListener {
            if(btDevice == null){
                Snackbar.make(parent, "接続機器を選択してください", Snackbar.LENGTH_SHORT).show()
                return@setOnClickListener
            }

            lifecycleScope.launchWhenResumed {
                withContext(Dispatchers.IO) {
                    try{
                        if(btSoc == null) {
                            btSoc = btDevice?.createRfcommSocketToServiceRecord(UUID.fromString(STR_UUID))
                            btSoc?.connect()
                            btDos = DataOutputStream(BufferedOutputStream(btSoc?.outputStream))
                        }
                        btDos?.writeUTF(editMessage.text.toString())
                        btDos?.flush()
                    }catch (e: Exception){
                        try{
                            btDos?.close()
                            btSoc?.close()
                        }catch (e: Exception){}
                        btDos = null
                        btSoc = null
                        withContext(Dispatchers.Main) {
                            Snackbar.make(parent, "Bluetoothでの通信に失敗", Snackbar.LENGTH_SHORT).show()
                        }
                    }

                }
            }
        }

        buttonSendIp.setOnClickListener {
            lifecycleScope.launchWhenResumed {
                withContext(Dispatchers.IO) {
                    try {
                        if(ipSoc == null){
                            ipSoc = Socket(editIpAddr.text.toString(), PORT)
                            ipDos = DataOutputStream(BufferedOutputStream(ipSoc?.outputStream))
                        }
                        ipDos?.writeUTF(editMessage.text.toString())
                        ipDos?.flush()
                    }catch (e: Exception){
                        try{
                            ipDos?.close()
                            ipSoc?.close()
                        }catch (e: Exception){}
                        ipSoc = null
                        withContext(Dispatchers.Main) {
                            Snackbar.make(parent, "Wi-Fiでの通信に失敗", Snackbar.LENGTH_SHORT).show()
                        }
                    }

                }
            }
        }
    }

    override fun onDestroy() {
        super.onDestroy()
        try {
            ipDos?.close()
            ipSoc?.close()
            btDos?.close()
            btSoc?.close()
        }catch (e: Exception){}
    }
}
送信ボタンを押した際にSocketがnullであれば未接続であると判断して接続処理を行うため,Bluetooth端末を選択する際や,宛先IPアドレスを入力する際に既存のSocketを閉じてnullを代入しています.
クライアントよりも先にサーバ側が接続を終了していた場合などでは送信時に例外が発生するので,ソケットを閉じてnullを代入し,通信失敗を表示します.
実行
2台の端末間で通信が行えることを確認します!
左側のタブレットがクライアント,右側のスマホがサーバです.

まずはBluetoothでの通信を試します.
宛先BTデバイスを選択と書いてあるボタンをタップするとダイアログが出ます.
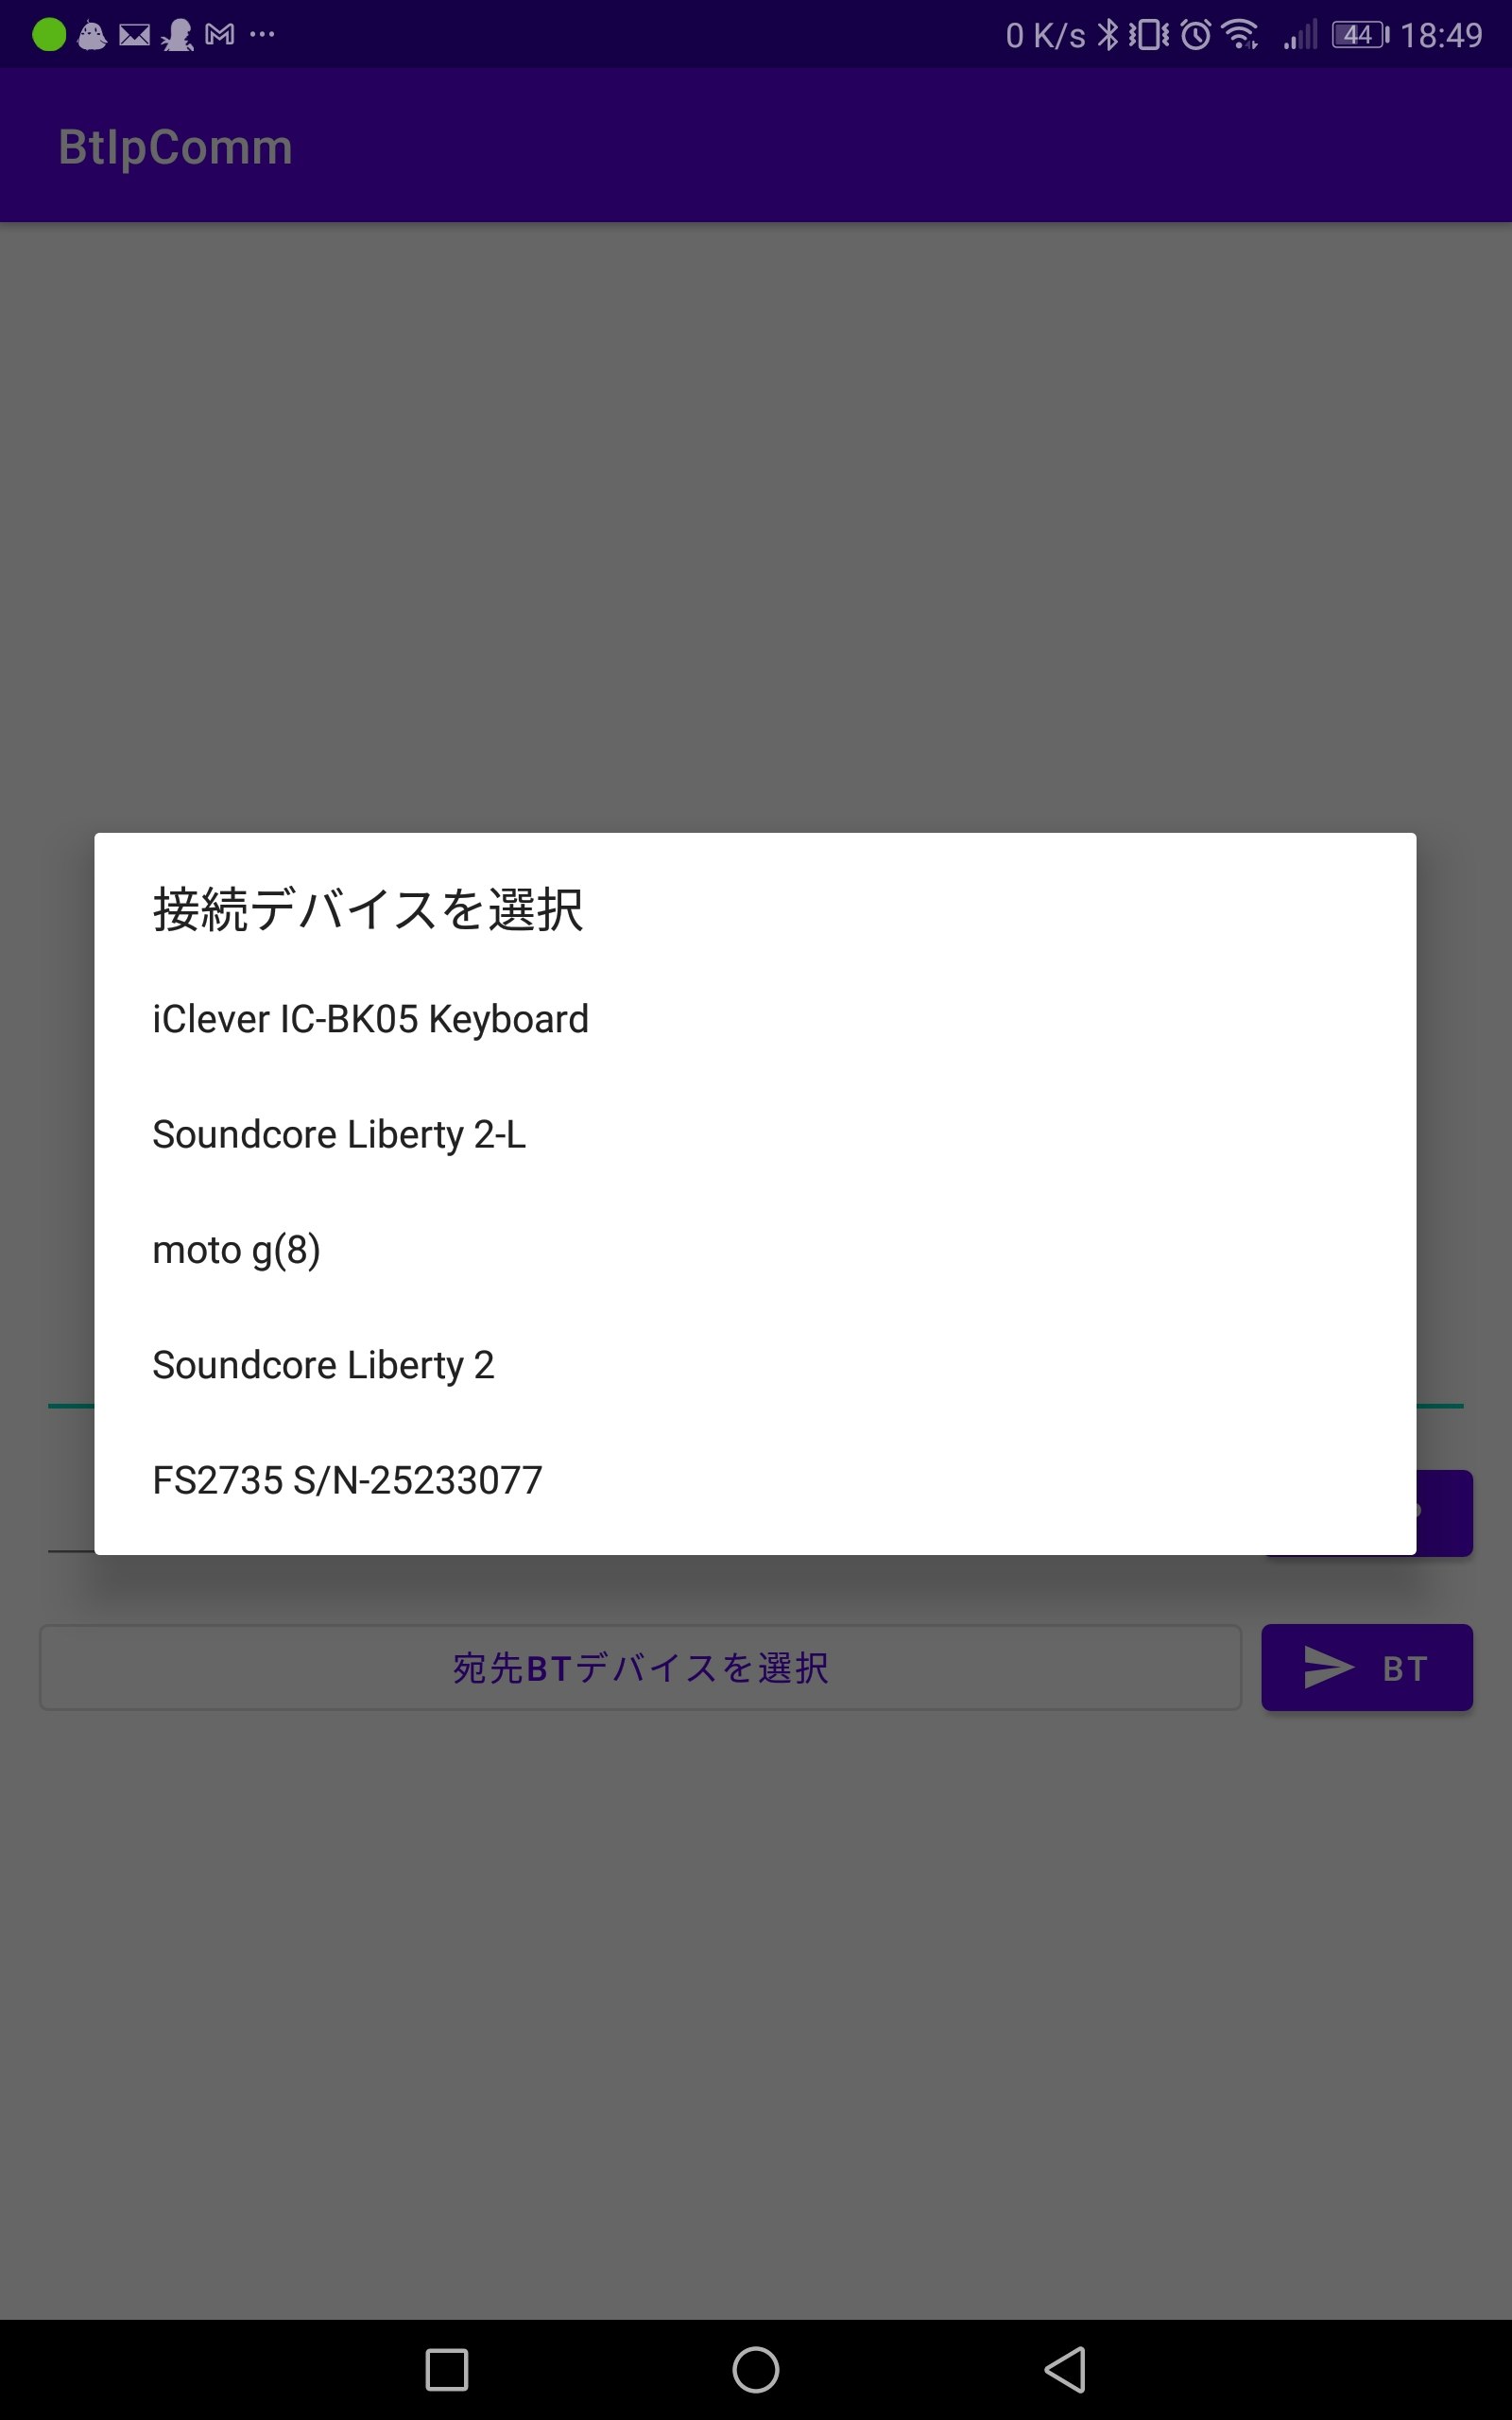
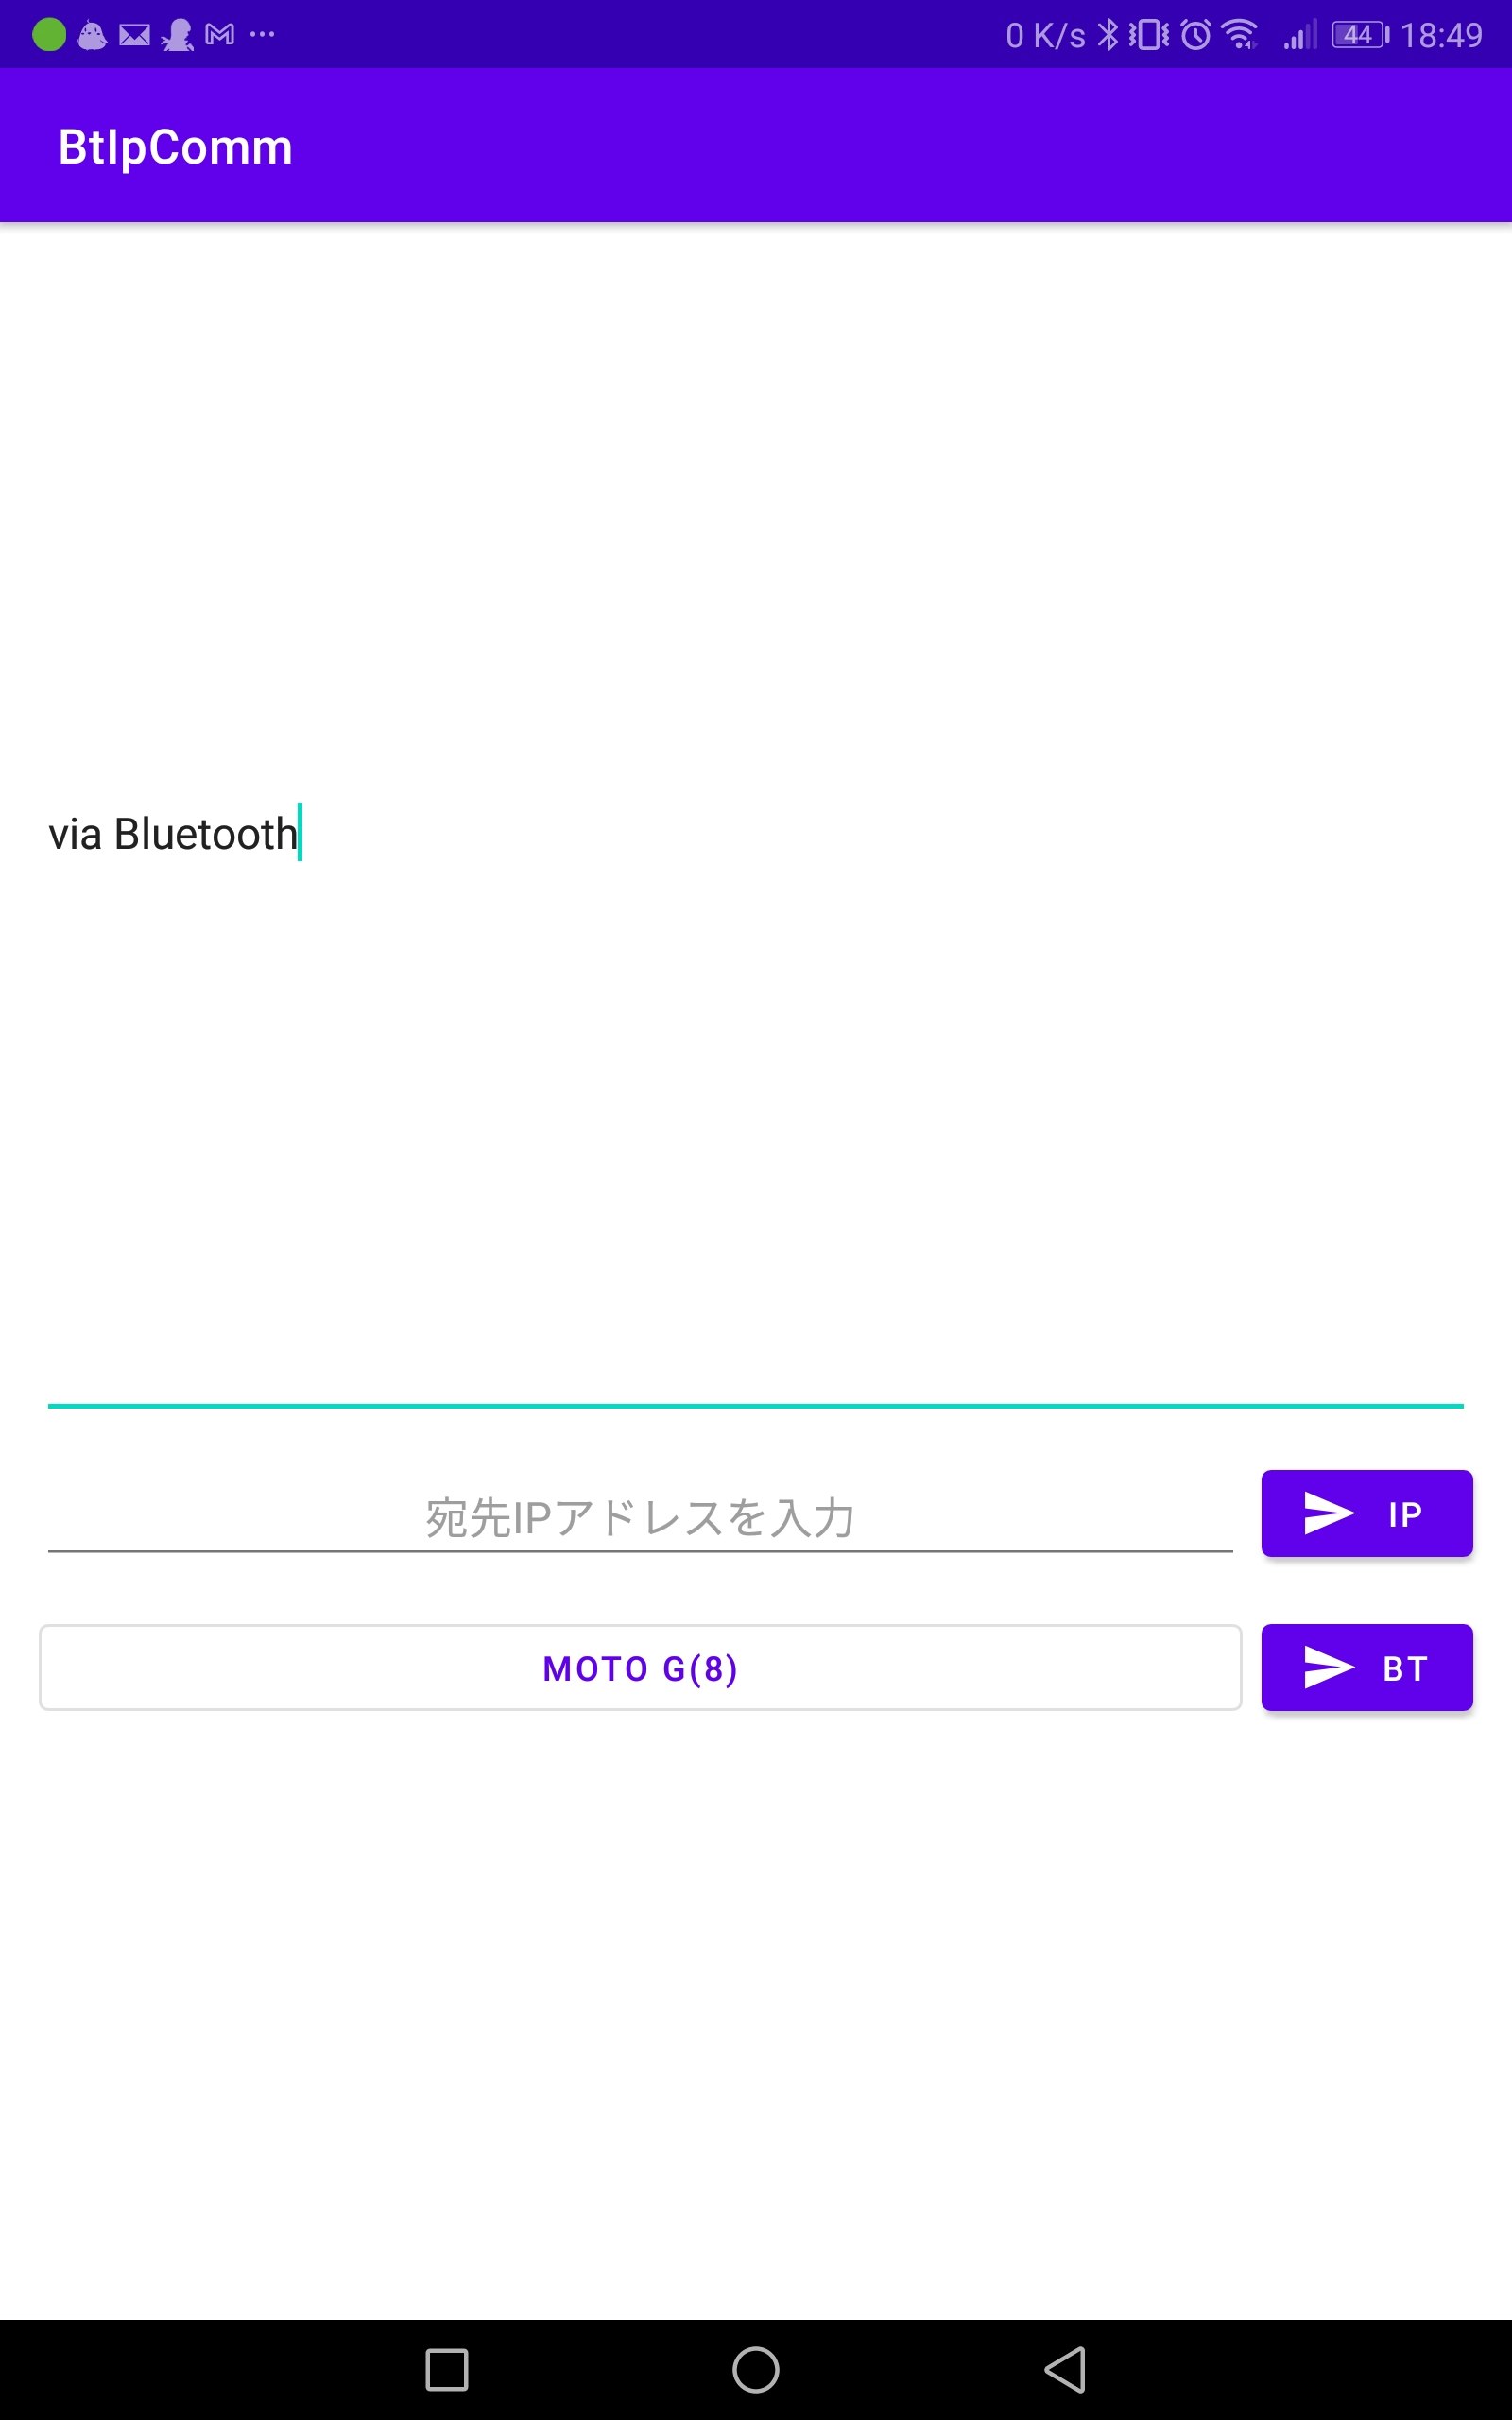
スマホ(moto g8)を選択してメッセージを入力し,送信ボタンをタップします.
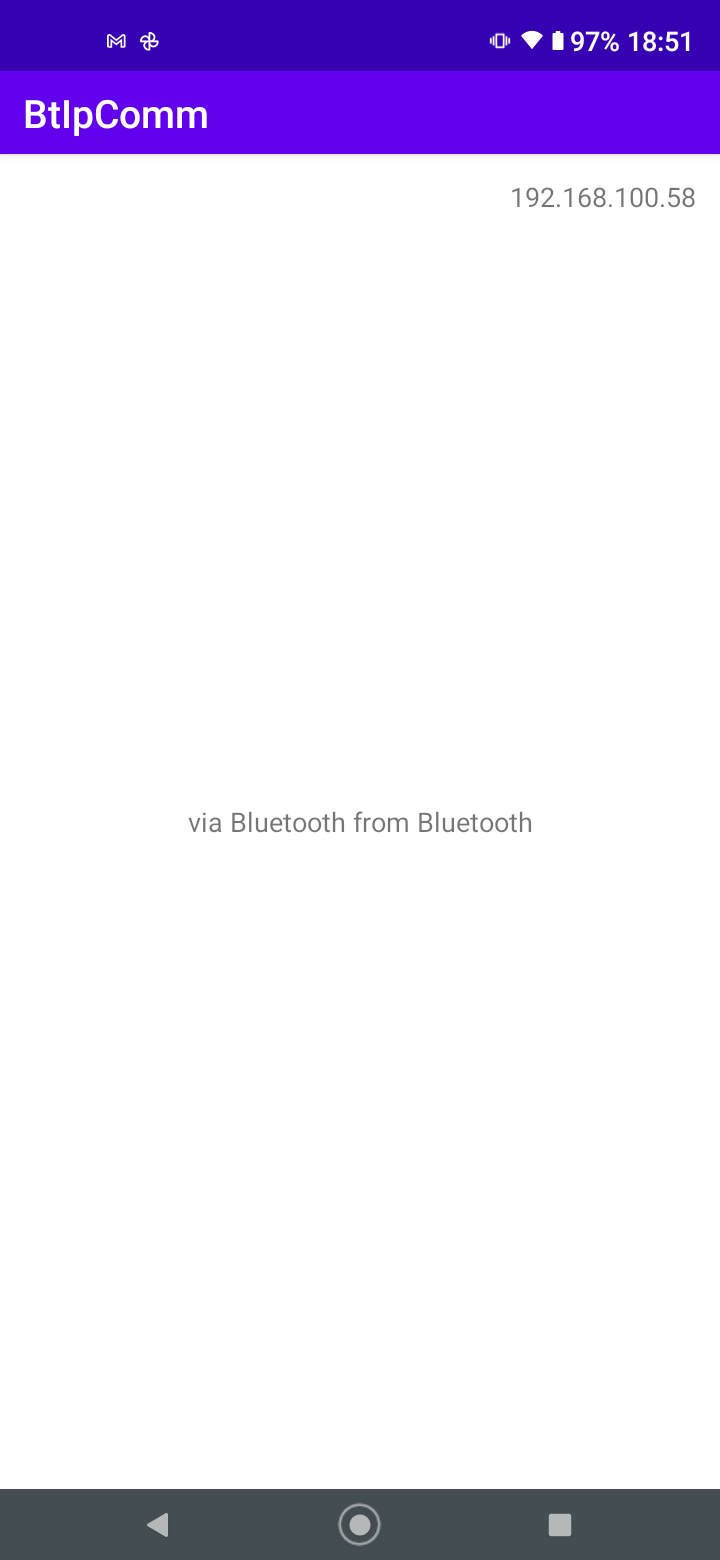
するとサーバ側にメッセージが表示されました.
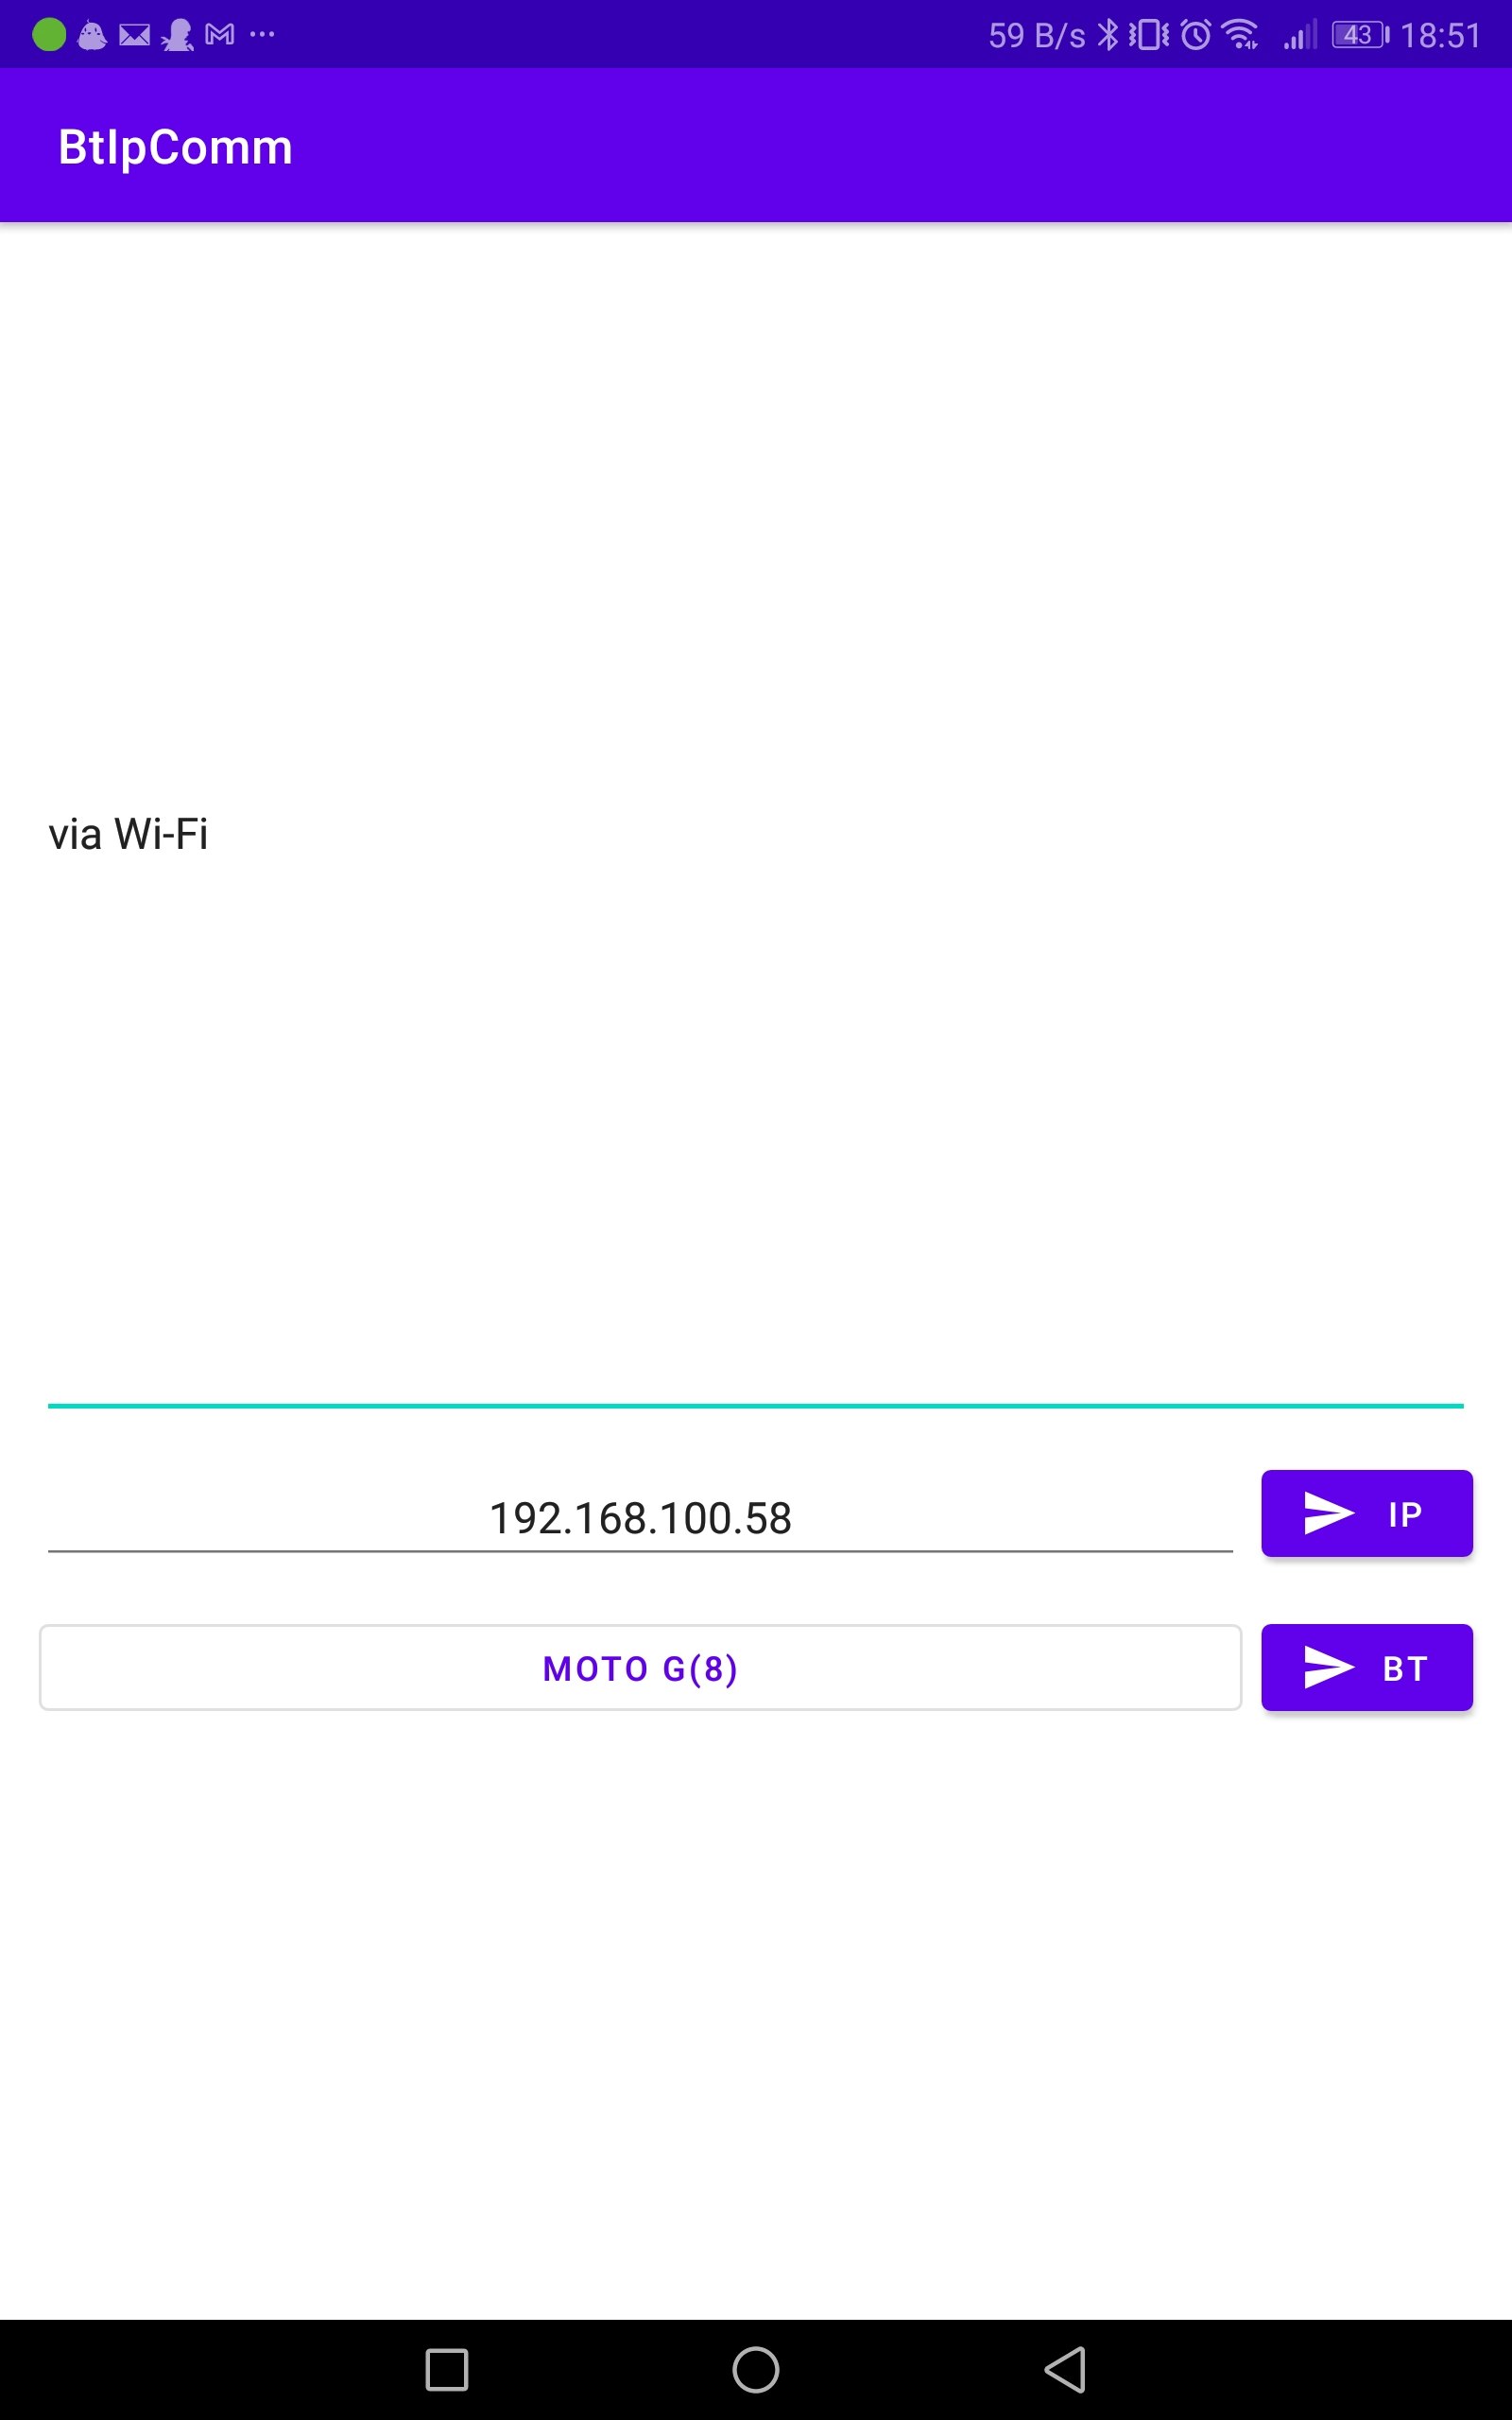
次にWi-Fiでの通信を試します.
宛先IPアドレスを入力とあるEditTextにサーバのIPアドレスを入力し,メッセージを入力して送信ボタンをタップします.
するとサーバ側にメッセージが表示されました.

というわけで,無事に通信が行えることが確認できました!
おわりに
例外処理などが少々面倒ではありますが,ローカルでの通信によりデータのやりとりが行えました!
今回はWi-Fi経由とBluetooth経由の両方でメッセージの送受信を行いましたが,どちらか一方で十分な場合や,やりとりするメッセージの順番が決まっており無限ループが不要な場合もあると思います.その場合は適宜書き換えてください.
またサーバに対して複数台のクライアントが接続できるような変更や,例えばBluetoothでIPアドレスや鍵交換など通信に必要な準備を行い,Wi-Fi経由でメッセージのやりとりを行うような通信経路の使い分けを行っても面白いと思います.
Life is Tech ! #1 Advent Calendar 2020に投稿したAndroid Thingsの記事に続いて需要がニッチな感はありますが,必要としている誰かの参考になれば幸いです!
参考文献
ソケット(Wikipedia)
AndroidでKotlin Coroutinesを使ってソケット通信をしてみる(Qiita)
Socket(Android Developer)
WifiManager(Android Developer)
Bluetooth の概要(Android Developer)
BluetoothAdapter(Android Developer)