はじめに
この記事はハンズオン形式で Remix と Cloudflare でアプリケーションを作成します。
未経験からRails エンジニアになった方をメインのターゲットとしています。
(私自身がその対象です)
Rails でアプリケーション開発ができるようになってきたけど、ほかの技術についても知ってみたいな、、、と思っている経験1年目から2年目くらいのジュニアエンジニアの方の力になりたいです。
Remix ってなに?、Cloudflare とか難しそう、、、と感じるかもしれません。
この記事では、先に Remix や Typescript の勉強をする必要はありません。
(Rails だったらこうですという例を入れます。)
まずはこの記事で動くアプリケーションを作成して、抵抗感をなくすことが肝要です。
興味をもったら下記をやってみれば良いのです。
-
Remix と Rails について学ぶ
- Remix Rails とググっていろんな記事を読んでみる
-
Remix 公式ドキュメント チュートリアルをやる
-
TypeScript の勉強をする
使用する技術
Remix, React, Typescript
Cloudflare pages, d1, Zero Trust
作成するアプリケーションの概要
データ一覧、作成、編集削除の基本的なCRUDができるアプリケーションです。
ユーザーは簡易的な認証を経て、アプリケーションにアクセスします。
複数の入力フォームが存在する画面があります。
ユーザーはフォームを入力して、サブミットします。
送信されたデータを検証します。(バリデーション)
d1 にデータを保存します。
ユーザーに結果を返します。
アプリケーションのセットアップ
https://developers.cloudflare.com/pages/framework-guides/deploy-a-remix-site/
↑の通りやっていきます。
npm create cloudflare@latest -- my-remix-app --framework=remix
インストール時に何度か質問がきます
全部 yes でOKです。
Need to install the following packages:
create-remix@2.11.1
Ok to proceed? (y) y

  git   Initialize a new git repository?
         Yes

  deps   Install dependencies with npm?
         Yes

Do you want to deploy your application?
         yes
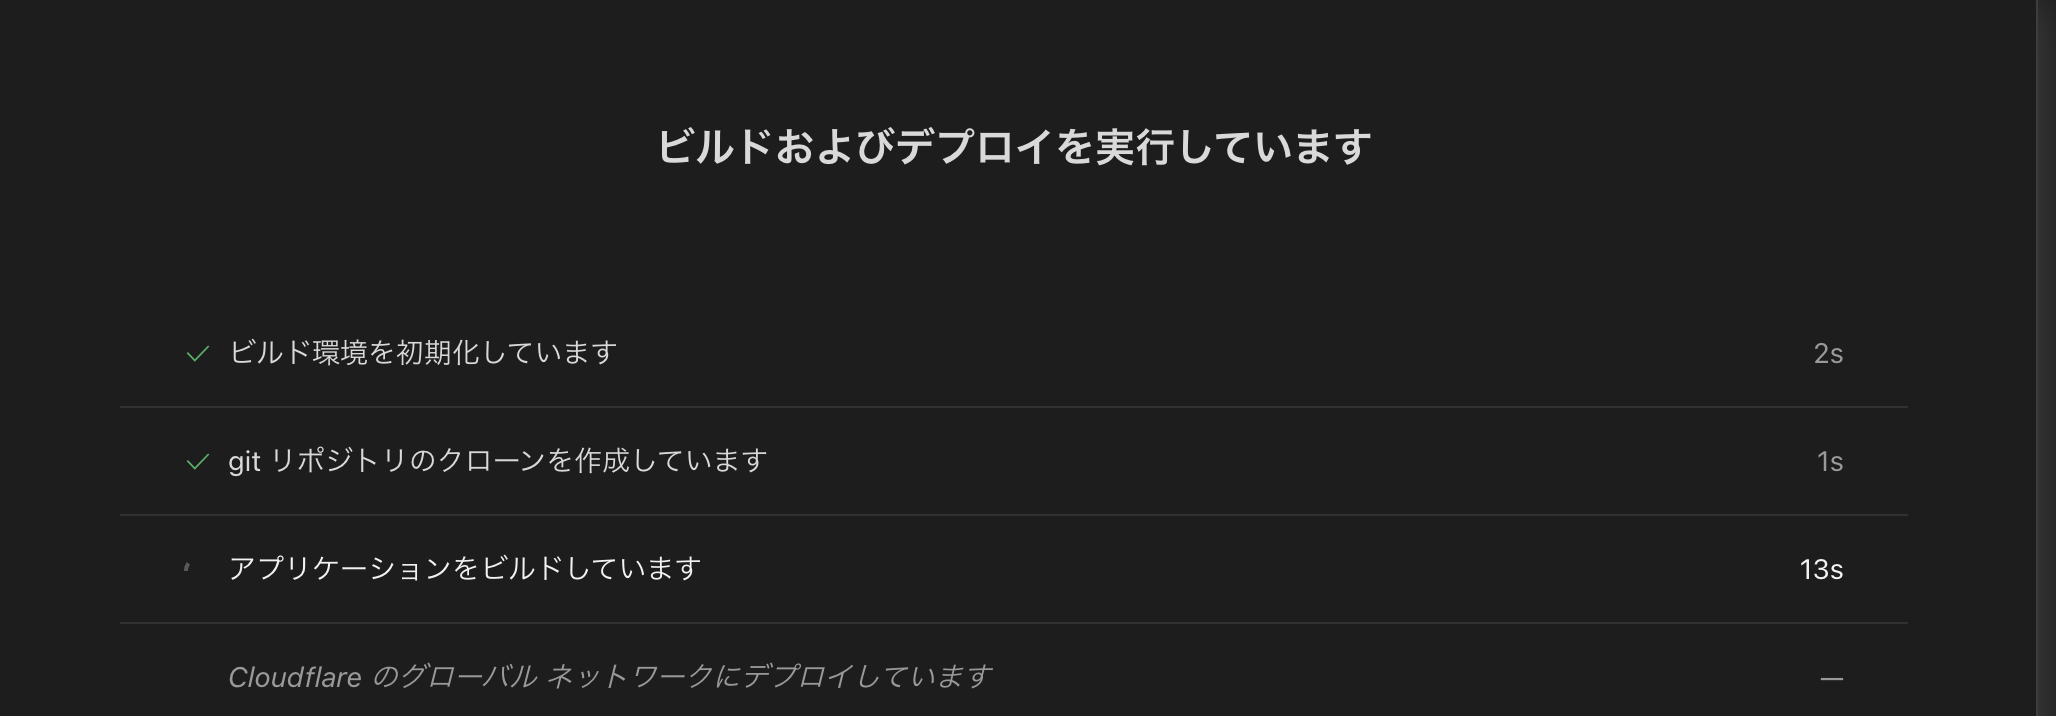
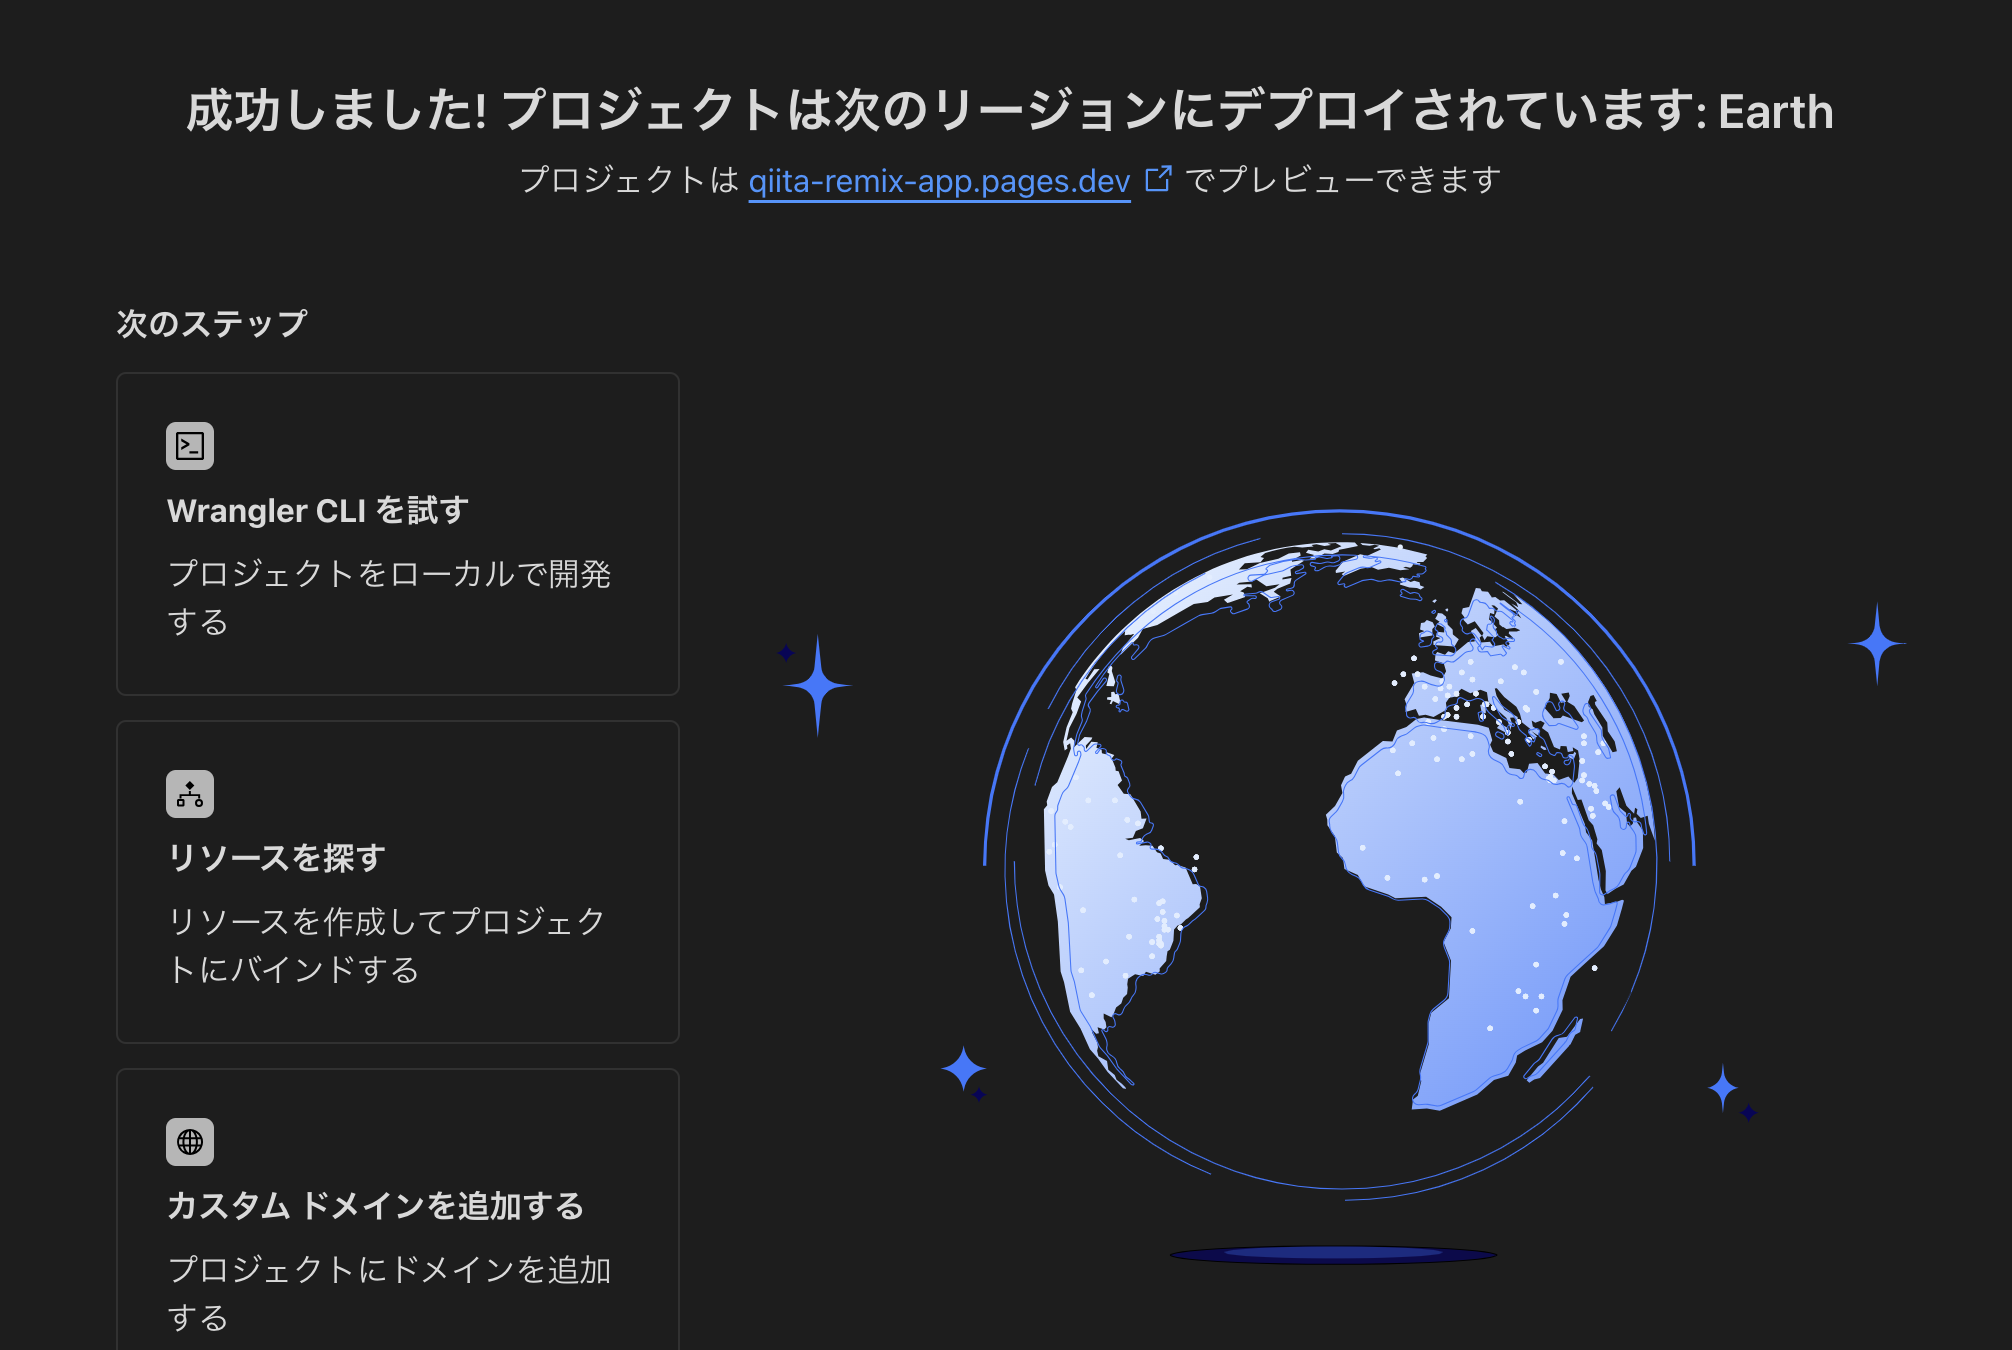
インストールとデプロイが完了すると下記がブラウザで確認できます。
これだけでデプロイまで完了しています、簡単ですね!
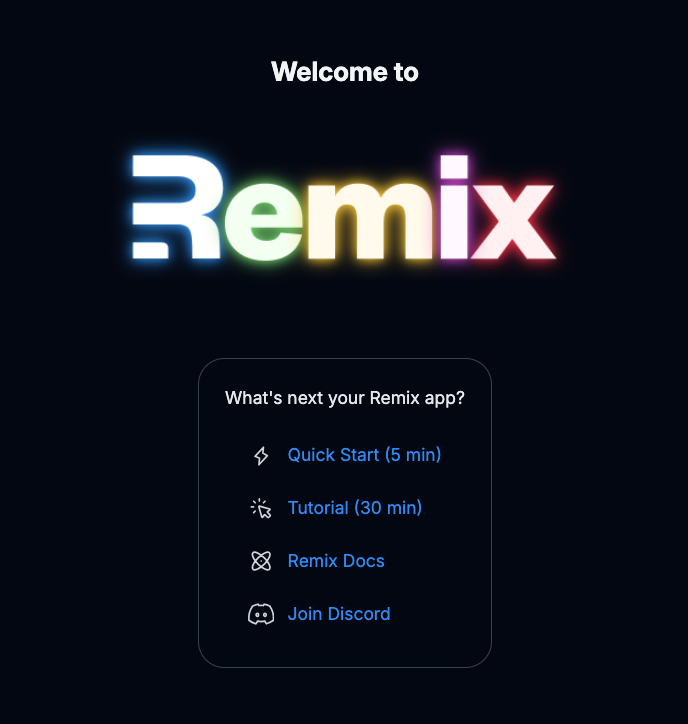
エディタを開いて、下記のコマンドを実行して開発環境が立ち上がることも確認しましょう。
npm run dev
Git と連携
https://github.com/new/
↑にアクセスして新しいレポジトリを作成します。
Repository name は任意です。
Public か Private かも任意です。
レポジトリを作成したら下記を実行します。
git remote add origin https://github.com/<your-gh-username>/<repository-name>
git branch -M main
git push -u origin main
これでGit との連携が完了です。
Cloudflare Pages と連携、デプロイ
まず、Cloudflare のアカウントを作成してください
「Cloudflare アカウント」と検索すればやり方が出てきます。
例:https://zenn.dev/taketakekaho/articles/5f72f4c58ab0ba
完了したらダッシュボードにアクセスします。
https://dash.cloudflare.com/
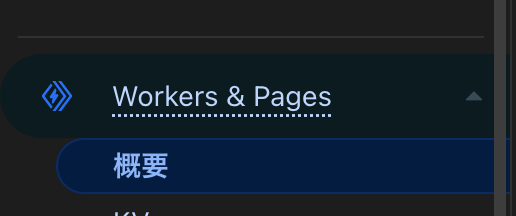
左のタブから 「Workers & Pages」を選択して、「作成」ボタンを押下します。
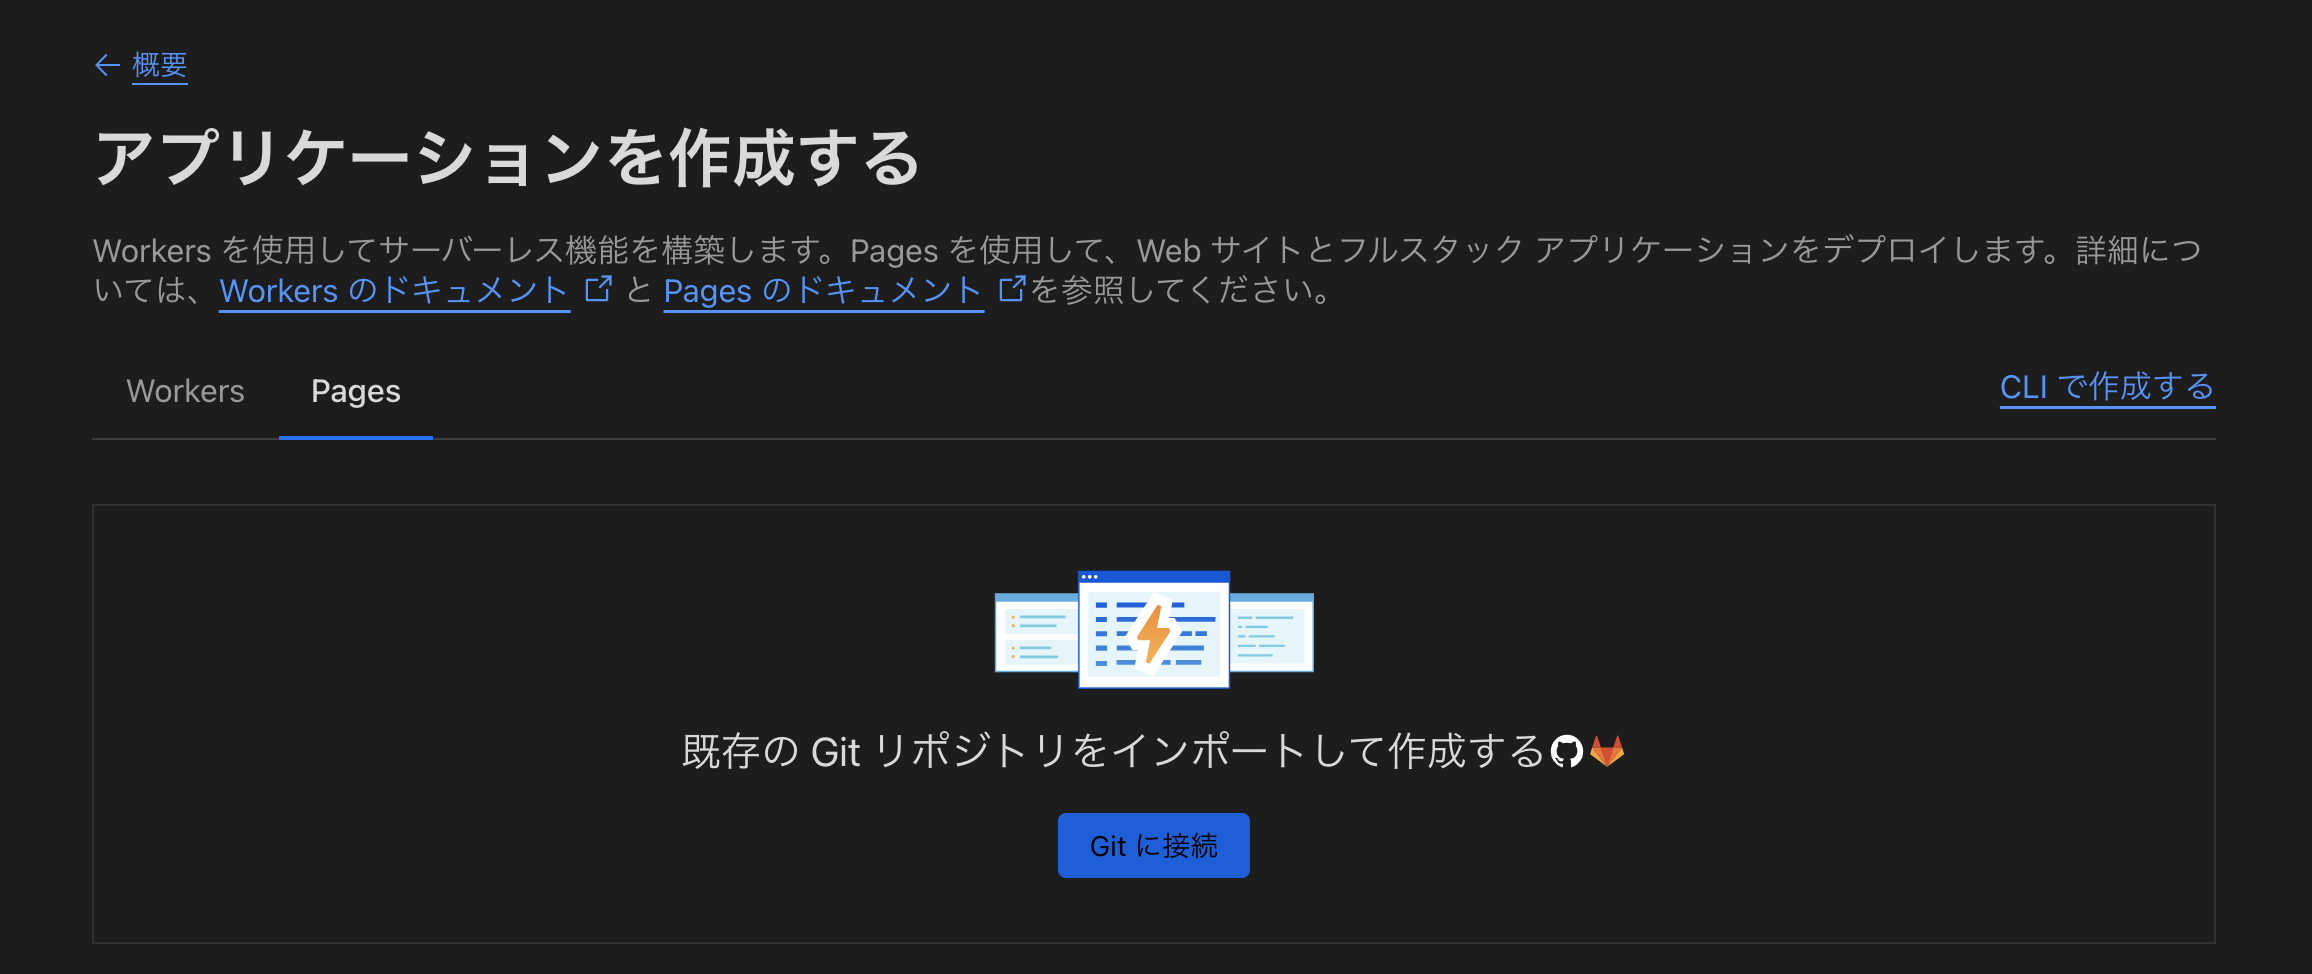
Pages タブを選択して、Git リポジトリをインポートします。
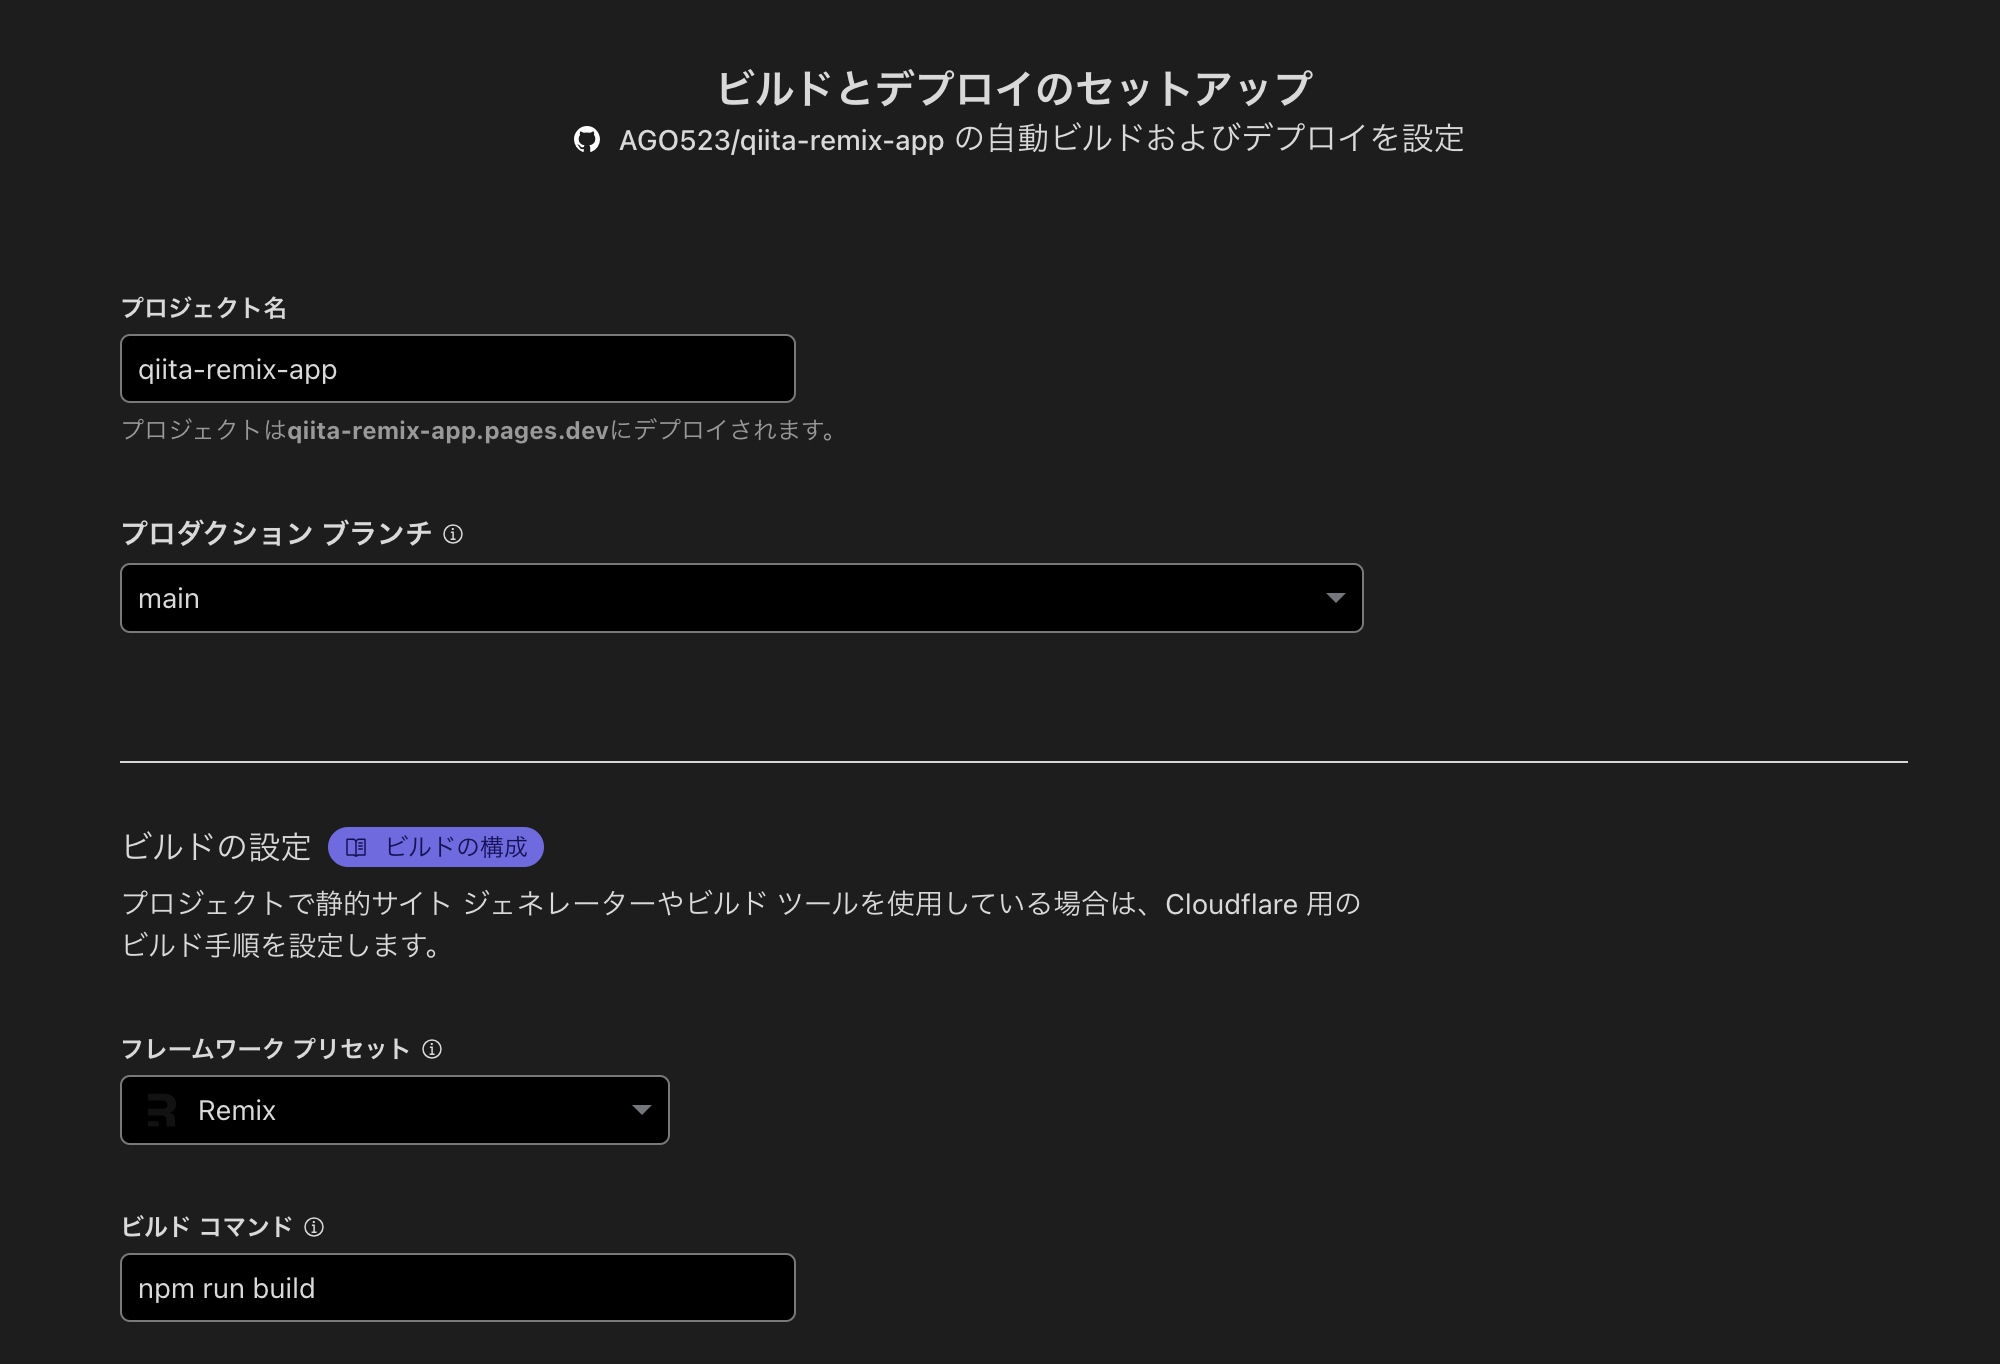
先ほど作成したリポジトリを選択して、「セットアップの開始」を押下します。
セットアップではフレームワークのプリセットだけ変更して、「Remix」を選択します。
他はデフォルトで良いです。(後から変更できます。)
設定ファイルのデプロイ
↑まで成功して生成されたURLにアクセスしてもサイトが表示されない場合は下記を試してください。
git status
設定ファイル系がGit に反映されていない場合があります。
全て反映しましょう。
git add .
git commit -m "add: settings"
git push origin main
main ブランチに PUSH すると自動的に Cloudflare Pages にデプロイされます。
Cloudflare Pages のダッシュボードで、デプロイが完了したことを確認します。
サイトに再度アクセスします。
コードを変更して、デプロイしてみる
開発用にブランチを作成します。
git checkout -b develop
app/routes/_index.tsx を開きます
コードを少しだけ変えてみます
<p className="leading-6 text-gray-700 dark:text-gray-200">
What's next your Remix app?
</p>
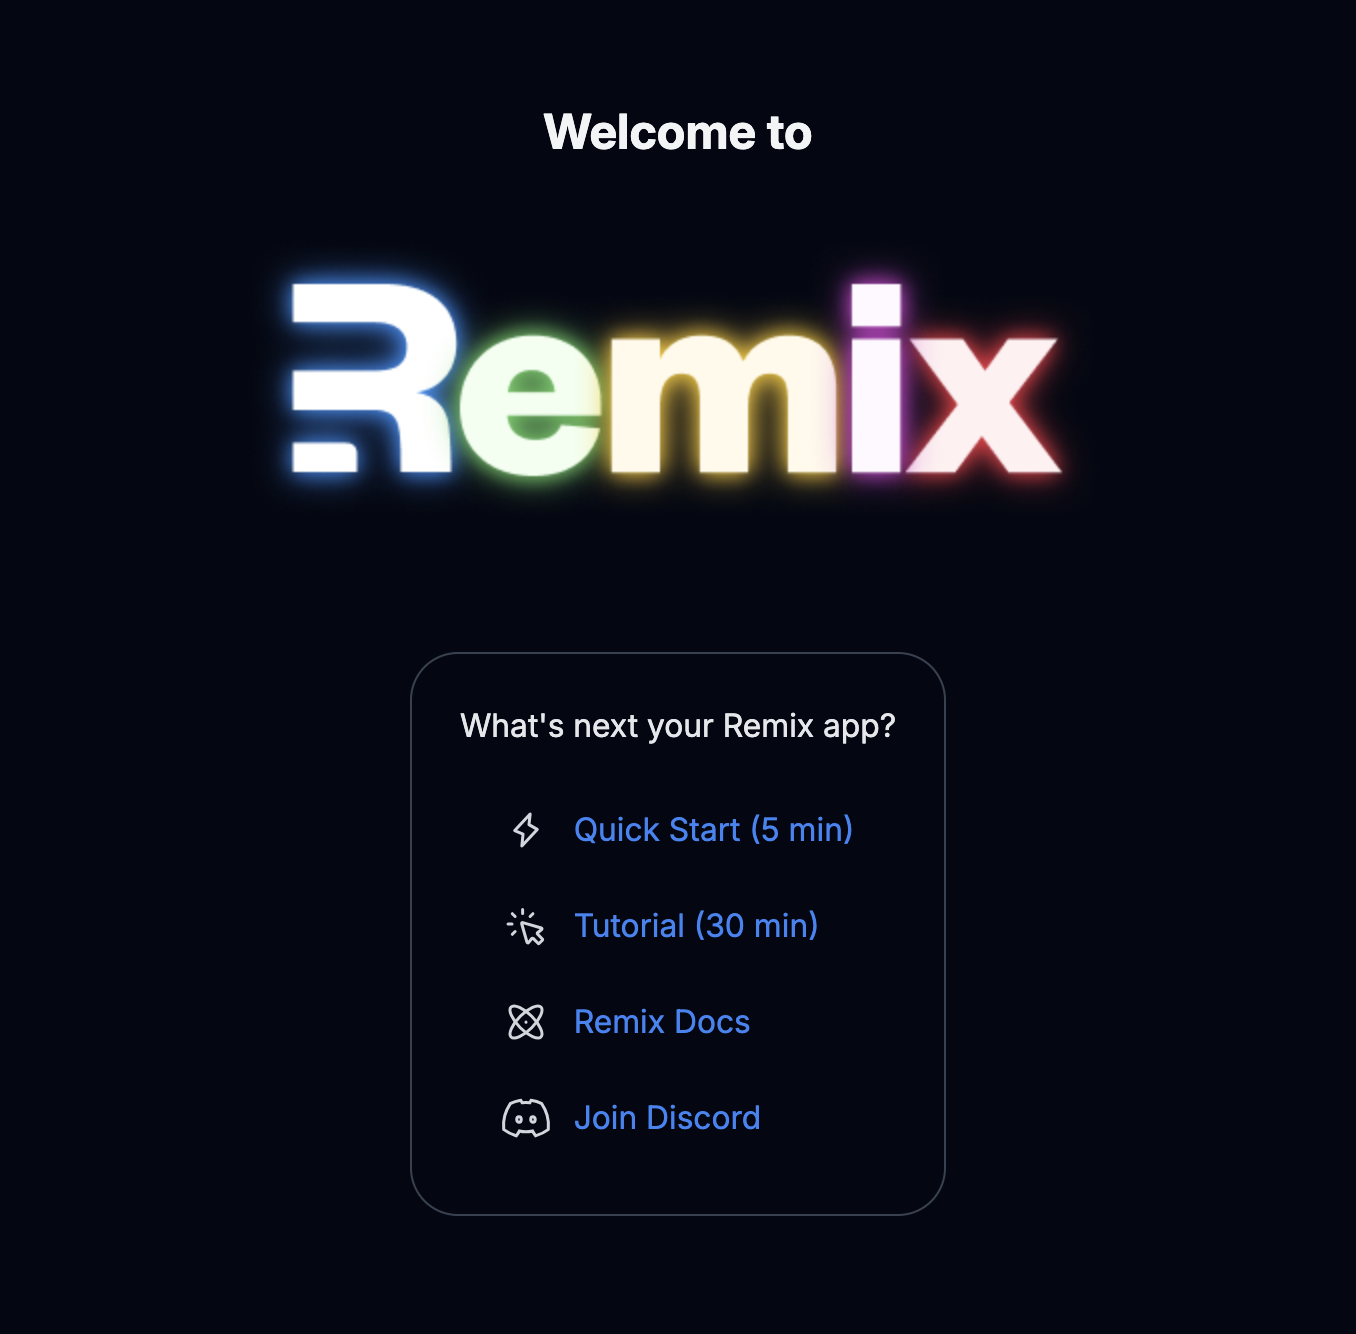
npm run dev で立ち上げた開発環境で、以下のように変更が反映されていることを確認できます。
develop に反映します。
git add app/routes/_index.tsx
git commit -m "fix: top page text"
git push origin develop
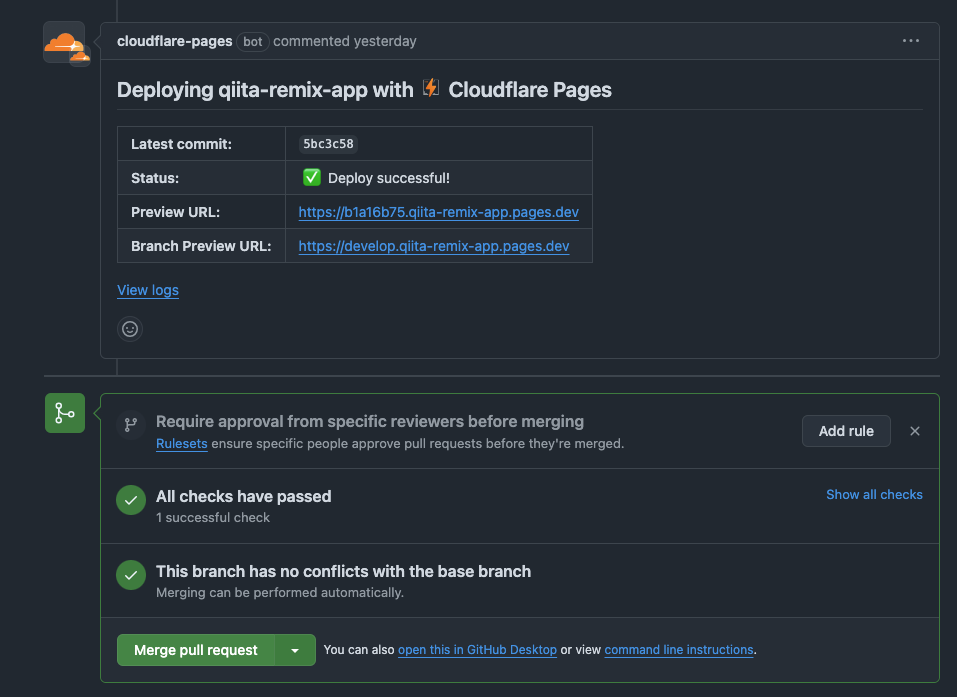
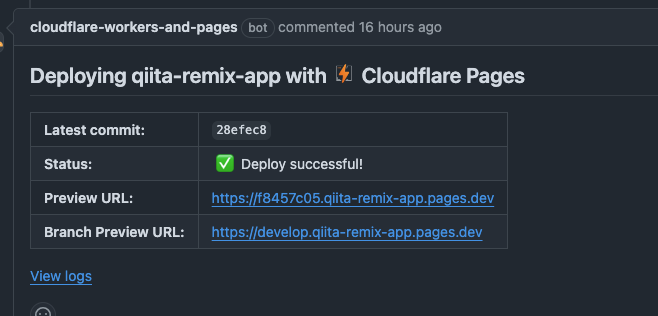
PRを作成すると、下記のように自動的にデプロイが始まります。

これは、Cloudflare Pages のデフォルトの設定です。
main ブランチ以外のブランチへの PUSH を検知して、プレビュー環境にデプロイを実行してくれています。

プレビュー環境でも動作を確認できます。
プレビュー環境へのデプロイは develop ブランチに限定しておきます。(これは任意の作業です)
「プレビュー環境のデプロイを構成する」を押下します。
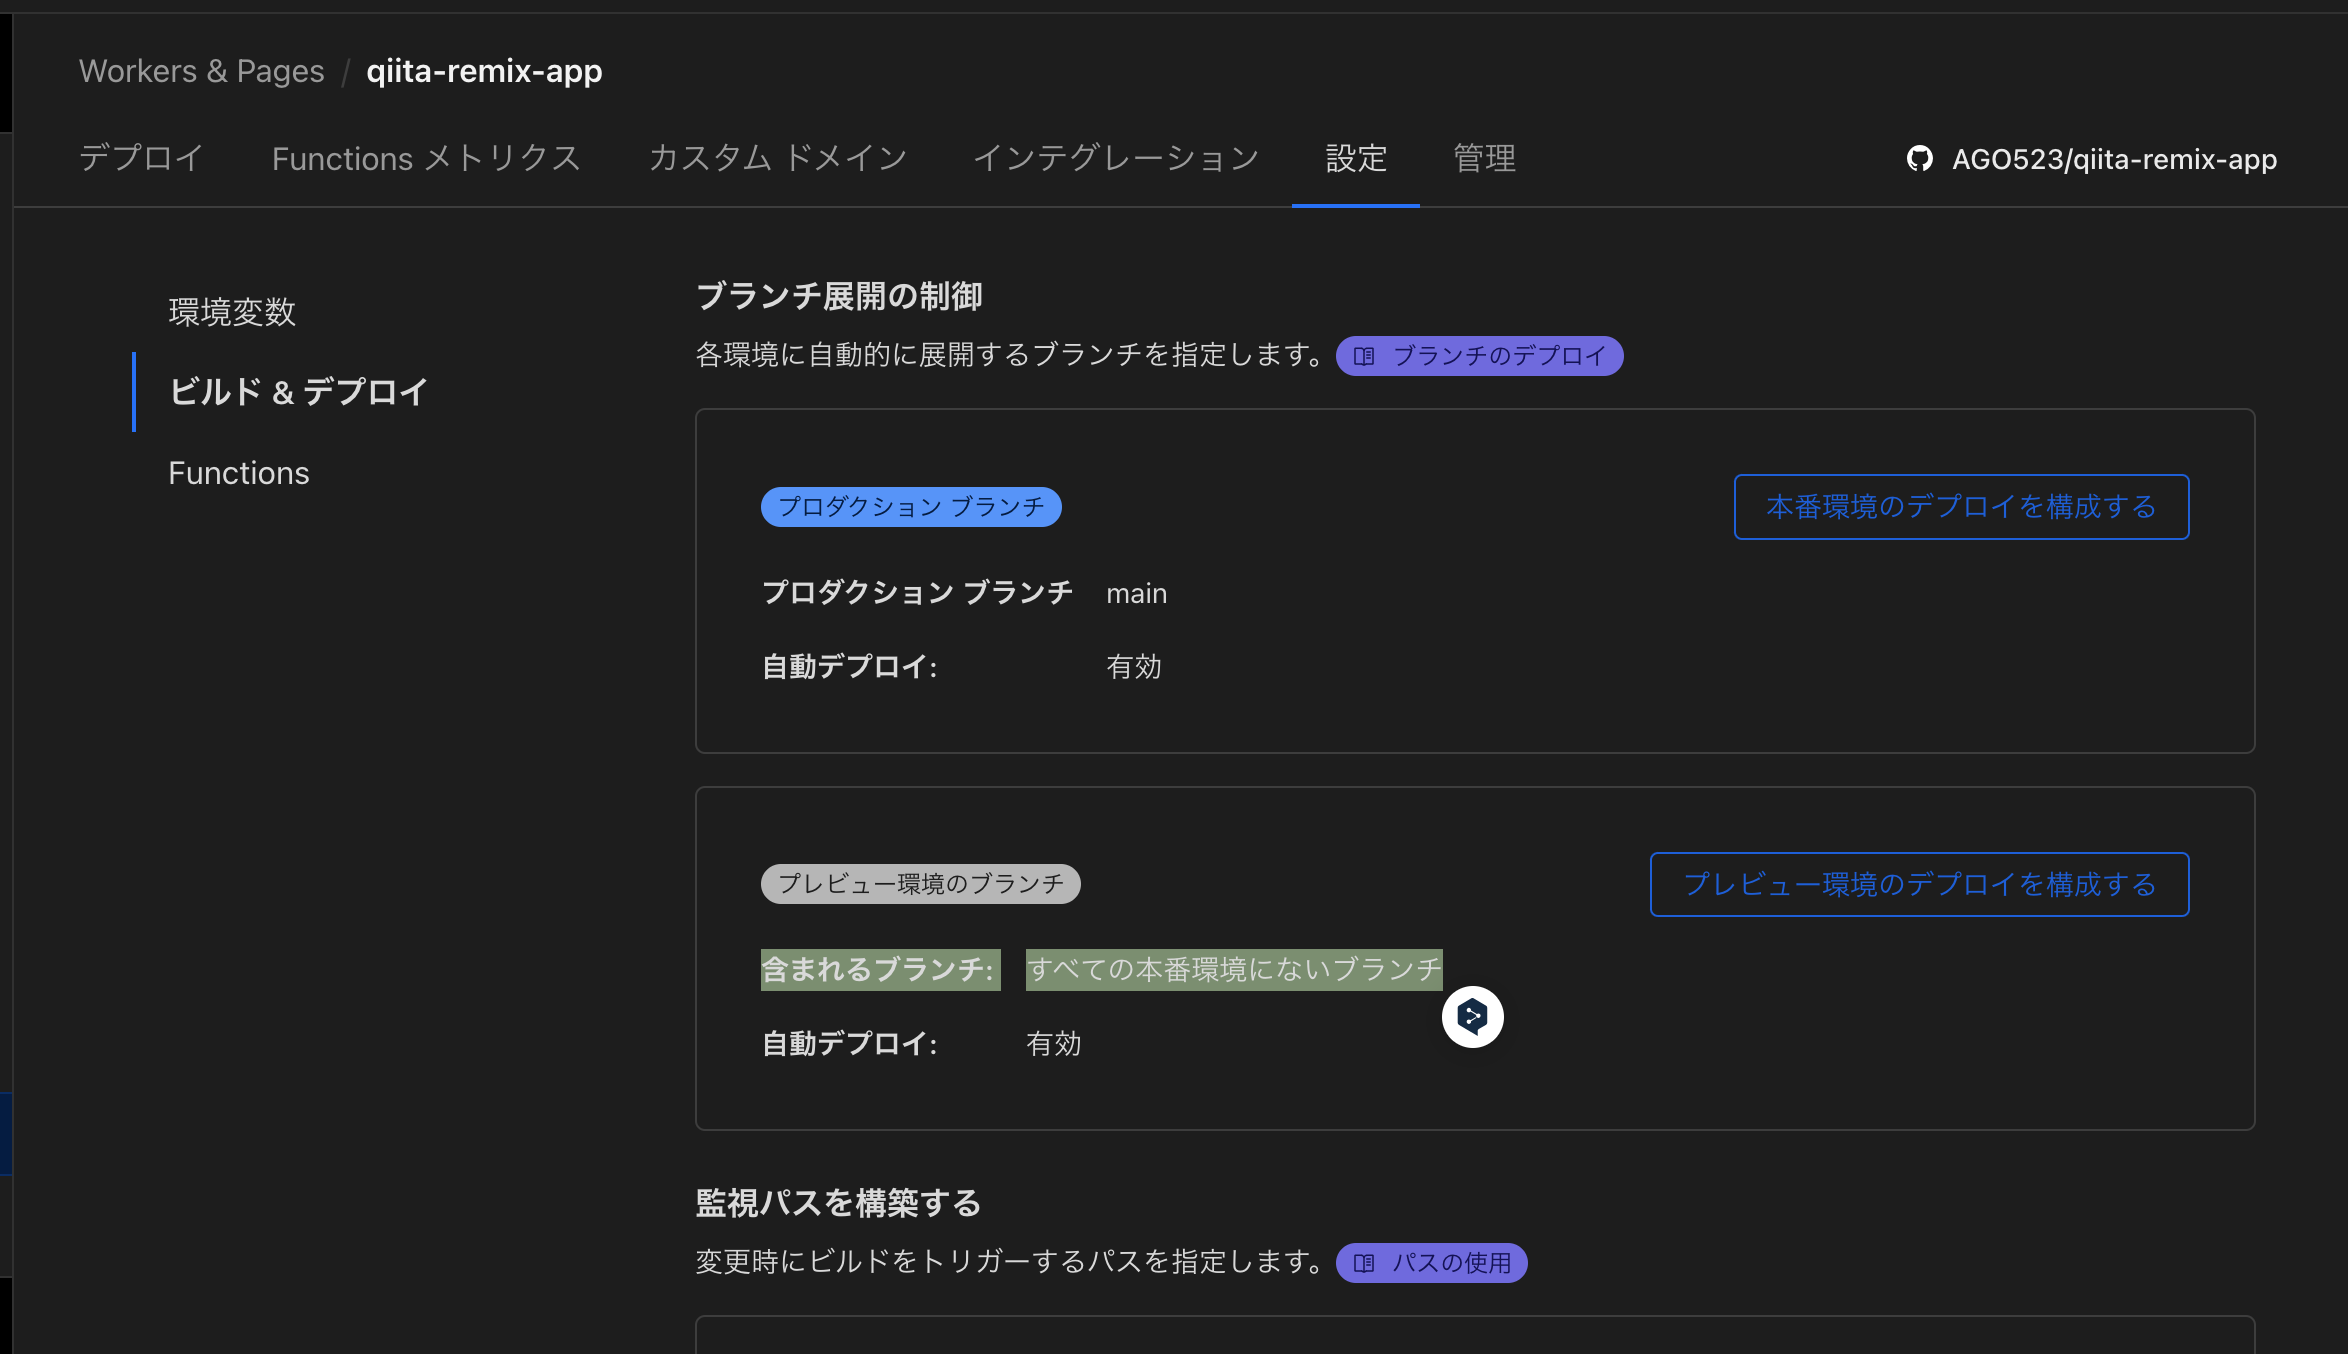
Cloudflare ダッシュボードに行きます。
main ブランチへの Merge を検知して、本番環境へのデプロイが起動します。

1〜2分で完了します。
本番環境を見てみます。
変更が反映されていますね。
デプロイは他の方法も可能です
今回は PR ベースでのデプロイを紹介しました。
他にもデプロイする方法があります。
https://developers.cloudflare.com/pages/framework-guides/deploy-a-remix-site/#deploy-with-cloudflare-pages
Cloudflare バインディング
バインディングとは、アプリケーションと Cloudflare の機能を紐づけることです。
https://developers.cloudflare.com/workers/wrangler/configuration/#bindings
バインディングにより、アプリケーションはKVネームスペース、Durable Objects、R2ストレージバケット、D1データベースなどのCloudflare開発者向け製品とやり取りできるようになります。
ここでは、アプリケーションとデータベースを紐づけます。
Remix(アプリケーション)と Cloudflare D1(データベース)を紐づけます。
D1 データベースを作成する
https://developers.cloudflare.com/d1/get-started/
↑を参考に作成していきます。
コマンドを実行します。
npx wrangler d1 create prod-d1-tutorial
prod-d1-tutorial の部分は任意で、データベースの名前です。
下記の結果が返ってきます。
$ npx wrangler d1 create prod-d1-tutorial

 ⛅️ wrangler 3.57.1 (update available 3.78.5)
-------------------------------------------------------
✅ Successfully created DB 'prod-d1-tutorial' in region APAC
Created your new D1 database.

[[d1_databases]]
binding = "DB" # i.e. available in your Worker on env.DB
database_name = "prod-d1-tutorial"
database_id = "xxxxxxxxxxxxxxxxxxxxxxxxxxxxxx"
wrangler.toml を開いて下記を貼り付けます。
[[d1_databases]]
binding = "DB" # i.e. available in your Worker on env.DB
database_name = "prod-d1-tutorial"
database_id = "xxxxxxxxxxxxxxxxxxxxxxxxxxxxxx"
これで D1 を作成できました。
ローカル環境のデータベースと、リモート環境のデータベースが作成されています。
Cloudflare のダッシュボードから、リモート環境のデータベースを確認できます。

Workers & Pages のセクションに D1 があります。
これを押下するとデータベースを確認できます。
D1 の型を生成
下記コマンドを実行します。
これは後で使う型を生成しています。
npm run typegen
クエリを実行してみる
ファイルを作成します。
touch schema.sql
作成したファイルに下記を貼り付けます。
DROP TABLE IF EXISTS Customers;
CREATE TABLE IF NOT EXISTS Customers (CustomerId INTEGER PRIMARY KEY, CompanyName TEXT, ContactName TEXT);
INSERT INTO Customers (CustomerID, CompanyName, ContactName) VALUES (1, 'Alfreds Futterkiste', 'Maria Anders'), (4, 'Around the Horn', 'Thomas Hardy'), (11, 'Bs Beverages', 'Victoria Ashworth'), (13, 'Bs Beverages', 'Random Name');
下記のコマンドを実行します。
これは、ローカルの D1 に対して、↑の SQL を適用します。
(--loacl でローカル環境を指定しています)
npx wrangler d1 execute prod-d1-tutorial --local --file=./schema.sql
早速、作成したデータを参照してみます。
npx wrangler d1 execute prod-d1-tutorial --local --command="SELECT * FROM Customers"
リモートの D1 にもクエリを実行する
--remote を指定すると、リモート環境に対して実行できます。
npx wrangler d1 execute prod-d1-tutorial --remote --file=./schema.sql
これでリモート環境の d1 にテーブルが作成されます。
あとから変更できるので、気楽に実行してみましょう。
下記は yes でOKです。
 This process may take some time, during which your D1 database will be unavailable to serve queries.
  Ok to proceed? … yes
Cloudflare ダッシュボードで、テーブルが作成されていることを確認できます。

下記コマンドでも確認できます。
npx wrangler d1 execute prod-d1-tutorial --remote --command="SELECT * FROM Customers"
ここまでの変更を develop ブランチにPUSHします。
PR を作成して、main ブランチにマージします。
これでデプロイも完了しますね。
Cloudflare D1 と Pages のバインディングを確認する
Pages プロジェクトを選択 > 設定 > バインディング
に移動します。
下記を確認します。

プレビュー環境(develop ブランチと連動している環境)に切り替えて、バインディングを確認してください。

アプリケーションから D1 データベースに接続する
ここまでで、環境構築が完了です。
本題のアプリケーション開発に進みましょう。
touch app/routes/customers.tsx
Remix では、ルーティングをディレクトリとファイルの構成で行います。
ファイルシステムルーティングです。
詳細が気になる方は下記を参照ください。
https://remix.run/docs/en/main/discussion/routes
https://remix-docs-ja.techtalk.jp/discussion/routes
app/routes/customers.tsxはRails だと下記みたいなイメージです。
# routes.rb
resources :customers, only: [:index]
# または
get '/customers', to: 'customers#index'
作成したファイルに下記のコードを貼り付けます。
import type { LoaderFunctionArgs } from "@remix-run/cloudflare";
import { json } from "@remix-run/cloudflare";
import { useLoaderData } from "@remix-run/react";

export async function loader({ context }: LoaderFunctionArgs) {
  const { env } = context.cloudflare;
  const customers = await env.DB.prepare("SELECT * FROM customers").all();

  if (!customers) {
    return json({ error: "No customers found" }, { status: 404 });
  }

  return json(customers);
}

export default function Index() {
  const customers = useLoaderData<typeof loader>();

  return (
    <div>
      <h1>Welcome to Remix</h1>
      <div>
        A value from D1:
        <p>{JSON.stringify(customers)}</p>
      </div>
    </div>
  );
}
D1 からデータを取得することができました!
loader と action
Remix では loader と action を理解する必要があります。
詳しいことが知りたい場合は、下記ドキュメントを参照したり、
ググったり、チャットGPTに聞いたりすると良いでしょう。
https://remix.run/docs/en/main/discussion/data-flow
money forward さんの記事がわかりやすかったです。
https://tech.mfkessai.co.jp/2024/03/remix/
ざっくり知って、先に進みたい方はまず、下記の概念図を覚えてください。

loader と action は Rails でよく使われる controller アクションと似た役割を担っています。
loader の説明
loader は、Rails の show や index アクションのように、クライアントにデータを提供するための関数です。
データの取得処理を行い、そのルート(ページ)に必要な情報をサーバー側で準備します。
Rails で言うところの「ビューに表示するデータをコントローラーで取得する」イメージです。
def show
  @user = User.find(params[:id])
end
これが Remix の loader では以下のように表現されます。
export let loader = async ({ params }) => {
  let user = await getUser(params.id);
  return { user };
};
そして、@user をビューで使うように、Remix では useLoaderData を使って user データを取得します。
import { useLoaderData } from "remix";

export default function User() {
  let { user } = useLoaderData();
  return <div>{user.name}</div>;
}
action の説明
action は、Rails の create や update, destroy アクションと同様に、サーバー側でデータを更新するための関数です。クライアントがフォームなどを使って送信したデータをサーバーで受け取り、その内容に基づいてデータベースを変更します。
def create
  @user = User.new(user_params)
  if @user.save
    redirect_to @user
  else
    render :new
  end
end
Remix ではこの処理が action 関数として以下のように記述されます。
export let action = async ({ request }) => {
  let formData = await request.formData();
  let name = formData.get("name");
  await createUser({ name });
  return redirect(`/users`);
};
そして、ユーザーがフォームを送信する際、次のような Form コンポーネントを使います。Rails の form_with や form_for に相当します。
import { Form } from "remix";

export default function NewUser() {
  return (
    <Form method="post">
      <input type="text" name="name" />
      <button type="submit">Create User</button>
    </Form>
  );
}
loader と action の違い
-
loaderは、Rails のbefore_actionのようにリクエストに応じて必要なデータを取得し、クライアント側に渡すために使います。主にGETリクエストで使用され、ページの初期表示やデータの取得に使用されます。 -
actionは、クライアントから送信されたデータを使って、サーバー側でデータを作成・更新・削除する処理を行います。POST,PATCH,PUT,DELETEリクエストで使用され、Rails のcreate,update,destroyと同じ役割を持っています。
データの同期
例えば、ユーザーがフォームを使ってデータを送信すると、Remix の action でデータの保存や更新が行われます。その後、自動的に loader が再度実行され、最新のデータを取得します。このデータはクライアントに渡され、React コンポーネント内の状態が更新されるので、Rails のフルページリロードなしで最新の状態が反映されます。
Rails で言うところの、redirect_to を使って更新後のページを再描画したり、render でそのまま同じページを再表示する代わりに、Remix ではこれが自動的に行われるのがポイントです。
D1 からデータを取得する部分をapp/.server/*.tsに実装する
まずは、ディレクトリとファイルを作成します。
mkdir app/.server && touch app/.server/database.ts
Remix では、*.server.ts はサーバーサイドでのみ動作するファイルになります。
型定義ファイルを作成します。
型は Rails 使いの方は見慣れないと思います。
変数やメソッド(関数)に特定の型を指定することで、さまざまな恩恵を受けます。(詳細は割愛)
mkdir app/types
touch app/types/customer.ts
app/types/customer.ts を下記にします。
export type Customer = {
  CustomerId: number;
  CompanyName: string;
  ContactName: string;
};
app/routes/customers.tsx を下記に変更します。
loader で getCustomers 関数を呼び出すようにしました。
getCustomers は app/.server/database.ts に実装します。
import type { LoaderFunctionArgs } from "@remix-run/cloudflare";
import { json } from "@remix-run/cloudflare";
import { useLoaderData } from "@remix-run/react";
import { getCustomers } from "../.server/database";
import type { Customer } from "../types/customer";

export async function loader({ context }: LoaderFunctionArgs) {
  const customers: Customer[] | null = await getCustomers(context);

  if (!customers || customers.length === 0) {
    throw new Response("No customers found", { status: 404 });
  }

  return json(customers);
}

export default function Index() {
  const customers = useLoaderData<typeof loader>();

  return (
    <div>
      <h1>Welcome to Remix</h1>
      <div>
        <h2>Customer List</h2>
        <table>
          <thead>
            <tr>
              <th>CustomerId</th>
              <th>CompanyName</th>
              <th>ContactName</th>
            </tr>
          </thead>
          <tbody>
            {customers.map((customer: Customer) => (
              <tr key={customer.CustomerId}>
                <td>{customer.CustomerId}</td>
                <td>{customer.CompanyName}</td>
                <td>{customer.ContactName}</td>
              </tr>
            ))}
          </tbody>
        </table>
      </div>
    </div>
  );
}
app/.server/database.ts
import type { AppLoadContext } from "@remix-run/cloudflare";
import type { Customer } from "../types/customer";

export async function getCustomers(
  context: AppLoadContext
): Promise<Customer[] | null> {
  const env = context.cloudflare.env;
  const db = env.DB;

  const response = await db.prepare("SELECT * FROM customers").all();

  if (!response.success) {
    return null;
  }

  return response.results as Customer[];
}
これで、loader 関数内がすっきりしました。
データベースとやりとりするロジックを app/.server/database.ts に移動できました。
いまやったことを Rails に置き換えると下記みたいな感じです。
(all を使用するとモデルに書く理由がないので、あくまで例です)
# controller
def index
  @customers = Customer.get_all_customers
end

# model
def self.get_all_customers
  all
end
Customer を作成する
GET 系ができたので、POST 系をやります。
まず、Customer を作成する関数を実装します。
app/.server/database.ts
export async function createCustomer(
  context: AppLoadContext,
  newCustomer: { CompanyName: string; ContactName: string }
) {
  const env = context.cloudflare.env;
  const db = env.DB;

  const response = await db
    .prepare(`INSERT INTO customers (CompanyName, ContactName) VALUES (?, ?)`)
    .bind(newCustomer.CompanyName, newCustomer.ContactName)
    .run();

  if (!response.success) {
    throw new Error("Failed to create customer");
  }

  return response.results;
}
次に、下記に action 関数を追加します。
action 関数は Remix の特徴の1つです。
https://remix.run/docs/en/main/route/action
formData からフォームの入力値を取得しています。
バリデーションをしています。(ここはあとで変えます。)
createCustomer でデータを作成します。
app/routes/customers.tsx
import type {
  LoaderFunctionArgs,
  ActionFunctionArgs,
} from "@remix-run/cloudflare";
import { json, redirect } from "@remix-run/cloudflare";
import { useLoaderData, Form } from "@remix-run/react";
import { getCustomers, createCustomer } from "../.server/database";
import type { Customer } from "../types/customer";

export async function loader({ context }: LoaderFunctionArgs) {
// ここは変更なし
}

export async function action({ request, context }: ActionFunctionArgs) {
  const formData = await request.formData();
  const companyName = formData.get("CompanyName");
  const contactName = formData.get("ContactName");

  // このバリデーションはあとで変更
  if (typeof companyName !== "string" || typeof contactName !== "string") {
    return json({ error: "Invalid form submission" }, { status: 400 });
  }

  await createCustomer(context, {
    CompanyName: companyName,
    ContactName: contactName,
  });

  return redirect("/customers");
}
管理画面ぽい見た目に変えます。
app/routes/customers.tsx の全体です。
import type {
  LoaderFunctionArgs,
  ActionFunctionArgs,
} from "@remix-run/cloudflare";
import { json, redirect } from "@remix-run/cloudflare";
import { useLoaderData, Form } from "@remix-run/react";
import { getCustomers, createCustomer } from "../.server/database";
import type { Customer } from "../types/customer";

export async function loader({ context }: LoaderFunctionArgs) {
  const customers: Customer[] | null = await getCustomers(context);

  if (!customers || customers.length === 0) {
    throw new Response("No customers found", { status: 404 });
  }

  return json(customers);
}

export async function action({ request, context }: ActionFunctionArgs) {
  const formData = await request.formData();
  const companyName = formData.get("CompanyName");
  const contactName = formData.get("ContactName");

  // このバリデーションはあとで変更
  if (typeof companyName !== "string" || typeof contactName !== "string") {
    return json({ error: "Invalid form submission" }, { status: 400 });
  }

  await createCustomer(context, {
    CompanyName: companyName,
    ContactName: contactName,
  });

  return redirect("/customers");
}

export default function Index() {
  const customers = useLoaderData<typeof loader>();

  return (
    <div className="min-h-screen bg-gray-100 p-8">
      <h1 className="text-3xl font-bold mb-6 text-gray-700">ダッシュボード</h1>

      <div className="bg-white shadow-md rounded-lg p-6 mb-8">
        <h2 className="text-2xl font-semibold mb-4 text-gray-700">顧客一覧</h2>
        <table className="min-w-full bg-white border border-gray-300">
          <thead className="bg-gray-200">
            <tr>
              <th className="py-2 px-4 text-left font-medium text-gray-600 border-b">
                CustomerId
              </th>
              <th className="py-2 px-4 text-left font-medium text-gray-600 border-b">
                CompanyName
              </th>
              <th className="py-2 px-4 text-left font-medium text-gray-600 border-b">
                ContactName
              </th>
            </tr>
          </thead>
          <tbody>
            {customers.map((customer: Customer) => (
              <tr key={customer.CustomerId} className="hover:bg-gray-100">
                <td className="py-2 px-4 border-b text-gray-500">
                  {customer.CustomerId}
                </td>
                <td className="py-2 px-4 border-b text-gray-500">
                  {customer.CompanyName}
                </td>
                <td className="py-2 px-4 border-b text-gray-500">
                  {customer.ContactName}
                </td>
              </tr>
            ))}
          </tbody>
        </table>
      </div>

      <div className="bg-white shadow-md rounded-lg p-6">
        <h2 className="text-2xl font-semibold mb-4 text-gray-700">
          顧客新規作成
        </h2>
        <Form method="post" className="space-y-4">
          <div>
            <label
              htmlFor="companyName"
              className="block text-sm font-medium text-gray-600 mb-1"
            >
              Company Name
            </label>
            <input
              type="text"
              id="companyName"
              name="CompanyName"
              required
              className="w-full px-4 py-2 border bg-inherit text-gray-500 border-gray-300 rounded-md shadow-sm focus:outline-none focus:ring focus:border-blue-300"
            />
          </div>
          <div>
            <label
              htmlFor="contactName"
              className="block text-sm font-medium text-gray-600 mb-1"
            >
              Contact Name
            </label>
            <input
              type="text"
              id="contactName"
              name="ContactName"
              required
              className="w-full px-4 py-2 border bg-inherit text-gray-500 border-gray-300 rounded-md shadow-sm focus:outline-none focus:ring focus:border-blue-300"
            />
          </div>
          <button
            type="submit"
            className="bg-blue-500 text-white font-medium px-4 py-2 rounded-md hover:bg-blue-600 transition"
          >
            作成する
          </button>
        </Form>
      </div>
    </div>
  );
}
これで下記の見た目になり、新規作成もできるようになりました!
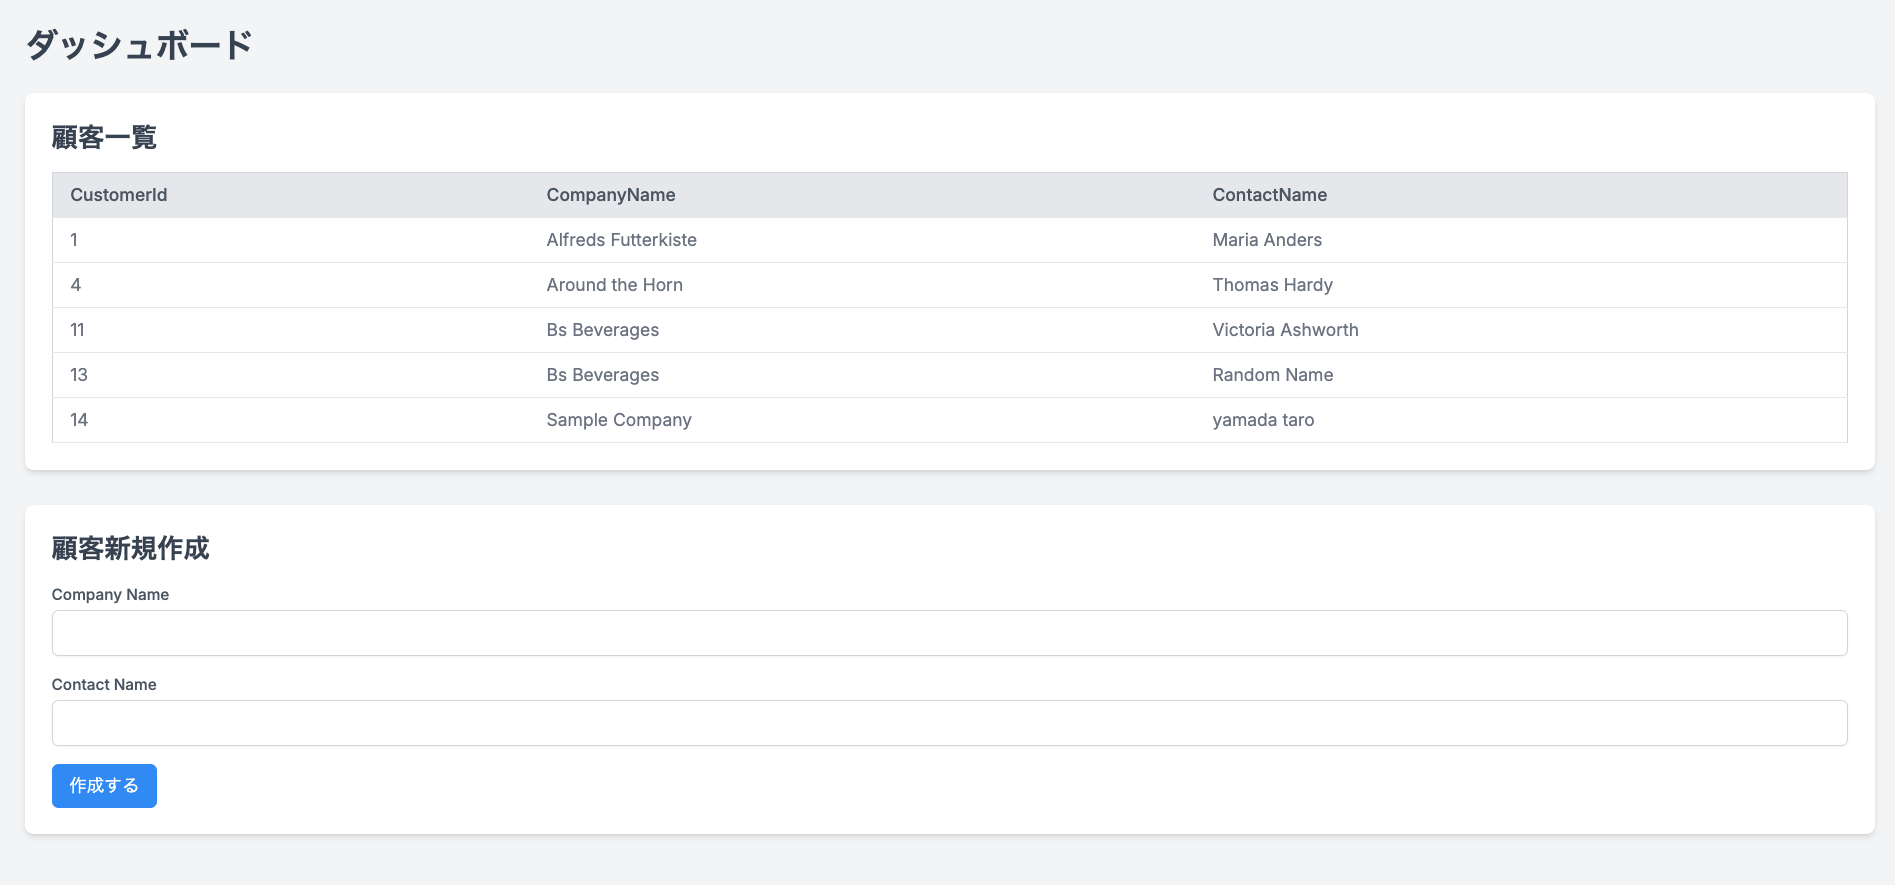
ここまでを GitHub に PUSH して、Cloudflare Pages にデプロイしておきましょう。
Outlet を使用する
まずはファイルを作成します。
touch app/routes/customers._index.tsx
touch app/routes/customers.new.tsx
説明は後ほどします。
まずはコードを変更します。
app/routes/customers.tsx
import { Outlet } from "@remix-run/react";

export default function CustomerLayout() {
  return (
    <div className="min-h-screen bg-gray-100 p-8">
      <h1 className="text-3xl font-bold mb-6 text-gray-700">ダッシュボード</h1>

      <Outlet />
    </div>
  );
}
app/routes/customers._index.tsx
import type { LoaderFunctionArgs } from "@remix-run/cloudflare";
import { json } from "@remix-run/cloudflare";
import { useLoaderData, Link, Outlet } from "@remix-run/react";
import { getCustomers } from "../.server/database";
import type { Customer } from "../types/customer";

export async function loader({ context }: LoaderFunctionArgs) {
  const customers: Customer[] | null = await getCustomers(context);

  if (!customers || customers.length === 0) {
    throw new Response("No customers found", { status: 404 });
  }

  return json(customers);
}

export default function CustomerIndex() {
  const customers = useLoaderData<typeof loader>();

  return (
    <>
      <div className="bg-white shadow-md rounded-lg p-6 mb-8">
        <h2 className="text-2xl font-semibold mb-4 text-gray-700">顧客一覧</h2>
        <Link to="/customers/new" className="text-blue-500 hover:underline">
          顧客新規作成
        </Link>

        <table className="min-w-full bg-white border border-gray-300">
          <thead className="bg-gray-200">
            <tr>
              <th className="py-2 px-4 text-left font-medium text-gray-600 border-b">
                CustomerId
              </th>
              <th className="py-2 px-4 text-left font-medium text-gray-600 border-b">
                CompanyName
              </th>
              <th className="py-2 px-4 text-left font-medium text-gray-600 border-b">
                ContactName
              </th>
            </tr>
          </thead>

          <tbody>
            {customers.map((customer: Customer) => (
              <tr key={customer.CustomerId} className="hover:bg-gray-100">
                <td className="py-2 px-4 border-b text-gray-500">
                  {customer.CustomerId}
                </td>
                <td className="py-2 px-4 border-b text-gray-500">
                  {customer.CompanyName}
                </td>
                <td className="py-2 px-4 border-b text-gray-500">
                  {customer.ContactName}
                </td>
              </tr>
            ))}
          </tbody>
        </table>
      </div>

      <Outlet />
    </>
  );
}
app/routes/customers.new.tsx
import type { ActionFunctionArgs } from "@remix-run/cloudflare";
import { json, redirect } from "@remix-run/cloudflare";
import { Form } from "@remix-run/react";
import { createCustomer } from "../.server/database";

export async function action({ request, context }: ActionFunctionArgs) {
  const formData = await request.formData();
  const companyName = formData.get("CompanyName");
  const contactName = formData.get("ContactName");

  // このバリデーションはあとで変更
  if (typeof companyName !== "string" || typeof contactName !== "string") {
    return json({ error: "Invalid form submission" }, { status: 400 });
  }

  await createCustomer(context, {
    CompanyName: companyName,
    ContactName: contactName,
  });

  return redirect("/customers");
}

export default function CustomerNew() {
  return (
    <>
      <div className="bg-white shadow-md rounded-lg p-6">
        <h2 className="text-2xl font-semibold mb-4 text-gray-700">
          顧客新規作成
        </h2>
        <Form method="post" className="space-y-4">
          <div>
            <label
              htmlFor="companyName"
              className="block text-sm font-medium text-gray-600 mb-1"
            >
              Company Name
            </label>
            <input
              type="text"
              id="companyName"
              name="CompanyName"
              required
              className="w-full px-4 py-2 border bg-inherit text-gray-500 border-gray-300 rounded-md shadow-sm focus:outline-none focus:ring focus:border-blue-300"
            />
          </div>
          <div>
            <label
              htmlFor="contactName"
              className="block text-sm font-medium text-gray-600 mb-1"
            >
              Contact Name
            </label>
            <input
              type="text"
              id="contactName"
              name="ContactName"
              required
              className="w-full px-4 py-2 border bg-inherit text-gray-500 border-gray-300 rounded-md shadow-sm focus:outline-none focus:ring focus:border-blue-300"
            />
          </div>
          <button
            type="submit"
            className="bg-blue-500 text-white font-medium px-4 py-2 rounded-md hover:bg-blue-600 transition"
          >
            作成する
          </button>
        </Form>
      </div>
    </>
  );
}
app/routes/customers.tsx を3つのファイルに分解したような状態です。
これで、/customers にアクセスしてみます。

「顧客新規作成」を押下すると、

「ダッシュボード」の文字以外の部分が変わりました。
パスは /customers/new になっていますね。
コードを見直します。
import { Outlet } from "@remix-run/react";

export default function CustomerLayout() {
  return (
    <div className="min-h-screen bg-gray-100 p-8">
      <h1 className="text-3xl font-bold mb-6 text-gray-700">ダッシュボード</h1>

      <Outlet />
    </div>
  );
}
app/routes/customers.tsx では、/customers 配下で共通の処理やレイアウト(スタイル)を記述します。
今回は、div と h1 が共通部分です。
Outletを使用することで、customers.new.tsx や customers._index.tsx の内容をレンダリングすることができます。
Outletとは、親ルート内において、子ルートがレンダリングされる場所を示すために使われるコンポーネントのことです。
Outletについて詳しく知りたい場合、公式のチュートリアルがおすすめです。
https://remix.run/docs/en/main/start/tutorial#nested-routes-and-outlets
こちらの記事もわかりやすいです。
https://zenn.dev/ak/articles/cef68c1b67a314#outlet
Rails では、yield と content_for が Remix の Outlet に相当します。
<!-- app/views/layouts/application.html.erb -->
<!DOCTYPE html>
<html>
<head>
  <title>MyApp</title>
  <%= yield :head %>  <!-- head にコンテンツを差し込むことができる -->
</head>
<body>
  <header>Header content here</header>
  <%= yield %>  <!-- メインコンテンツ -->
  <footer>Footer content here</footer>
</body>
</html>

<!-- app/views/pages/show.html.erb -->
<% content_for :head do %>
  <meta name="description" content="Page-specific description">
<% end %>

<h1>Page-specific content</h1>
後の項では、customers.edit.tsx を作成します。
このファイルもOutletでレンダリングするようにします。
ここまでを GitHub に PUSH して、デプロイまで完了させましょう。
バリデーションの実装
zod を使用してバリデーションを実装します。
https://github.com/colinhacks/zod
TypeScript向けのスキーマ宣言とデータ検証のためのライブラリです。
型安全な方法でデータ構造を定義し、それに基づいてデータを検証できます。
Rails でいつもやっている valadates の部分を zod を使用する感じになります。
基礎的な内容の解説
https://zenn.dev/fumito0808/articles/29ad3c1b51f8fe
npm install zod
まずは呼び出し部分。
さらにコンパクトになりましたね。
app/routes/customers.new.tsx
import type { ActionFunctionArgs } from "@remix-run/cloudflare";
import { redirect } from "@remix-run/cloudflare";
import { Form } from "@remix-run/react";
import { createCustomer } from "../.server/database";

export async function action({ request, context }: ActionFunctionArgs) {
  const formData = await request.formData();
  await createCustomer(context, formData);

  return redirect("/customers");
}

// 以下略
CompanyName と ContactName に1文字以上、100文字以内で string 型のバリデーションを実装します。
app/.server/database.ts
import type { AppLoadContext } from "@remix-run/cloudflare";
import type { Customer } from "../types/customer";
import { z } from "zod";

const CustomerSchema = z.object({
  CompanyName: z.string().min(1).max(100),
  ContactName: z.string().min(1).max(100),
});

export async function getCustomers(
// 略
}

export async function createCustomer(
  context: AppLoadContext,
  formData: FormData
) {
  const env = context.cloudflare.env;
  const db = env.DB;
  const formObject = {
    CompanyName: formData.get("CompanyName"),
    ContactName: formData.get("ContactName"),
  };

  const results = CustomerSchema.safeParse(formObject);
  if (!results.success) {
    throw new Error("Invalid form data");
  }

  const response = await db
    .prepare(`INSERT INTO customers (CompanyName, ContactName) VALUES (?, ?)`)
    .bind(results.data.CompanyName, results.data.ContactName)
    .run();

  if (!response.success) {
    throw new Error("Failed to create customer");
  }

  return response.results;
}
100文字以上入力するとエラー画面が表示されることを確認してみてください。
バリデーションの実装も簡単にできました。
zod の機能は他にもたくさんありますし、エラーハンドリングがお粗末ですが、今回はこのまま進みます。
なお、Rails だと下記のようなことをしています。
class Customer < ApplicationRecord
  validates :CompanyName, presence: true, length: { minimum: 1, maximum: 100 }
  validates :ContactName, presence: true, length: { minimum: 1, maximum: 100 }
end
ここまでを GitHub に PUSH して、デプロイまで完了させましょう。
編集機能の作成
touch app/routes/customers.$customerId.edit.tsx
$customerIdは Rails だと :idです。
$customerId で個別の顧客情報を取得する関数getCustomerByIdと
顧客情報を更新する関数updateCustomerを作成します。
Rails だと、edit/update アクションで下記をする部分です。
def edit
  @customer = Customer.find(customer_params[:id])
end

def update
  @customer.update!(customer_params)
end
app/.server/database.ts
export async function getCustomerById(
  context: AppLoadContext,
  customerId: number
): Promise<Customer | null> {
  const env = context.cloudflare.env;
  const db = env.DB;
  const response = await db
    .prepare("SELECT * FROM customers WHERE CustomerId = ?")
    .bind(customerId)
    .first();

  if (response === null) {
    return null;
  }

  return response as Customer;
}

export async function updateCustomer(
  context: AppLoadContext,
  customerId: number,
  formData: FormData
) {
  const env = context.cloudflare.env;
  const db = env.DB;

  const results = CustomerSchema.safeParse({
    CompanyName: formData.get("CompanyName"),
    ContactName: formData.get("ContactName"),
  });
  if (!results.success) {
    throw new Error("Invalid form data");
  }

  const response = await db
    .prepare(
      `UPDATE customers SET CompanyName = ?, ContactName = ? WHERE CustomerId = ?`
    )
    .bind(results.data.CompanyName, results.data.ContactName, customerId)
    .run();

  if (!response.success) {
    throw new Error("Failed to update customer");
  }

  return response.results;
}
編集ボタンを設置します。
app/routes/customers._index.tsx
import type { LoaderFunctionArgs } from "@remix-run/cloudflare";
import { json } from "@remix-run/cloudflare";
import { useLoaderData, Link, Outlet } from "@remix-run/react";
import { getCustomers } from "../.server/database";
import type { Customer } from "../types/customer";

export async function loader({ context }: LoaderFunctionArgs) {
  const customers: Customer[] | null = await getCustomers(context);

  if (!customers || customers.length === 0) {
    throw new Response("No customers found", { status: 404 });
  }

  return json(customers);
}

export default function CustomerIndex() {
  const customers = useLoaderData<typeof loader>();

  return (
    <>
      <div className="bg-white shadow-md rounded-lg p-6 mb-8">
        <h2 className="text-2xl font-semibold mb-4 text-gray-700">顧客一覧</h2>
        <Link to="/customers/new" className="text-blue-500 hover:underline">
          顧客新規作成
        </Link>

        <table className="min-w-full bg-white border border-gray-300">
          <thead className="bg-gray-200">
            <tr>
              <th className="py-2 px-4 text-left font-medium text-gray-600 border-b">
                CustomerId
              </th>
              <th className="py-2 px-4 text-left font-medium text-gray-600 border-b">
                CompanyName
              </th>
              <th className="py-2 px-4 text-left font-medium text-gray-600 border-b">
                ContactName
              </th>
              <th className="py-2 px-4 text-left font-medium text-gray-600 border-b"></th>
            </tr>
          </thead>

          <tbody>
            {customers.map((customer: Customer) => (
              <tr key={customer.CustomerId} className="hover:bg-gray-100">
                <td className="py-2 px-4 border-b text-gray-500">
                  {customer.CustomerId}
                </td>
                <td className="py-2 px-4 border-b text-gray-500">
                  {customer.CompanyName}
                </td>
                <td className="py-2 px-4 border-b text-gray-500">
                  {customer.ContactName}
                </td>
                <td className="py-2 px-4 border-b text-gray-500">
                  <Link
                    to={`/customers/${customer.CustomerId}/edit`}
                    className="text-blue-500 hover:underline"
                  >
                    編集
                  </Link>
                </td>
              </tr>
            ))}
          </tbody>
        </table>
      </div>

      <Outlet />
    </>
  );
}
編集用のページとフォームを作成します。
Rails だと edit.html.erb で form_with を使う部分です。
loader で顧客データを取得し、action で更新処理を行います。
app/routes/customers.$customerId.edit.tsx
import { json, redirect } from "@remix-run/cloudflare";
import { useLoaderData, Form } from "@remix-run/react";
import { getCustomerById, updateCustomer } from "../.server/database";
import type {
  LoaderFunctionArgs,
  ActionFunctionArgs,
} from "@remix-run/cloudflare";
import type { Customer } from "../types/customer";

export async function loader({ params, context }: LoaderFunctionArgs) {
  const customerId = params.customerId;
  if (!customerId)
    throw new Response("Customer ID is required", { status: 400 });

  const customer: Customer | null = await getCustomerById(
    context,
    parseInt(customerId)
  );
  if (!customer) throw new Response("Customer not found", { status: 404 });

  return json(customer);
}

export async function action({ request, context, params }: ActionFunctionArgs) {
  const formData = await request.formData();
  const customerId = params.customerId;
  if (!customerId)
    throw new Response("Customer ID is required", { status: 400 });

  await updateCustomer(context, parseInt(customerId), formData);

  return redirect("/customers");
}

export default function EditCustomer() {
  const customer = useLoaderData<Customer>();

  return (
    <div className="bg-white shadow-md rounded-lg p-6">
      <h2 className="text-2xl font-semibold mb-4 text-gray-700">
        顧客情報編集
      </h2>
      <Form method="post" className="space-y-4">
        <div>
          <label
            className="block text-sm font-medium text-gray-600 mb-1"
            htmlFor="companyName"
          >
            Company Name
          </label>
          <input
            type="text"
            id="companyName"
            name="CompanyName"
            defaultValue={customer.CompanyName}
            required
            className="w-full px-4 py-2 border border-gray-300 rounded-md shadow-sm focus:outline-none focus:ring focus:border-blue-300 bg-inherit text-gray-500"
          />
        </div>
        <div>
          <label
            className="block text-sm font-medium text-gray-600 mb-1"
            htmlFor="contactName"
          >
            Contact Name
          </label>
          <input
            type="text"
            id="contactName"
            name="ContactName"
            defaultValue={customer.ContactName}
            required
            className="w-full px-4 py-2 border border-gray-300 rounded-md shadow-sm focus:outline-none focus:ring focus:border-blue-300 bg-inherit text-gray-500"
          />
        </div>
        <button
          type="submit"
          className="bg-blue-500 text-white font-medium px-4 py-2 rounded-md hover:bg-blue-600 transition"
        >
          更新
        </button>
      </Form>
    </div>
  );
}
これで、各顧客の行に編集ボタンを追加できました。
そして、編集ページに遷移して、更新処理もできました。
ここまでを GitHub に PUSH して、デプロイまで完了させましょう。
削除機能の実装
touch app/routes/customers.$customerId.delete.tsx
顧客リストに「削除」ボタンを追加します。
import type { LoaderFunctionArgs } from "@remix-run/cloudflare";
import { json } from "@remix-run/cloudflare";
import { useLoaderData, Link, Outlet } from "@remix-run/react";
import { getCustomers } from "../.server/database";
import type { Customer } from "../types/customer";

export async function loader({ context }: LoaderFunctionArgs) {
  const customers: Customer[] | null = await getCustomers(context);

  if (!customers || customers.length === 0) {
    throw new Response("No customers found", { status: 404 });
  }

  return json(customers);
}

export default function CustomerIndex() {
  const customers = useLoaderData<typeof loader>();

  return (
    <>
      <div className="bg-white shadow-md rounded-lg p-6 mb-8">
        <h2 className="text-2xl font-semibold mb-4 text-gray-700">顧客一覧</h2>
        <Link to="/customers/new" className="text-blue-500 hover:underline">
          顧客新規作成
        </Link>

        <table className="min-w-full bg-white border border-gray-300">
          <thead className="bg-gray-200">
            <tr>
              <th className="py-2 px-4 text-left font-medium text-gray-600 border-b">
                CustomerId
              </th>
              <th className="py-2 px-4 text-left font-medium text-gray-600 border-b">
                CompanyName
              </th>
              <th className="py-2 px-4 text-left font-medium text-gray-600 border-b">
                ContactName
              </th>
              <th className="py-2 px-4 text-left font-medium text-gray-600 border-b"></th>
            </tr>
          </thead>

          <tbody>
            {customers.map((customer: Customer) => (
              <tr key={customer.CustomerId} className="hover:bg-gray-100">
                <td className="py-2 px-4 border-b text-gray-500">
                  {customer.CustomerId}
                </td>
                <td className="py-2 px-4 border-b text-gray-500">
                  {customer.CompanyName}
                </td>
                <td className="py-2 px-4 border-b text-gray-500">
                  {customer.ContactName}
                </td>
                <td className="py-2 px-4 border-b text-gray-500">
                  <Link
                    to={`/customers/${customer.CustomerId}/edit`}
                    className="text-blue-500 hover:underline"
                  >
                    編集
                  </Link>
                  <Link
                    to={`/customers/${customer.CustomerId}/delete`}
                    className="ml-4 text-red-500 hover:underline"
                  >
                    削除
                  </Link>
                </td>
              </tr>
            ))}
          </tbody>
        </table>
      </div>

      <Outlet />
    </>
  );
}
削除対象の顧客情報を表示して、確認メッセージと削除実行フォームを表示します。
Rails だと下記の部分に当たります。
def destroy
  # before_action で @customer を設定
  @customer.destroy!
end
app/routes/customers.$customerId.delete.tsx
import { json, redirect } from "@remix-run/cloudflare";
import { useLoaderData, Form } from "@remix-run/react";
import { getCustomerById, deleteCustomer } from "../.server/database";
import type {
  LoaderFunctionArgs,
  ActionFunctionArgs,
} from "@remix-run/cloudflare";
import type { Customer } from "../types/customer";

export async function loader({ params, context }: LoaderFunctionArgs) {
  const customerId = params.customerId;
  if (!customerId)
    throw new Response("Customer ID is required", { status: 400 });

  const customer: Customer | null = await getCustomerById(
    context,
    parseInt(customerId)
  );
  if (!customer) throw new Response("Customer not found", { status: 404 });

  return json(customer);
}

export async function action({ params, context }: ActionFunctionArgs) {
  const customerId = params.customerId;
  if (!customerId)
    throw new Response("Customer ID is required", { status: 400 });

  await deleteCustomer(context, parseInt(customerId));

  return redirect("/customers");
}

export default function DeleteCustomer() {
  const customer = useLoaderData<Customer>();

  return (
    <div className="bg-white shadow-md rounded-lg p-6">
      <h2 className="text-2xl font-semibold mb-4 text-gray-700">
        顧客情報の削除
      </h2>
      <p className="mb-4 text-gray-600">以下の顧客情報を本当に削除しますか?</p>
      <div className="mb-4 text-gray-600">
        <strong>Company Name:</strong> {customer.CompanyName}
      </div>
      <div className="mb-4 text-gray-600">
        <strong>Contact Name:</strong> {customer.ContactName}
      </div>
      <Form method="post">
        <button
          type="submit"
          className="bg-red-500 text-white font-medium px-4 py-2 rounded-md hover:bg-red-600 transition"
        >
          削除する
        </button>
      </Form>
    </div>
  );
}
データベースから顧客を削除するための deleteCustomer 関数を実装します。
app/.server/database.ts
export async function deleteCustomer(
  context: AppLoadContext,
  customerId: number
) {
  const env = context.cloudflare.env;
  const db = env.DB;

  const response = await db
    .prepare(`DELETE FROM customers WHERE CustomerId = ?`)
    .bind(customerId)
    .run();

  if (!response.success) {
    throw new Error("Failed to delete customer");
  }

  return response.results;
}
これで、各顧客のデータを削除することができるようになりました。
ここまでを GitHub に PUSH して、デプロイまで完了させましょう。
簡易的な認証の実装
ここまでで、CRUD 機能を実装することができました。
最後に、簡易的な認証の実装をします。
まずは検証環境の認証を設定します。
下記の PR を作成したときの環境です。
ダッシュボードから、Pages アプリケーションを選択して、設定 → 一般に遷移します。
「有効にする」を押下します。

これだけで完了です。
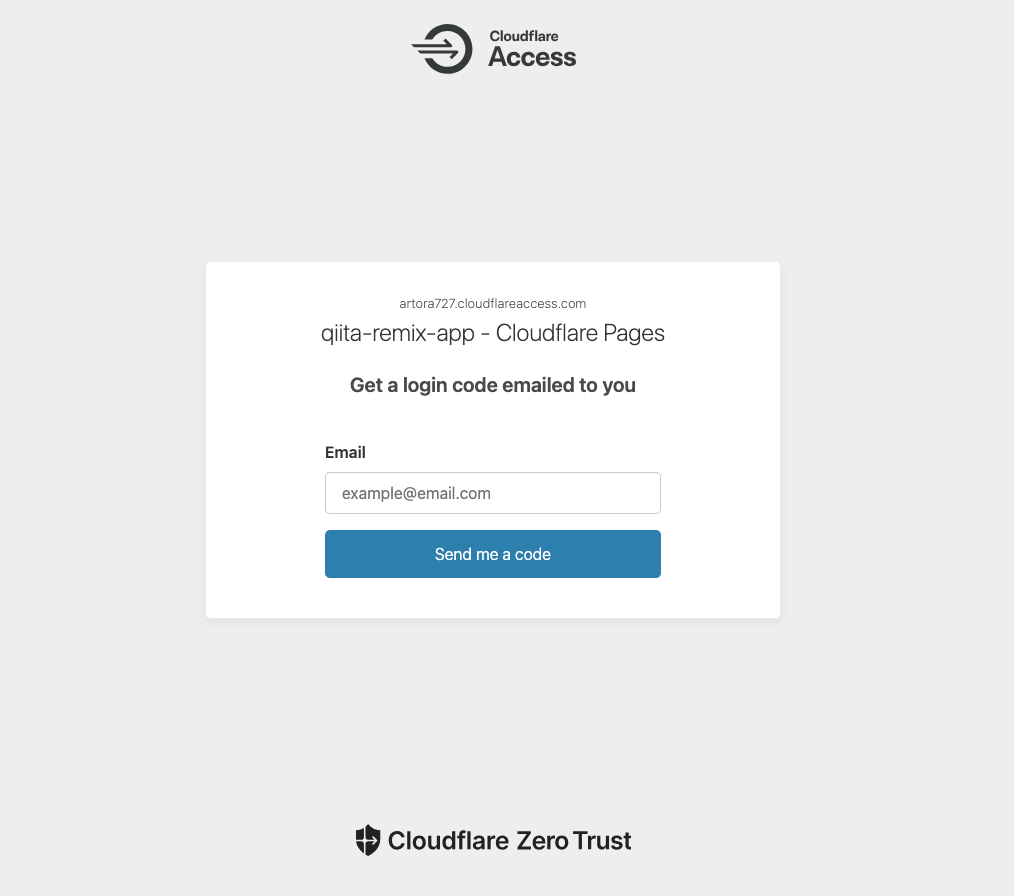
Cloudflare に登録したメールアドレスでワンタイムパスワード認証をします。
メール内にあるワンタイムパスワードを使用するとアプリケーションにアクセスできます。
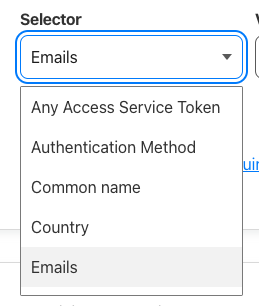
アクセスできるユーザーをメールアドレスやトークンなどで管理できます。
本番環境にもアクセス制限をかけます。
ダッシュボードの下記を押下します。
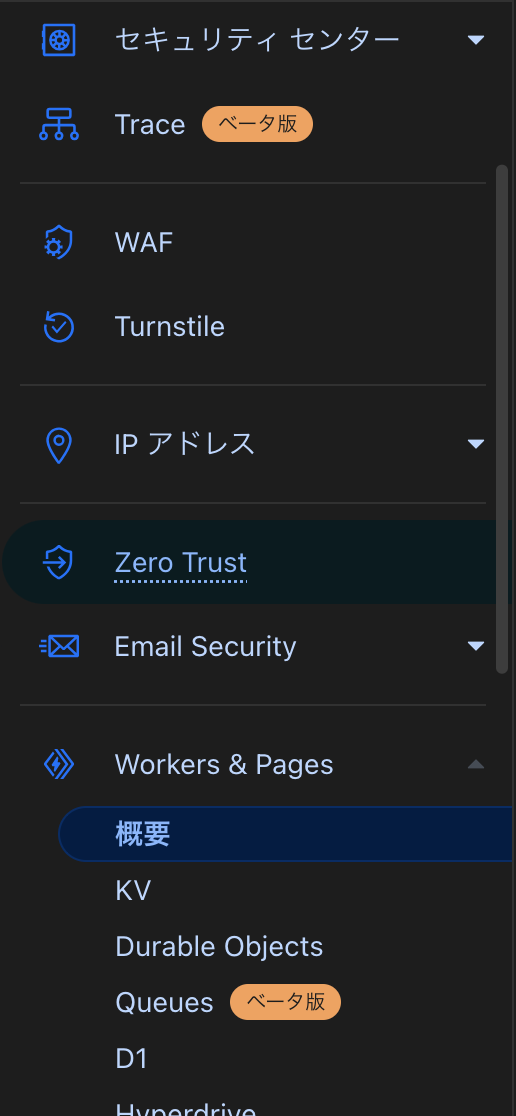
Zero Trust のダッシュボードに遷移したら、下記を押下します。

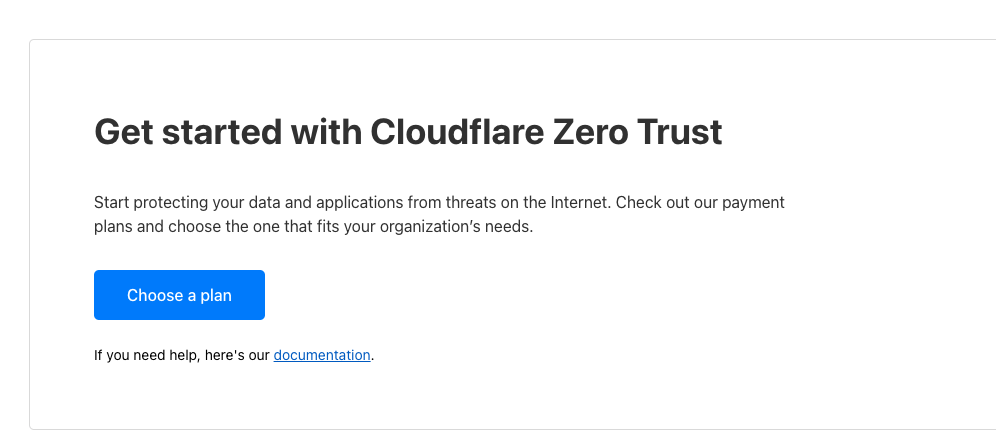
もし、Zero Trust のプランを選ぶ画面が出てきたら下記を実行してください。
Choose Plan を押下して Free を選択します。
支払い情報の入力をしてプランの設定が完了させます。
もし支払い情報を入力したくない場合、この項は読むだけでも良いです。
次に、該当のアプリケーションの三点リーダを押下します。
Edit を押下します。

Overview のタブに移動します。
Application domain に、下記のようにサブドメインを指定しないでアプリケーションのドメインを設定します。
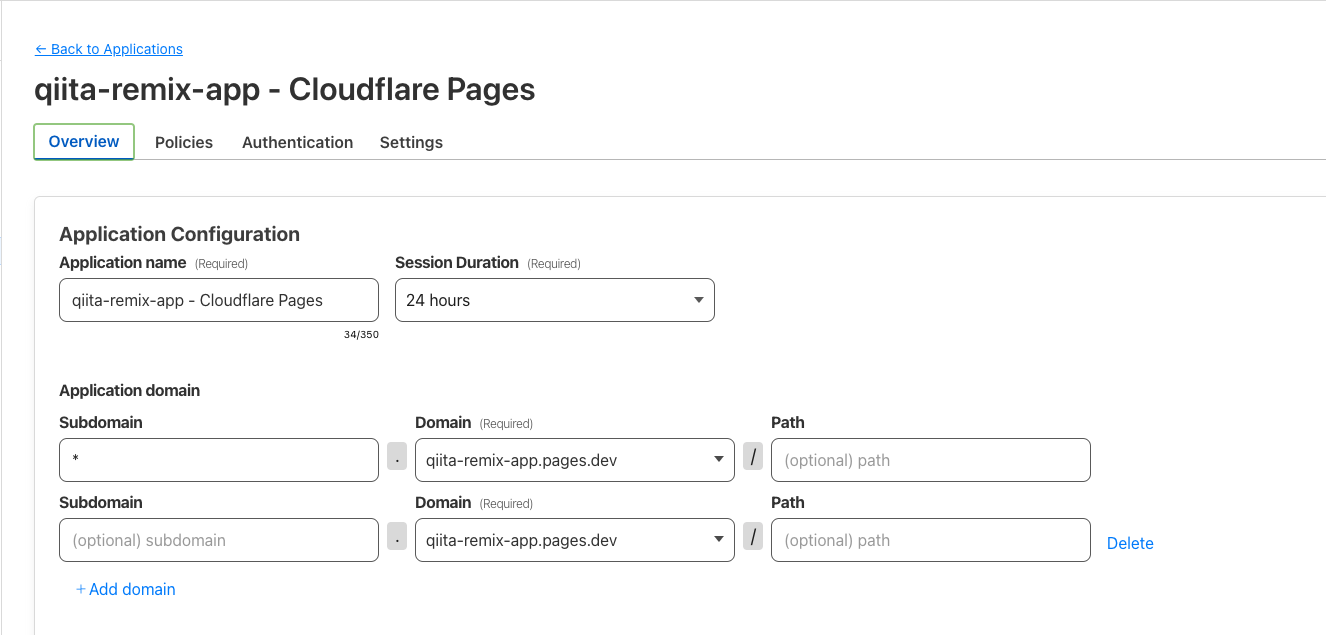
(サブドメインに * が設定されているルールは、検証環境用のアクセス制限です。)
これで、本番環境にもアクセス制限をすることができました。
アクセス許可したいメールアドレスの増減は下記から設定できます。
Configure を押下して、Configure rules の項で設定できます。

さいごに
これで全ての工程が終了です!
基本的な CRUD 機能と簡易的な認証のあるアプリケーションが完成しました!
Cloudflare を使うことでインフラの設定を簡単にできましたね。
フルスタックフレームワークとしての Remix 入門することができました。
Remix に興味を持った方は使い慣れた Rails との違いを感じながら、
Remix の良さを調べていくと面白いかもしれません。
この記事をきっかけに、様々な技術に挑戦してもらえると嬉しいです!
反響があれば、このアプリケーションに機能追加する記事を作成します。


