なぜこの記事を書こうと思ったのか
先日、Rust + Bevyで作ったゲームをWebAssembly (以後Wasm) 化してGithubPagesに公開してみたのですが、
その時に意外と簡単に出来るものだなと思った反面、Wasm化のときに音が鳴らない問題に悩まされて困っておりました。
自分の他にも困っている人がいるかなと思い、今回記事にしてみました。
以下の人には参考になるかもしれません。
- Rust + Bevy でゲームを作ってサクッとウェブに公開したい人
- Wasm化したときに音が鳴らなくて困っている人
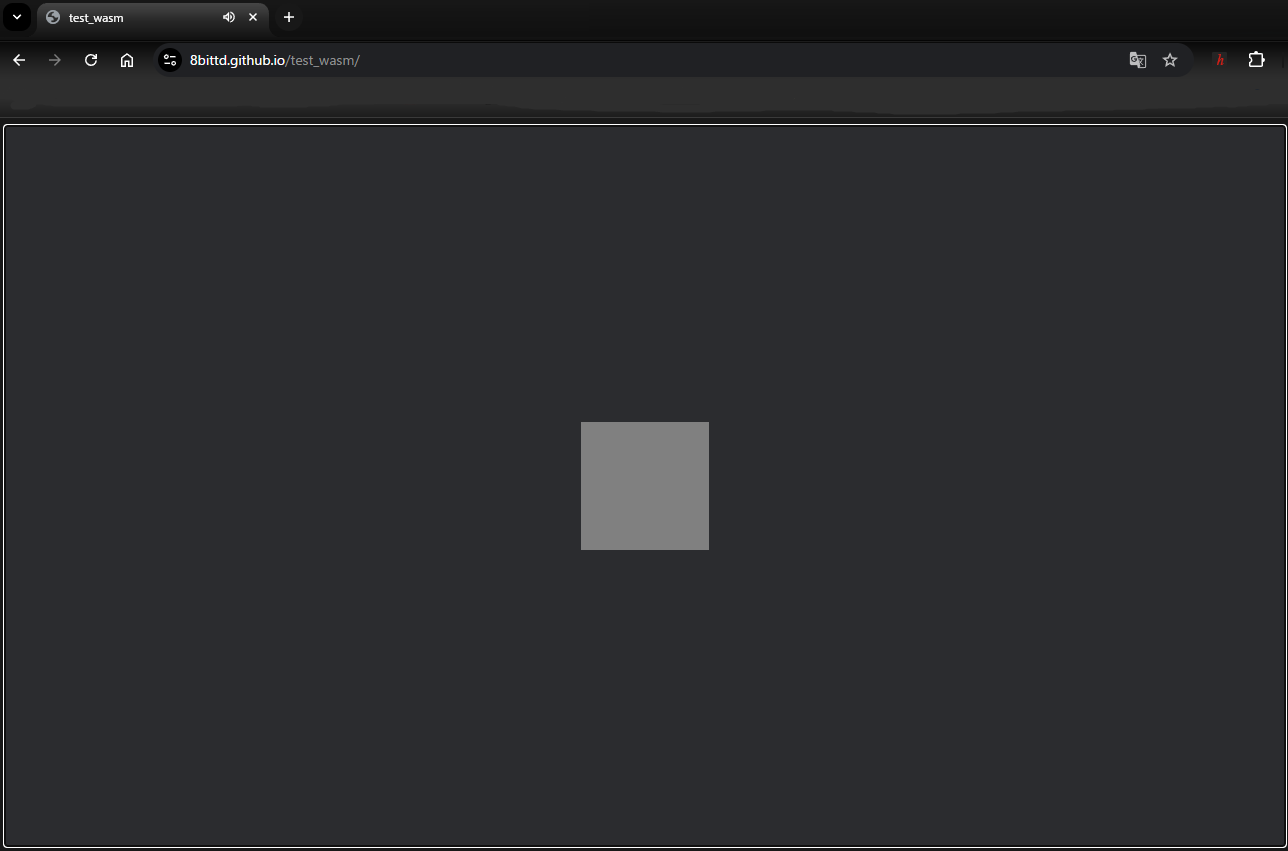
出来上がったもの
https://8bittd.github.io/test_wasm/
![]() クリックすると音楽が流れます
クリックすると音楽が流れます![]()
実行環境
- Window10
事前準備
- Rust をインストール
- Visual Studio Codeをインストール
- Github Desktopをインストール
- Github アカウントを作成
Rustのプロジェクトを作成
cargo new test_wasm
cd test_wasm
code .
#Cargo.toml
[package]
name = "test_wasm"
version = "0.1.0"
edition = "2024"

[dependencies]
bevy = "0.15.3"
//main.rs

use bevy::{color::palettes::basic, prelude::*};

fn main() {
    App::new()
        .add_plugins(DefaultPlugins)
        .add_systems(Startup, setup)
        .run();
}

fn setup(
    mut commands: Commands,
    mut meshes: ResMut<Assets<Mesh>>,
    mut materials: ResMut<Assets<ColorMaterial>>,
    asset_server: Res<AssetServer>,
) {
    commands.spawn(Camera2d);
    commands.spawn(AudioPlayer::new(
        asset_server.load("sounds/Windless Slopes.ogg"),
    ));
    commands.spawn((
        Mesh2d(meshes.add(Rectangle::default())),
        MeshMaterial2d(materials.add(Color::from(basic::GRAY))),
        Transform::default().with_scale(Vec3::splat(128.)),
    ));
}
![]() プロジェクトフォルダ/assets/soundsフォルダに以下のファイルを配置しておいてください
プロジェクトフォルダ/assets/soundsフォルダに以下のファイルを配置しておいてください
https://github.com/bevyengine/bevy/blob/main/assets/sounds/Windless Slopes.ogg
cargo run —release でビルドするとグレーの図形が表示されて、音楽が流れていると思います
Wasm化の手順
プロジェクトフォルダに以下のファイルを配置してください
<html lang="en">
  <head>
    <meta charset="UTF-8" />
    <style>
      body {
        background-color: #181818;
      }
    </style>
    <title>jump_cube</title>
  </head>
  <script type="module">
    import init from './wasm/target/test_wasm.js'
    init().catch((error) => {
      if (!error.message.startsWith("Using exceptions for control flow, don't mind me. This isn't actually an error!")) {
        throw error;
      }
    });
  </script>
</html>
rustup target add wasm32-unknown-unknown
cargo install wasm-bindgen-cli
cargo build --release --target wasm32-unknown-unknown
wasm-bindgen --out-name test_wasm --out-dir wasm/target --target web ./target/wasm32-unknown-unknown/release/test_wasm.wasm
cargo install basic-http-server
basic-http-server -a "127.0.0.1:4000" ./
build.batを実行してサーバーを起動する
ブラウザでhttp://localhost:4000 にアクセスする

図形は表示されてますが、音が鳴っていないことに気づくと思います。
コンソールで調べてみると…

と書いてあって、Audioの再生が止めらているのがわかると思います。
(筆者は、ここで数週間ハマりました。。。orz)
公式のGithubにも記載がありまして、
In browsers, audio is not authorized to start without being triggered by an user interaction.
と書いてありました。。
解決方法なのですが、リンクにあるGoogleChromeのブログにヒントが乗っておりました。
新しい AudioContext オブジェクトの作成をインターセプトし、ユーザーがさまざまなユーザー操作を実行したときに、これらのオブジェクトの resume 関数を自動的にトリガーします。
記載されているjsコードをWasmが呼ばれる前に実行すると音が鳴るみたいです。
早速jsを配置してindex.htmlを修正してみます。
(function () {
  // An array of all contexts to resume on the page
  const audioContextList = [];

  // An array of various user interaction events we should listen for
  const userInputEventNames = [
    'click',
    'contextmenu',
    'auxclick',
    'dblclick',
    'mousedown',
    'mouseup',
    'pointerup',
    'touchend',
    'keydown',
    'keyup',
  ];

  // A proxy object to intercept AudioContexts and
  // add them to the array for tracking and resuming later
  self.AudioContext = new Proxy(self.AudioContext, {
    construct(target, args) {
      const result = new target(...args);
      audioContextList.push(result);
      return result;
    },
  });

  // To resume all AudioContexts being tracked
  function resumeAllContexts(event) {
    let count = 0;

    audioContextList.forEach(context => {
      if (context.state !== 'running') {
        context.resume();
      } else {
        count++;
      }
    });

    // If all the AudioContexts have now resumed then we
    // unbind all the event listeners from the page to prevent
    // unnecessary resume attempts
    if (count == audioContextList.length) {
      userInputEventNames.forEach(eventName => {
        document.removeEventListener(eventName, resumeAllContexts);
      });
    }
  }

  // We bind the resume function for each user interaction
  // event on the page
  userInputEventNames.forEach(eventName => {
    document.addEventListener(eventName, resumeAllContexts);
  });
})();
<html lang="en">
  <head>
    <meta charset="UTF-8" />
    <style>
      body {
        background-color: #181818;
      }
    </style>
    <title>test_wasm</title>
  </head>
  <script type="module">
    import './wasm/target/restart-audio-context.js' <!--←この1行を追加-->
    import init from './wasm/target/test_wasm.js'
    init().catch((error) => {
      if (!error.message.startsWith("Using exceptions for control flow, don't mind me. This isn't actually an error!")) {
        throw error;
      }
    });
  </script>
</html>
build.batを実行後に、ブラウザで http://localhost:4000 にアクセスすると音が鳴っていることを確認できると思います。(※クリックするか、キーボードのボタンを押すなど1アクションを起こさないと音は鳴らないみたいです)
Githubにリポジトリを作成
- GithubDesktopを起動する
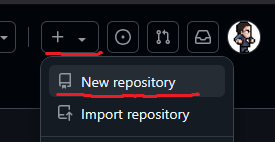
File → Add local repositoryで先程作った test_wasm プロジェクトのフォルダを指定する - ブラウザで https://github.com/ユーザー名 にアクセスして、リポジトリを作成する

Ripository Name を test_wasm、Publicにチェックを入れて Create repositoryボタンを押す - GithubDesktopを再起動して、右上のFetch originをクリック

Publish branchをクリックしてプッシュする

-
https://github.com/ユーザー名/test_wasm にアクセスすると↓この形になっていると思います

GithubPagesに公開する手順
Settingsタブをクリックする

左側のPagesをクリック

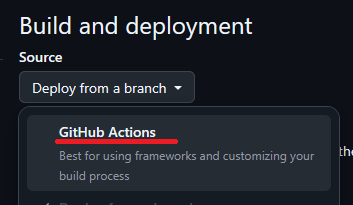
Build and deploymentのSourceをGithub Actionsに設定

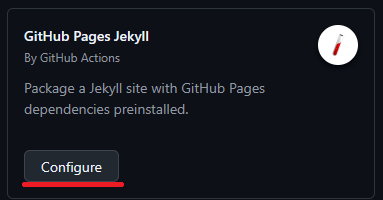
GitHub Pages JekyllのConfigureボタンを押す

右上の Commit changes… ボタンを押す

以上で、公開する手順が終了です。https://ユーザー名.github.io/リポジトリ名 にアクセスすると表示されます。

参考にさせていただいたURL
