普段よく使っているエディタがマイクロソフトのVisual Studio Codeです。最近Rustの勉強を始めたので、Visual Studio Code上でRust環境を整えてみました。その際のセットアップ方法をまとめておこうと思います。Windows環境前提の記事です。
前提となる環境の情報
- Windows ver.1903
- Visual Studio Code 1.49.1
- Rust 1.46.0
1. セットアップ
Rustは既にインストール済みという前提でスタートします。
(難しい手順ではないですが、いちおうこちらに手順をまとめました→Rustに入門してみた)
今回導入するのは次の2つの拡張機能です。
| 拡張機能 | 名前とリンク | 用途 |
|---|---|---|
| Rust for Visual Studio Code | コードの補完、フォーマット、リファクタリング、ナビゲーションなど、コーディングに必要な便利ツールが一通りそろっています。 | |
| CodeLLDB | LLDBとは次世代の高機能デバッガーです。この拡張機能を利用することにより、Visual Studio CodeでRustのデバッグ実行を実施することができます。 | |
| Better TOML | 設定ファイルでTOMLを扱うために、編集支援用に使う拡張機能です。 |
拡張機能のインストールは特に難しいことはありません。Rust for Visual Studio Codeもインストールしちゃえば機能するので、説明は不要かと思います。CodeLLDBは設定があるので以下で補足します。
CodeLLDBのセットアップ
順を追って説明します。
- Rustのプログラムが格納されたフォルダをVisual Studio Codeで開く。
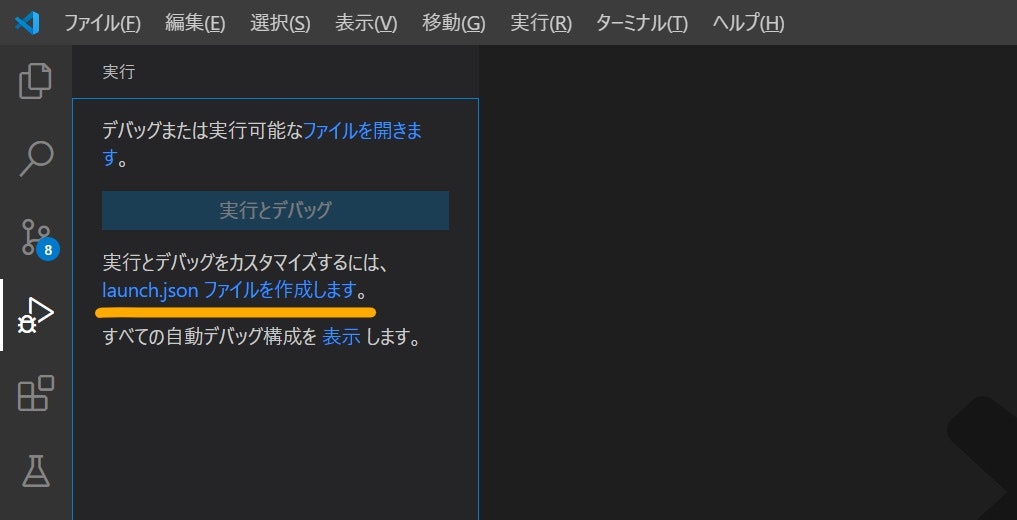
- 左のサイドバーからデバッグ実行を選択する。
- 「launch.jsonファイルを作成します。」をクリックし、設定ファイルである
launch.jsonファイルを作成する
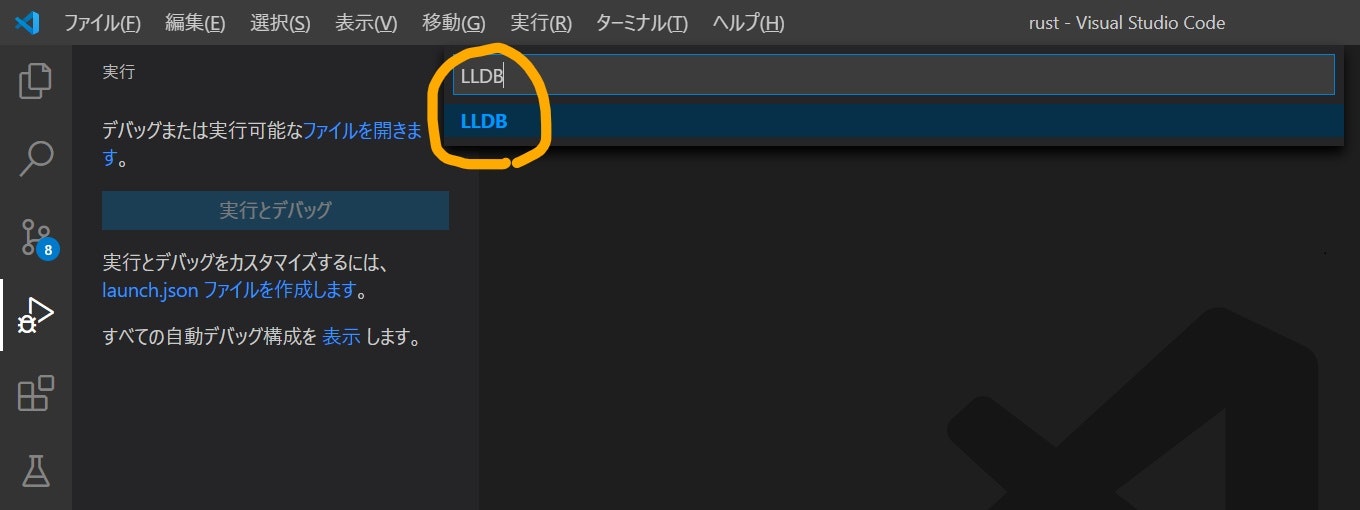
- コマンドパレットが開くため、デバッガーとして、
LLDBを選択する
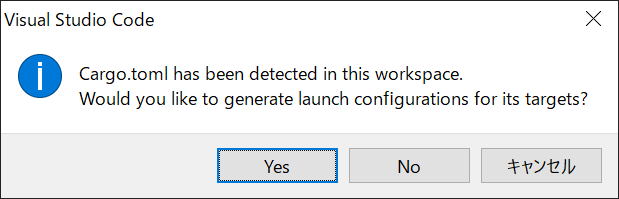
- 同じフォルダにある
Cargo.tomlに基づいて、launch.jsonが自動生成される。ダイアログは「Yes」をクリック。
- これで設定完了!自動生成されたファイルは以下のイメージ。
launch.json
{
    // IntelliSense を使用して利用可能な属性を学べます。
    // 既存の属性の説明をホバーして表示します。
    // 詳細情報は次を確認してください: https://go.microsoft.com/fwlink/?linkid=830387
    "version": "0.2.0",
    "configurations": [
        {
            "type": "lldb",
            "request": "launch",
            "name": "Debug executable 'hello'",
            "cargo": {
                "args": [
                    "build",
                    "--bin=hello",
                    "--package=hello"
                ],
                "filter": {
                    "name": "hello",
                    "kind": "bin"
                }
            },
            "args": [],
            "cwd": "${workspaceFolder}"
        },
        {
            "type": "lldb",
            "request": "launch",
            "name": "Debug unit tests in executable 'hello'",
            "cargo": {
                "args": [
                    "test",
                    "--no-run",
                    "--bin=hello",
                    "--package=hello"
                ],
                "filter": {
                    "name": "hello",
                    "kind": "bin"
                }
            },
            "args": [],
            "cwd": "${workspaceFolder}"
        }
    ]
}
デバッグ実行してみる
デバッグ実行している際の画面イメージは以下のとおりです。
- ブレークポイントで止められる
- 逐次実行できる
- ウォッチ式も定義できる
- コールスタックも丸わかり
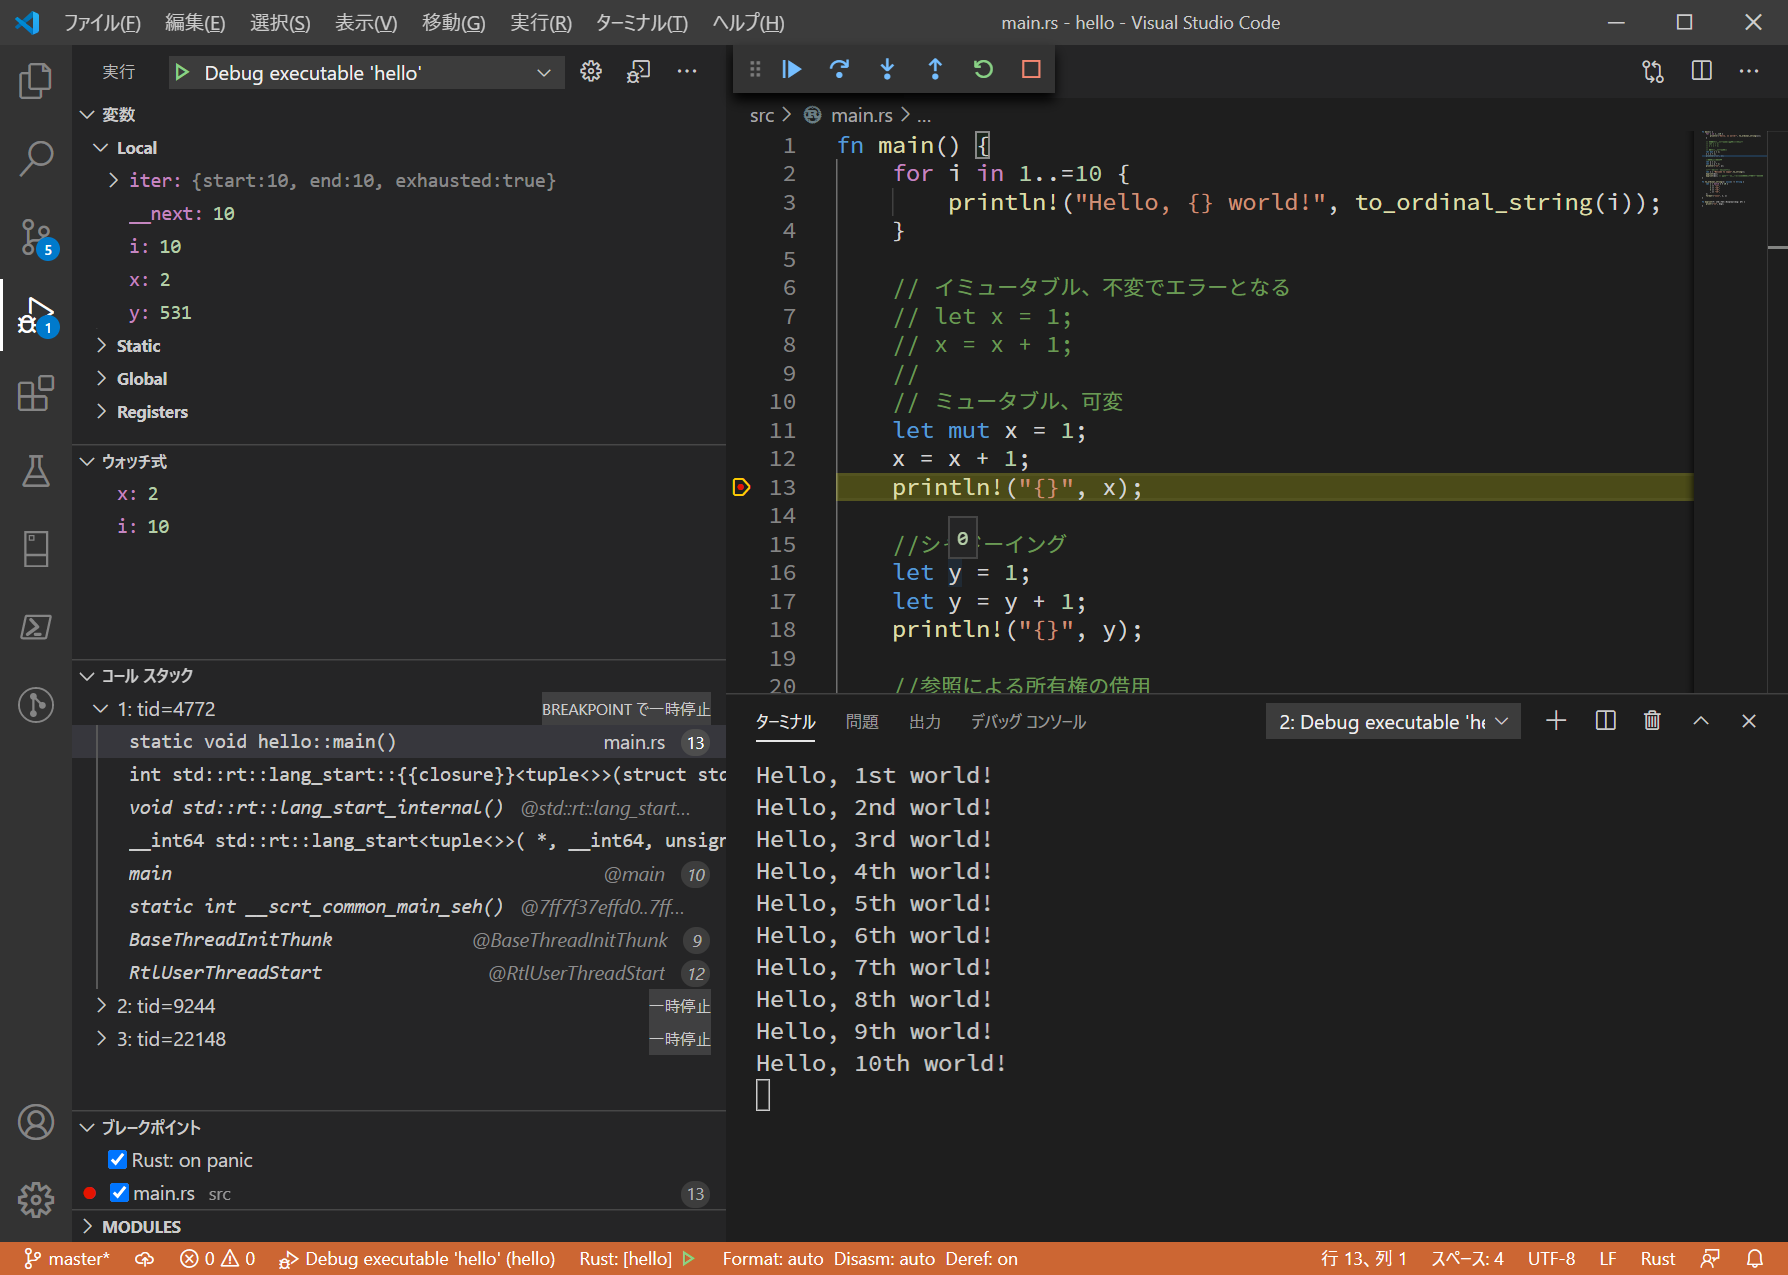
いい感じですね。
2.おわりに
これだけあれば、あとはさくさくRustのお勉強を進められそうです。誰かの参考になれば。