Snackbars - Material Design
- 画面下部で一時的に表示されるアプリケーションのプロセスに関する簡単なメッセージ
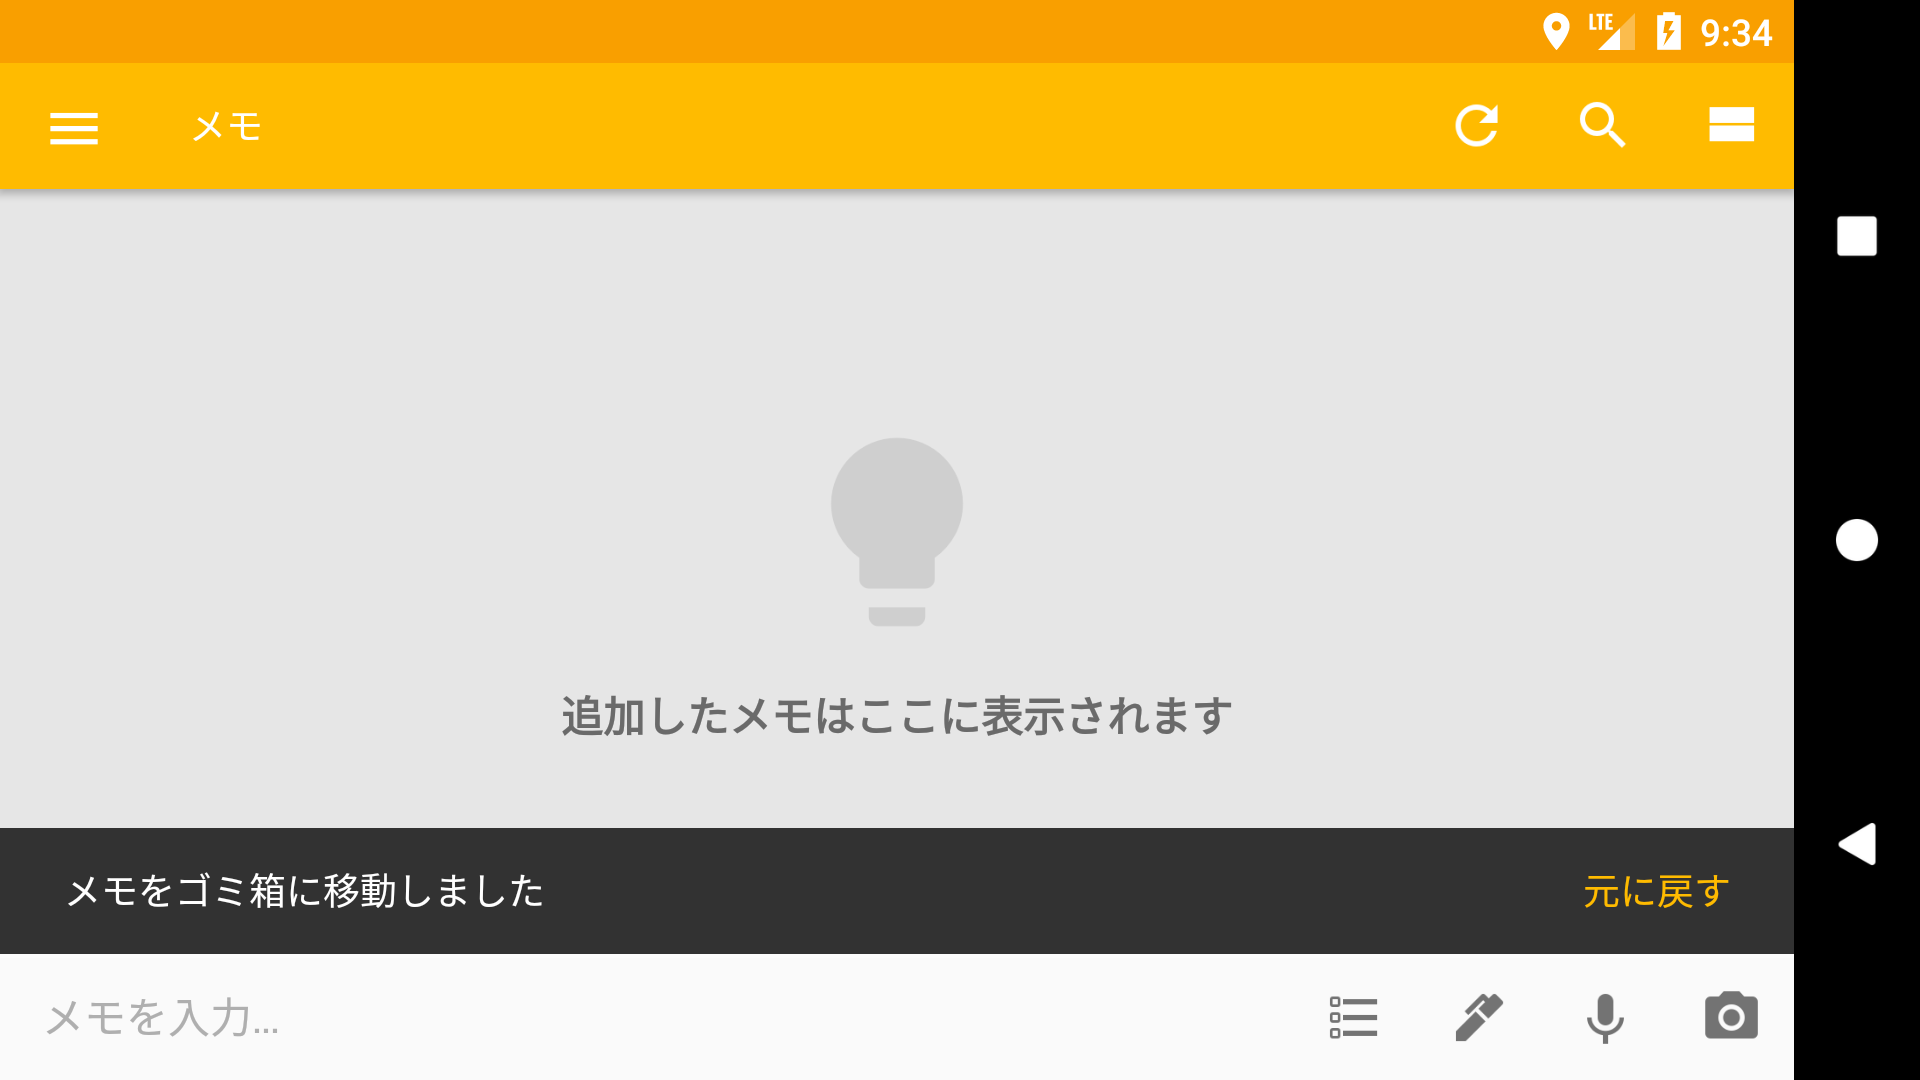
推奨 
- コンポーネント上部での表示が理想
| FloatingActionButton | BottomAppBar |
|---|---|
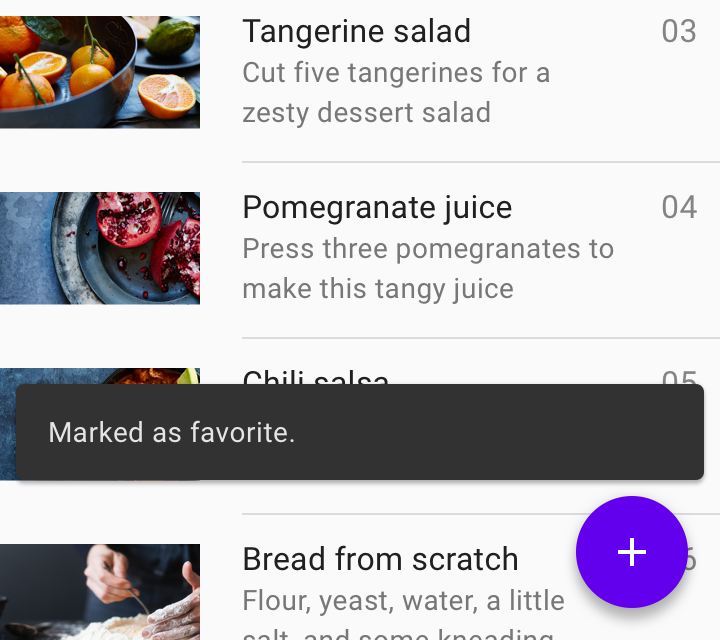 |
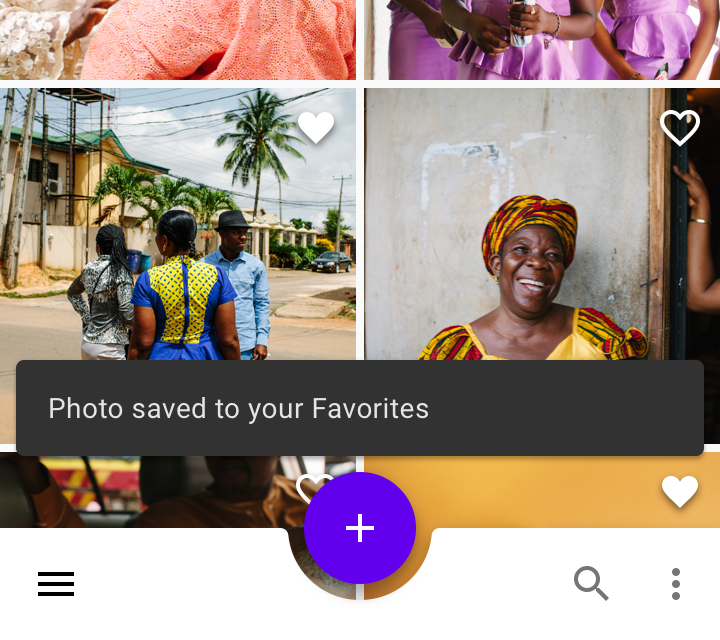 |
模範例 
- Google Keep(Android スマホにて)
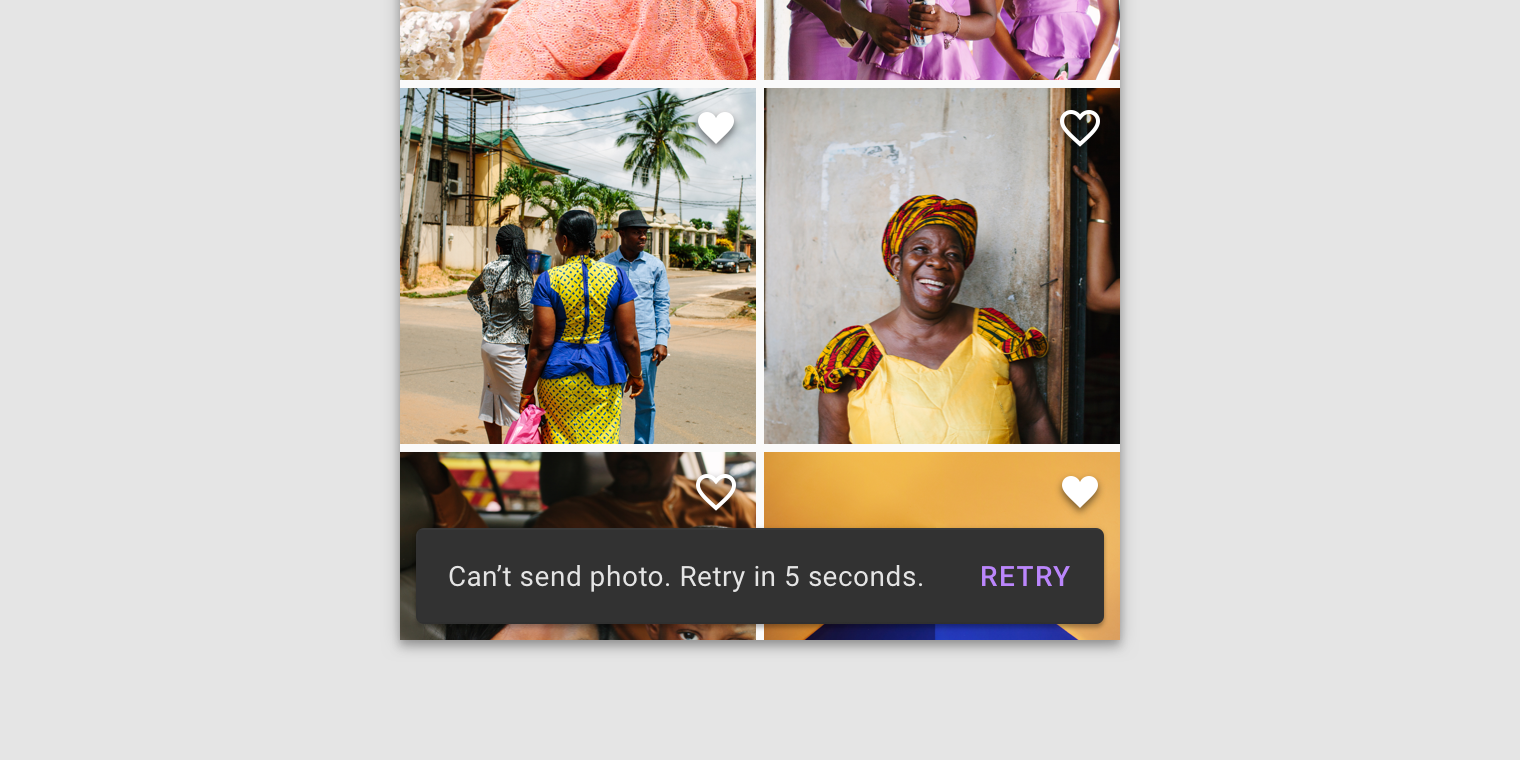
駄目 
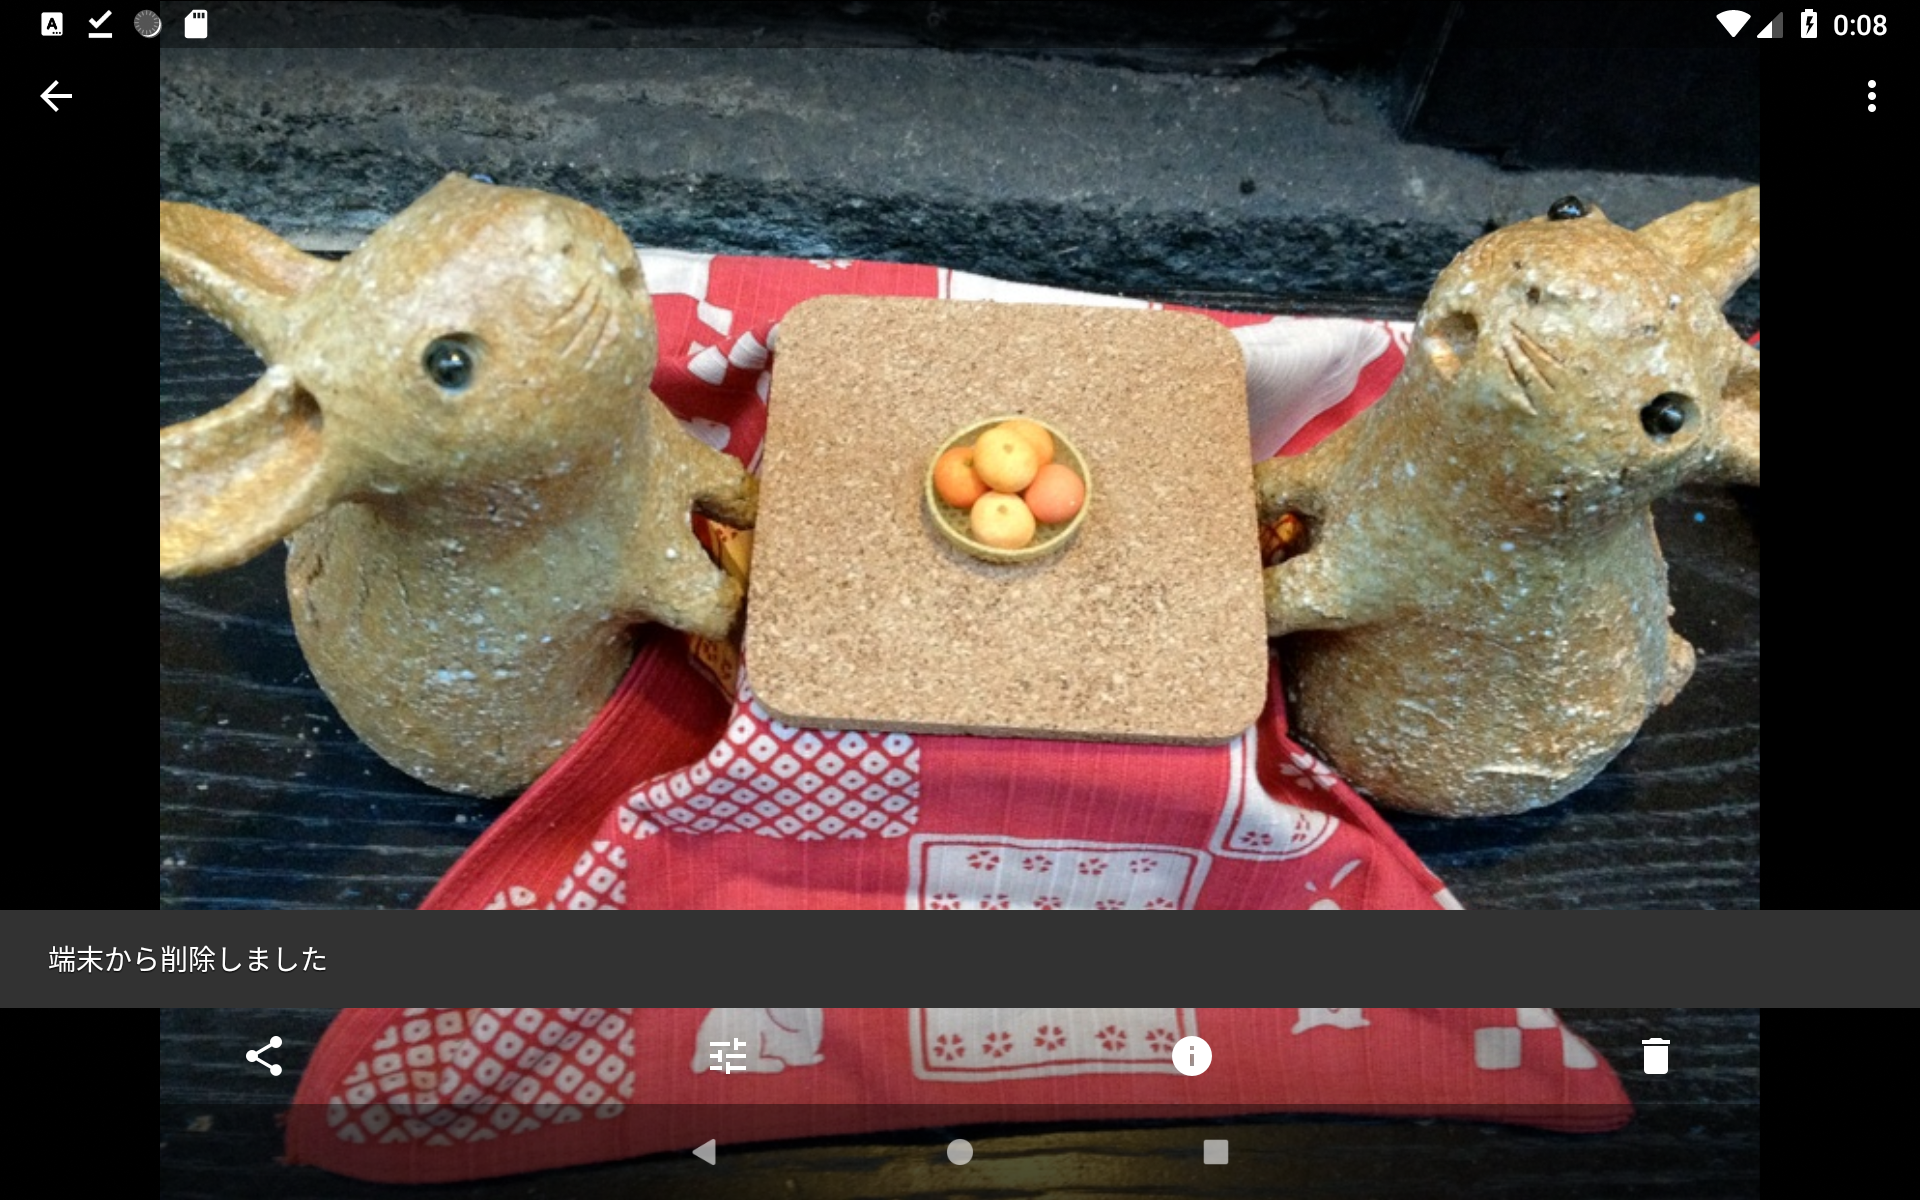
- コンポーネントの前面に被せるのは厳禁
| FloatingActionButton | BottomAppBar |
|---|---|
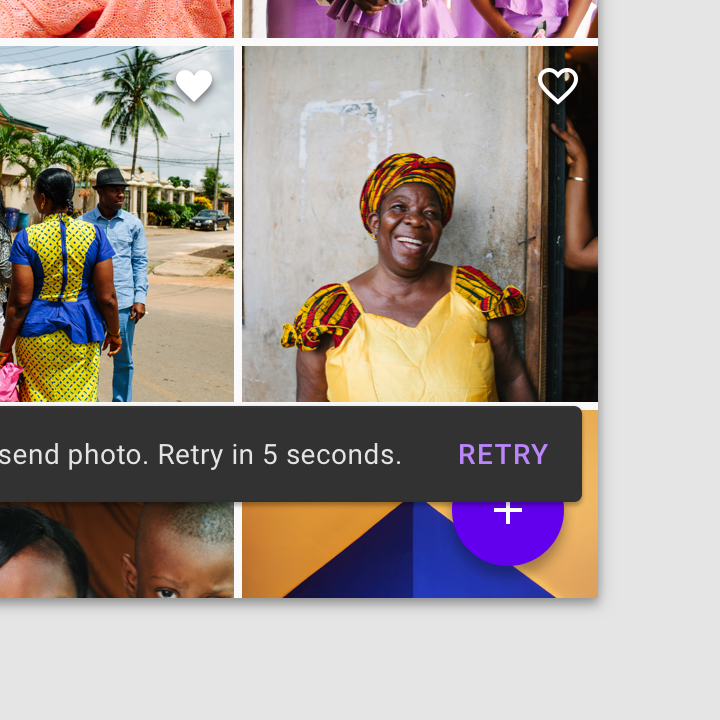 |
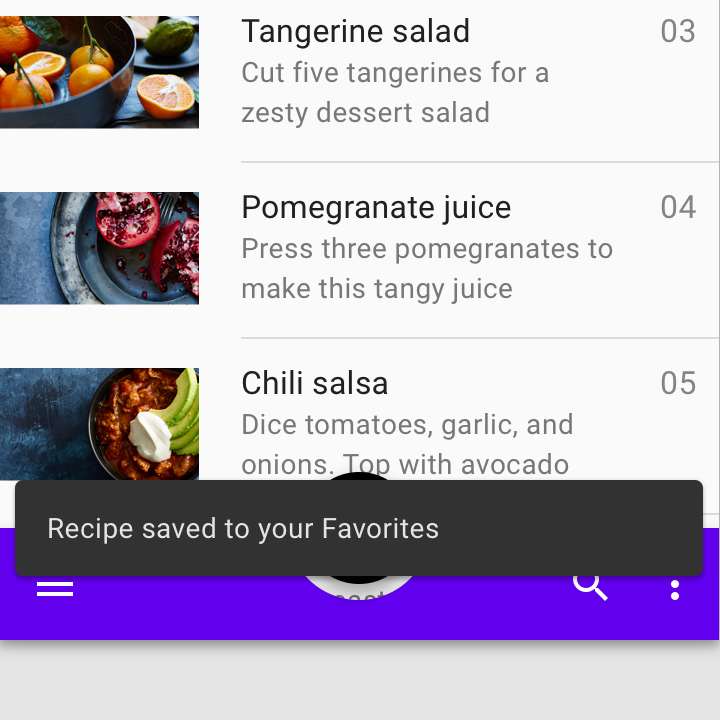 |
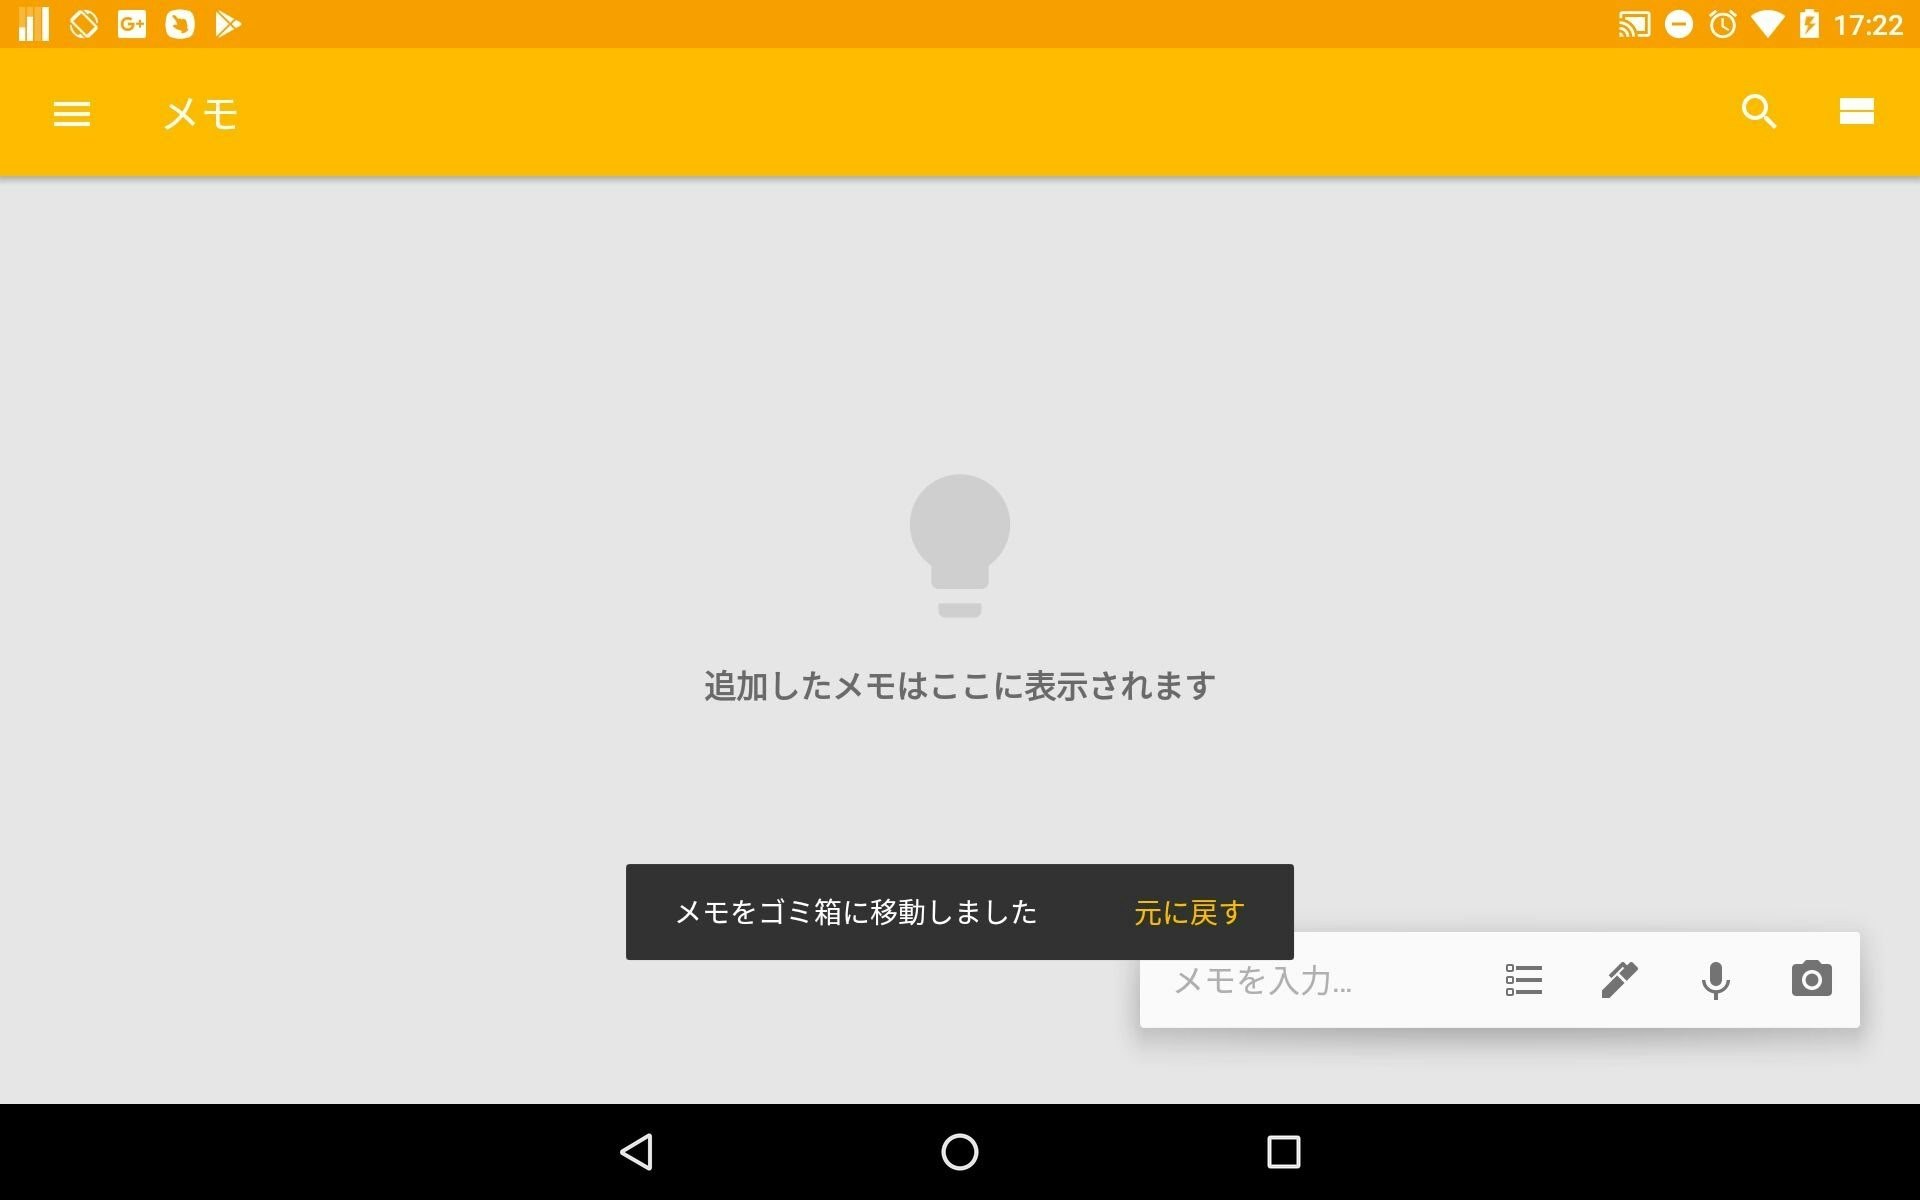
疑惑 
- Google Keep(Android タブレットにて)
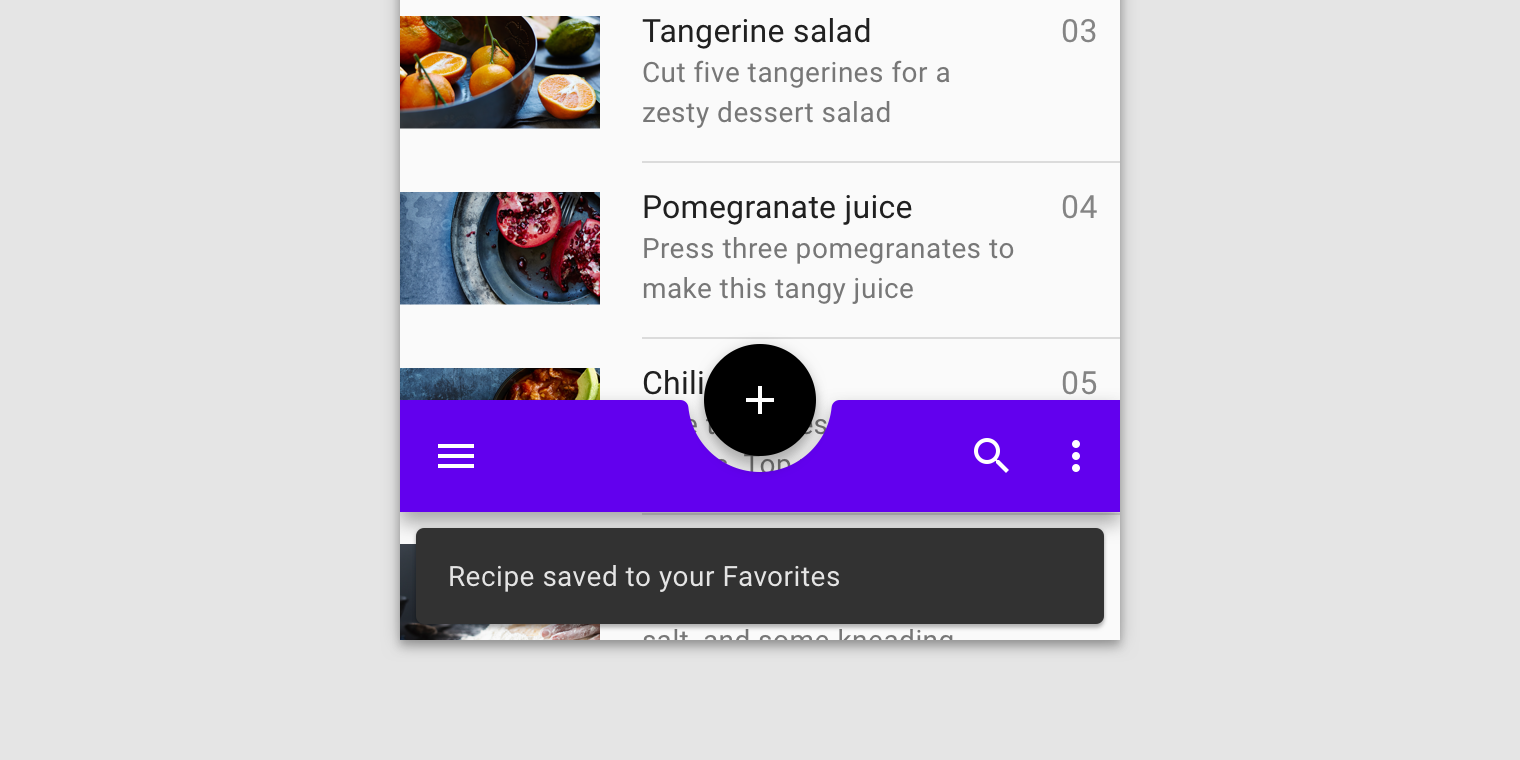
アカンやつ 
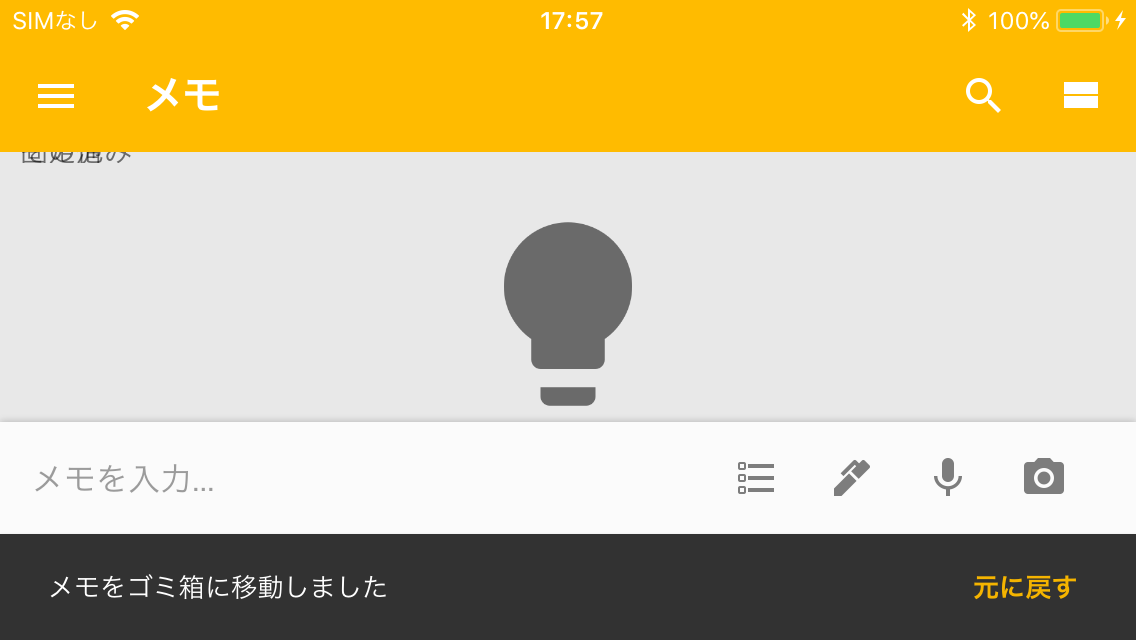
- 画面底の永続的要素を押し上げて、ひょっこりはん(例:BottomAppBar)
事案 
- Google Keep(iPhone 5s にて)
 任意の位置から
-
Snackbar を画面の底からではなく、指定の場所から表示させたい

方法
- レイアウト内で Snackbar を表示させたい地点に CoordinatorLayout を配置
- Snackbar.make メソッドの第1引数に、レイアウト内に設置した CoordinatorLayout を渡す
参考 
サンプル
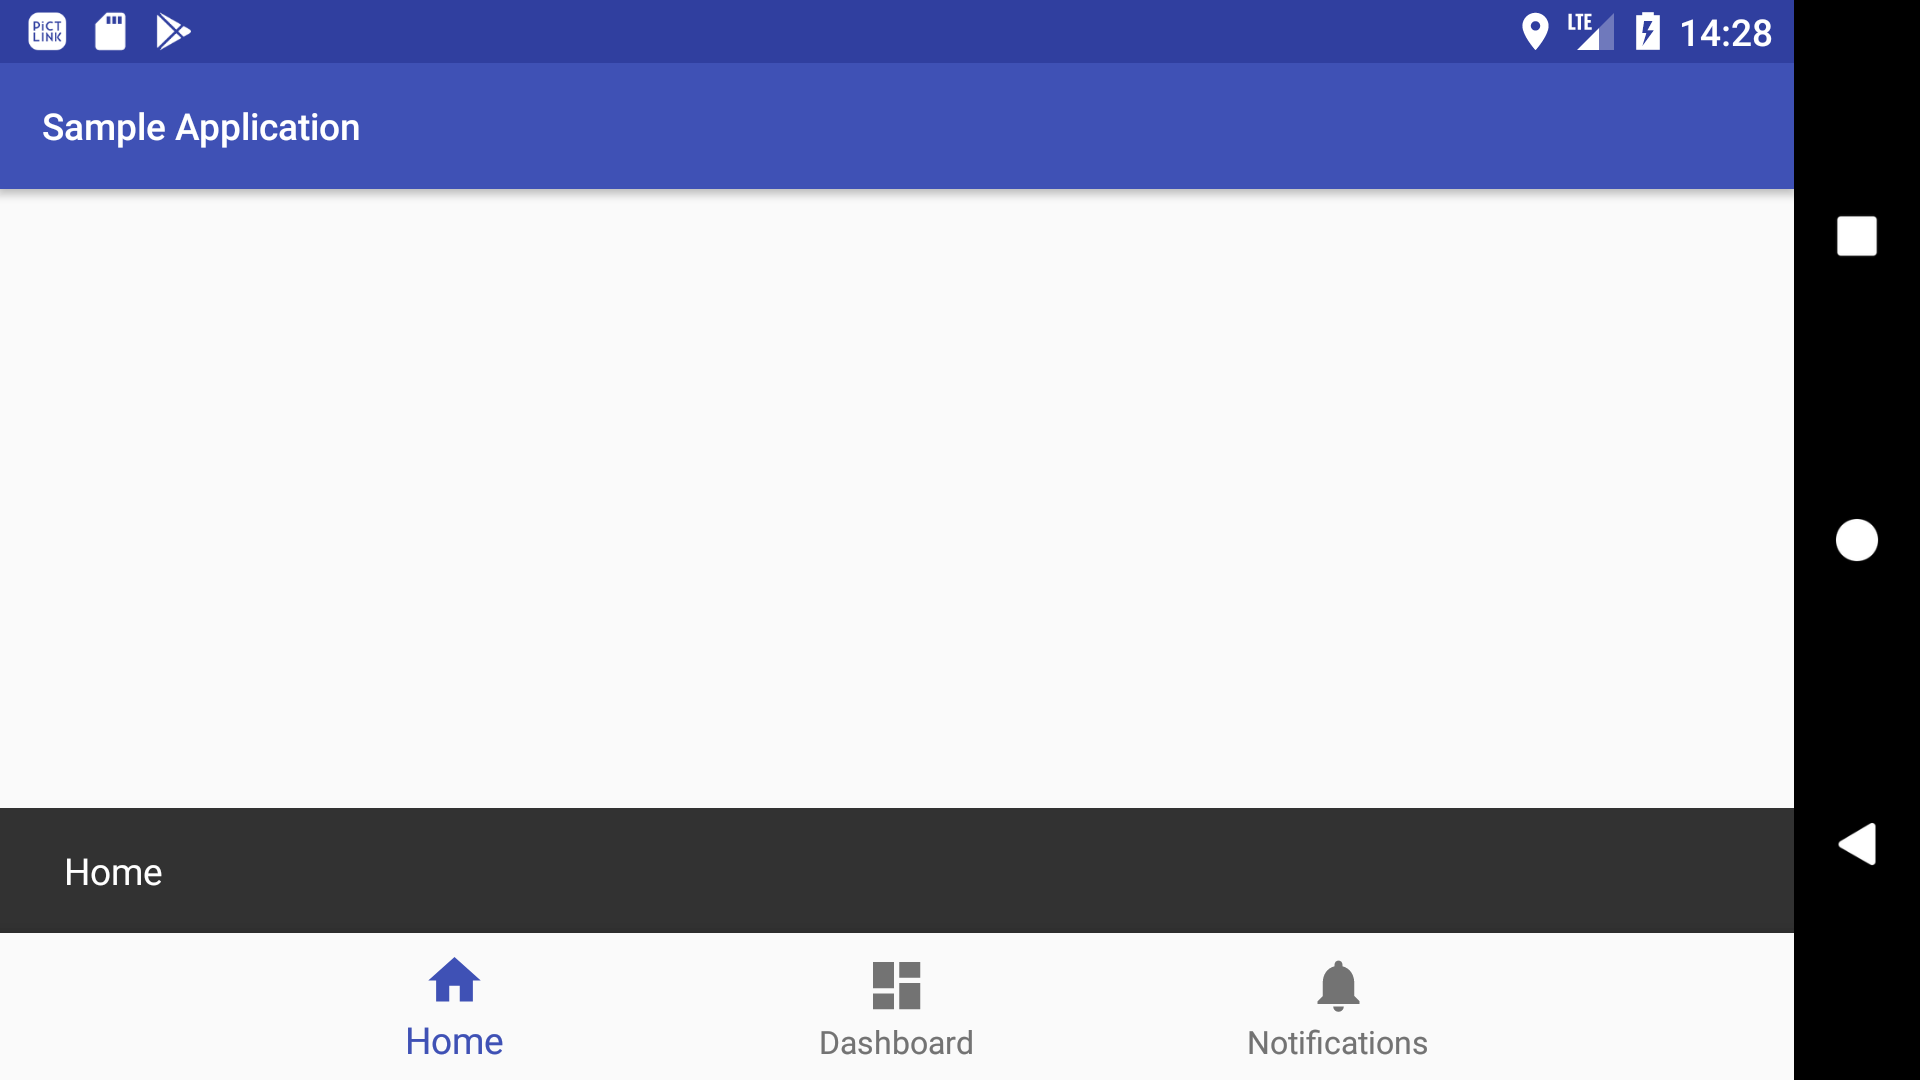
- BottomNavigationView の上部から Snackbar を表示する
手法
-
Android Studio 内のテンプレート Bottom Navigation Activity を少し修正します

目標
- Google フォト(Android タブレットでの挙動)
コード
activity_main.xml
<?xml version="1.0" encoding="utf-8"?>
<android.support.constraint.ConstraintLayout xmlns:android="http://schemas.android.com/apk/res/android"
    xmlns:app="http://schemas.android.com/apk/res-auto"
    android:layout_width="match_parent"
    android:layout_height="match_parent">

    <android.support.design.widget.CoordinatorLayout
        android:id="@+id/coordinatorLayout"
        android:layout_width="0dp"
        android:layout_height="wrap_content"
        app:layout_constraintBottom_toTopOf="@+id/bottomNavigationView"
        app:layout_constraintEnd_toEndOf="parent"
        app:layout_constraintStart_toStartOf="parent" />

    <android.support.design.widget.BottomNavigationView
        android:id="@id/bottomNavigationView"
        android:layout_width="0dp"
        android:layout_height="wrap_content"
        android:background="?android:attr/windowBackground"
        app:layout_constraintBottom_toBottomOf="parent"
        app:layout_constraintEnd_toEndOf="parent"
        app:layout_constraintStart_toStartOf="parent"
        app:menu="@menu/navigation" />

</android.support.constraint.ConstraintLayout>
MainActivity.kt
import android.os.Bundle
import android.support.design.widget.Snackbar
import android.support.v7.app.AppCompatActivity
import kotlinx.android.synthetic.main.activity_main.*

class MainActivity : AppCompatActivity() {

    override fun onCreate(savedInstanceState: Bundle?) {
        super.onCreate(savedInstanceState)
        setContentView(R.layout.activity_main)

        bottomNavigationView.setOnNavigationItemSelectedListener({ menuItem ->
            Snackbar.make(coordinatorLayout, menuItem.title, Snackbar.LENGTH_SHORT).show()
            true
        })
    }
}
実行結果
 任意の幅で
任意の幅で
-
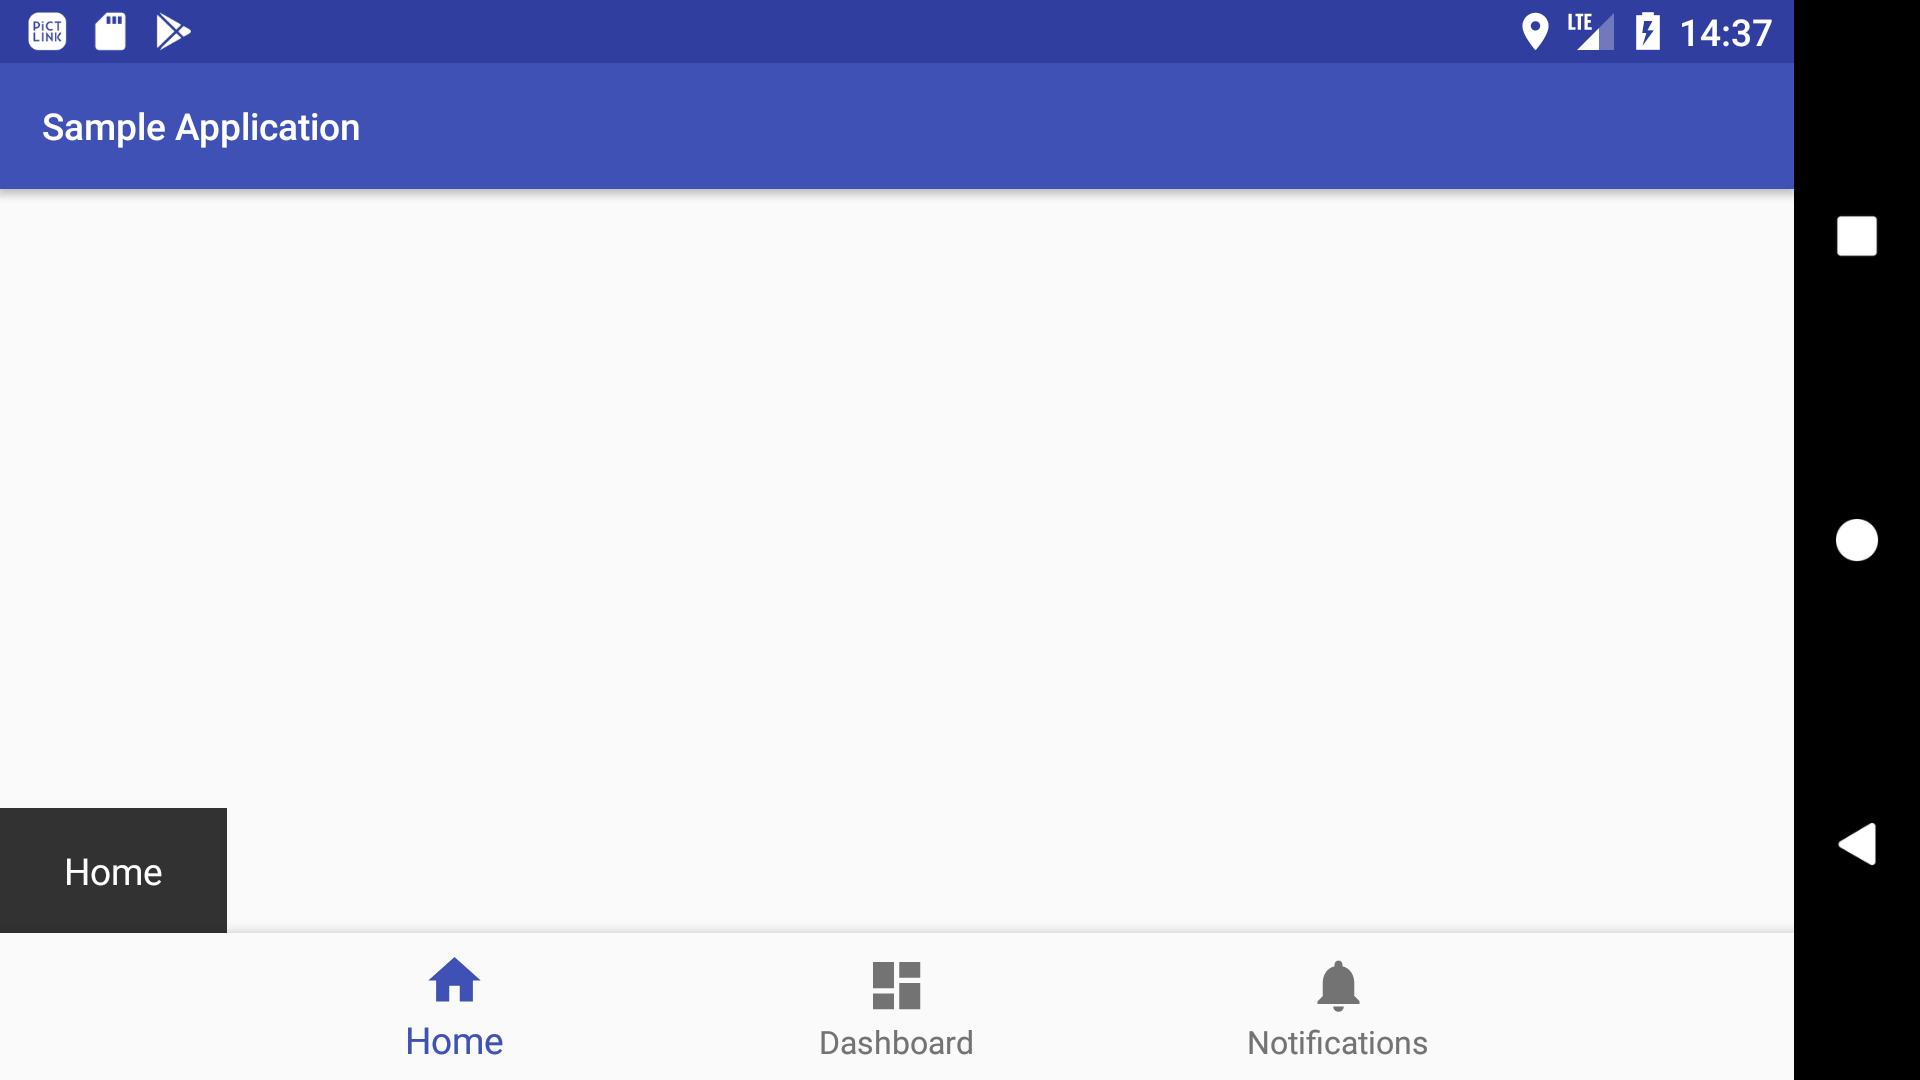
CoordinatorLayout のサイズを調整することで、表示される Snackbar の幅を変更できます

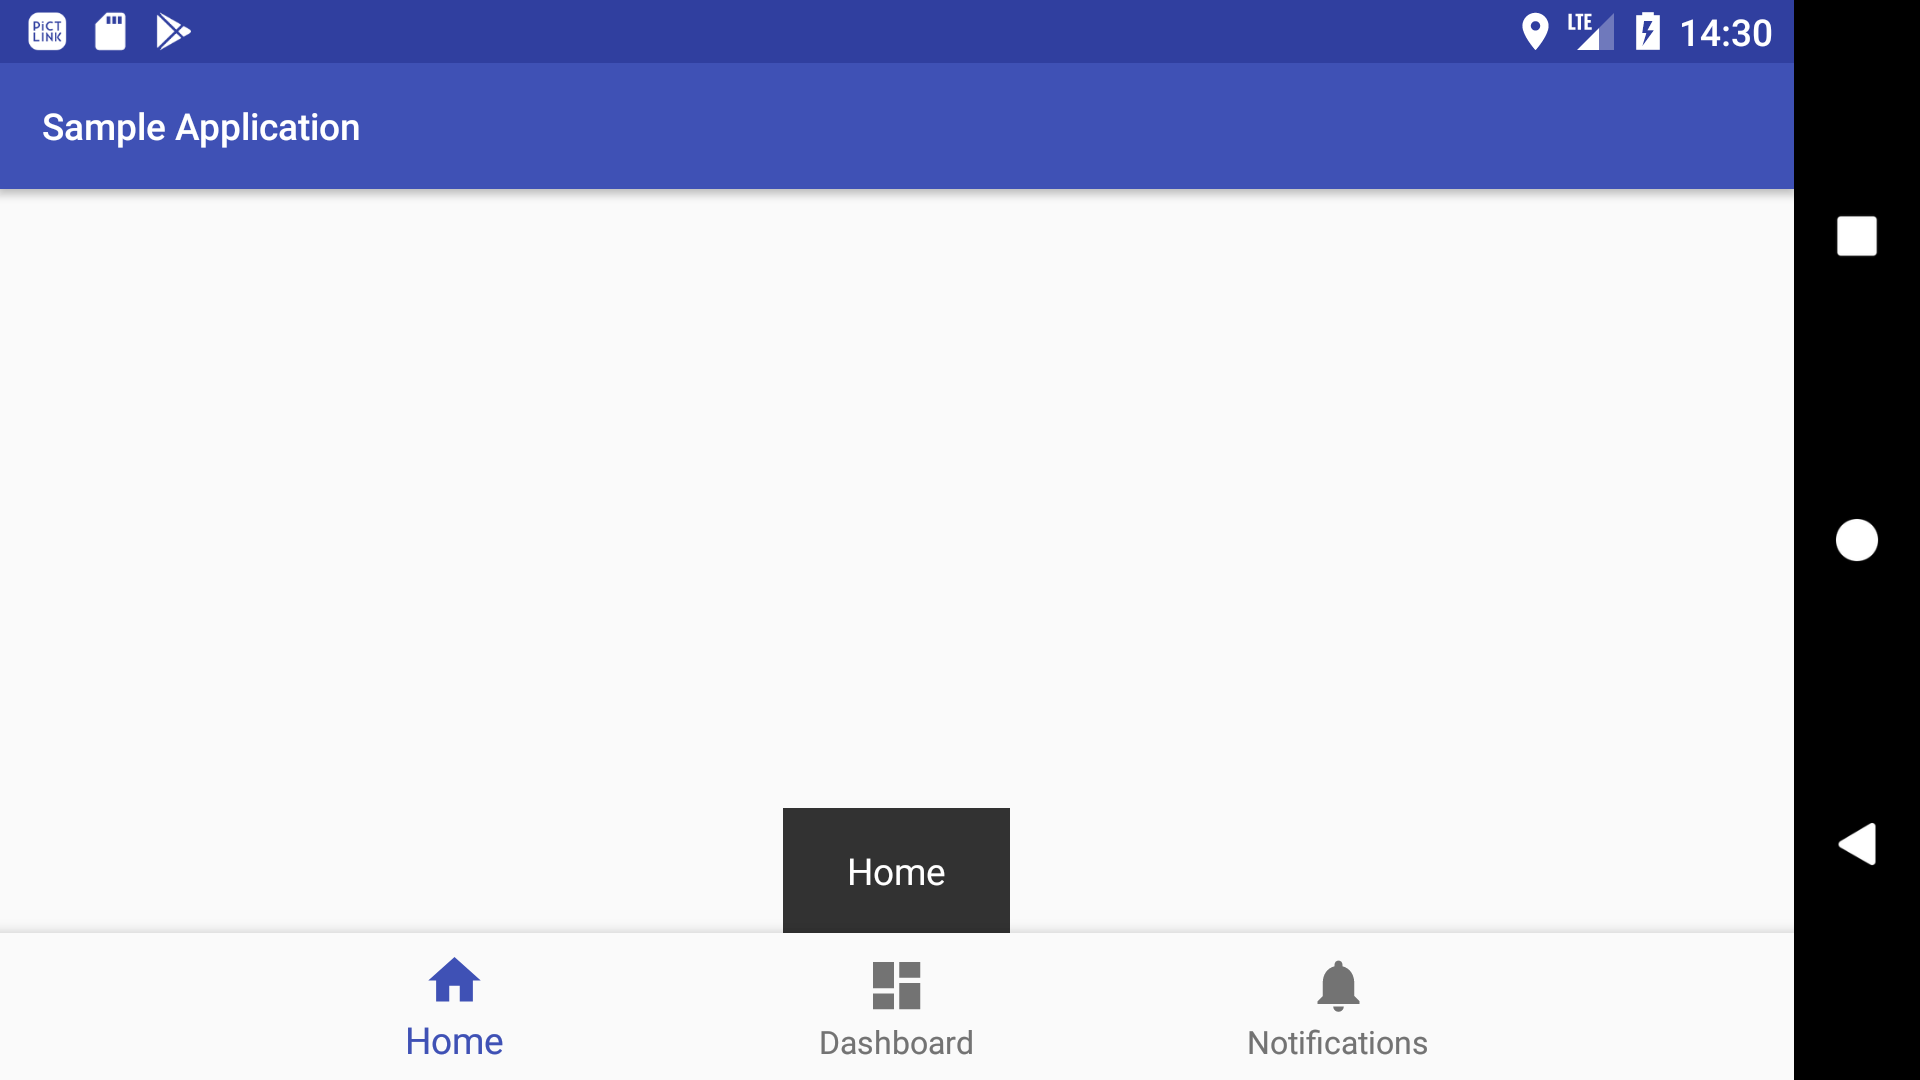
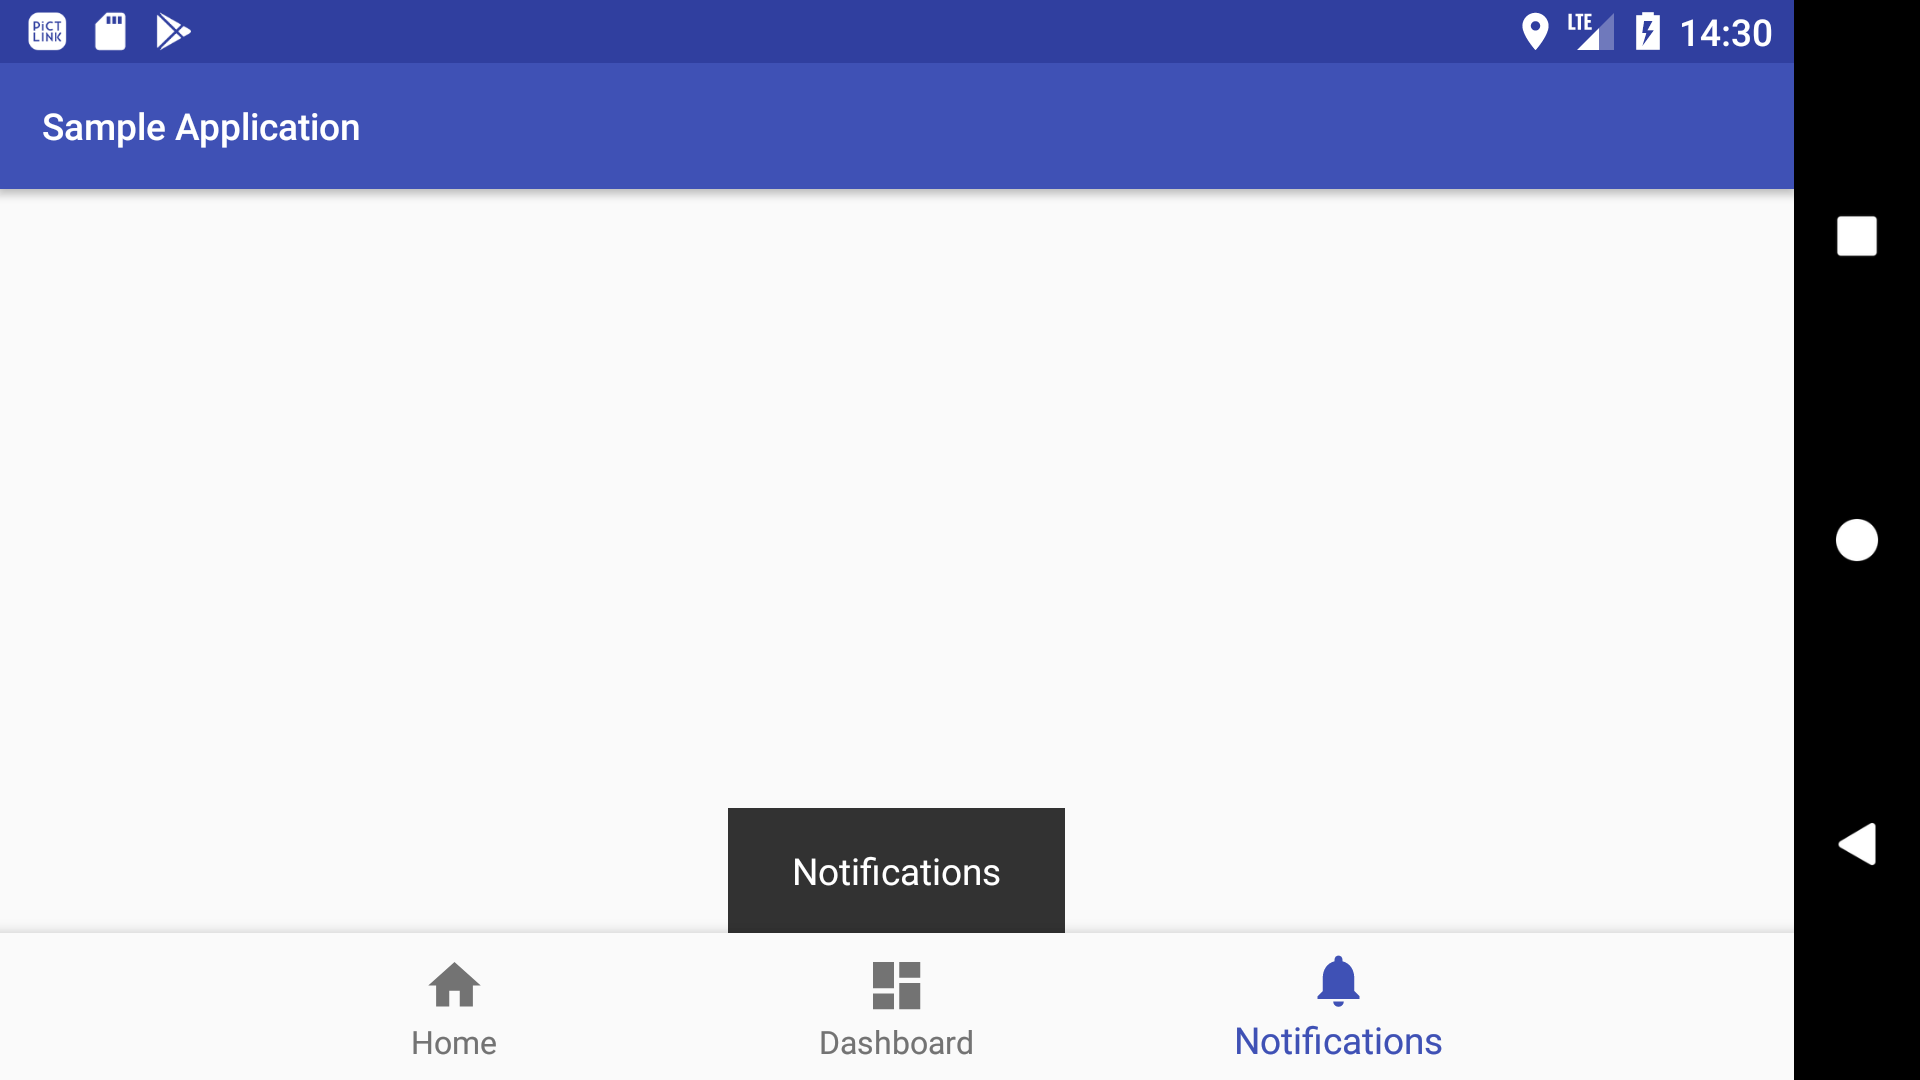
幅を "wrap_content" にした場合
-
CoordinatorLayout を
android:layout_width="wrap_content"にすると、表示される Snackbar の幅がテキストの長さ分になります
コード
activity_main.xml
<?xml version="1.0" encoding="utf-8"?>
<android.support.constraint.ConstraintLayout xmlns:android="http://schemas.android.com/apk/res/android"
    xmlns:app="http://schemas.android.com/apk/res-auto"
    android:layout_width="match_parent"
    android:layout_height="match_parent">

    <android.support.design.widget.CoordinatorLayout
        android:id="@+id/coordinatorLayout"
        android:layout_width="wrap_content"
        android:layout_height="wrap_content"
        app:layout_constraintBottom_toTopOf="@+id/bottomNavigationView"
        app:layout_constraintEnd_toEndOf="parent"
        app:layout_constraintStart_toStartOf="parent" />

    <android.support.design.widget.BottomNavigationView
        android:id="@id/bottomNavigationView"
        android:layout_width="0dp"
        android:layout_height="wrap_content"
        android:background="?android:attr/windowBackground"
        app:layout_constraintBottom_toBottomOf="parent"
        app:layout_constraintEnd_toEndOf="parent"
        app:layout_constraintStart_toStartOf="parent"
        app:menu="@menu/navigation" />

</android.support.constraint.ConstraintLayout>
実行結果
| 例 ① | 例 ② |
|---|---|
 |
 |
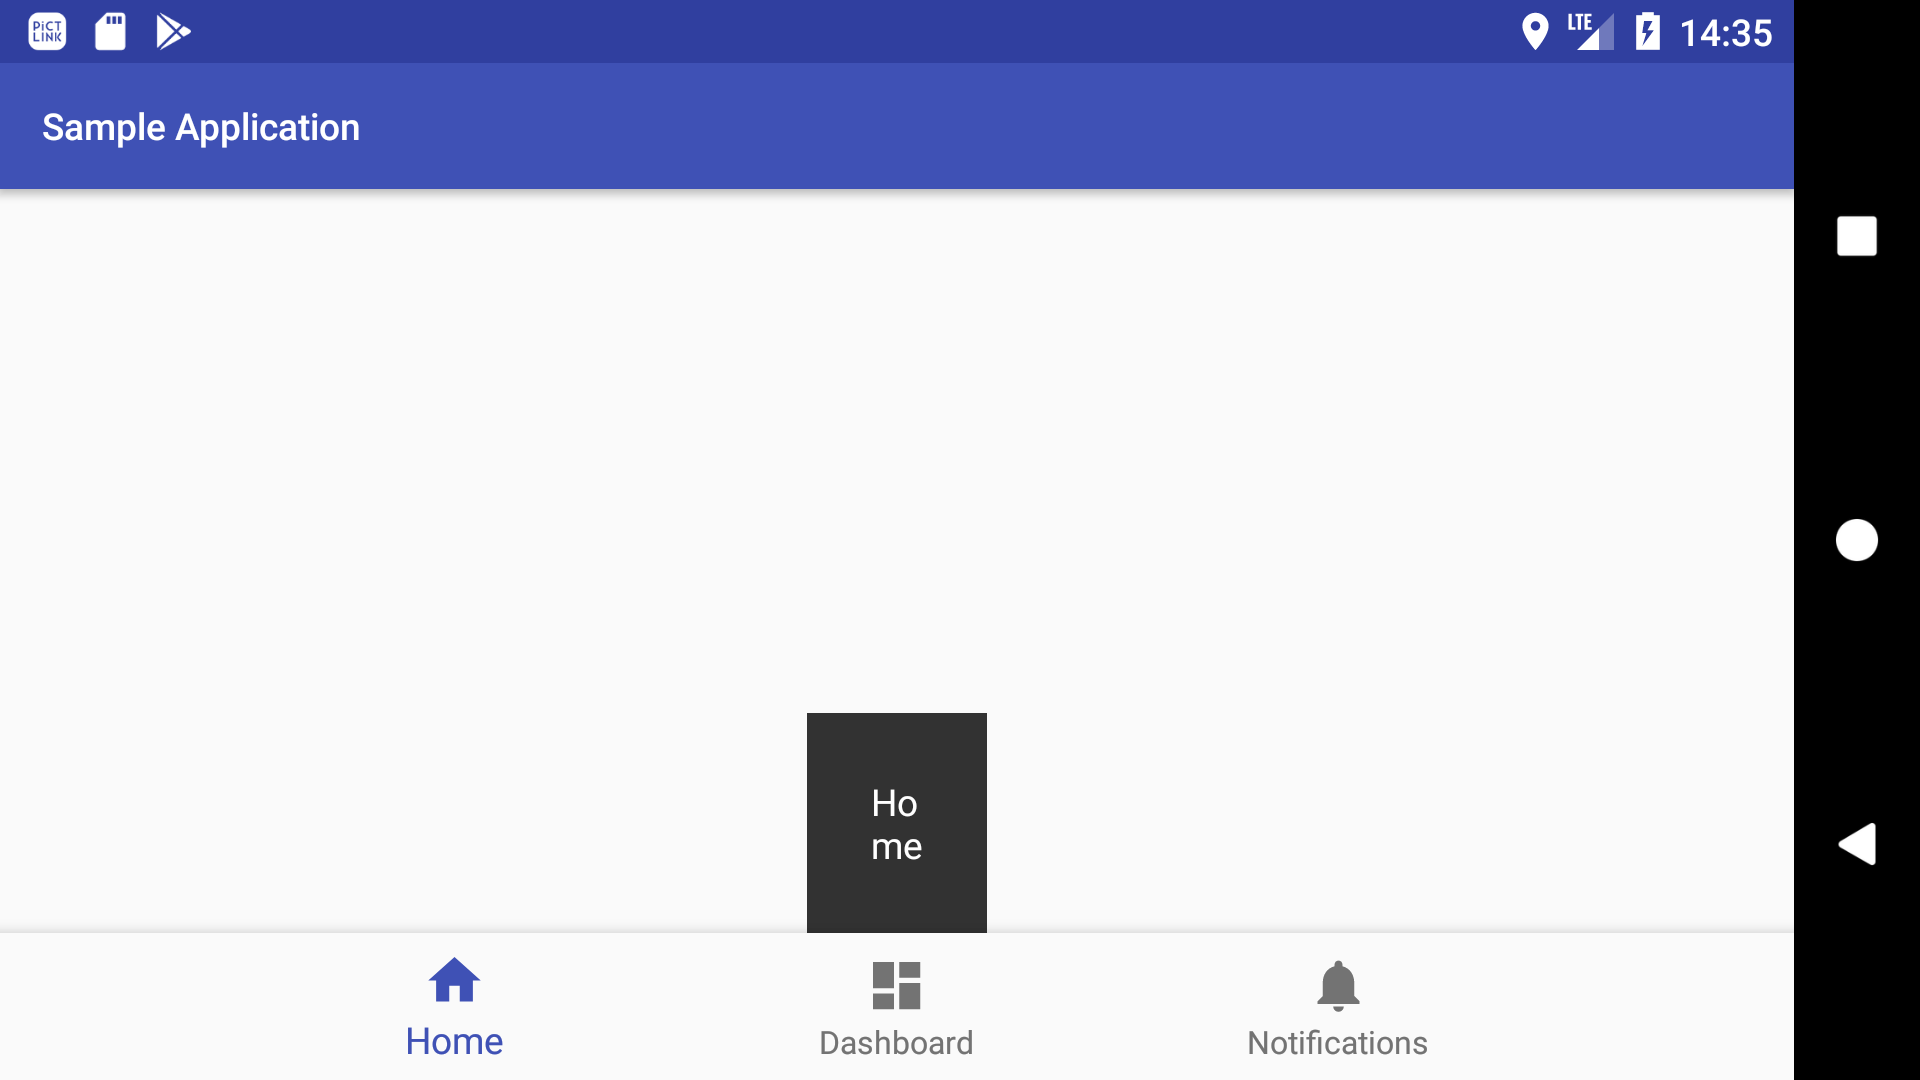
サイズを指定
-
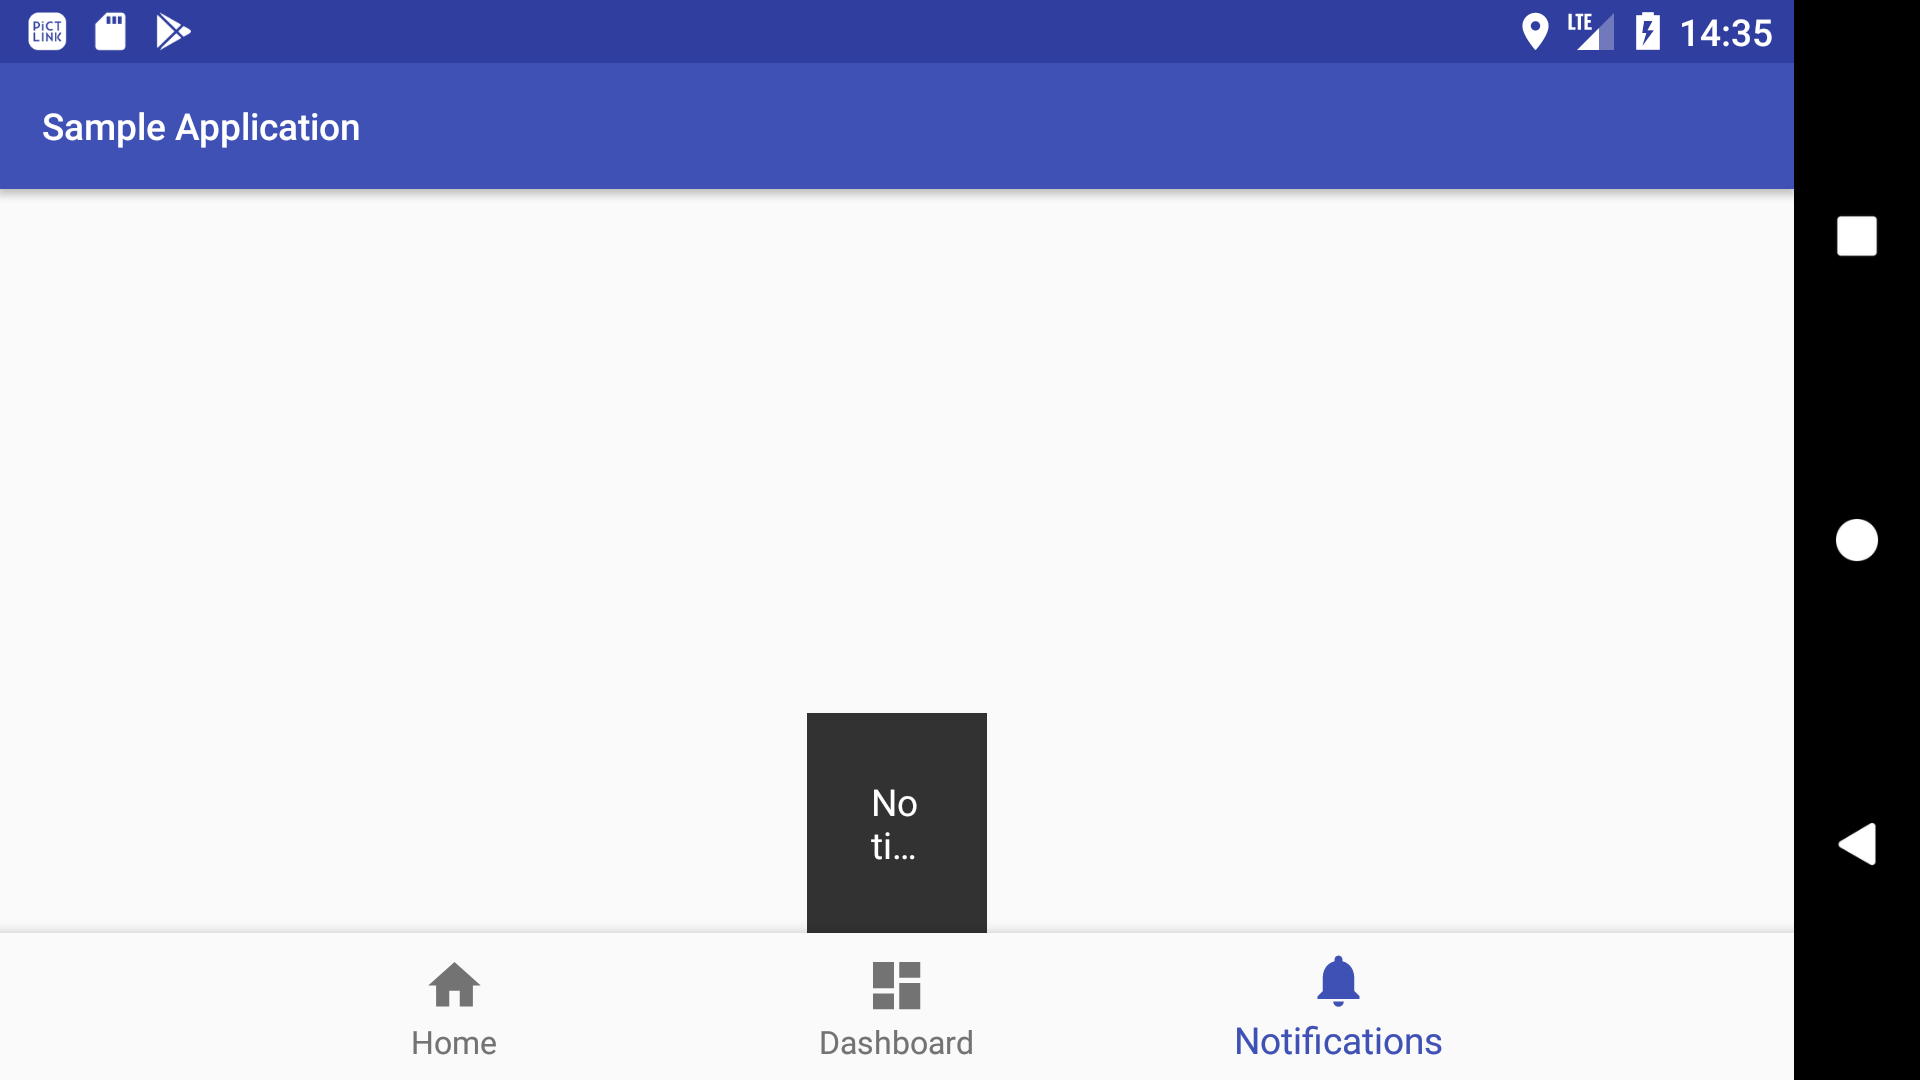
CoordinatorLayout に設定した幅が表示される Snackbar の幅になります

サンプル
- CoordinatorLayout の幅を画面幅の 10 % にする
参考 
コード
activity_main.xml
<?xml version="1.0" encoding="utf-8"?>
<android.support.constraint.ConstraintLayout xmlns:android="http://schemas.android.com/apk/res/android"
    xmlns:app="http://schemas.android.com/apk/res-auto"
    android:layout_width="match_parent"
    android:layout_height="match_parent">

    <android.support.design.widget.CoordinatorLayout
        android:id="@+id/coordinatorLayout"
        android:layout_width="0dp"
        android:layout_height="wrap_content"
        app:layout_constraintBottom_toTopOf="@+id/bottomNavigationView"
        app:layout_constraintEnd_toEndOf="parent"
        app:layout_constraintStart_toStartOf="parent"
        app:layout_constraintWidth_percent="0.1" />

    <android.support.design.widget.BottomNavigationView
        android:id="@id/bottomNavigationView"
        android:layout_width="0dp"
        android:layout_height="wrap_content"
        android:background="?android:attr/windowBackground"
        app:layout_constraintBottom_toBottomOf="parent"
        app:layout_constraintEnd_toEndOf="parent"
        app:layout_constraintStart_toStartOf="parent"
        app:menu="@menu/navigation" />

</android.support.constraint.ConstraintLayout>
実行結果
| 例 ① | 例 ② |
|---|---|
 |
 |
 任意の位置 & 幅で
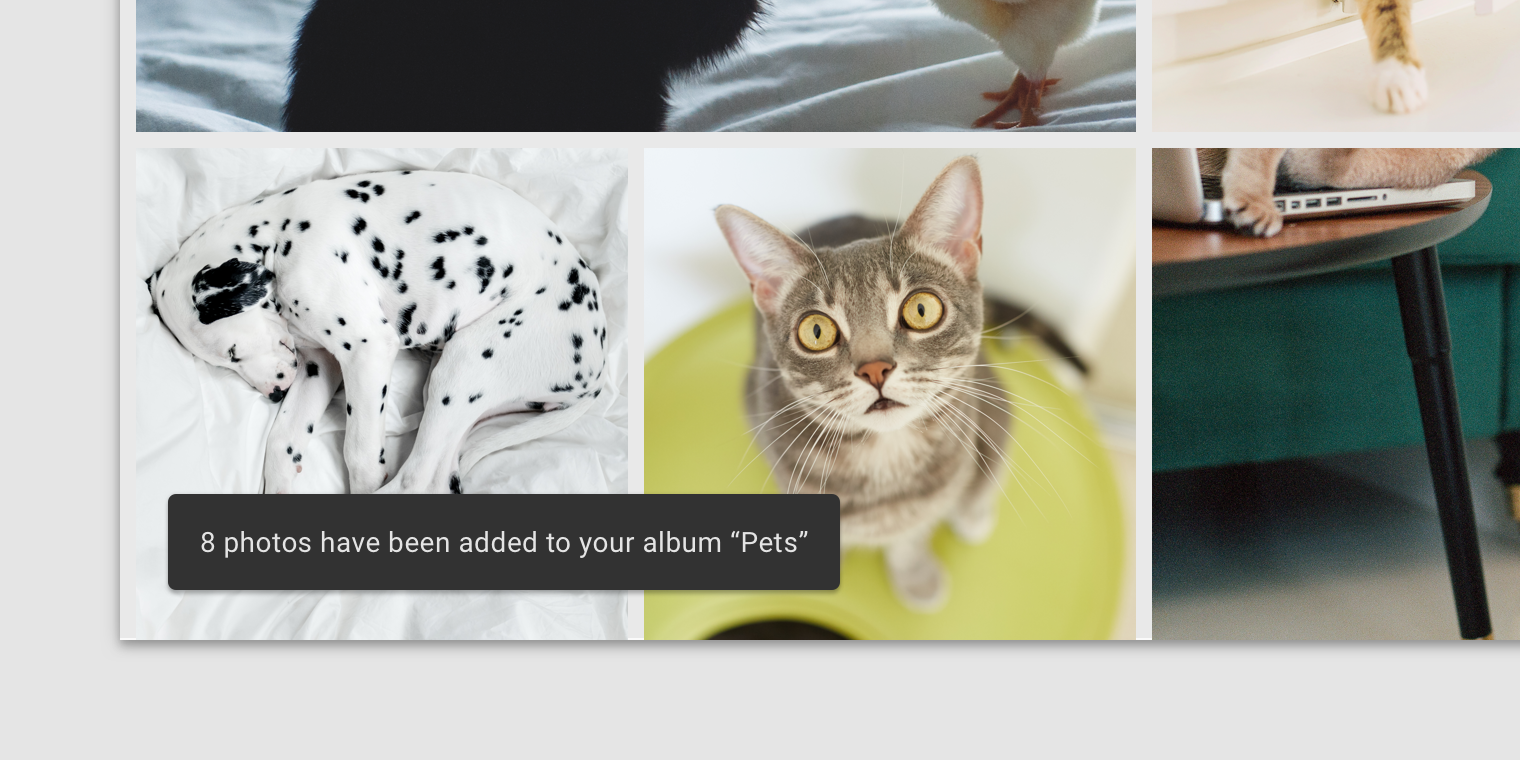
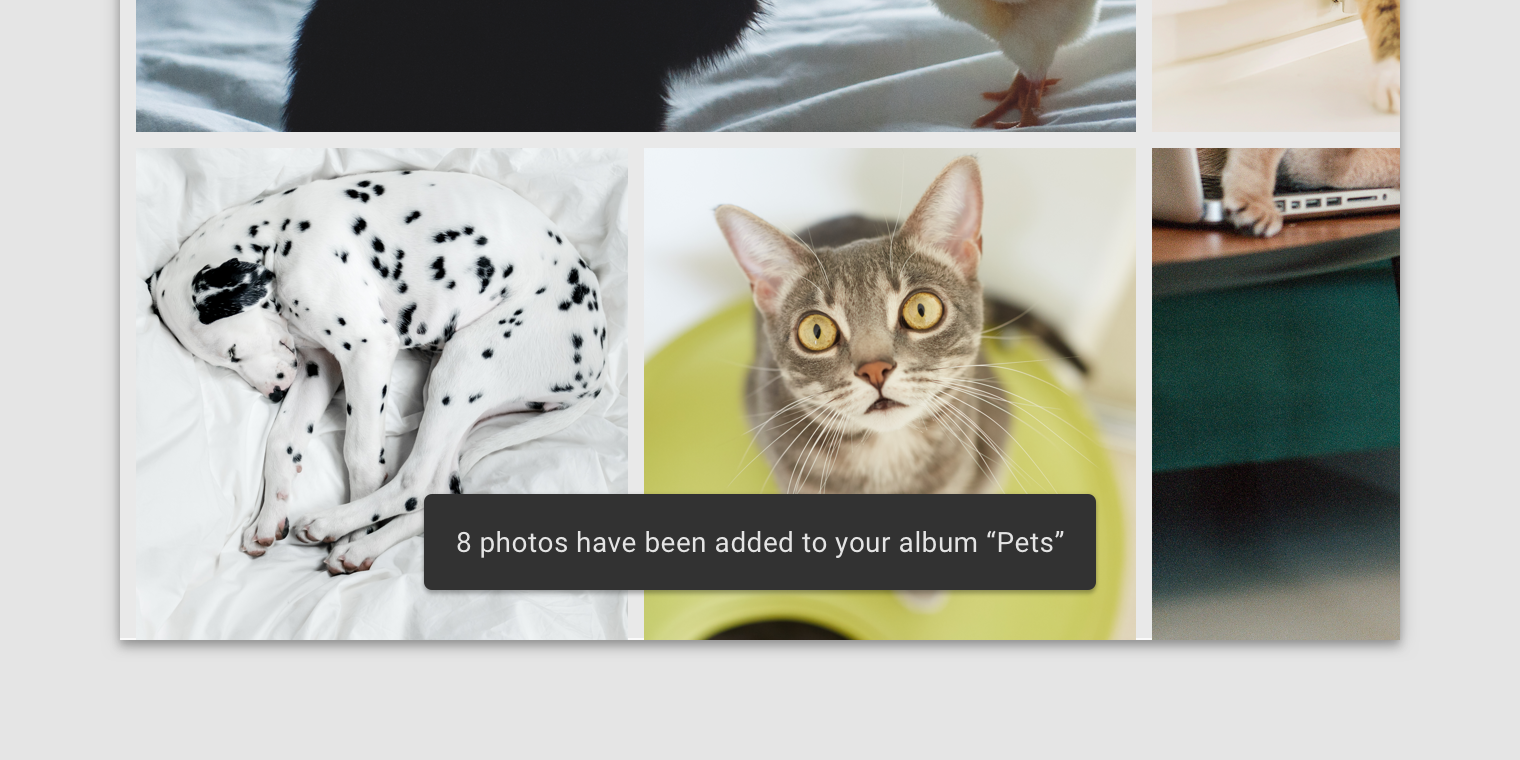
- Material Design のガイドライン Snackbars > Placement > Snackbars in wide layouts によると、レイアウトの幅が広い場合、Snackbar を「左揃え」または「中央揃え」にすることができます
| 左揃え | 中央揃え |
|---|---|
 |
 |
実例

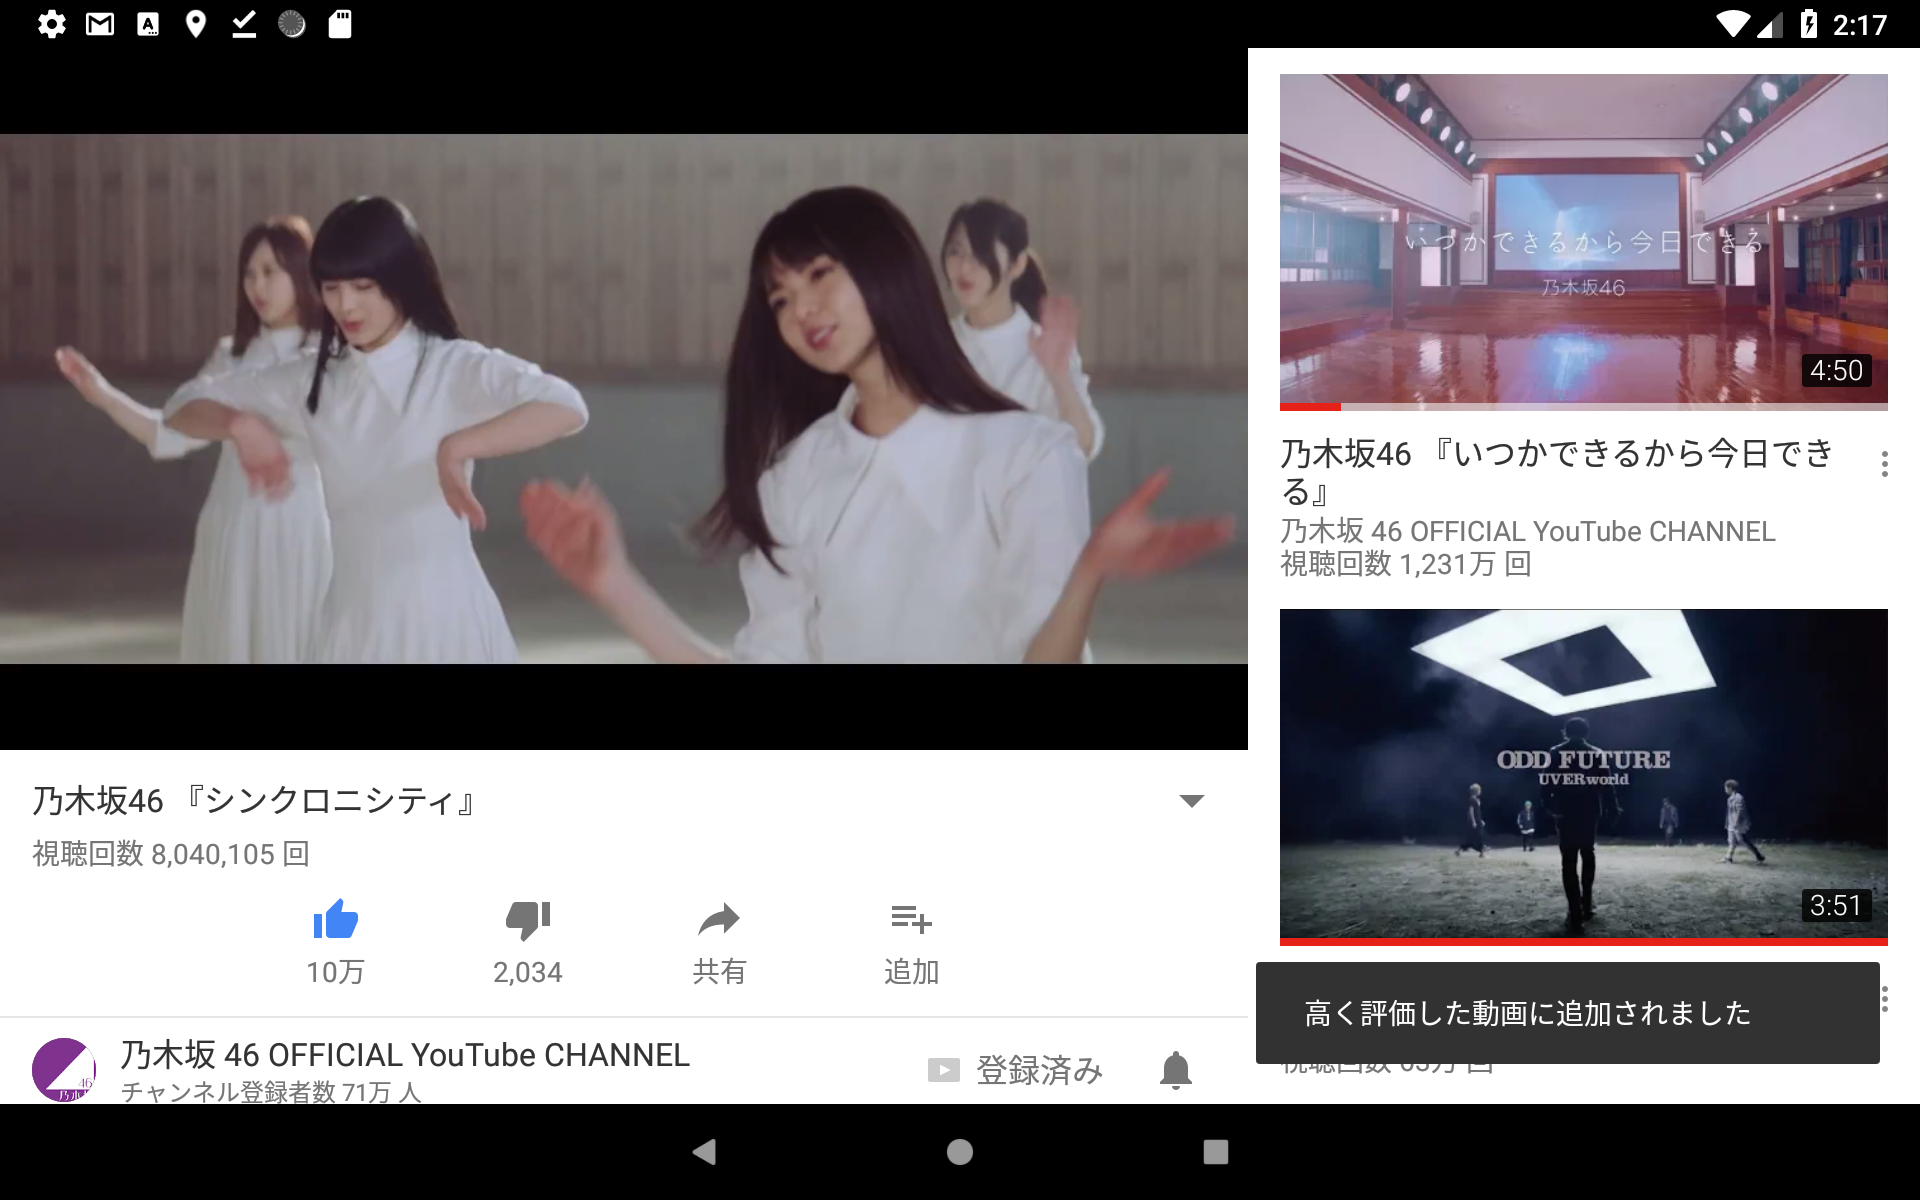
YouTube
- Android タブレットでは右側(左側は高評価ボタンと重なり邪魔になるからと忖度
 )
)
サンプル
- CoordinatorLayout の位置と幅を調整して、Snackbar を左寄せにします
コード
activity_main.xml
<?xml version="1.0" encoding="utf-8"?>
<android.support.constraint.ConstraintLayout xmlns:android="http://schemas.android.com/apk/res/android"
    xmlns:app="http://schemas.android.com/apk/res-auto"
    android:layout_width="match_parent"
    android:layout_height="match_parent">

    <android.support.design.widget.CoordinatorLayout
        android:id="@+id/coordinatorLayout"
        android:layout_width="wrap_content"
        android:layout_height="wrap_content"
        app:layout_constraintBottom_toTopOf="@+id/bottomNavigationView"
        app:layout_constraintStart_toStartOf="parent" />

    <android.support.design.widget.BottomNavigationView
        android:id="@id/bottomNavigationView"
        android:layout_width="0dp"
        android:layout_height="wrap_content"
        android:background="?android:attr/windowBackground"
        app:layout_constraintBottom_toBottomOf="parent"
        app:layout_constraintEnd_toEndOf="parent"
        app:layout_constraintStart_toStartOf="parent"
        app:menu="@menu/navigation" />

</android.support.constraint.ConstraintLayout>
