0
0

Delete article

Deleted articles cannot be recovered.

Draft of this article would be also deleted.

Are you sure you want to delete this article?

More than 3 years have passed since last update.

PYNQ > DMA tutorial: DMA to streamed interfacesを試した > 提供されたbitstream | tclから生成されるBlock Design

Last updated at Posted at 2020-08-01
動作確認
Windows 10 Pro (v1909) 
PYNQ-Z1 (Digilent) (以下、PYNQと表記)
PYNQ v2.5 Image
Vivado v2019.1 (64-bit)

概要

  • PYNQ_Workshopにて掲載されているDMAの実装を試した
    • 二つのDMA (read, write) + FIFO
  • 提供される.bitと.tclでの動作
  • Vivado 2019.1で.bitと.tclを生成した上での動作
  • Block Designの設定

PYNQ Image

提供される.bitと.tclでの動作

dma_tutorial.bitとdma_tutorial.tclを/home/xilinx/jupyter_notebooks/base/にscp。

from pynq import Overlay
overlay = Overlay("/home/xilinx/jupyter_notebooks/base/dma_tutorial.bit")

上記のようにoverlayを用意して、あとはTutorial通りに実行。
https://github.com/Xilinx/PYNQ_Workshop/blob/master/Session_4/6_dma_tutorial.ipynb

Vivado 2019.1で.bitと.tclを生成した上での動作

  1. dma_tutorial.bitとdma_tutorial.tclを任意のフォルダにコピー
    • 例: C:\pynq_proj_2020-05-23\2020-08-01_1010_DMATutorial\dma_tutorial
  2. Vivado v2019.1を起動
  3. tclコンソールにて
    • cd C:/pynq_proj_2020-05-23/2020-08-01_1010_DMATutorial/dma_tutorial
    • source dma_tutorial.tcl

Block Designが生成される。
bitstream生成までは8分41秒かかった (Core i7-6700K 4.00GHz + 16GB RAM)。

Block Designの設定

全体のBlock Design

コメント 2020-08-01 104917.png

axi_dma_from_ps_to_pl

コメント 2020-08-01 105556.png

コメント 2020-08-01 105655.png

axis_data_fifo

コメント 2020-08-01 110306.png

コメント 2020-08-01 110456.png

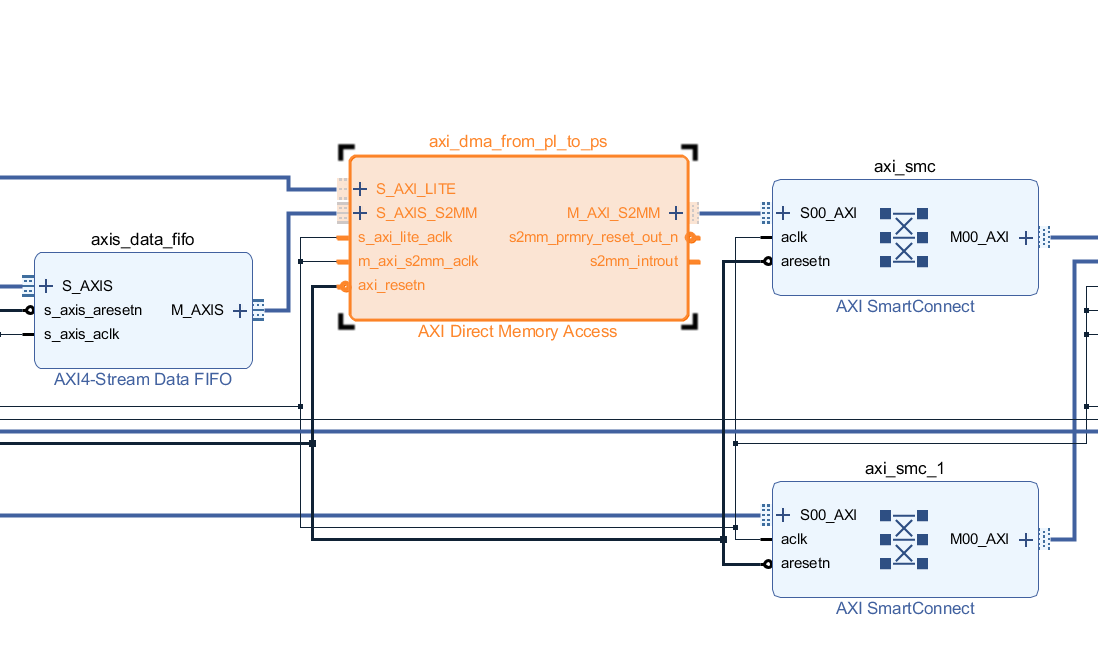
axi_dma_from_pl_to_ps

コメント 2020-08-01 110637.png

コメント 2020-08-01 110725.png

Zynq > PS-PL Configuration

コメント 2020-08-01 111216.png

0
0
0

Register as a new user and use Qiita more conveniently

  1. You get articles that match your needs
  2. You can efficiently read back useful information
  3. You can use dark theme
What you can do with signing up
0
0

Delete article

Deleted articles cannot be recovered.

Draft of this article would be also deleted.

Are you sure you want to delete this article?