6
7

Delete article

Deleted articles cannot be recovered.

Draft of this article would be also deleted.

Are you sure you want to delete this article?

More than 5 years have passed since last update.

raspberry pi のシリアルポートでコンソールを使う

Posted at

HDMIのモニターがない、無線LAN、有線LANで接続できない場合に、
シリアルポート接続でコンソールを使うと便利です。

#設定確認環境
raspberry pi側のOSにNOOBS
PC側のOSにWindows7(Windows10)
動作確認にはraspberry pi 2を使用

#raspberry pi 以外に用意するもの

  • コンソールを動かすPC、Windowsかmacなどのパソコンを用意する。
  • USBシリアル変換モジュール

USBシリアル変換モジュールは秋月の超小型USBシリアル変換モジュール(通販コード M-08461)が600円と安く、
コネクタがUSBマイクロBなのでお勧め。ピンは半田付けする必要があるがそんなに難しくありません。
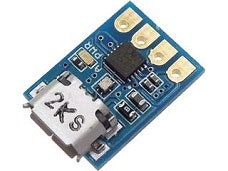
M-08461 (1).jpg

#接続方法

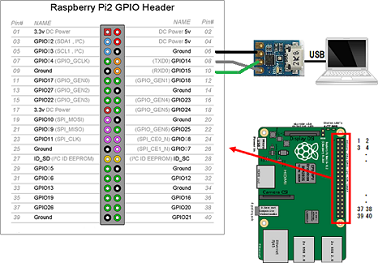
3本を接続するだけです。
グラウンドとTX,RXを互い違いで接続する。

raspberry pi側     USBシリアル変換モジュール
    Ground(6) <---> Ground
      Tx(8) <---> Rx
      Rx(10) <---> Tx

20150823004314.png

#コンソール
初期設定でシリアルポートが有効になっているので特に設定しなくて動作します。

コンソールソフトにはTeraTermで確認しました。

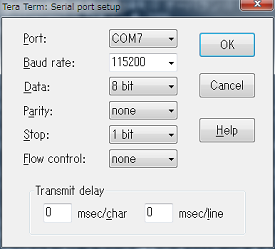
設定は転送速度を115200bpsにします

スクリーンショット 2016-05-17 07.48.31.png

※未確認ですがRaspberry Pi 3の場合は「ボーレート」が「72000」に変更になっているようです。
6
7
0

Register as a new user and use Qiita more conveniently

  1. You get articles that match your needs
  2. You can efficiently read back useful information
  3. You can use dark theme
What you can do with signing up
6
7

Delete article

Deleted articles cannot be recovered.

Draft of this article would be also deleted.

Are you sure you want to delete this article?