はじめに
この記事は2019/09/17現在の所々の最新のライブラリについて記した用法なので、この記事自体が半月や1年以上経つと、全く意味のない内容になっていたりするので、注意されたい
記事でやること
更地のフォルダにnuxt,CKEditor5,APIサーバーを導入していき、最終的にCKEditor5のアップロード機能をAWS S3で行えるようにする
事前準備
- AWSマイセキュリティ認証情報のアクセスキー (このへんからダウンロードする)
- NodeJS v10.16.3
- yarn v1.16.0
記事内で使用するライブラリとバージョン
- nuxt@2.9.2
- @nuxtjs/axios@5.6.0
- @ckeditor/ckeditor5-vue@1.0.0-beta.2
- @ckeditor/ckeditor5-build-classic@12.4.0
- ほかexpress関連(aws-sdk cors express mime multer multer-s3 uuid)
Nuxtを建てる
更地のフォルダを作成してそこにnuxtとpages/index.vueだけを作成する
mkdir nuxtjs-ckeditor5-s3
cd nuxtjs-ckeditor5-s3
yarn add nuxt
mkdir pages
vim pages/index.vue
<template>
  <h1>Hello world!</h1>
</template>
tree
# .
# ├── node_modules
# ├── package.json
# ├── pages
# │   └── index.vue
# └── yarn.lock
open http://localhost:3000/
yarn nuxt dev # 少し待つ...

nuxtの動作を確認して次へ
CKEditor5( @ckeditor/ckeditor5-build-classic )の導入
この単純な環境に導入するにもけっこう骨が折れる。ただimportしただけではエラーになるので、no-ssr(最新版ではclient-onlyに変名になった)コンポーネントの使用やnuxt.config.jsなどでSSRを無効にしたあと、専用のコンポーネントを作成して、その中で初期化する必要がある
yarn add @ckeditor/ckeditor5-vue
yarn add @ckeditor/ckeditor5-build-classic

vim nuxt.config.js
export default {
  plugins: [{ src: "~/plugins/ckeditor.js", mode: "client" }]
};
mkdir plugins
vim plugins/ckeditor.js
import Vue from "vue";
import Ckeditor5Vue from "@ckeditor/ckeditor5-vue";
import CkeditorClassic from "@/components/CkeditorClassic";

Vue.use(Ckeditor5Vue);
Vue.component("ckeditor-classic", CkeditorClassic);
mkdir components
vim components/CkeditorClassic.vue
<template>
  <ckeditor
    v-model="ckeditorValue"
    v-bind="ckeditorConfig"
    @ready="ckeditorReady"
  />
</template>

<script>
import editor from "@ckeditor/ckeditor5-build-classic";
import "@ckeditor/ckeditor5-build-classic/build/translations/ja.js";

export default {
  props: ["config"],
  data() {
    const config = this.config || {};

    const ckeditorValue = "";
    const ckeditorConfig = { editor, ...config };
    const ckeditorReady = () => {};

    return { ckeditorValue, ckeditorConfig, ckeditorReady };
  },
  watch: {
    ckeditorValue(value) {
      this.$emit("input", value);
    }
  }
};
</script>
上記設定で ckeditor5-vueの初期化がブラウザ描写時にのみ行われるので、window is not defined エラーに関してはこれで修正になる。
tree
# .
# ├── components
# │   └── CkeditorClassic.vue
# ├── node_modules
# ├── nuxt.config.js
# ├── package.json
# ├── pages
# │   └── index.vue
# ├── plugins
# │   └── ckeditor.js
# └── yarn.lock
用意したckeditor-classicコンポーネントをclient-onlyコンポーネントで梱包して、下記のように使用する
<template>
  <div>
    <client-only>
      <ckeditor-classic v-model="html" />
    </client-only>

    <pre>{{ html }}</pre>
  </div>
</template>

<script>
export default {
  data() {
    return { html: "" };
  }
};
</script>
さて、上記のようにindex.vueを変更すると、CKEditor5の動作が http://localhost:3000/ 上で確認できる。
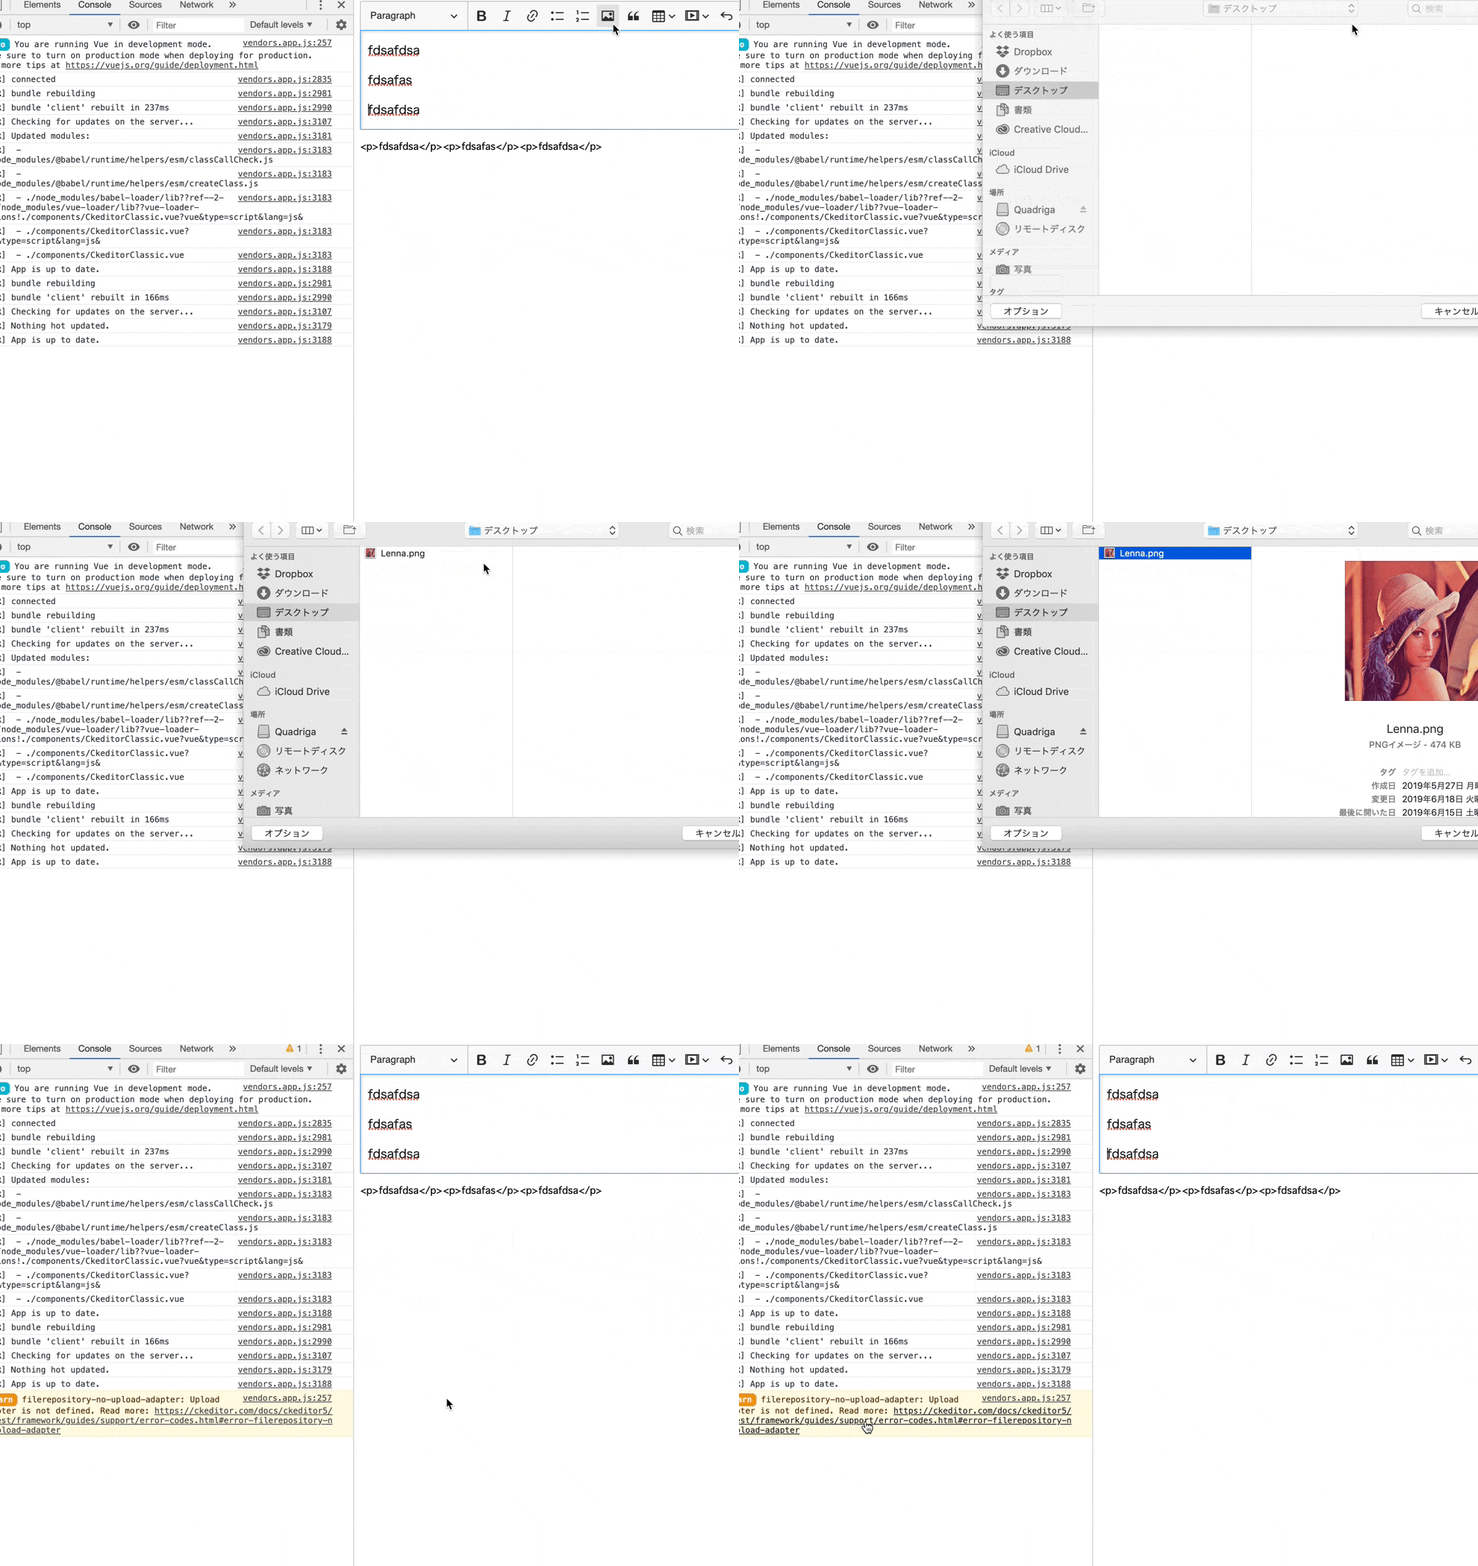
エディタの内容はhtmlで同期されるので良しとして、上記ツールバーのボタンで動作しないものがある。そう、 ![]() だ。
だ。
じっさいにボタンをクリックすると、画像を選択するダイアログが出るが、選択後にコンソール上に下記のようなエラーが表示されて動作しない。
filerepository-no-upload-adapter: Upload adapter is not defined. Read more: https://ckeditor.com/docs/ckeditor5/latest/framework/guides/support/error-codes.html#error-filerepository-no-upload-adapter
とりあえずPOSTさせるだけ
You need to enable an upload adapter in order to be able to upload files.
This warning shows up when FileRepository is being used without definining an upload adapter.
If you see this warning when using one of the CKEditor 5 Builds it means that you did not configure any of the upload adapters available by default in those builds.
エラーメッセージのリンク先では上記のような説明がなされているが、具体的には「選択したファイルの受け取れるところまで確認」できれば、あとは@nuxtjs/axiosを使用してPOSTを行えばよい。
yarn add @nuxtjs/axios
export default {
  plugins: [{ src: "~/plugins/ckeditor.js", mode: "client" }],
  modules: ["@nuxtjs/axios"],
  axios: {
    baseURL: process.env.BASE_URL || "http://localhost:3001"
  }
};
FileRepository というプラグインは、ckeditorコンポーネントの@readyイベントハンドラ内で取得できるため、前述のcomponents/CkeditorClassic.vue内のckeditorReady関数を、下記のように書き換える。
///...
    const ckeditorReady = eventData => {
      const FileRepository = eventData.plugins.get("FileRepository");
      FileRepository.createUploadAdapter = loader => {
        class UploadAdapter {
          constructor(loader, $axios) {
            this.loader = loader;
            this.$axios = $axios;
          }
          async upload() {
            const file = await this.loader.file;
            const params = new FormData();
            params.append("file", file);

            return this.$axios.$post("/api/image-upload/", params);
          }
        }

        return new UploadAdapter(loader, this.$axios);
      };
    };
///...
FileRepository.createUploadAdapter には、上記のようなuploadメソッドを持つクラスインスタンスを返す、ファクトリ関数を代入すれば良い。(※ upload実行時、this.loader.file はPromise<[File](https://developer.mozilla.org/ja/docs/Web/API/File)> を持つ)
Custom image upload adapter - CKEditor 5 Documentation
https://ckeditor.com/docs/ckeditor5/latest/framework/guides/deep-dive/upload-adapter.html
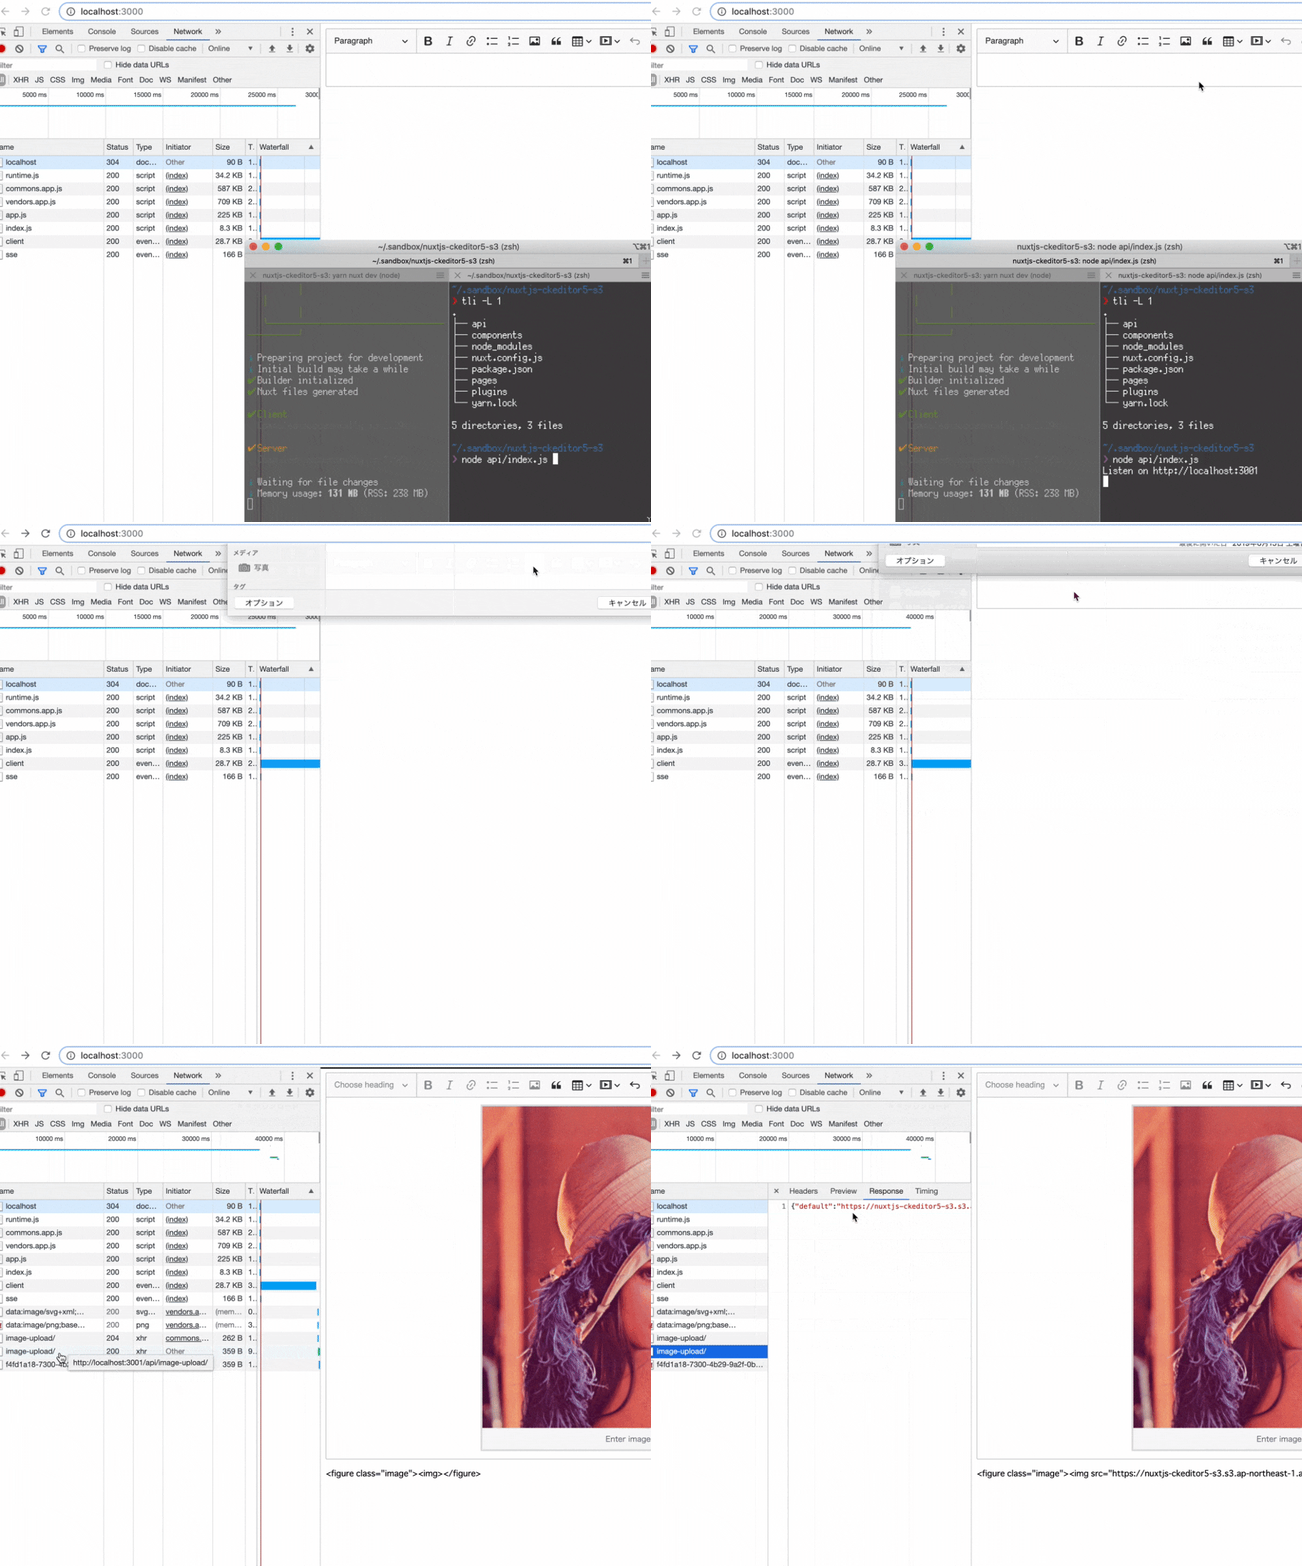
この変更を加えると、ファイル選択時の挙動が下記のように変わる。
POST http://localhost:3001/api/image-upload/ 404 (Not Found)
express + multer + multer-s3で画像アップロードAPIを実装する
axiosで/api/image-upload/に向けてPOSTするところまで正常に動作しているのを確認できたので、あとは受信側の実装を行う。
mkdir api
cd api
echo '{}' > package.json
yarn add aws-sdk cors express mime multer multer-s3 uuid

vim index.js
const AWS = require("aws-sdk");
const multer = require("multer");
const multerS3 = require("multer-s3");

const express = require("express");
const cors = require("cors");

const mime = require("mime");
const uuidv4 = require("uuid/v4");

AWS.config.update({
  secretAccessKey: "XXXXXXXXXXXXXXXXXXXXXXXXXXXXXXXXXXX",
  accessKeyId: "XXXXXXXXXXXXXXX",
  region: "ap-northeast-1"
});

const upload = multer({
  storage: multerS3({
    s3: new AWS.S3({ apiVersion: "2006-03-01" }),
    bucket: process.env.AWS_S3_BUCKET || "nuxtjs-ckeditor5-s3",
    acl: "public-read",
    contentType: multerS3.AUTO_CONTENT_TYPE,
    key(req, file, callback) {
      const ext = mime.getExtension(file.mimetype);
      callback(null, uuidv4() + "." + ext);
    }
  })
});

const app = express();
app.use(cors());
app.post("/api/image-upload/", upload.single("file"), async (req, res) => {
  const url = req.file.location;
  if (!url) {
    return res.status(500).json({ error: new Error("upload failing") });
  }
  res.json({ default: url });
});

const PORT = process.env.PORT || 3001;
const listener = app.listen(PORT, () => {
  const { port } = listener.address();
  console.log(`Listen on http://localhost:${port}`);
});
cd ..

tree
# .
# ├── api
# │   ├── index.js
# │   ├── package.json
# │   └── yarn.lock
# ├── components
# │   └── CkeditorClassic.vue
# ├── node_modules
# ├── nuxt.config.js
# ├── package.json
# ├── pages
# │   └── index.vue
# ├── plugins
# │   └── ckeditor.js
# └── yarn.lock
secretAccessKey, accessKeyId は前述のAWSマイセキュリティ認証情報のアクセスキーからコピーを。バケットは事前に「nuxtjs-ckeditor5-s3」という名前で作成しておき、パブリックアクセスを許可する設定にしておく。
アップロード時に
AccessDeniedなどと出る場合はバケットの公開設定などを見直す。「バケットの作成>③アクセス許可の設定>パブリックアクセスをすべてブロック」のチェックを外してから、再度試す。また、バケット一覧で、下記のような表記に設定されているか確認する

node api/index.js
# Listen on http://localhost:3001
サーバーを実行した状態で再度ファイルを選択すると、S3にアップロードが行われ、APIからは
{
  "default": "https://nuxtjs-ckeditor5-s3.s3-ap-northeast-1.amazonaws.com/e9d6cc4c-21b2-46ef-b1f6-d99d15efe58c.png"
}
のようなレスポンスが返されることを確認する。
終わりに
以上、駆け足となったが、nuxt上でのCKEditor5の設置方法と、画像アップロードの簡易セットアップ手順について記した。
前者についてはこれ以上簡潔にするのは難しいと思うが、後者については代替方法がいくらでもあると思うので、読者の好きなように環境を構築してもらって構わない。
記事中の環境については nuxtjs-ckeditor5-s3 - github にアップした


