はじめに
AWS上にあるMySQLデータベースをOCIのMySQL DBシステムに移行する際に、S3上にあるバックアップデータを移動することなく、直接MySQL DBシステムにリストアする手順を検証しました。
今回は、Oracle Autonomous Linux 7.9のComputeインスタンスに、S3をファイルシステムとしてマウントできる「goofys」をインストールして使用しました。
1. goofysのインストール
goofysはGoとfuseを使用するため、yumコマンドでgolangとfuseをインストールします。
[opc@compute1 ~]$ sudo yum install -y golang fuse
Loaded plugins: langpacks, ulninfo
Resolving Dependencies
--> Running transaction check
---> Package fuse.x86_64 0:2.9.4-1.0.9.el7 will be installed
---> Package golang.x86_64 0:1.9.4-1.el7 will be installed
--> Processing Dependency: golang-bin = 1.9.4-1.el7 for package: golang-1.9.4-1.el7.x86_64
--> Processing Dependency: golang-src = 1.9.4-1.el7 for package: golang-1.9.4-1.el7.x86_64
--> Running transaction check
---> Package golang-bin.x86_64 0:1.9.4-1.el7 will be installed
---> Package golang-src.noarch 0:1.9.4-1.el7 will be installed
--> Finished Dependency Resolution

Dependencies Resolved

===================================================================================================================
 Package                 Arch                Version                        Repository                        Size
===================================================================================================================
Installing:
 fuse                    x86_64              2.9.4-1.0.9.el7                ol7_latest                        88 k
 golang                  x86_64              1.9.4-1.el7                    ol7_optional_latest              610 k
Installing for dependencies:
 golang-bin              x86_64              1.9.4-1.el7                    ol7_optional_latest               48 M
 golang-src              noarch              1.9.4-1.el7                    ol7_optional_latest              5.1 M

Transaction Summary
===================================================================================================================
Install  2 Packages (+2 Dependent packages)

Total download size: 54 M
Installed size: 222 M
Downloading packages:
(1/4): fuse-2.9.4-1.0.9.el7.x86_64.rpm                                                      |  88 kB  00:00:01
(2/4): golang-1.9.4-1.el7.x86_64.rpm                                                        | 610 kB  00:00:01
(3/4): golang-src-1.9.4-1.el7.noarch.rpm                                                    | 5.1 MB  00:00:00
(4/4): golang-bin-1.9.4-1.el7.x86_64.rpm                                                    |  48 MB  00:00:02
-------------------------------------------------------------------------------------------------------------------
Total                                                                               20 MB/s |  54 MB  00:00:02
Running transaction check
Running transaction test
Transaction test succeeded
Running transaction
  Installing : golang-src-1.9.4-1.el7.noarch                                                                   1/4
  Installing : golang-1.9.4-1.el7.x86_64                                                                       2/4
  Installing : golang-bin-1.9.4-1.el7.x86_64                                                                   3/4
  Installing : fuse-2.9.4-1.0.9.el7.x86_64                                                                     4/4
  Verifying  : golang-bin-1.9.4-1.el7.x86_64                                                                   1/4
  Verifying  : golang-1.9.4-1.el7.x86_64                                                                       2/4
  Verifying  : fuse-2.9.4-1.0.9.el7.x86_64                                                                     3/4
  Verifying  : golang-src-1.9.4-1.el7.noarch                                                                   4/4

Installed:
  fuse.x86_64 0:2.9.4-1.0.9.el7                             golang.x86_64 0:1.9.4-1.el7

Dependency Installed:
  golang-bin.x86_64 0:1.9.4-1.el7                          golang-src.noarch 0:1.9.4-1.el7

Complete!
[opc@compute1 ~]$
wgetでGitHubからgoofysをダウンロードします。
[opc@compute1 ~]$ wget https://github.com/kahing/goofys/releases/latest/download/goofys
--2022-02-24 01:01:15--  https://github.com/kahing/goofys/releases/latest/download/goofys
Resolving github.com (github.com)... 13.114.40.48
Connecting to github.com (github.com)|13.114.40.48|:443... connected.
HTTP request sent, awaiting response... 302 Found
Location: https://github.com/kahing/goofys/releases/download/v0.24.0/goofys [following]
--2022-02-24 01:01:15--  https://github.com/kahing/goofys/releases/download/v0.24.0/goofys
Reusing existing connection to github.com:443.
HTTP request sent, awaiting response... 302 Found
Location: https://objects.githubusercontent.com/github-production-release-asset-2e65be/42475296/92e1ec00-768c-11ea-82dd-825b7e124210?X-Amz-Algorithm=AWS4-HMAC-SHA256&X-Amz-Credential=AKIAIWNJYAX4CSVEH53A%2F20220224%2Fus-east-1%2Fs3%2Faws4_request&X-Amz-Date=20220224T010115Z&X-Amz-Expires=300&X-Amz-Signature=8b8605da0670a0357a9d53da81ee05fbb010ae9b74465bf64dbfe51cef9b5f53&X-Amz-SignedHeaders=host&actor_id=0&key_id=0&repo_id=42475296&response-content-disposition=attachment%3B%20filename%3Dgoofys&response-content-type=application%2Foctet-stream [following]
--2022-02-24 01:01:15--  https://objects.githubusercontent.com/github-production-release-asset-2e65be/42475296/92e1ec00-768c-11ea-82dd-825b7e124210?X-Amz-Algorithm=AWS4-HMAC-SHA256&X-Amz-Credential=AKIAIWNJYAX4CSVEH53A%2F20220224%2Fus-east-1%2Fs3%2Faws4_request&X-Amz-Date=20220224T010115Z&X-Amz-Expires=300&X-Amz-Signature=8b8605da0670a0357a9d53da81ee05fbb010ae9b74465bf64dbfe51cef9b5f53&X-Amz-SignedHeaders=host&actor_id=0&key_id=0&repo_id=42475296&response-content-disposition=attachment%3B%20filename%3Dgoofys&response-content-type=application%2Foctet-stream
Resolving objects.githubusercontent.com (objects.githubusercontent.com)... 185.199.108.133, 185.199.109.133, 185.199.110.133, ...
Connecting to objects.githubusercontent.com (objects.githubusercontent.com)|185.199.108.133|:443... connected.
HTTP request sent, awaiting response... 200 OK
Length: 23296633 (22M) [application/octet-stream]
Saving to: ‘goofys’

100%[=========================================================================>] 23,296,633  7.01MB/s   in 3.2s

2022-02-24 01:01:19 (7.01 MB/s) - ‘goofys’ saved [23296633/23296633]

[opc@compute1 ~]$ ls -l
total 22752
-rw-rw-r--. 1 opc opc 23296633 Dec  8 02:48 goofys
ダウンロードしたgoofysをパスの通っているディレクトリ(今回は/usr/local/bin)に移動そ、オーナーとパーミッションを変更します。
[opc@compute1 ~]$ sudo mv goofys /usr/local/bin
[opc@compute1 ~]$ sudo chown root:root /usr/local/bin/goofys
[opc@compute1 ~]$ sudo chmod 775 /usr/local/bin/goofys
2. S3アクセス用のクレデンシャルファイルの作成
S3アクセス用のクレデンシャルファイル"/root/.aws/credentials"を作成します。
[opc@compute1 ~]$ sudo vi /root/.aws/credentials
[aws]
aws_access_key_id = S3バケットにアクセス可能なユーザのアクセスキー
aws_secret_access_key = S3バケットにアクセス可能なユーザのシークレットキー
3. S3バケットのマウント
S3バケットをファイルシステムとしてマウントするためのマウントポイントを作成します。
今回な"/mnt_s3"としました。
[opc@compute1 ~]$ sudo mkdir -p /mnt_s3
/etc/fstabに、goofysでS3バケットをマウントするためのエントリを追加します。
[opc@compute1 ~]$ sudo vi /etc/fstab
以下の内容を追加します。
今回は"s3bucketformds"という名前のS3バケットを"/mnt_s3"にマウントします。
goofys#s3bucketformds /mnt_s3 fuse _netdev,allow_other,--file-mode=0644,--uid=0,--gid=0,--region=ap-northeast-1,--profile=aws 0 0
mount -aでファイルシステムをマウントします。
[opc@compute1 ~]$ sudo mount -a
S3のマウントポイントにファイルが作成できるか確認します。
[opc@compute1 mnt]$ cd /mnt_s3
[opc@compute1 mnt_s3]$ sudo touch test.txt
[opc@compute1 mnt_s3]$ ls -l
total 0
-rw-r--r--. 1 root root 0 Feb 24 01:18 test.txt
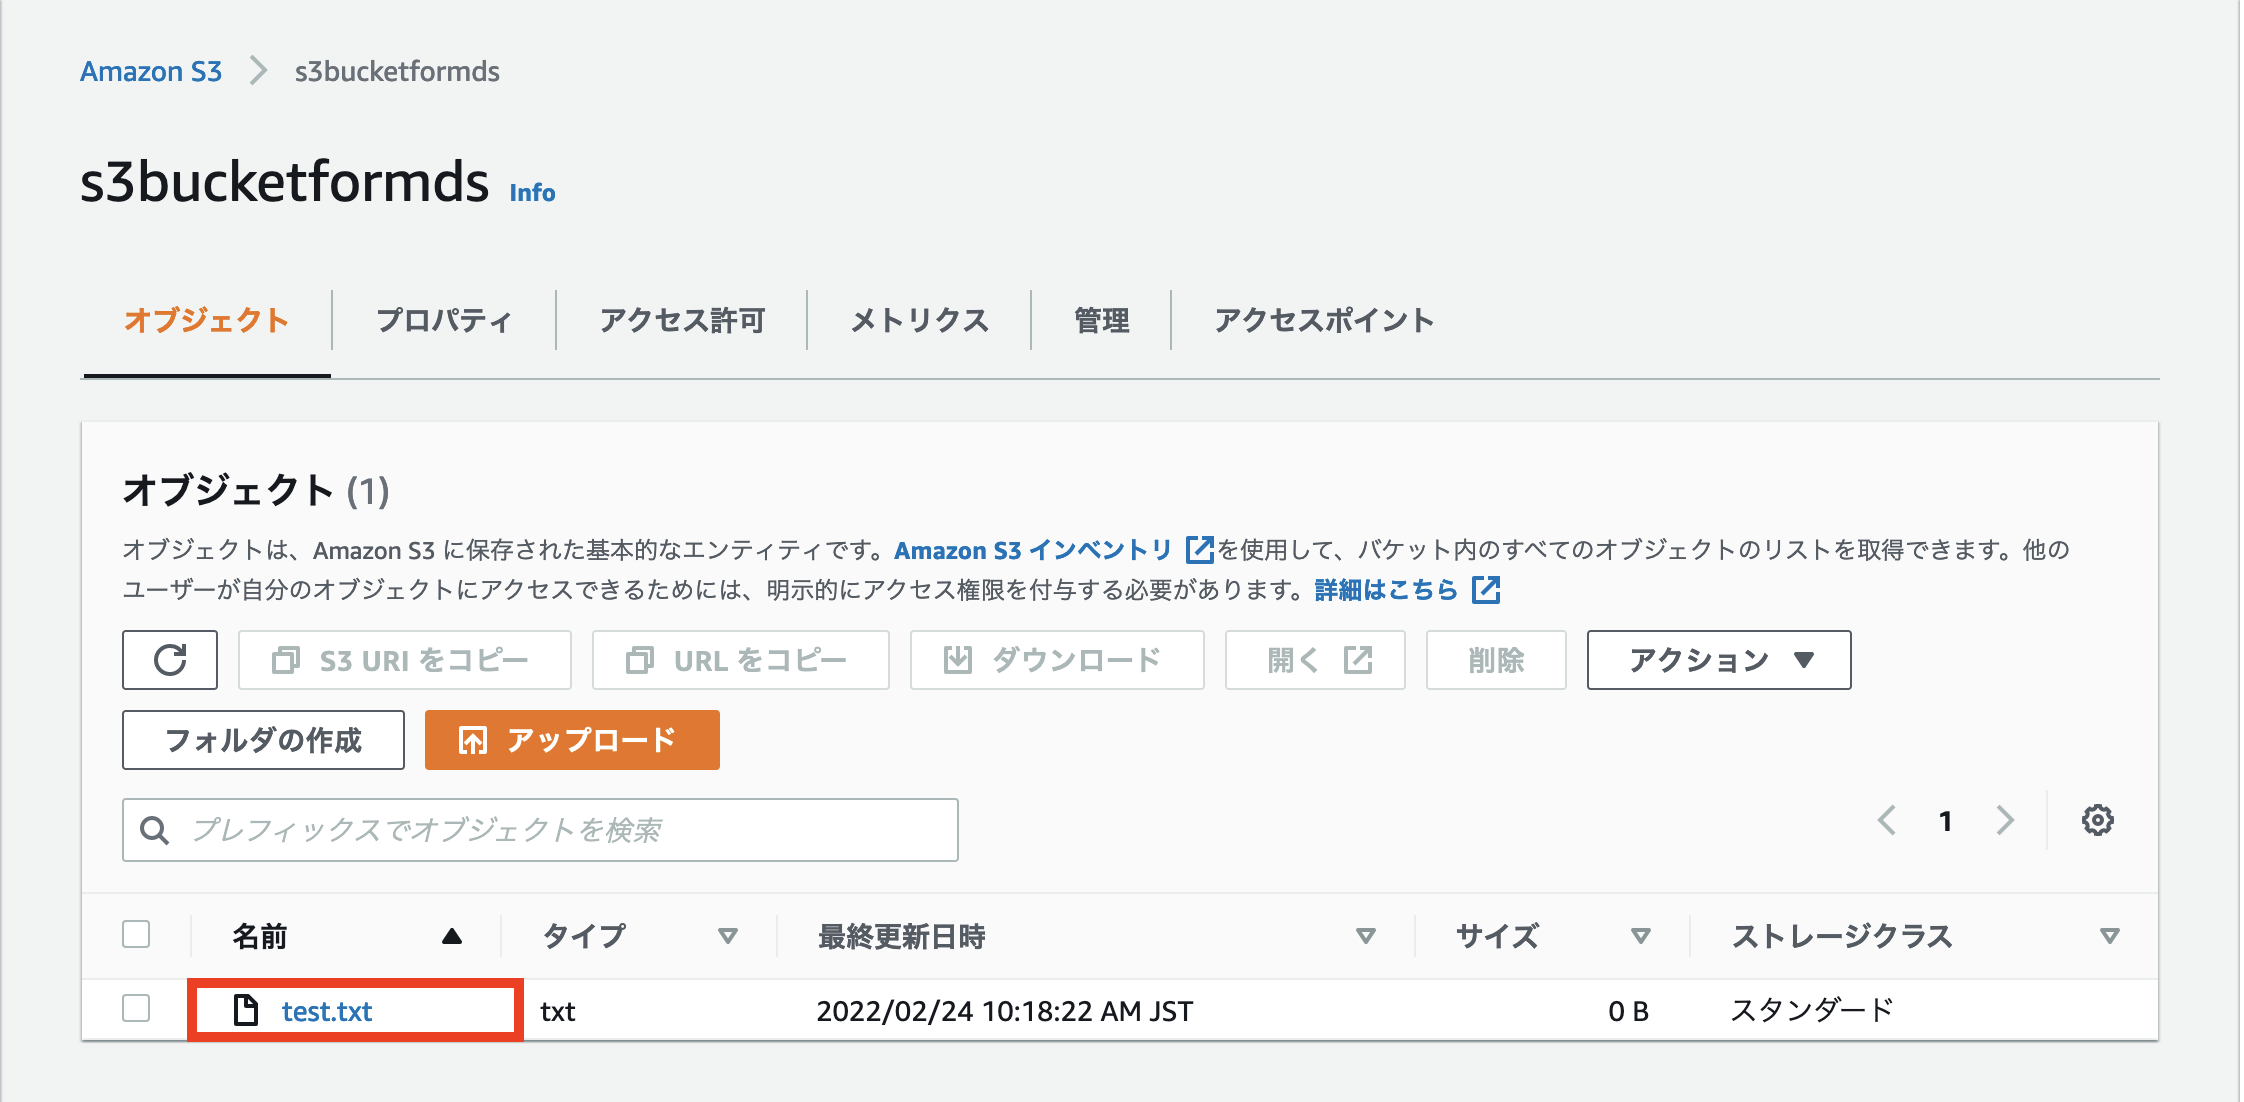
AWSのコンソールでバケットの内容を確認します。

ファイルシステム上で作成したファイルが、S3バケット内にオブジェクトとして格納されていることが確認できました。
4. MySQLクライアントのインストール
yumコマンドでリポジトリをセットアップします。
[opc@compute1 ~]$ sudo yum install -y https://dev.mysql.com/get/mysql80-community-release-el7-5.noarch.rpm
yumコマンドでMySQLクライアントをインストールします。
[opc@compute1 ~]$ sudo yum install -y mysql-community-client
5. MySQLクライアントからMySQL DBシステムに接続
mysqlコマンドでadminユーザとしてMySQL DB システムに接続します。
[opc@compute1 ~]$ mysql -u admin -p -h mysqlds1.subnet1.vcn1.oraclevcn.com
Enter password:
Welcome to the MySQL monitor.  Commands end with ; or \g.
Your MySQL connection id is 11
Server version: 8.0.28-u1-cloud MySQL Enterprise - Cloud

Copyright (c) 2000, 2022, Oracle and/or its affiliates.

Oracle is a registered trademark of Oracle Corporation and/or its
affiliates. Other names may be trademarks of their respective
owners.

Type 'help;' or '\h' for help. Type '\c' to clear the current input statement.

mysql>
データベースemployeesを作成します。
mysql> CREATE DATABASE employees;
Query OK, 1 row affected (0.01 sec)

mysql> show databases;
+--------------------+
| Database           |
+--------------------+
| employees          |
| information_schema |
| mysql              |
| performance_schema |
| sys                |
+--------------------+
5 rows in set (0.00 sec)

mysql>
mysqlを終了します。
mysql> exit
Bye
[opc@compute1 ~]$
6. バックアップファイルの準備
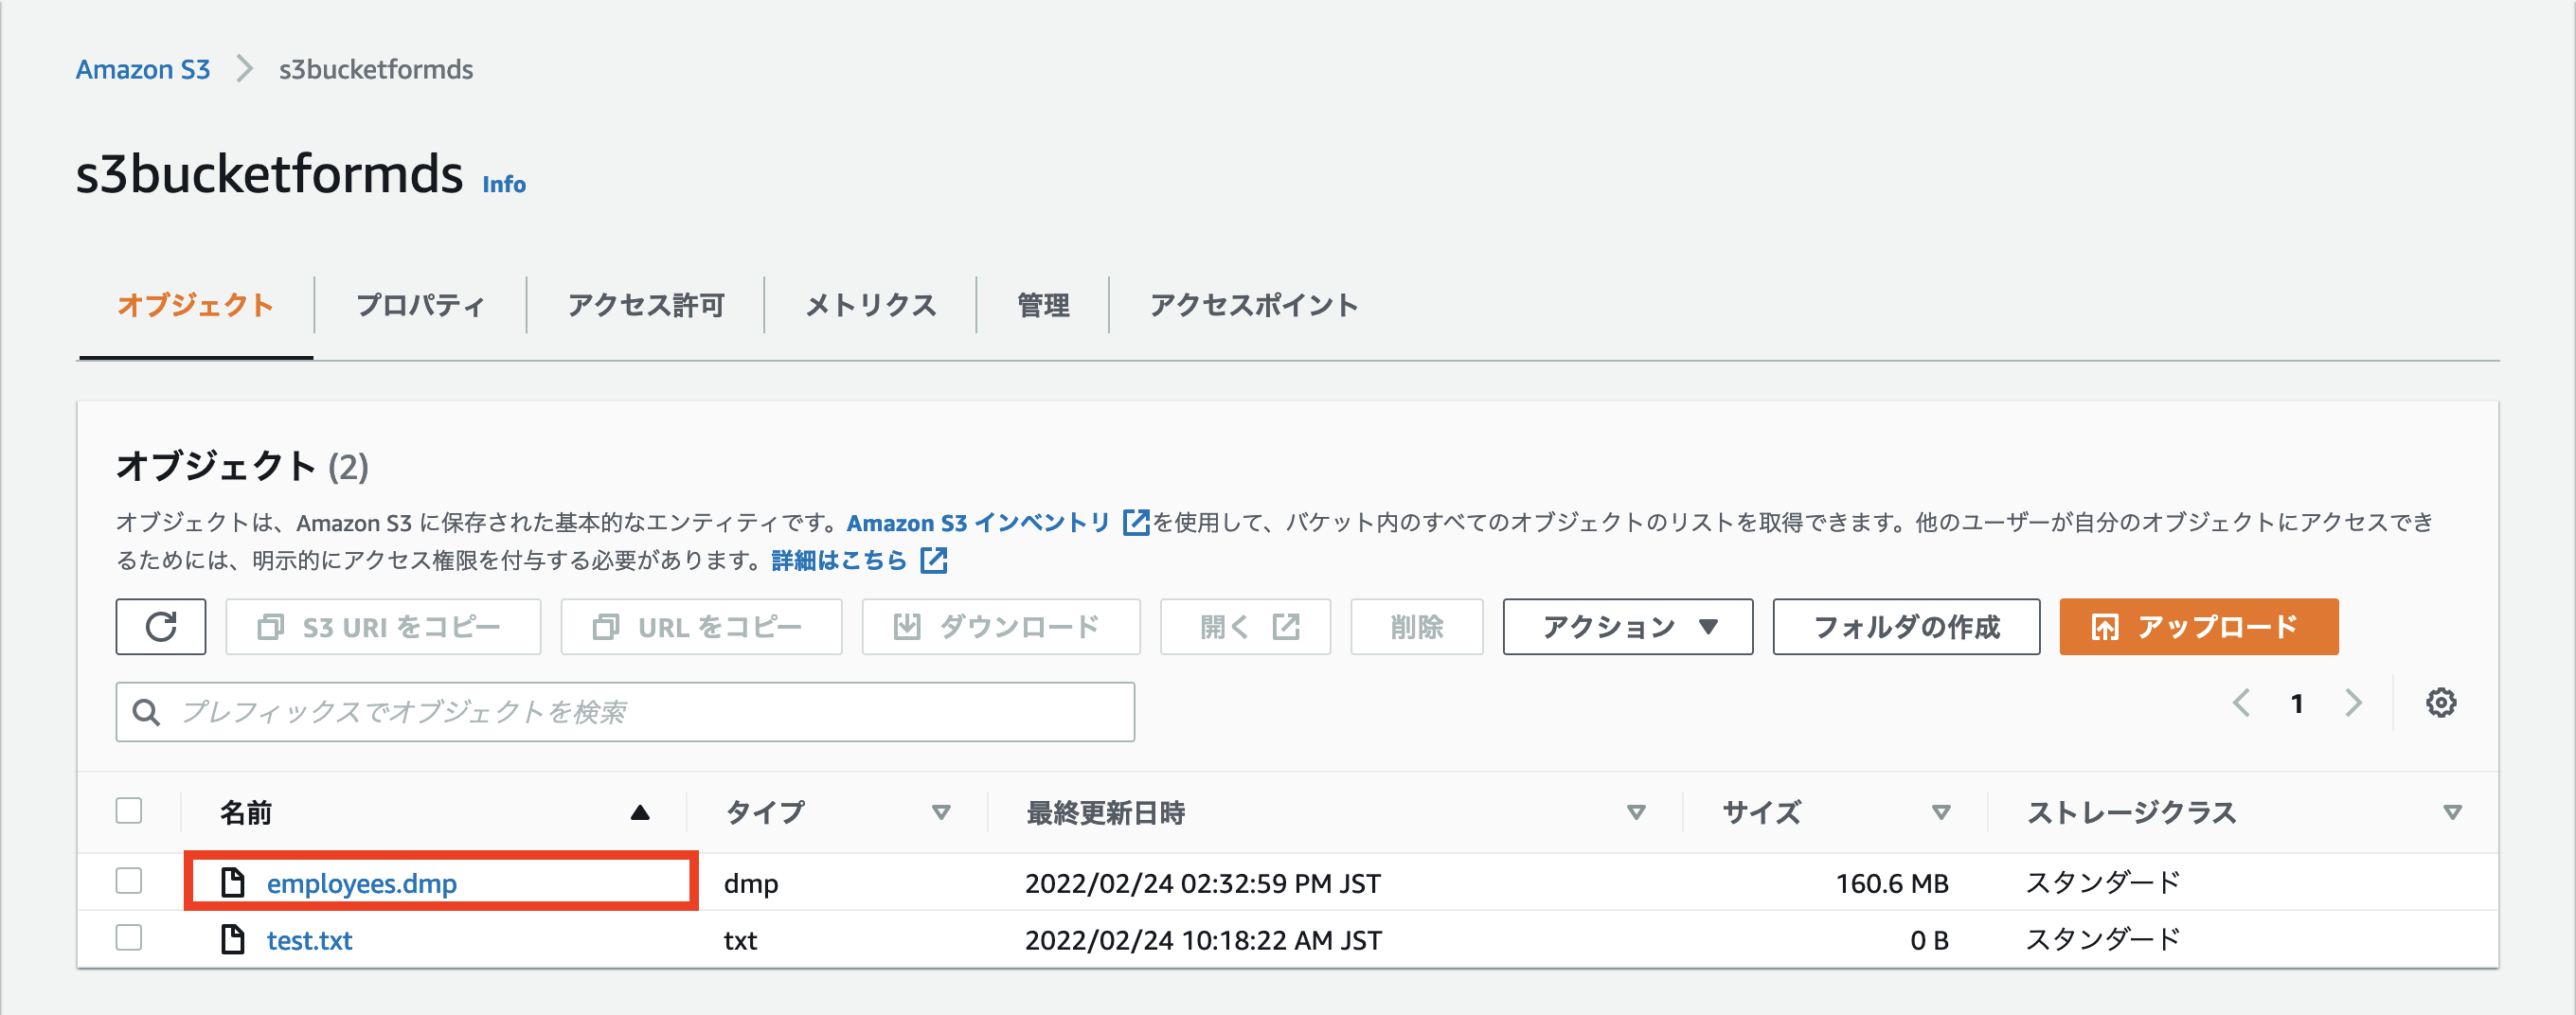
mysqldumpで取得したバックアップファイル"employees.dmp"をS3バケットにアップロードします。
こちらのバックアップファイルは、こちらで公開されているサンプルデータを一度MySQLに取り込み、mysqldumpでデータベースのバックアップとして取得したものです。

S3のマウントポイントの内容を確認します。
[opc@compute1 ~]$ ls -l /mnt_s3/
total 164430
-rw-r--r--. 1 root root 168375940 Feb 24 05:32 employees.dmp
-rw-r--r--. 1 root root         0 Feb 24 01:18 test.txt
[opc@compute1 ~]$
employees.dmpがあることが確認できました。
7. S3バケットにあるバックアップファイルのリストア
S3バケットのマウントポイント/mnt_s3にあるemployees.dmpをmysqlコマンドでMySQL DBシステムにリストアします。
[opc@compute1 ~]$ time mysql -u admin -p -h mysqlds1.subnet1.vcn1.oraclevcn.com -t employees < /mnt_s3/employees.dmp
Enter password:

real	1m9.092s
user	0m2.026s
sys	0m0.167s
[opc@compute1 ~]$
mysqlコマンドでadminユーザとしてMySQL DBシステムに接続して、バックアップファイルが正しくリストアされているか確認します。
[opc@compute1 ~]$ mysql -u admin -p -h mysqlds1.subnet1.vcn1.oraclevcn.com
Enter password:
Welcome to the MySQL monitor.  Commands end with ; or \g.
Your MySQL connection id is 11
Server version: 8.0.28-u1-cloud MySQL Enterprise - Cloud

Copyright (c) 2000, 2022, Oracle and/or its affiliates.

Oracle is a registered trademark of Oracle Corporation and/or its
affiliates. Other names may be trademarks of their respective
owners.

Type 'help;' or '\h' for help. Type '\c' to clear the current input statement.

mysql>
データベースをemployeesに切り替えます。
mysql> use employees;
Database changed
mysql>
データベースemployees内のテーブルを確認します。
mysql> show tables;
+----------------------+
| Tables_in_employees  |
+----------------------+
| current_dept_emp     |
| departments          |
| dept_emp             |
| dept_emp_latest_date |
| dept_manager         |
| employees            |
| salaries             |
| titles               |
+----------------------+
8 rows in set (0.00 sec)

mysql>
テーブル内のデータを確認します。
mysql> SELECT COUNT(*) FROM employees;
+----------+
| COUNT(*) |
+----------+
|   300024 |
+----------+
1 row in set (0.02 sec)

mysql> SELECT COUNT(*) FROM departments;
+----------+
| COUNT(*) |
+----------+
|        9 |
+----------+
1 row in set (0.01 sec)

mysql>
mysqlを終了します。
mysql> exit
Bye
[opc@compute1 ~]$
goofysを使用してS3バケットをファイルシステムにマウントし、S3バケット内のバックアップファイルを直接MySQL DBシステムにリストアすることができました。