現状(2022/12現在)のSwiftUIではalertにカスタムViewを設定することができません。
そのため、UIKit時代のようにカスタムダイアログを作ろうとすると力技1になりがちです。
しかし、UIKitとSwiftUIを共存させようとしているプロジェクトでカスタムダイアログを作ろうとした際に思わぬ引っ掛かり方をしたので共有します。
何が起きたか
やったこと
StackOverflow2を参考にカスタムViewをセットできるViewModifierを作りました。
※だいぶ端折ってますがそれでも長いので畳んでます
CustomDialog.swift
public extension View {
    func dialog<Content: View>(isPresented: Binding<Bool>,
                               isCloseEnabled: Bool = false,
                               @ViewBuilder _ content: @escaping () -> Content,
                               onOk okAction: @escaping () -> Void = {}) -> some View {
        modifier(DialogView(isPresented: isPresented,
                            isCloseEnabled: isCloseEnabled,
                            dialogContent: content,
                            actions: [
                                .init(actionType: .ok,
                                      isPrimary: true, isDestructive: false, handler: okAction)
                            ]))
    }
}

struct DialogView<DialogContent: View>: ViewModifier {
    @Binding var isPresented: Bool
    var isCloseEnabled: Bool
    var dialogContent: () -> DialogContent
    var actions: [Action]

    public func body(content: Content) -> some View {
        content
            .animation(nil, value: isPresented)
            .overlay(isPresented ? backgroundView : nil)
            .overlay(isPresented ? contentView : nil)
            .animation(.easeInOut(duration: 0.1), value: isPresented)
    }
}

extension DialogView {
    var backgroundView: some View {
        Color.black
            .opacity(0.4)
            .ignoresSafeArea()
            .onTapGesture {
                if isCloseEnabled {
                    isPresented = false
                }
            }
    }

    var contentView: some View {
        VStack(spacing: 0) {
            dialogContent()
                .padding()
            Divider()
                .foregroundColor(.gray)
            HStack(spacing: 1) {
                ForEach(actions) { action in
                    let weight: Font.Weight = action.isPrimary ? .bold : .regular
                    let color: Color = action.isDestructive ? .red : .blue
                    Button {
                        withAnimation(.easeInOut(duration: 0.1)) {
                            isPresented = false
                        }
                        action.handler()
                    } label: {
                        Text(action.actionType.title)
                            .font(.body)
                            .fontWeight(weight)
                            .foregroundColor(color)
                            .frame(height: 44)
                            .frame(maxWidth: .infinity)
                    }
                    .background(Color.white)
                }
            }.background(Color.gray)
        }
        .frame(width: 270)
        .background(Color.white)
        .cornerRadius(8)
    }
}
SampleView.swift
struct SampleView: View {
    @Environment(\.dismiss) private var dismiss
    @State private var isPresented = false

    var body: some View {
        NavigationView {
            ScrollView {
                VStack {
                    Spacer()
                    Button {
                        isPresented = true
                    } label: {
                        Text("Hello, World!")
                            .frame(maxWidth: .infinity)
                    }
                    ForEach(1...50, id: \.self) {
                        Text(String($0))
                    }
                    Spacer()
                }.padding()
            }.background(Color.white)
                .navigationViewStyle(StackNavigationViewStyle())
                .navigationBarItems(
                    leading: Button {
                        dismiss()
                    } label: {
                        Image(systemName: "xmark")
                    },
                    trailing: Button {
                        isPresented = true
                    } label: {
                        Image(systemName: "ellipsis.circle")
                    }
                )
        }.dialog(isPresented: $isPresented) {
            VStack {
                Image(systemName: "exclamationmark.bubble")
                    .resizable()
                    .frame(width: 40, height: 40)
                    .foregroundColor(.brown)
                Text("Hello, World!")
                    .font(.title).bold()
            }
        }
    }
}
通常であればこれでそれっぽいカスタムダイアログが作れるはずです。
実際、サンプル用に作ったシンプルなアプリでは正常に表示されました。
実際に起きたこと
実際のプロダクトで起きたことを↑のサンプルアプリで再現しました。
※実際のアプリではNavigtionViewは使わずViewのHostingControllerをNavigationControllerにセットしています。
let host = UIHostingController(rootView: SampleView())
let nav = UINavigationController(rootViewController: host)
nav.modalPresentationStyle = .fullScreen
present(nav, animated: true)
背景
iOS15でUINavigationBarに仕様変更があり、ざっくり言うとスクロール時に背景が透過されるようになりました。
そこで対策として UINavigationBar.appearance() の standardAppearance と scrollEdgeAppearance に同じ設定を施していました3。
let standardAppearance = UINavigationBarAppearance()
standardAppearance.configureWithOpaqueBackground()
standardAppearance.backgroundColor = .white
nav.standardAppearance = standardAppearance
nav.scrollEdgeAppearance = standardAppearance // ← ココ
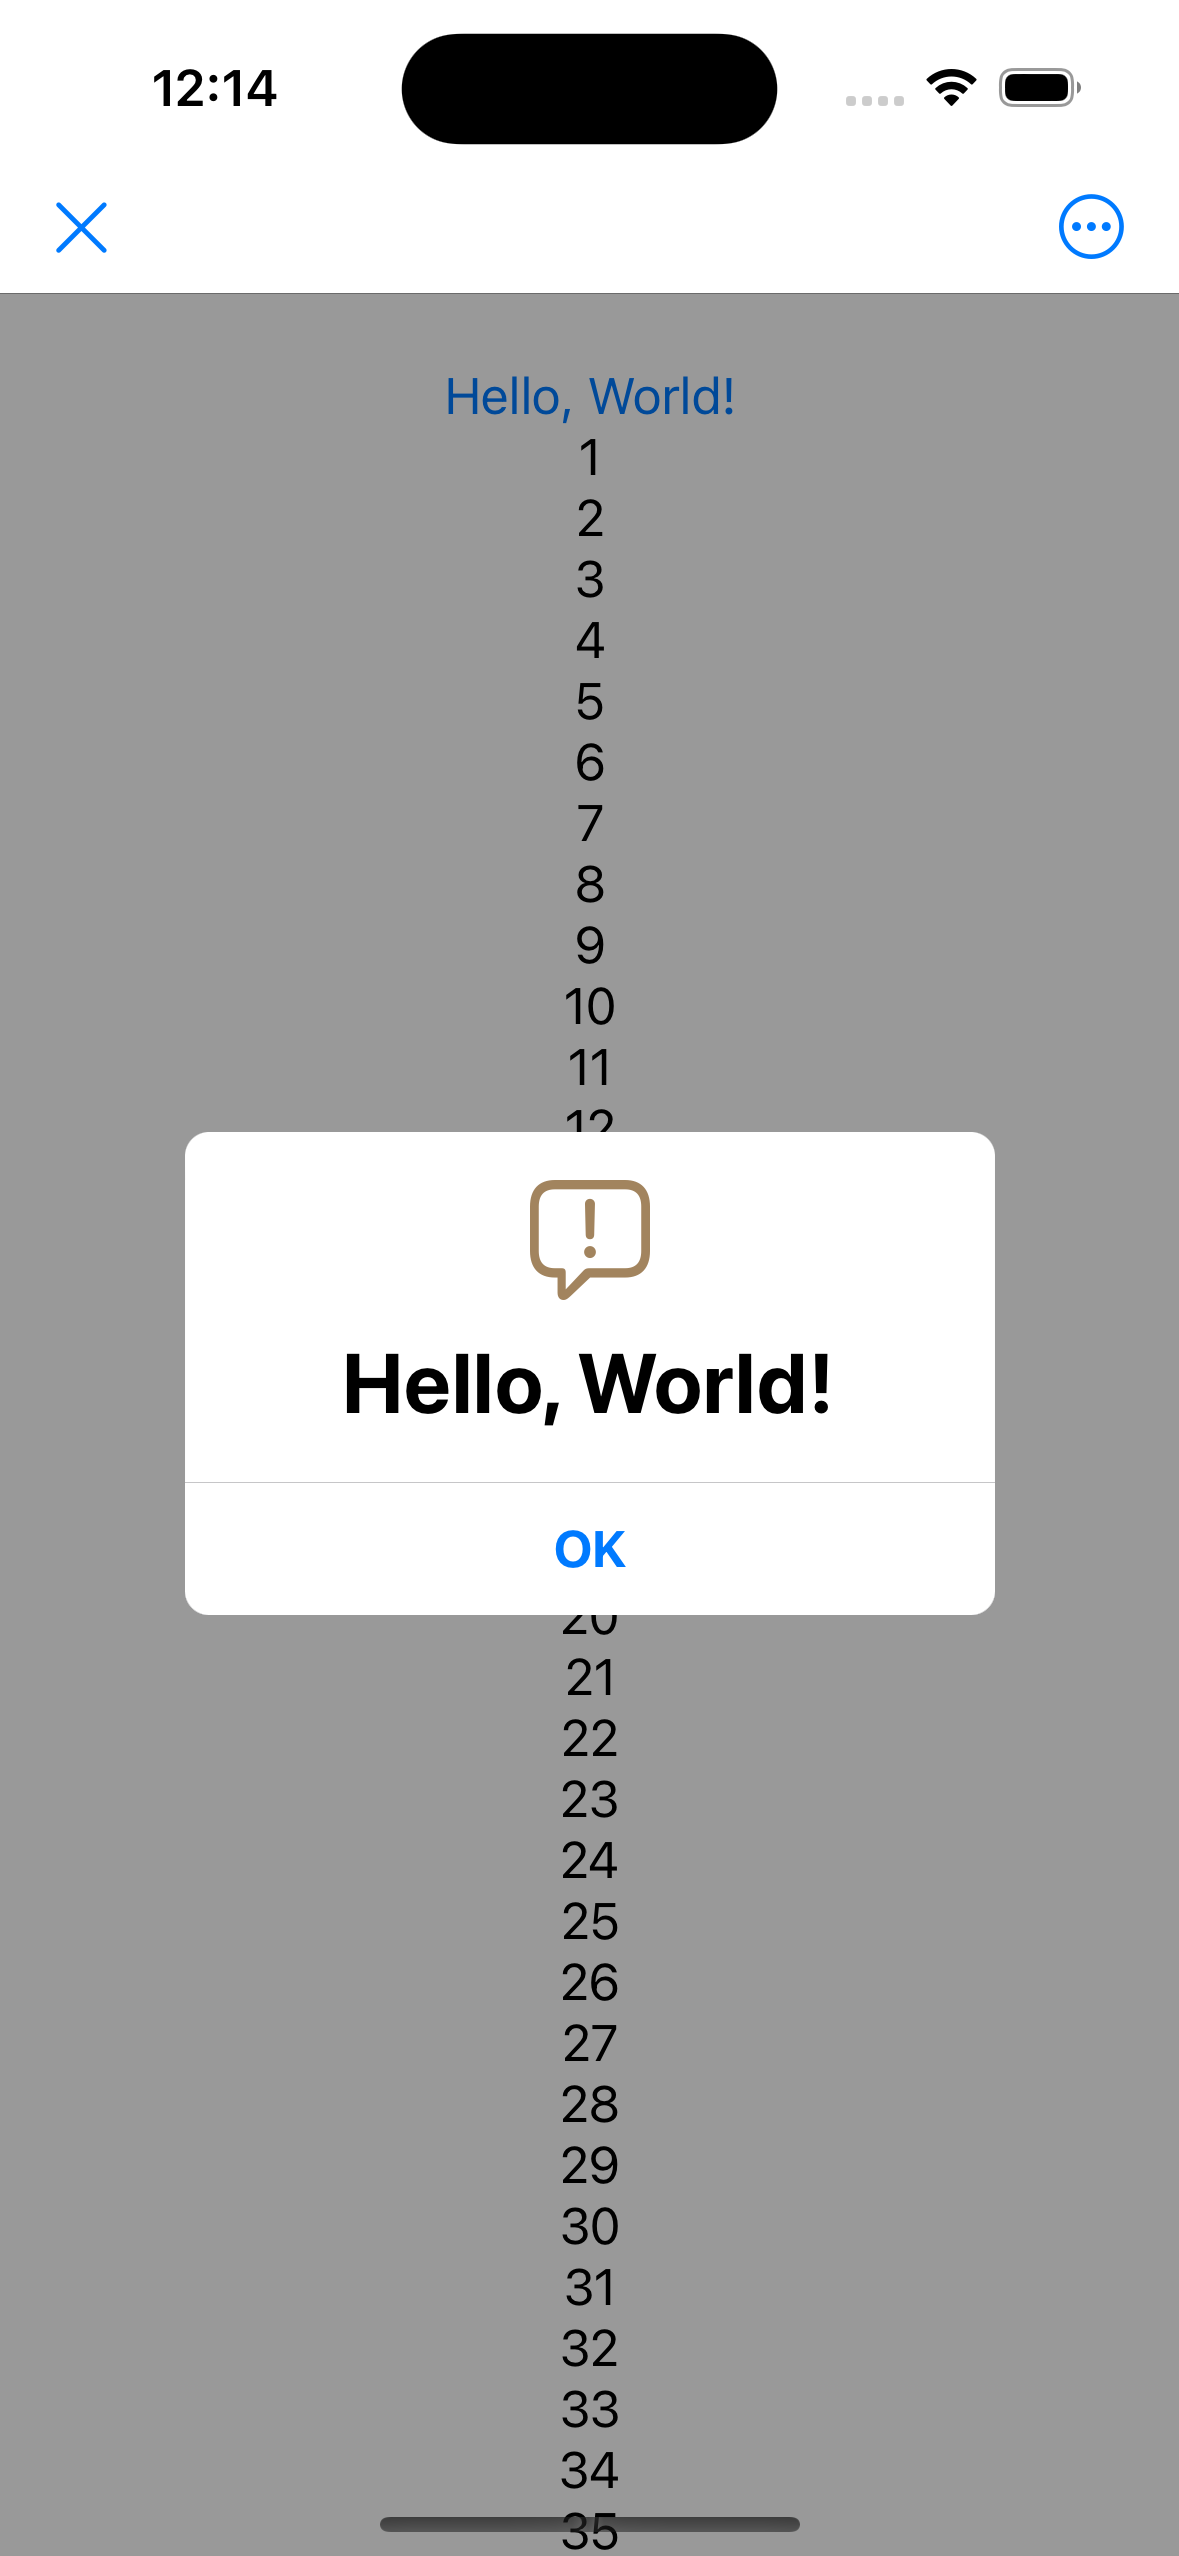
その結果、SwiftUIで定義されたViewの上から白いViewが乗っかるようになっていました。
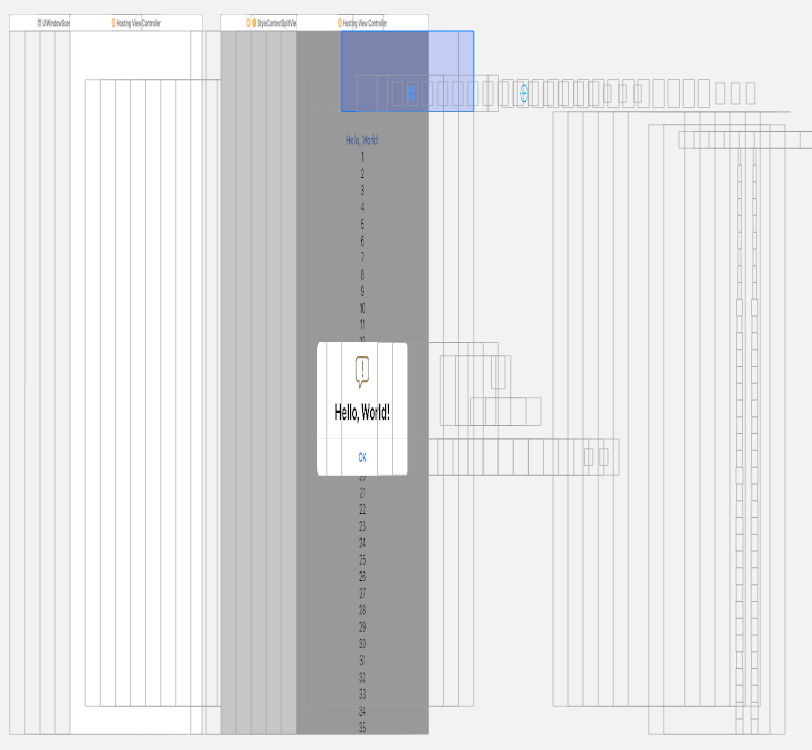
厳密にはこの書き方は正しくなくて、View Hierarchyで見たところSwiftUIで定義されたViewの上にscrollEdgeAppearanceから描画されたViewが乗っかっているようです。
そのため、scrollEdgeAppearanceをデフォルトのまま使っている場合は透過されているので想定どおり見えているだけでした。
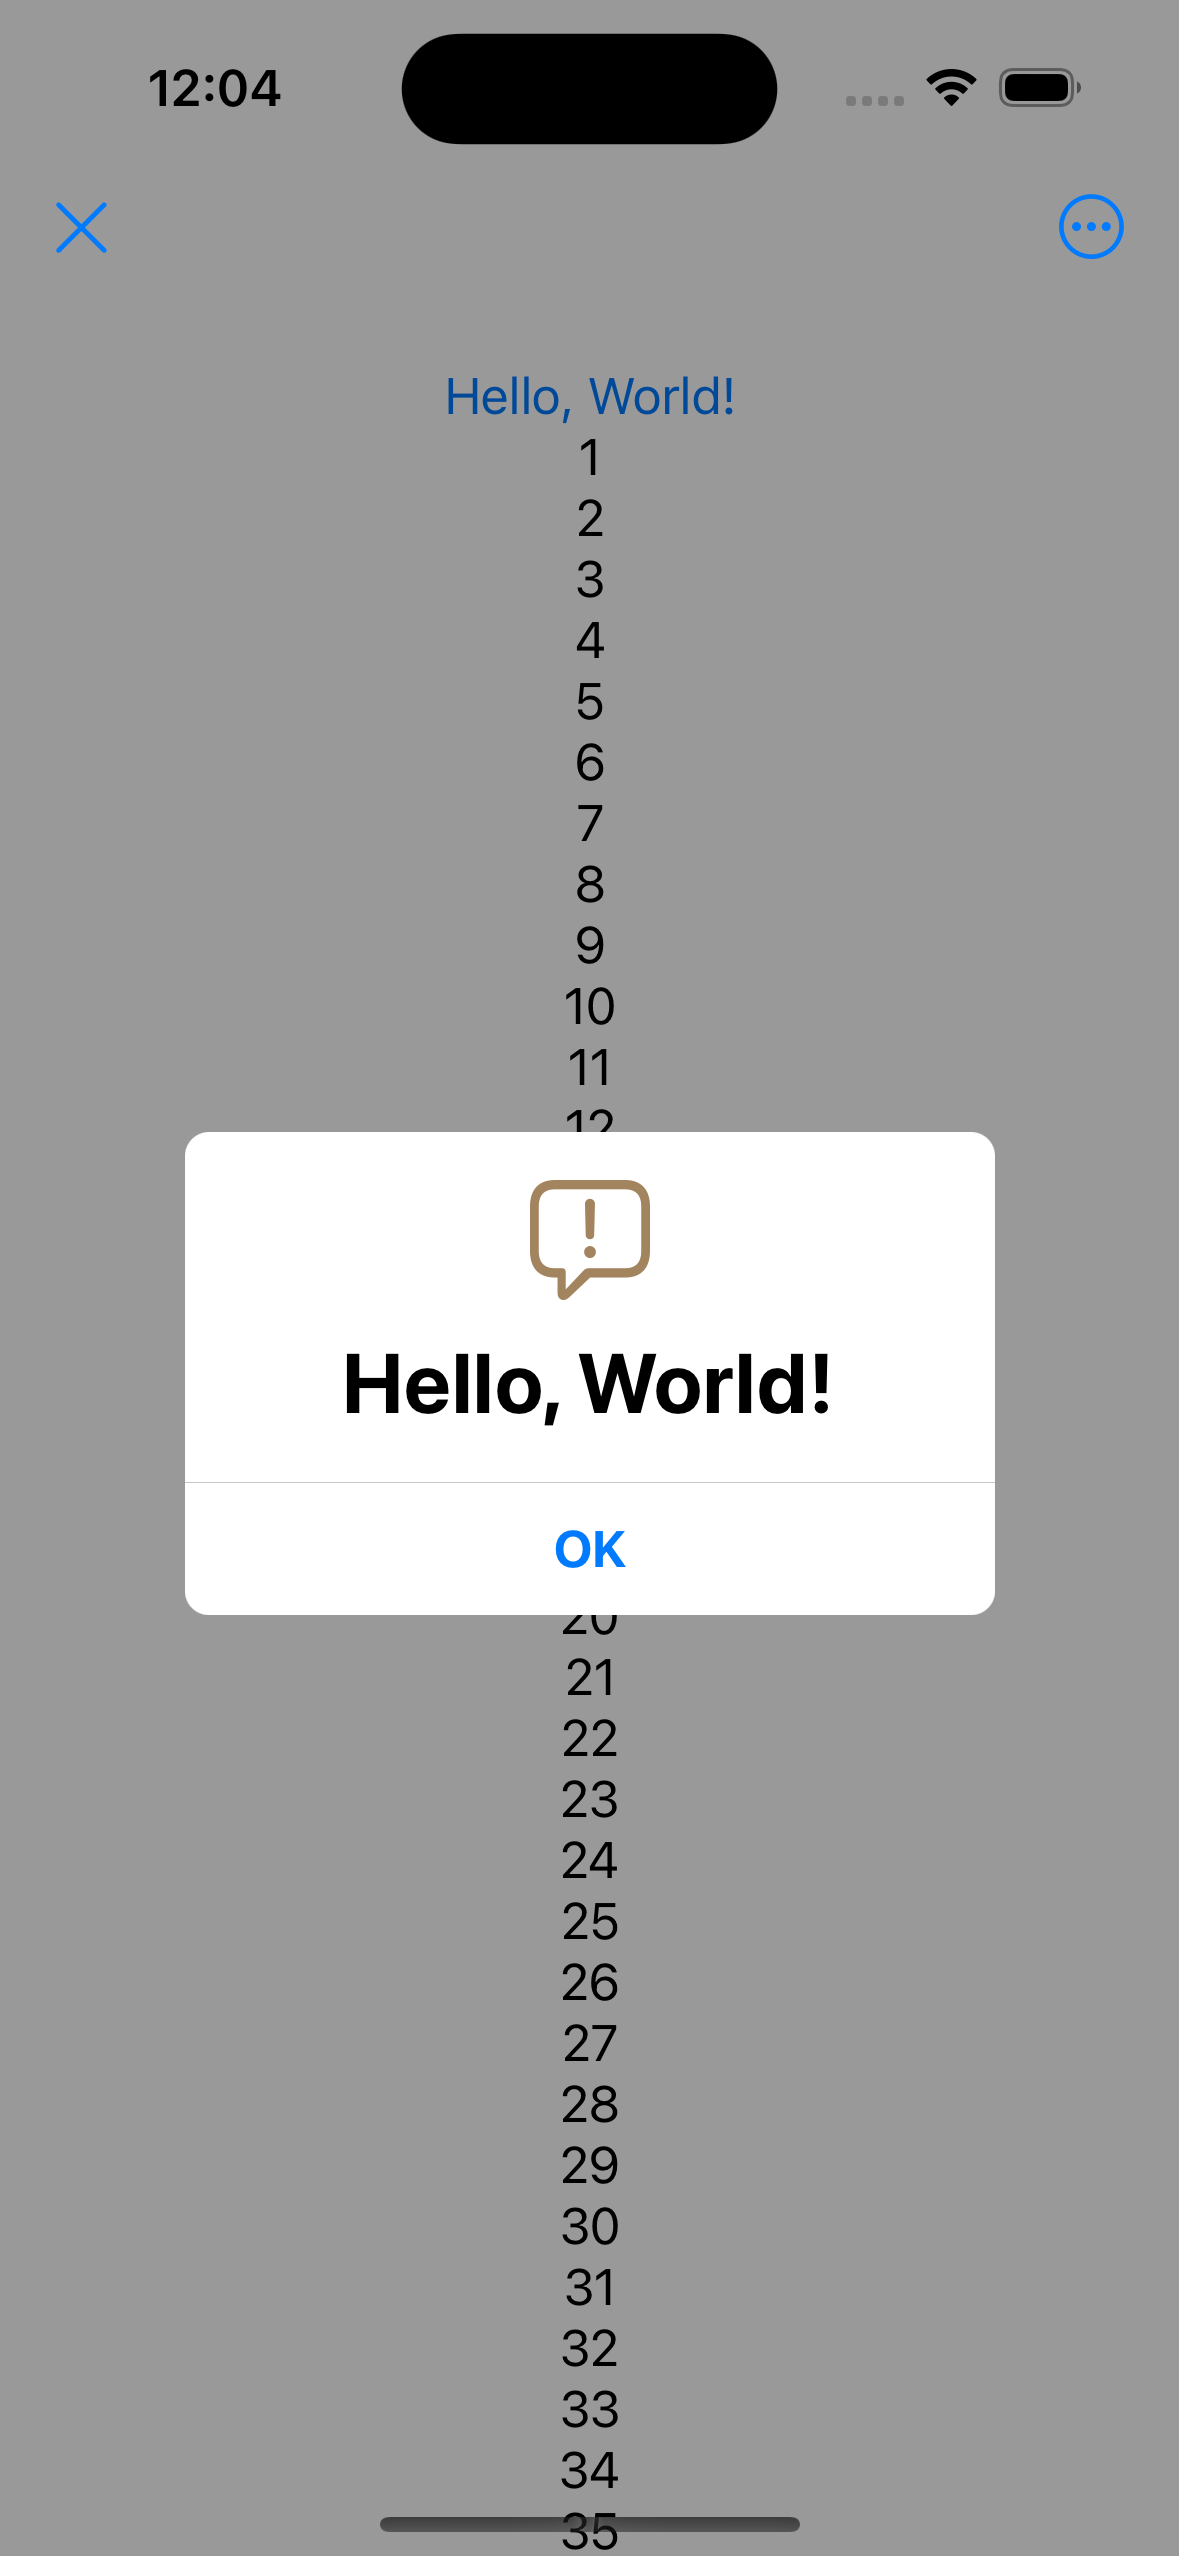
scrollEdgeAppearance セット前 |
scrollEdgeAppearance セット後 |
|---|---|
 |
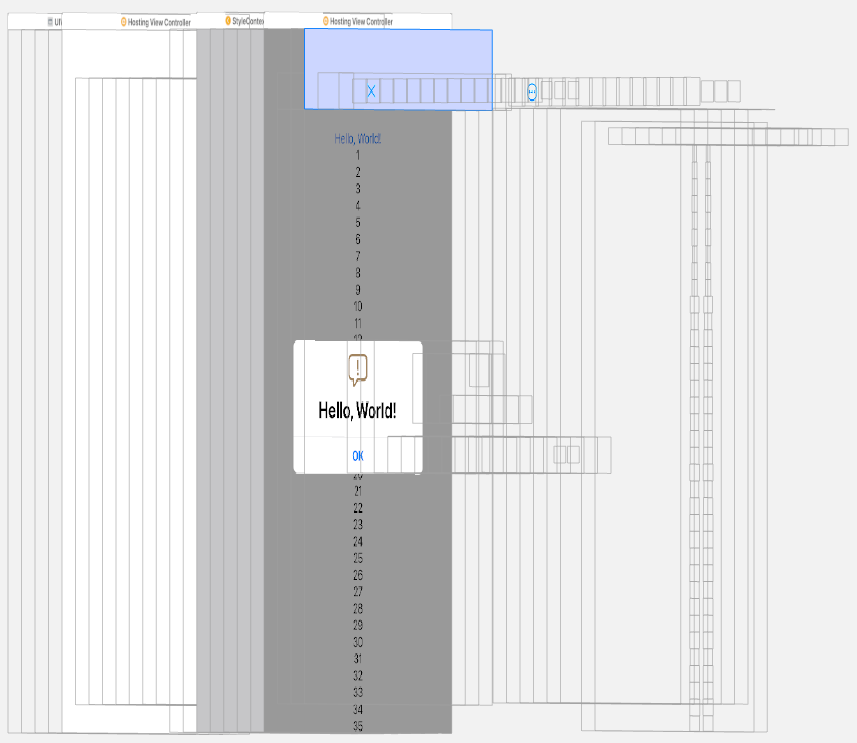 |
また、↑のスクショからView側でセットしたnavigationBarItemsもscrollEdgeAppearanceの上に乗るため、ダイアログが表示中でも押せてしまうという罠にも気づきました。
結局
scrollEdgeAppearanceの設定を戻すのは影響範囲が大きすぎて非現実的です。
そのため、SwiftUI側から直接カスタムダイアログを呼ぶのは断念せざるを得ませんでした。
そこで、SwiftUIの方がカスタムダイアログが書きやすいのは事実なので苦肉の策としてDialogView専用のHostingControllerを作ってUIKitから呼び出すようにしました。
これは仕上がったら別の記事にするかもしれません。
最後に
今後、カスタムViewのダイアログを作ろうと思っている方は同じ轍を踏まないように気をつけていただければ幸いです。
また、良い解決方法をご存知の方がいたらコメント欄やTwitterで教えて下さい![]()