はじめに
現在友人依頼の作付計画アプリを作成中です 🌱
作物マスターのAPIあったら楽だなーと思いつつ(あるっぽい👀)
根幹機能なのでやめときました💦
seedファイル使って手動でぽちぽちマスター登録をしているので、せっかくならWebAPIに挑戦してみようと思います!
初心者ですので、間違い等ありましたらご指摘いただけますと幸いです!
この記事の目標
- RubyonRailsのseed機能を使って作成した作物マスターをWebAPIで公開する
この記事でやらないこと
- 前提知識や細かい設定の説明
前提知識などは、下記の記事を参考にしています!
Swagger
SwaggerとはOpenAPIを利用しREST APIを設計するために使用するツールセットのことです
公式ドキュメント
GitHub
完成物
WebAPI作成
Cropの作成
マスターは登録済みのものを使用しますが、この段階でない場合は作成する必要があります
$ rails g model Crop
今回データベース設計等は割愛しています。
seedファイルで一気に作成します。
  Crop.find_or_create_by!(name: "ナス") do |crop|
    crop.user_id = admin.id
    crop.plant_family = "ナス科"
    crop.rotation_year = "4年以上"
    crop.companion = "ビガンバナ科、マメ科、シソ科"
  end

  Crop.find_or_create_by!(name: "ピーマン") do |crop|
    crop.user_id = admin.id
    crop.plant_family = "ナス科"
    crop.rotation_year = "4年以上"
    crop.companion = "ビガンバナ科、マメ科、シソ科"
  end
  :
user_idをadmin.idにしているのは、マスター管理はadmin(管理者)が行い
MyCropPlanのユーザーはマスターとは別に個人で作物登録をできるようにしているためです。APIで公開するデータからuser_idは排除する予定です。
ルーティング
/api/v1/cropsと/api/v1/crops/{id}に対応するルーティングを設定します。
Rails.application.routes.draw do
:
  namespace :api do
    namespace :v1 do
      resources :crops, only: [:index, :show]
    end
  end
:
end
コントローラ、アクション作成
先ほど作成したルーティングに沿ってコントローラとアクションを設定します
module Api
  module V1
    class CropsController < ApplicationController

      def index
        admin_user_ids = Admin.pluck(:id)
        @crops = Crop.where(user_id: admin_user_ids)

        render json: @crops.select(:id, :name, :plant_family, :rotation_year, :companion)
      end

      def show
        @crop = Crop.find(params[:id])
        render json: {
          id: @crop.id,
          name: @crop.name,
          plant_family: @crop.plant_family,
          rotation_year: @crop.rotation_year,
          companion: @crop.companion
        }
      end

    end
  end
end
今回は作物マスターの公開のためログイン不要としていますが、設計によってはログイン必須(before_action :authenticate_user!を追記)にすることも検討しましょう。
また、ここで公開するカラムなどを設定するためuser_idなど不要と判断するものは除外します!
これでURIを叩けばjson形式で情報を取得できるようになっているはずです。
ただ、APIをより使いやすいものにするためにドキュメントを作成してみようと思います。
OpenAPIファイルを作成(YAML形式)
今から作るのはAPIの説明書のようなものです。
今回はGETメソッドで作物一覧取得と作物取得のみです。
POSTやDELETEメソッドはありませんのでご了承ください🙇
openapi: 3.0.3

info:
  title: MyCropPlan API
  description: MyCropPlanの作物マスターAPIです
  version: 1.0.0

servers:
- url: https://-数字-.vfs.cloud9.ap-northeast-1.amazonaws.com/
  description: ローカル環境
- url: https://my-crop-plan.com/
  description: 本番環境

tags:
  - name: crops
    description: 作物の操作

paths:
  /api/v1/crops:
    get:
      summary: 作物一覧取得
      tags: [crops]
      responses:
        '200':
          description: A list of crops
          content:
            application/json:
              schema:
                type: array
                items:
                  $ref: '#/components/schemas/Crop'

  /api/v1/crops/{id}:
    get:
      summary: 作物の取得
      tags: [crops]
      parameters:
        - name: id
          in: path
          required: true
          schema:
            type: integer
      responses:
        '200':
          description: A crop object
          content:
            application/json:
              schema:
                $ref: '#/components/schemas/Crop'

        '404':
          description: Crop not found

components:
  schemas:
    Crop:
      type: object
      properties:
        id:
          type: integer
          example: 1
        name:
          type: string
          example: トマト
        plant_family:
          type: string
          example: ナス科
        rotation_year:
          type: string
          example: 4年以上
        companion:
          type: string
          example: ネギ、バジル、ニラ、落花生、ビガンバナ科、マメ科、シソ科
上記コードはローカル環境を入れて動作確認できるようにしていますが、最終的には削除しています。(ローカル環境に不正なアクセスをされることを防止するため)
Swagger UIのダウンロード
下記URLにアクセスして、ソースコードをダウンロードします
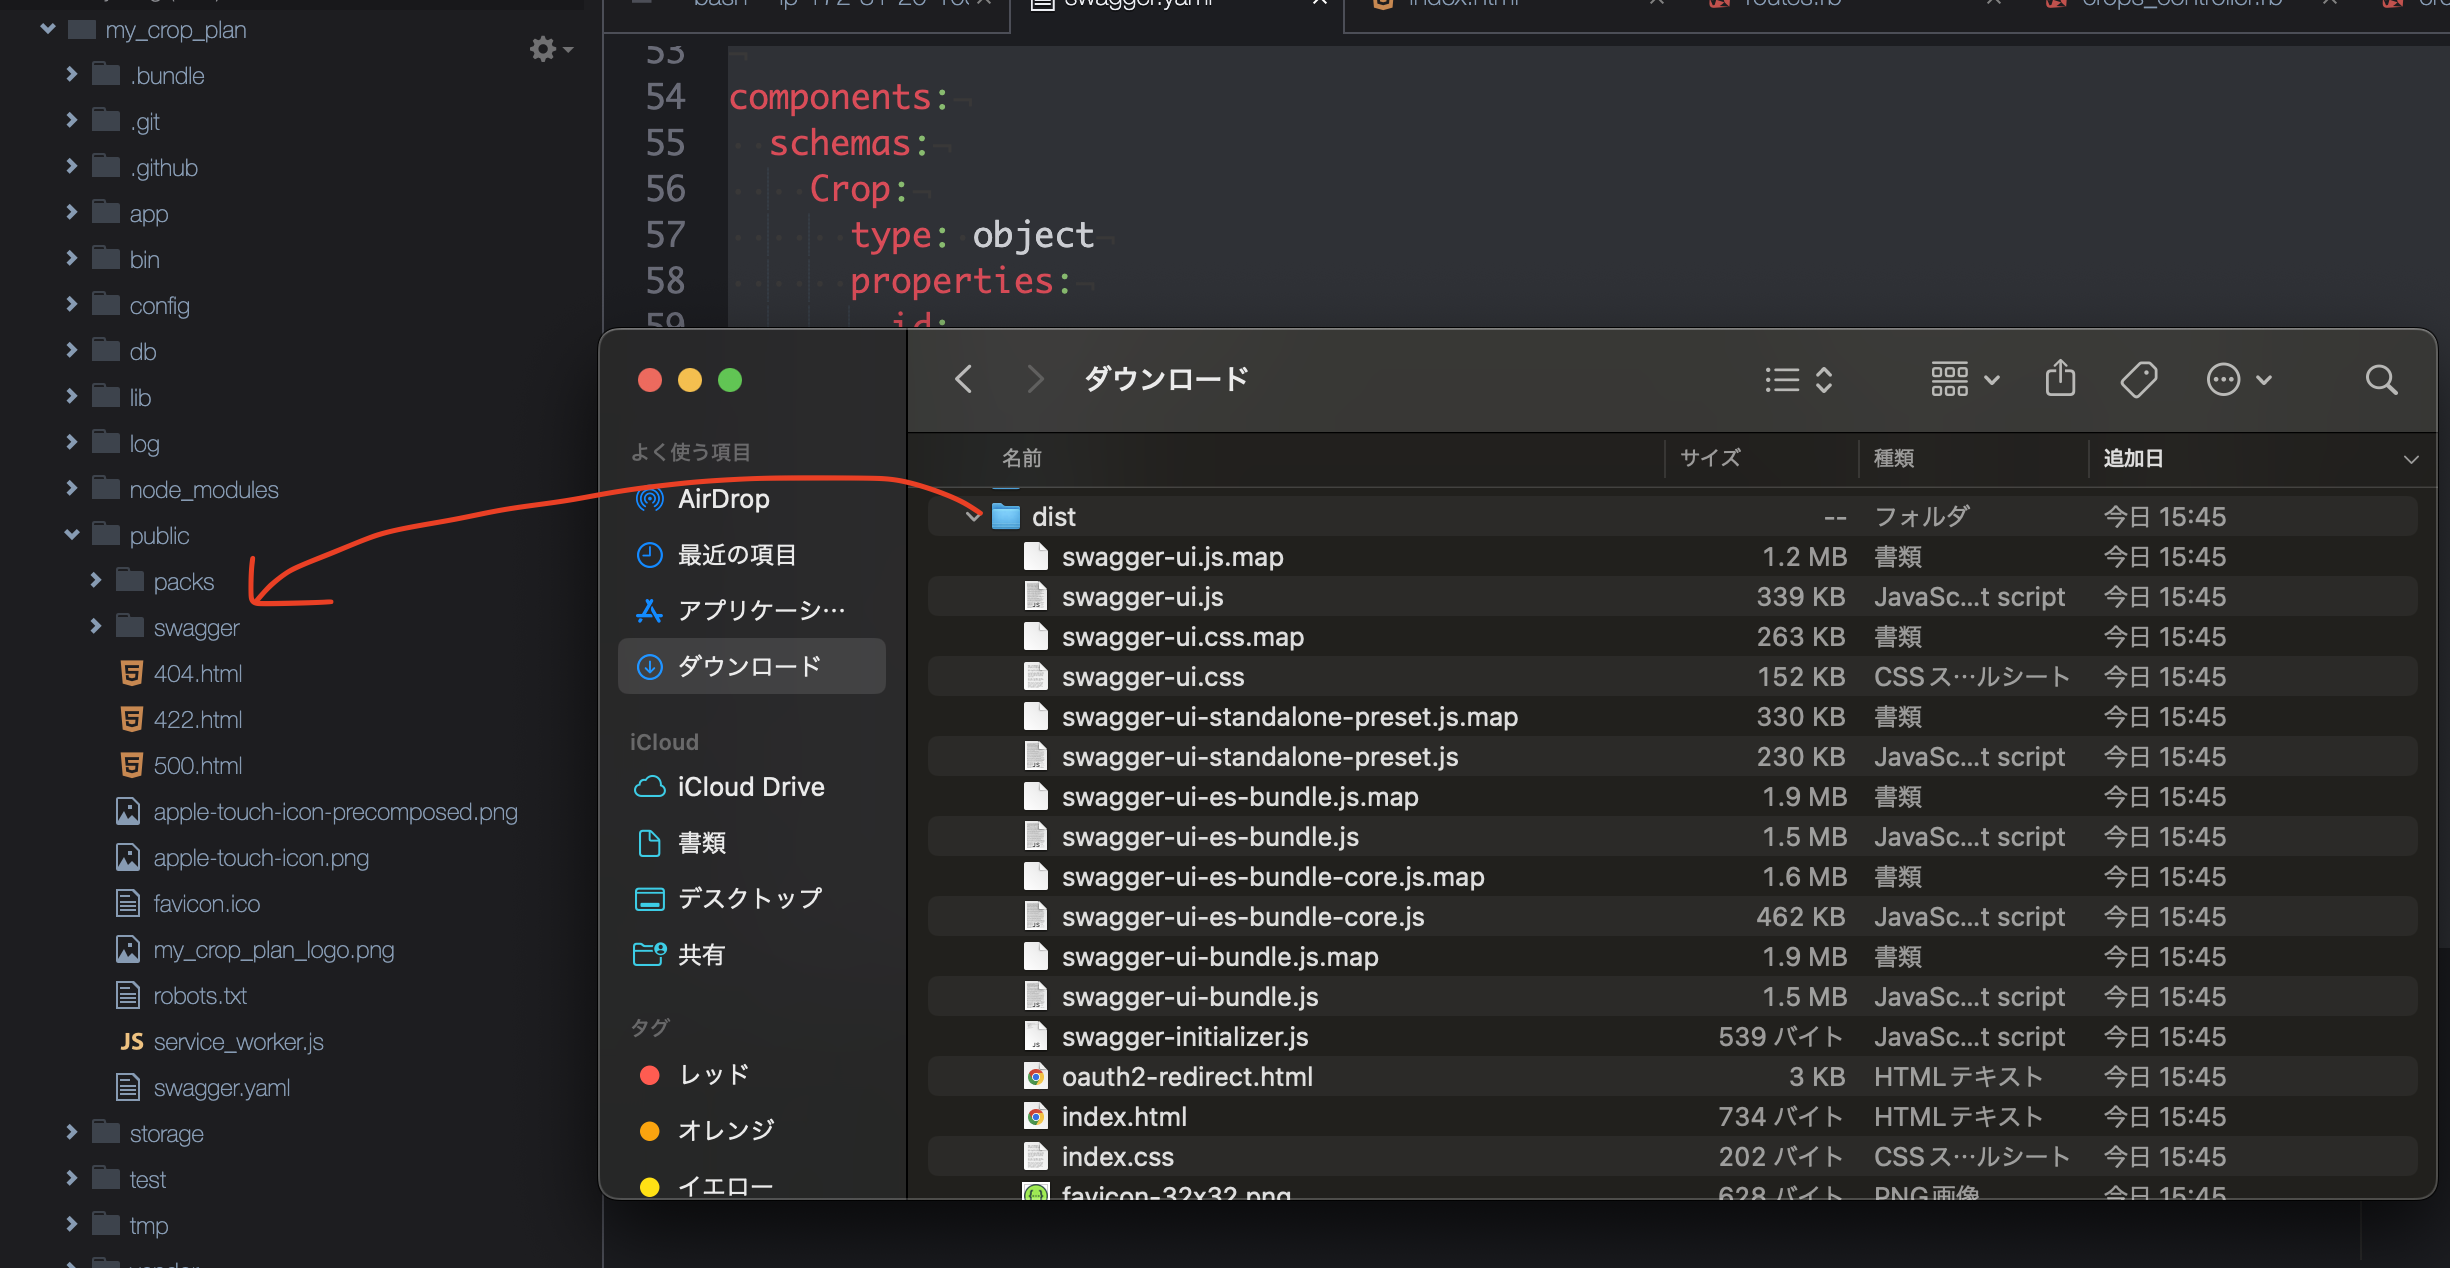
ダウンロードしたファイルの中からdistというファイルをpublicの中にコピーし、名前をswaggerに変更します。
public/
└── swagger/
    ├── index.html
    ├── swagger-ui.css
    ├── swagger-ui-bundle.js
    └── ...(その他の静的ファイル)
index.htmlのbody要素の中に、<script>を追加します
<!-- HTML for static distribution bundle build -->
<!DOCTYPE html>
<html lang="en">
  <head>
    <meta charset="UTF-8">
    <title>Swagger UI</title>
    <link rel="stylesheet" type="text/css" href="./swagger-ui.css" />
    <link rel="stylesheet" type="text/css" href="index.css" />
    <link rel="icon" type="image/png" href="./favicon-32x32.png" sizes="32x32" />
    <link rel="icon" type="image/png" href="./favicon-16x16.png" sizes="16x16" />
  </head>

  <body>
    <div id="swagger-ui"></div>
    <script src="./swagger-ui-bundle.js" charset="UTF-8"> </script>
    <script src="./swagger-ui-standalone-preset.js" charset="UTF-8"> </script>
    <script src="./swagger-initializer.js" charset="UTF-8"> </script>

    <!-- ここから追加 -->
    <script>
      window.onload = function() {
        const ui = SwaggerUIBundle({
          url: "/swagger.yaml",
          dom_id: '#swagger-ui',
          deepLinking: true,
          presets: [
            SwaggerUIBundle.presets.apis,
            SwaggerUIStandalonePreset
          ],
          layout: "StandaloneLayout"
        });
      };
    </script>
    <!-- ここまで追加 -->
  </body>
</html>
ここで/swagger.yamlを読み込みことにより先ほど作成した"説明書"をドキュメントとして表示させることができます。
URLにアクセス
今の私が出来得る範囲でAPIを作成してみました。
上記URLにアクセスすることでJSON形式のデータが表示されます。
上記にアクセスすることでAPIの取扱説明書であるswaggerUIが表示されます。
さいごに
知識不足を実感したので、現在オライリージャパンの「WebAPI The Good Parts」を読んでいます。理解を深めていきたいと思います!
間違えているところや、改善点ございましたらご指摘いただけますと幸いです!


