環境構築
Eclipseをダウンロード
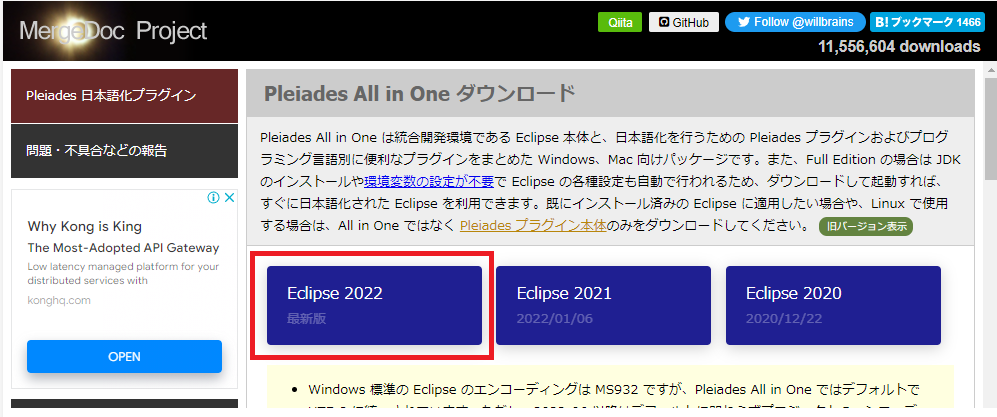
以下のURLへアクセス
URL:https://mergedoc.osdn.jp/
-
Eclipseの最新版を選択
-
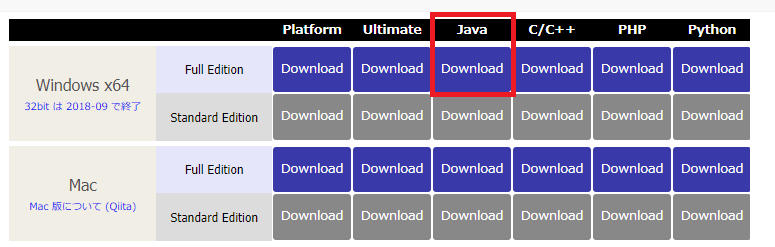
JavaのFull Editionをdownload
あとは解凍してEclipseを起動してください
これで環境構築は完了になります!!
Spring Tool Suite (STS)などはFull Editionにすでに入っているのでDownLoadは不要です。
HelloWordを表示しよう
controllerを作成
-
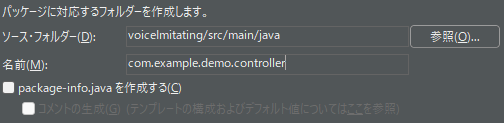
com.example.demoのパッケージを右クリック→新規(W)→パッケージ
名前(M):に「com.example.demo」→「com.example.demo.controller」に変更
-
作成したパッケージを右クリック→新規(W)→クラス
名前(M):に「IndexController」を入力して完了(F)ボタンを押下する

-
IndexController.javaを修正
package com.example.demo.controller;
import org.springframework.stereotype.Controller;
import org.springframework.ui.Model;
import org.springframework.web.bind.annotation.RequestMapping;


@Controller
public class IndexController {
	@RequestMapping("/")
	public String open(Model model) {
	    String str = "Hello World";
	    model.addAttribute("value", str);
	    return "index";
	  }
}
controllerの説明
以降の説明はあくまでざっくりと簡単な説明になります
詳細が気になる場合は自身でお調べください
- 「@Controller」について
- URLがたたかれた際に呼び出されるクラスであることを表します
- 「@RequestMapping」
- 呼び出されるURLを指定します。
- 今回の例の場合は「http://localhost:8080/」を実行するとopenメソッドが呼び出されます
- 仮に
@RequestMapping("/index")の場合は「http://localhost:8080/index」をたたく必要があります
- 「model.addAttribute("value", str);」
- 表示したい値を変数にセットします。
- 遷移先の「value」という変数に表示したい値をセットします。
- 「return "index";」について
- returnに記載するものは遷移するhtmlファイル名を記載します
- 遷移先の「index.html」はこの後作成します・
viewを作成
-
templatesのパッケージを右クリック→新規(W)→HTMLファイル
-
名前(M)に「index.html」を入力→完了(F)ボタンを押下する
-
index.htmlを修正
<!DOCTYPE html>
<html>
<head>
<meta charset="UTF-8">
<title>Insert title here</title>
</head>
<body>
  <h1 th:text="${value}"></h1>
</body>
</html>
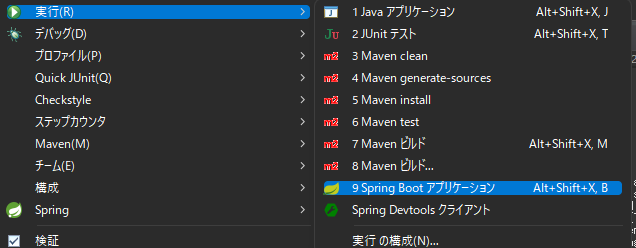
実行
- 対象のプロジェクトを右クリックして実行(R)→9 Spring Boot アプリケーションを選択
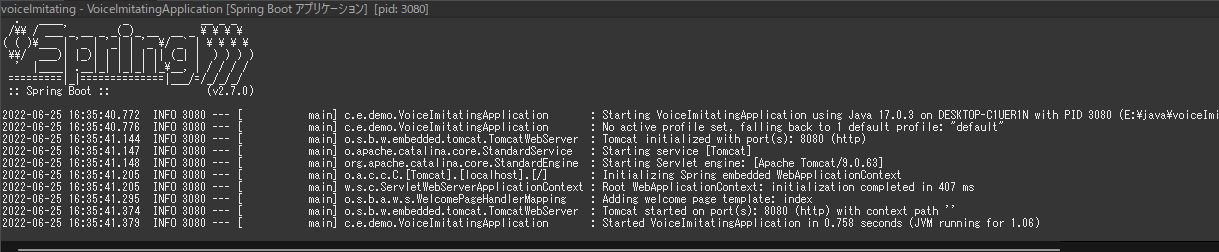
- consoleに以下が表示されれば完了